
Related Manuals for Remington HC9005AU


Summary of Contents for Remington HC9005AU
- Page 1 THE WORKS GROOMING KIT USE & CARE MANUAL PLEASE READ PRIOR TO USE To register your product go to www.remington-products.com.au www.remington.co.nz 2 YEAR WARRANTY HC9005AU...
- Page 2 • Use this appliance only for its intended use as described in this manual. • Do not use attachments not recommended by Remington. • Keep the cord away from heated surfaces.
- Page 3 • Do not wrap the cord around the appliance. WARNING - KEEP THE APPLIANCE DRY Remington strongly recommends that an approved Safety Switch (residual current device) be installed to protect all bathroom power outlets. Ask an electrical contractor for advice.
-
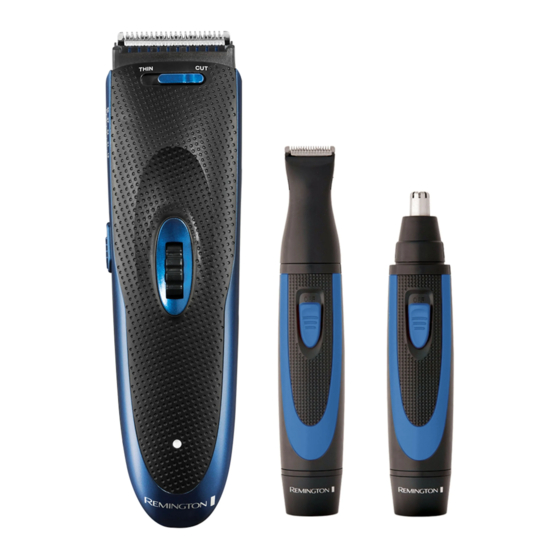
Page 4: Key Parts
HC9005AU REMINGTON THE WORKS HAIR CLIPPER USE & CARE INSTRUCTION MANUAL Thank you for purchasing your new Remington The Works Grooming Kit. ® Inside this manual you will find tips on using and caring for your hair clipper. KEY PARTS 1. - Page 5 ABOUT YOUR HAIR CLIPPER SPECIFICATIONS Power System Cord/Cordless Full Charge Time 16 Hours Run Time 45 Minutes Indicators Charging Worldwide Voltage Power System: Cord/Cordless – can be used with or without the power cord. Charging Indicator: Red light that glows when the hair clipper is being charged.
- Page 6 Remington hair clipper. Do not use hair oil, grease or any oil mixed with kerosene or any solvent as the solvent will evaporate and leave the thick oil, slowing the blades.
- Page 7 Comb Settings LENGTH SETTING MARK Comb 1 - Short Comb 2 - Long 18mm • 4.5mm 19.5mm 21mm • 7.5mm 22.5mm 24mm • 10.5mm 25.5mm 12mm 27mm • 13.5mm 28.5mm 15mm 30mm Step 1 - Nape of the Neck Use 3mm or 6mm setting. Hold the hair clipper with the blade teeth pointing upwards.
-
Page 8: Cleaning And Maintenance
Step 5 - The Finishing Touches Use the hair clipper without an attachment comb for close trimming around the base and sides of the neck. To produce a clean straight line at the sideburns, reverse the hair clipper. Place the reversed hair clipper at right angles to the head, tips of the blades lightly touching the skin and then work downwards. -
Page 9: Troubleshooting
Replace the blade set by inserting the notch (on the inside at the bottom of the blade set) into the groove of the hair pocket and firmly push down with the palm of your hand until you hear an audible ‘click’ and the blade set is locked into place. - Page 10 • Use this appliance only for its intended use as described in this manual. Do not use attachments not recommended by Remington. • Do not use on people who are asleep. • Never drop or insert any object into any opening of this appliance.
- Page 11 HC9005AU REMINGTON THE WORKS TRIMMERS USE & CARE INSTRUCTION MANUAL Thank you for purchasing your new Remington The Works Grooming Kit. ® Inside this manual you will find tips on using and caring for your Detail Trimmer and Nose & Ear Trimmer.
-
Page 12: Inserting The Battery
INSERTING THE BATTERY Your Remington The Works trimmers are each powered by one “AA” ® ALKALINE battery, which are included in your pack. To open the battery compartment, turn the base of the unit approximately 1cm clockwise (to the right) and pull it off. - Page 13 To Remove Hair From The Ear Select the nose & ear trimmer. Turn the trimmer on. Insert the trimmer’s cutting unit gently into the outer ear canal opening. Gently rotate the trimmer in a circular motion. To trim hairs protruding from the surface of the area surrounding the outer ear canal, guide the trimmer around the edge of the ear.
- Page 14 Lubricating the Cutters • After rinsing the attachment heads, apply a drop or two of lubricating oil or sewing machine oil to the cutting teeth &/or blades (nose & ear trimmer). • Don’t apply too much oil, or it may spray. •...
-
Page 15: Warranty Against Defects
Spectrum Brands Australia Pty Ltd and Spectrum Brands New Zealand Limited WARRANTY AGAINST DEFECTS In this warranty: Australian Consumer Law means the Australian consumer law set out in Schedule 2 to the Competition and Consumer Act 2010; CGA means the New Zealand Consumer Guarantees Act 1993; Goods means the product or equipment which was accompanied by this warranty and purchased in Australia or New Zealand, as the case may be;... - Page 16 Australia 1800 623 118 (toll free) New Zealand 0800 736 776 (toll free) AUTHORISED REPAIR CENTRES Visit www.remington-products.com.au for Authorised repair centre details. ® Registered Trade Mark of Spectrum Brands Inc., (SBI) or one of its subsidiaries © 2019 Spectrum Brands Inc.