Table of Contents
Advertisement
Quick Links
Table of Contents ......................................................................................... 1
Usage Notice ................................................................................................ 2
Precautions ..........................................................................................................2
Introduction .................................................................................................. 4
Product Features ..................................................................................................4
Package Overview ...............................................................................................5
Product Overview .................................................................................................6
Main Unit ........................................................................................................................6
Control Panel .................................................................................................................7
Connection Ports ...........................................................................................................8
Wireless Remote Control ...............................................................................................9
Installation .................................................................................................. 10
Connecting the Projector ....................................................................................10
Powering On/Off the Projector ...........................................................................11
Powering On the Projector ........................................................................................... 11
Powering Off the projector ...........................................................................................12
Warning Indicator .........................................................................................................12
Adjusting the Projected Image ...........................................................................13
Adjusting the Projector Image Height ..........................................................................13
Adjusting the Projector Zoom / Focus ..........................................................................14
Adjusting Projected Image Size ...................................................................................14
User Controls ............................................................................................. 15
On-Screen Display Menus .................................................................................18
How to operate ............................................................................................................18
Menu Tree ....................................................................................................................19
Language .....................................................................................................................20
Image-I ........................................................................................................................21
Image-II (Computer Mode) ...........................................................................................23
Image-II (Video Mode) .................................................................................................25
Audio ............................................................................................................................27
Management ................................................................................................................28
Lamp Setting ...............................................................................................................31
Appendices ................................................................................................ 32
Troubleshooting ..................................................................................................32
Replacing the lamp .............................................................................................36
Compatibility Modes ...........................................................................................37
Ceiling Mount Installation ...................................................................................38
Table of Contents
... English
1
Advertisement
Table of Contents

Related Manuals for Optoma DS305r


Summary of Contents for Optoma DS305r
-
Page 1: Table Of Contents
Table of Contents Table of Contents ..................1 Usage Notice ....................2 Precautions ......................2 Introduction ....................4 Product Features ....................4 Package Overview ....................5 Product Overview ....................6 Main Unit ........................6 Control Panel .........................7 Connection Ports ......................8 Wireless Remote Control ....................9 Installation ....................10 Connecting the Projector ..................10 Powering On/Off the Projector ................11 Powering On the Projector ................... -
Page 2: Usage Notice
Usage Notice Precautions Follow all warnings, precautions and maintenance as recom- mended in this user’s guide to maximize the life of your unit. Warning- Do not look into the projector’s lens when the lamp is on. The bright light may hurt your eyes. Warning- To reduce the risk of fire or electric shock, do not expose this product to rain or moisture. - Page 3 Usage Notice Turn off the product before cleaning. Use a soft cloth moistened with mild detergent to clean the display housing. Disconnect the power plug from AC outlet if the product is not being used for a long period of time. Don’t: Block the slots and openings on the unit provided for ...
-
Page 4: Introduction
Introduction Product Features This product is an SVGA single chip 0.55” DLP projector. Outstanding features include: True SVGA, 800 x 600 addressable pixels Single chip Dark Chip2 technology NTSC/NTSC4.43/PAL/PAL-M/PAL-N/SECAM and HDTV compatible (480i/p, 576i/p, 720p, 1080i) Multi-Auto functions: Auto detection, Auto image and ... -
Page 5: Package Overview
Introduction Package Overview This projector comes with all the items shown below. Check to make sure your unit is complete. Contact your dealer immedi- ately if anything is missing. Projector with lens cap Power Cord 1.8m VGA Cable 1.8m Composite Video Cable SCART RGB/S-Video Carrying Case 1.8m... -
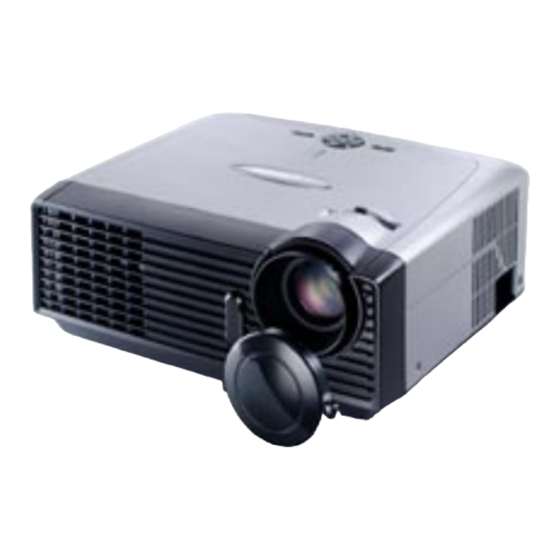
Page 6: Product Overview
Introduction Product Overview Main Unit 1. Control Panel 2. Zoom Lever 3. Focus Ring 4. Power Socket 5. Elevator Foot 6. Elevator Button 7. Zoom Lens 8. IR Receivers 9. Connection Ports 10. Tilt Adjusting Feet English ... -
Page 7: Control Panel
Introduction Control Panel 1. Power Indicator LED 2. Temp Indicator LED 3. Lamp Indicator LED 4. Keystone Correction 5. Power/Standby 6. Re-Sync 7. Source 8. Four Directional Select Keys 9. Menu (On/Off) 10. Enter ... English... -
Page 8: Connection Ports
Introduction Connection Ports 1. IR Receiver 2. USB Connector 3. Monitor Loop-through Output Connector 4. Composite Video Input Connector 5. S-Video Input Connector 6. Audio Input Connector 7. PC Analog signal/SCART RGB/HDTV/Component Video Input Connector 8. PC Analog signal/HDTV/Component Video Input Connector 9. -
Page 9: Wireless Remote Control
Introduction Wireless Remote Control 1. Power 2. IR LED 3. Hide 4. Freeze 5. D-Zoom 6. Display Mode 7. Menu 8. Keystone Correction 9. Re-Sync 10. Volume + 11. Volume - 12. Reset 13. Enter 14. Four Directional Select Keys 15. -
Page 10: Installation
Installation Connecting the Projector DVD Player, Set- top Box, HDTV receiver Due to the differ- ence in applica- tions for each Video Output country, some S-Video Output regions may have different accessories. 1......................Power Cord 2....................... VGA Cable 3. -
Page 11: Powering On/Off The Projector
Installation Powering On/Off the Projector Powering On the Projector 1. Remove the lens cap. 2. Ensure that the power cord and signal cable are securely Quick Menu connected. The Power LED will flash green. 3. Turn on the lamp by pressing “Power/Standby” button on the control panel.... -
Page 12: Powering Off The Projector
Installation Powering Off the Projector 1. Press the “Power/Standby” button to turn off the projector lamp, you will see a message displayed on the pro- jector’s screen. Press the “Power/Standby” button again to confirm, otherwise the message will disappear after 5 seconds. -
Page 13: Adjusting The Projected Image
Installation Adjusting the Projected Image Adjusting the Projector Image Height The projector is equipped with an elevator foot for adjusting the image height. To raise the image: 1. Press the elevator button 2. Raise the image to the desired height angle , then release the button to lock the elevator foot into position. -
Page 14: Adjusting The Projector Zoom / Focus
Installation Adjusting the Projector Zoom / Focus You may turn the zoom lever to zoom in or out. To focus the im- age, rotate the focus ring until the image is clear. The projector will focus at distances from 4.9 to 39.4 feet (1.5 to 12.0 meters) with mechanical travel. -
Page 15: User Controls
User Controls Control Panel & Remote Control There are two ways for you to control the functions: Remote Control and Control Panel. Control Panel Remote Control Using the Control Panel Power/Standby Refer to the “Power On/Off the Projector” section on pages ... - Page 16 User Controls Using the Remote Control Power Refer to the “Power On/Off the Projector” section on pages 11-12. Re-Sync Automatically synchronizes the projector to the input source. Volume + / - (Vol+/Vol-) Increases/decreases speaker volume. Reset Changes the adjustments and settings to the factory default ...
- Page 17 User Controls Composite Press “composite” to choose Composite video source. ... English...
-
Page 18: On-Screen Display Menus
User Controls On Screen Display Menus The Projector has multilingual On Screen Display menus that allow you to make image adjustments and change a variety of settings. The projector will automatically detect the source. How to operate To open the OSD menu, press “Menu ”... -
Page 19: Menu Tree
User Controls Menu Tree ... English... -
Page 20: Language
User Controls Language Language Choose the multilingual OSD menu . Use the key to select your preferred language. Press “Enter” to finalize the selection. English ... -
Page 21: Image-I
User Controls Image-I Display Mode There are many factory presets optimized for various types of images. PC: For computer or notebook. Movie: For home theater. Game : For game. sRGB: For standard color. User: Memorize user’s settings. ... - Page 22 User Controls maximum peaking. If you prefer a stronger image, adjust towards the maximum setting. For a smooth and more natural image, adjust towards the minimum setting. Color Temp. Adjust the color temperature. At higher temperature, the screen looks colder; at lower temperature, the screen looks warmer. English ...
-
Page 23: Image-Ii (Computer Mode)
User Controls Image-II (Computer Mode) Frequency “Frequency”changes the display data frequency to match the frequency of your computer’s graphic card. If you experience a vertical flickering bar, use this function to make an adjustment. Tracking “Tracking” synchronizes the signal timing of the display with the graphic card. - Page 24 User Controls Original Pixel Window 16:9 Image Position Adjust the image position to up or down, when you select the aspect ratio to 16:9. image down. Press the to move the Press the to move the image up. 16:9 Image Position: ...
-
Page 25: Image-Ii (Video Mode)
User Controls Image-II (Video Mode) Degamma This allows you to choose a degamma table that has been fine- tuned to bring out the best image quality for the input. Saturation Adjusts a video image from black and white to fully saturated color. - Page 26 User Controls Original Pixel Window 16:9 Image Position Adjust the image position to up or down, when you select the aspect ratio to 16:9. image down. Press the to move the Press the to move the image up. 16:9 Image Position: Image Position at win- dow mode will also be...
-
Page 27: Audio
User Controls Audio Volume Press the to decrease the volume. Press the to increase the volume. Mute Choose the left icon to turn mute on. Choose the right icon to turn mute off. ... English... -
Page 28: Management
User Controls Management Menu Location Choose the menu location on the display screen. Projection Front-Desktop The factory default setting. Rear-Desktop When you select this function, the projector reverses the image so you can project behind a translucent screen. Front-Ceiling ... - Page 29 User Controls Security Settings A. Press “Enter” to set password. (First time) 1. Password is allowed of 4~8 bits, Default value is “0000”. 2. Display on the screen by “*” while inputting. 3. Use keys to select your input bits, and then press “Enter”...
- Page 30 User Controls 1. Input the old Password. 2. Changes a new Password. 3. Confirms the password, please input the new password once again. 4. Password is allowed of 4~8 bits, Default value is “0000”. 5. Display on the screen by “*” while inputting. 6.
-
Page 31: Lamp Setting
User Controls Lamp Setting Lamp Hours Display the cumulative lamp operating time. Lamp Reset Reset the lamp life hour after replacing a new lamp. Lamp Reminding Choose this function to show or to hide the warning message when the changing lamp message is displayed. The message will show up 30 hours before end of life. -
Page 32: Appendices
Appendices Troubleshooting If you experience trouble with the projector, refer to the following information. If the problem persists, please contact your local reseller or service center. Problem: No image appears on screen Ensure all the cables and power connections are correctly and ... - Page 33 Appendices 5. Select the “Change” button under the “Monitor” tab . 6. Click on “Show all devices.” Next, select “Standard monitor types” under the SP box; choose the resolution mode you need under the “Models” box. If you are using a Notebook: ...
- Page 34 Appendices Make sure the projection screen is between the required distance 4.9 to 39.4 feet (1.5 to 12.0 meters) from the projector. See page 14. Problem: The image is stretched when displaying 16:9 DVD The projector automatically detects 16:9 DVD and adjusts the aspect ratio by digitizing to full screen with 4:3 default setting.
- Page 35 Appendices Problem: Message Reminders Fan failed: Over temperature: Replacing the lamp: Password error : Time out: ... English...
-
Page 36: Replacing The Lamp
Appendices Replacing the lamp The projector will detect the lamp life itself. It will show you a warning message When you see this message, change the lamp as soon as pos- sible. Warning: Lamp Make sure the projector has been cooled down for at least 30 compartment is hot! Allow it to cool down minutes before changing the lamp. -
Page 37: Compatibility Modes
Appendices Compatibility Modes (ANALOG) Mode Resolution V.Frequency H.Frequency (Hz) (kHz) VESA VGA 640 x 350 31.5 VESA VGA 640 x 350 37.9 VESA VGA 640 x 400 37.9 VESA VGA 640 x 480 31.5 VESA VGA 640 x 480 37.9 VESA VGA 640 x 480 37.5... -
Page 38: Ceiling Mount Installation
Appendices Ceiling Mount Installation 1. To prevent damaging your projector, please use the ceiling mount package for installation. 2. If you wish to use a third party ceiling mount kit, please ensure the screws used to attached a mount to the projector met the following specifications: Screw type: M2.6 ...