Advertisement
Quick Links
Advertisement

Related Manuals for Vivitar Vivicam 5B


Summary of Contents for Vivitar Vivicam 5B
- Page 1 Quickstart Guide 数码说明书之家 2005.09.04 WWW.54GG.COM Vivicam5 B...
-
Page 2: Table Of Contents
2. Vivicam 5B Introduction ..........3 3. The Vivicam 5B.............. 5 4. Taking Images ..............10 5. Installing the Driver and Application Software..13 6. Transferring Images to Your Computer ....16 7. Using The Vivicam 5B as a PC/Web Camera .... 20... -
Page 3: General Precautions
Camera Precautions Follow these guidelines when using your Vivicam 5B: Keep the camera from the following environments - High temperature places such as direct sunlight or extreme heat. - Excessive humidity, dust, vibration. Do not use the camera outdoors if it is raining or snowing. -
Page 4: Vivicam 5B Introduction
2. Vivicam 5B lntroduction 2.1 Specifications Resolution: Digital Camera mode : 640 x 480 pixels (VGA) 320 x 240 pixels (CIF) PC Camera mode : 640 x 480 pixels 320 x 240 pixels 160 x 120 pixels Range of Focus : 2 feet to infinity... - Page 5 2.2 Accessories 1. Camera Cradle 2. One AAA alkaline battery 3. Camera necklace 4. Camera driver and application software CD 5. USB cable 6. Quick Start Guide...
-
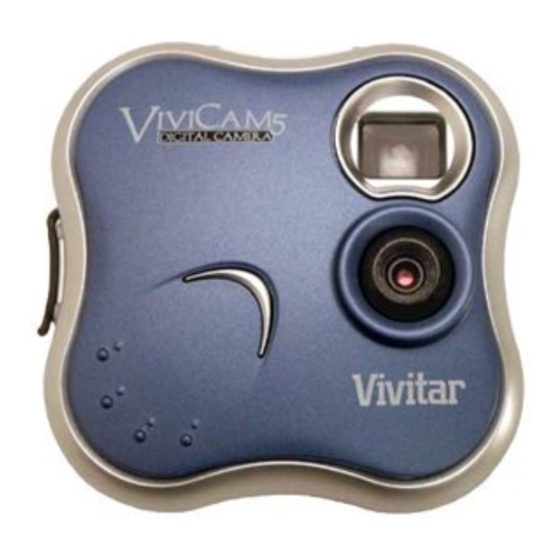
Page 6: The Vivicam 5B
3. The Vivicam 5B 3.1 General Front Back (Face Plate is interchangeable ) - Page 7 3.2 LCD Panel indicators Image Counter : The number of images remaining (to be taken) : Power off : Higher Image Quality - Disable compression (Default value with no compression) : Lower Image Quality - Enable compression - for more images : 50Hz lighting environment...
- Page 8 : 60Hz lighting environment (Default frequency is 60Hz) PC Connection : PC Connect (Pop-up when running U/I application) Continuos capture : For Video clips at 320x240 pixels (CIF resolution). Self-timer : Self timer - to capture an image in10 secs. Resolution: : 320 x 240 pixels (CIF resolution) - Low-Resolution...
- Page 9 Image Delete : Delete all the images from memory. : Delete last image in from memory. u Important: When the the LCD is blinking continuously, it indicates low battery power...
- Page 10 3.3 Status LCD panel icon: Press the mode key to select a mode or function - 3.4 Tips & Trouble Shooting To stabilize the cradle on a desk, insert the barrel of USB cable into the base of cradle as shown The cradle can be also placed on the top of a...
-
Page 11: Taking Images
4. Taking Images 4.1 Turn Power On Power on : Press Mode button and the camera will beep. Power off : Press Mode button to select , then press the shutter button to turn off the power. Note: The camera will automatically turn off if inactive for about 20 seconds. - Page 12 LCD Panel will show : : When you take a image the number of images remaining will reduce by one - down to zero. 4.3 Self Timer - Image Capture Self-timer: Press MODE key to select , then press shutter, the camera will beep 10 times and then take an image.
- Page 13 4.6 Resolution Select resolution: Press MODE key to select then press shutter to confirm VGA or CIF resolution. 4.7 Enable/Disable Compression of Images 1.Enable compression - to allow for more images in memory Press MODE key to select " ", and then press shutter to enable compression setting.
-
Page 14: Installing The Driver And Application Software
5. Installing the Driver and Application Software 5.1 Computer System Requirements - Please check your PC system requirements before installing the software : 1. Windows 98SE, Me, 2000, XP 2. Pentium or higher CPU 3. CD-ROM drive 4. USB port 5.2 Installation of TWAIN Driver and AVI Maker - 1. - Page 15 3. Select desired language: Click " OK " to next setup procedure. 4. Your computer will display: Click " Next " and follow setup procedure. The TWAIN driver and AVI Maker installation are complete...
- Page 16 5. Click " Finish " to finish the installation. 5.3 Installing Application Software 1. lnsert software CD into the CD-ROM drive 2. This screen will appear: Select the application software you wish to install.
-
Page 17: Transferring Images To Your Computer
6.Transferring Images To Your Computer After the TWAIN driver and application software are installed on your PC. You may download images from your camera. 6.1 Connecting Vivicam 5B to your PC - Use the USB cable connect to your computer Vivicam 5B Computer 6.2 Windows will detect the Camera:... - Page 18 6. Click the "Acquire" button, and the Vivicam 5B TWAIN software window will open. 7. The images on the cmaera will display in the TWAIN window. 8. Choose the images that you like or click "Select All" to select all images then click the "Transfer" button.
- Page 19 Continuous Capture Mode to capture a sequence of CIF images for making a video clip. 2. Connect your Vivicam 5B to your PC with the USB cable 3. Start AVI Maker from the Windows Programs menu: 4. AVI Maker will automatically read the CIF images from...
- Page 20 5. Select a Compression Quality and Click on "Create" 6. A "Save As " window will appear. 7. Choose an file name (and directory/folder) where you want to save your new AVI video file. 8. You may play your AVI movie file using Windows Media Player:...
-
Page 21: Using The Vivicam 5B As A Pc/Web Camera
8.Using Vivicam 5B as a PC/Web Camera You can connect Vivicam 5B to your computer and use as a PC/Web camera. You may use Microsoft NetMeeting, Microsoft MoveMaker, or other third party video software to enjoy the video capability of yor Vivicam 5B.