Advertisement
Quick Links
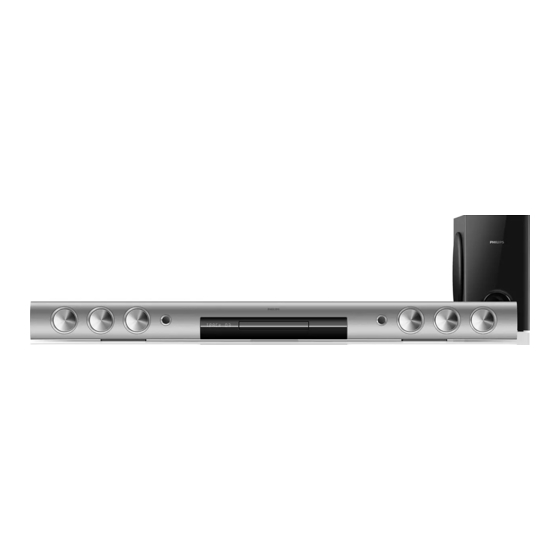
Home Theater Soundbar
Service
Service Manual
. Location of PCB Boards ,Version Variation and Repair Scenario Matrix....1-2
. Technical Specifications.........................................................1- 3
. Safety Instruction, Warning & Notes........................................1-7
. DFU Instruction..............................................................................2-1
. Mechanical and Dismantling Instructions....................................3-1
. Software Upgrades .......................................................................
. Trouble Shooting Chart......................................................
. Wiring Diagram..................................................................6-1
. Electrical Diagrams and Print-layouts......................................7-1
. Votages and Waveforms for Connection Pins...........................8-1
. Pin Description & Block Diagrams of ICs..................................9-1
. Set Mechanical Exploded view & Part list...............................10-1
. Revision List.................................................................................11-1
©Copyright 2011 Philips Consumer Electronics B.V. Eindhoven, The Netherlands
All rights reserved. No part of this publication may be reproduced, stored in aretrieval system or
transmitted, in any form or by any means, electronic, mechanical, photocopying, or otherwise
without the prior permission of Philips.
Published by Arya & Stephen - 1234 BU AVM Printed in The Netherlands Subject to modification
Version 1.1
TABLE OF CONTENTS
HTB5150D/12
Page
4-1
.
5-1
.
CLASS 1
LASER PRODUCT
3141 785 38360
GB
PHILIPS
Advertisement

Related Manuals for Philips HTB5150D/12


Summary of Contents for Philips HTB5150D/12
-
Page 1: Table Of Contents
. Set Mechanical Exploded view & Part list.…………………..….…10-1 . Revision List.................11-1 CLASS 1 ©Copyright 2011 Philips Consumer Electronics B.V. Eindhoven, The Netherlands All rights reserved. No part of this publication may be reproduced, stored in aretrieval system or LASER PRODUCT transmitted, in any form or by any means, electronic, mechanical, photocopying, or otherwise without the prior permission of Philips. - Page 2 PCB BOARD LOCATION OF SOUNDBAR: AMPLIFIER BOARD KEY BOARD WIFI BOARD VFD BOARD WIRELESS POWER BOARD BOARD(UNDER MAIN BOARD) MAIN BOARD IN BOARD LOADER VERSION VARIATIONS FOR SOUNDBAR Type / Versions HTB5150D Service Police Board in used MAIN BOARD M +C POWER BOARD M +C AMPLIFER BOARD...
- Page 3 PCB BOARD LOCATION Of SUBWOOFER: WIFI BOARD(UNDER WIRELESS BOARD) WIRELESS BOARD AMPLIFIER BOARD POWER BOARD Board in used VERSION VARIATIONS FOR SUBWOOFER HTB5150D Type / Versions Service Police Board in used POWER BOARD AMPLIFER BOARD WIRELESS BOARD WIFI BOARD C -- Component Lever Repair Tips:...
- Page 4 Product File formats specifications Audio: .aac, .mka, .mp3, .wma, .wav, .mp4, Video: .avi, .divx, .mp4, .m4v, .mov, .mkv, .m2ts, .rmvb, .rm, .rv (Available only in Asia Note notice. Audio formats Your home theater supports the following Region codes The type plate on the back or bottom of the Extension Con- Audio Bit rate...
- Page 5 Audio codec Video codec Bit rate Video formats Dolby Digital, MPEG 1, MPEG 40 Mbps MPEG, MP3, theater allows you to play your: AAC, HE-AAC MPEG 4 ASP 38.4 1080 pixels (except DivX, which has a Mbps resolution of 77220 x 576) and frame rate H.264/AVC 25 Mbps of 6 ~ 30 frames per second.
- Page 6 Audio codec Video codec Bit rate Video WMV9 45 Mbps Signal system: PAL / NTSC HDMI output: 480i/576i, 480p/576p, 720p, 1080i, 1080p, 1080p24 Audio codec Video codec Bit rate PCM, DTS core, MPEG 1, Audio MPEG, MP3 MPEG 2 Mbps S/PDIF Digital audio input: Optical: TOSLINK Sampling frequency:...
- Page 7 Weight: 4.9 KG Subwoofer Impedance: 3 ohm Speaker drivers: 1 x 6.5" woofer Power consumption: 50 W Standby power consumption: 0.5 W Dimensions (WxHxD): 195 x 298 x 410 Weight: 7.2 KG Remote control batteries 2 x AAA-R03-1.5 V Laser Laser Type (Diode): InGaN/AIGaN (BD), AIGaInP (DVD/CD) Wave length: 405 +7 nm/-7 nm (BD), 655...
-
Page 8: Safety Instruction, Warning & Notes
Safety instruction, Warning & Notes Safety instruction 1. General safety 2.Laser safety Safety regulations require that during a repair: This unit employs a laser. Only qualified service personnel . Connect the unit to the mains via an isolation transformer. may remove the cover, or attempt to service this device . - Page 9 Warning 1.General 2. Laser . All ICs and many other semiconductors are susceptible to . The use of optical instruments with this product, will electrostatic discharges (ESD). Careless handing during increase eye hazard. repair can reduce life drastically. Make sure that, during .
- Page 10 Solder Joint...
- Page 11 - lead free BGA-ICs will be delivered in so-called respected by the workshop during a repair: ‘dry-packaging’ (sealed pack including a silica gel Use only lead-free solder alloy Philips SAC305 with pack) to protect the IC against moisture. After order code 0622 149 00106. If lead-free solder-paste is...
-
Page 12: Dfu Instruction
Source buttons / Color buttons Color buttons: Select tasks or options for Blu-ray discs or Smart TV services. DISC: Switch to disc source. DOCK for iPod: Switch to Philips dock for iPod or iPhone. HELP: Access the onscreen help. SOURCE: Select an audio input a OK source or radio source. - Page 13 Navigate menus. In radio mode, press left or right to start auto search. In radio mode, press up or down to tune the radio frequency. During network and password setup, press left to delete a character. (Mute) Mute or restore volume. d +/- (Volume) Increase or decrease volume.
- Page 14 Signal input from an antenna, cable or satellite. Connect to the power supply. e DOCK for iPod b OPTICAL IN Connect to a Philips dock for iPod or Connect to an optical audio output on the iPhone.(Model: Philips DCK306x, sold TV or a digital device. separately) c USB FOR VOD/BD-LIVE ONLY Slot for a USB storage device.
- Page 15 Switch the voltage selector to the local power line voltage. d AC MAINS~ Connect to the power supply. (USB) Audio, video or picture input from a USB storage device. b MUSIC iLINK / MIC (MIC is available only in selected models) Audio input from an MP3 player or a microphone.
-
Page 16: Mechanical And Dismantling Instructions
Mechanical and Dismantling Instructions Dismantling Instruction Detailed information please refer to the model set. The following guidelines show how to dismantle the soundbar. Step 1: Remove 11 screws around the bottom Cover, and then remove the bottom Cover (Figure 1) Figure 1 Dismantle Amplifier Board.Remove 2 screws , and then disconnect connectors(XP1,XP5,XP4,XP3,XP8,XP2)(Figure 2) Step 2:... - Page 17 Mechanical and Dismantling Instructions Dismantling Instruction Detailed information please refer to the model set. XP19 XP18 XP17 XP16 XP20 Figure 3 Dismantle IN Board.Disconnect connectors(XP1,XS609) ,remove 1 screw on the IN Board and 2 screws on the back Step 4: pannel.(Figure 4) XS609 Figure 4...
- Page 18 Mechanical and Dismantling Instructions Dismantling Instruction Detailed information please refer to the model set. Step 6 Dismantle loader. Remove 4 screws, disconnect connectors(P4,XP7,XP17,XP16),and then remove the loader. (Figure 6) Step 7: Dismantle Key Board. Remove 5 screws, disconnect connector(XS1),and then remove the Key Board. (Figure 6) XP17 XP16 Figure 6...
- Page 19 Mechanical and Dismantling Instructions Dismantling Instruction Detailed information please refer to the model set. Dismantle the cover of speakers.FInish Step1 to Step9 first,then remove 12 screws on the back pannel and 2 screws on the bottom Step 10: (Figure 8). Open the Front cover,remove 16 screws on the cover of speakers(Figure 9) Figure 8 Figure 9...
- Page 20 Mechanical and Dismantling Instructions Dismantling Instruction The following guidelines show how to dismantle the subwoofer. Step1: Remove 12 screws around the Back Cover, and then Turn over the Back pannel (Figure 1). Figure 1 Before remove the back pannel, disconnect the connector (XP6). Step2: XP11 CN503...
-
Page 21: Software Upgrades
Software Upgrade 1.Upgrade from USB: Build UPG file in USB , copy the upgrade file HTB5150.bin to USB UPG file. then insert USB ,start up DUT enter into HOME screen ,select Setup >>Advance>> software update >>USB. When upgrade file detected, select "Yes" to upgrade, select "No"... -
Page 22: Trouble Shooting Chart
Trouble shooting Chart VFD No display on Front Control Board VFD No display on Front Control Board Check every supply voltage on Main Board whether normal or not. Refer to CN504 on Power Board (XP8, PIN2: -24V, PIN3: 12V, PIN4:3.3V Check voltage -24V,+12V,3.3V on Power Fix the connection XP6 on Front Board at CN504 position and Front Control... - Page 23 Trouble shooting Chart keys do not work keys do not work Check voltage +3.3V on keypad board Fix the connection XS1 to XP1 on Main XS1 of pin 2,3,4, whether normal or not. Board Check keypad Board signals of XS1 pin2,3,4,5 if have high or low voltage Replace U36 on Main Board, or replace Main Board...
- Page 24 Trouble shooting Chart Remote control does not work Remote control does not work Check battery of remote control whether exhausted or not. Replace the battery for remote control Check power supply of IR1 on Front Check the +3.3V net on Front Control Control Board whether normal or not Board to Main Board XP8 PIN8 IR1 Pin1 :+3.3V...
- Page 25 Trouble shooting Chart No audio output No audio output Check CN504 Pin 1= 33.V& PIN 8 = 3.3V Check voltage +33.5V (33.5V on power Board whether normal or not HTB5150D) for whether normal or not at on Amplifier Board Refer to CN504 on Power Board Check the 24Pin FFC connection XP11 on Main Board and XP1 on Amplifier Board...
- Page 26 Trouble shooting Chart No video output No video output Check L457, R188 whether right on Main Board Add L457, R188 Check the video signal whether right at U4: PIN 6 on IN board Replace Main IC or Main Board...
- Page 27 Trouble shooting Chart Can’t read disc or can’t open the disk door Can’t read disc or can’t open the disk door Check loader work normally or not Check XP16 on Main Board Check 45Pin, 8Pin, 4Pin cable from Main Board to Loader connect right or Fix 45Pin, 8Pin, 4Pin cable Replace Loader 、...
- Page 28 Trouble shooting Chart Tuner FM does not work Tuner FM does not work Check voltage at XS1 pin2 (+5V) on Main Board whether normal Refer to Power Board CN504 or not Check voltage +3.3V Tuner module (U184 Pin11) whether right or Check Main Board tuner power supply circuit.
- Page 29 Trouble shooting Chart AUX in does not work AUX in does not work Check voltage at U185 PIN36:3.3V on Main Refer to MAIN Board U5 PIN6 Board whether normal or not Refer to Power Board CN504 Check Main Board U185 pin11&pin12 signal Check AUX IN connector input whether right or not Check Main Board XP11 all pin signal...
- Page 30 Trouble shooting Chart MP3 Link does not work MP3 Link does not work Check signal JACK601 PIN3:MP3_R PIN2:MP3_L ON front board whether normal or Refer to Main Board XP20 Check Main Board U185 CS5346 PIN7, Check Main Board C408, C410, R457, PIN8 L/R signal input right or not R470, Refer to MAIN Board U5 PIN6...
- Page 31 5-10 Trouble shooting Chart COAX in does not work COAX in does not work Check voltage at U22 PIN3/PIN22:3.3V on Main Board whether normal or not Refer to Power Board CN504 Check Main Board U22 CS8422 PIN2 input signal whether normal or not Check Coax in Board C18,L1 Check U22 CS8422 whether broken.
- Page 32 5-11 Trouble shooting Chart W I FI does not work wifi in does not work P1 Pin2, Pin3, Pin5, Pin6 from Check netting twine normal or not netting twine link Check normal or Replace P1...
- Page 33 5-12 Trouble shooting Chart Optical in does not work Optical in does not work Check pin1 of P2 on optical in Board Check XP 21 of main board Pin1:3.3V whether normal or not whether normal or not Check power supply Fix XS 3 Check the input signal of U22 CS8422 whether normal...
- Page 34 5-13 Trouble shooting Chart No sub output No sub output Check the SUB AMP board xp11 of Check power supply PIN10: 33.5V , PIN4:12V,PIN2:5 V Check U1 TAS5538 pin of I2S signal Check U4 and wireless module whether normal or not Check the voltage, clock and data of U4 and U1...
- Page 37 KEY Board Circuit Diagram for HTB5150D/12 Soundbar:...
- Page 38 IN Board Circuit Diagram for HTB5150D/12 Soundbar:...
- Page 39 FV Board Circuit Diagram for HTB5150D/12 Soundbar:...
- Page 40 Power Board Circuit Diagram for HTB5150D/12 Soundbar: Alternative R525 R525 CN503 CN503 470K 470K 2PIN/7.92mm 2PIN/7.92mm RV502 RV502 CE501 CE501 VDR/240V VDR/240V 470uF/200V 470uF/200V R526 R526 CY503 CY503 470K 470K 230VAC\115VAC CE501N C505 C505 JP502 JP502 ZD509 ZD509 0.0022uF(222)400V 0.0022uF(222)400V...
- Page 41 Amplifier Board Circuit Diagram for HTB5150D/12 Soundbar :AMP TAS5352...
- Page 42 Amplifier Board Circuit Diagram for HTB5150D/12 Soundbar :AUDIO TAS5538...
- Page 43 Main Board Circuit Diagram for HTB5150D/12 Soundbar:POWER-SOURCE...
- Page 44 Main Board Circuit Diagram for HTB5150D/12 Soundbar :DDT-Part-I...
- Page 45 Main Board Circuit Diagram for HTB5150D/12 Soundbar :DDT-II...
- Page 46 7-10 7-10 Main Board Circuit Diagram for HTB5150D/12 Soundbar :MOTOR DRIVER...
- Page 47 7-11 7-11 Main Board Circuit Diagram for HTB5150D/12 Soundbar :SERVO-FE...
- Page 48 7-12 7-12 Main Board Circuit Diagram for HTB5150D/12 Soundbar:FLASH...
- Page 49 7-13 7-13 Main Board Circuit Diagram for HTB5150D/12 Soundbar:MCU-WT61P8-TUNER...
- Page 50 7-14 7-14 Main Board Circuit Diagram for HTB5150D/12 Soundbar :RJ45-USB-SD CARD...
- Page 51 7-15 7-15 Main Board Circuit Diagram for HTB5150D/12:CS5346+CS8422+AUDIO IN...
- Page 52 7-16 7-16 Main Board Circuit Diagram for HTB5150D/12:IPOD...
- Page 53 7-17 7-17 Main Board Circuit Diagram for HTB5150D/12:HDMI IN...
- Page 54 7-18 7-18 Main Board Circuit Diagram for HTB5150D/12:HDMI OUT...
- Page 55 7-19 7-19 Main Board Circuit Diagram for HTB5150D/12:CVBS...
- Page 56 7-20 7-20 USB & MIC Board Circuit Diagram for HTB5150D/12 Soundbar:...
- Page 57 7-21 7-21 Power Board Circuit Diagram for HTB5150D/12 Subwoofer: CY505 CY505 Alternative R524 R524 CN502 CN502 CE503 CE503 470K 470K 2PIN/7.92mm 2PIN/7.92mm C540 C540 R505A3 R505A3 R505B3 R505B3 JMP13 JMP13 RV502 RV502 CE501 CE501 C509 C509 120K 120K VDR/240V VDR/240V...
- Page 58 7-22 7-22 Amplifier Board Circuit Diagram for HTB5150D/12 Subwoofer:POWER...
- Page 59 7-23 7-23 Amplifier Board Circuit Diagram for HTB5150D/12 Subwoofer:MCU...
- Page 60 7-24 7-24 Amplifier Board Circuit Diagram for HTB5150D/12 Subwoofer:AMP TAS5352...
- Page 61 7-25 7-25 Amplifier Board Circuit Diagram for HTB5150D/12 Subwoofer:AUDIO TAS5538...
- Page 62 7-26 7-26 Key Board Print-layout(bottom side)for HTB5150D/12 Soundbar:...
- Page 63 7-27 7-27 Power Board Print-layout(bottom side)for HTB5150D/12 Soundbar:...
- Page 64 7-28 7-28 IN Board Print-layout(top side)for HTB5150D/12 Soundbar:...
- Page 65 7-29 7-29 IN Board Print-layout(bottom side)for HTB5150D/12 Soundbar: :...
- Page 66 7-30 7-30 FV Board Print-layout(top side)for HTB5150D/12 Soundbar: :...
- Page 67 7-31 7-31 FV Board Print-layout(bottom side)for HTB5150D/12 Soundbar: :...
- Page 68 7-32 7-32 Amplifier Board Print-layout(top side)for HTB5150D/12 Soundbar:...
- Page 69 7-33 7-33 Amplifier Board Print-layout(bottom side)for HTB5150D/12 Soundbar:...
- Page 70 7-34 7-34 Main Board Print-layout(top side)for HTB5150D/12 Soundbar:...
- Page 71 7-35 7-35 Main Board Print-layout(bottom side)for HTB5150D/12 Soundbar:...
- Page 72 7-36 7-36 Power Board Print-layout(bottom side)for HTB5150D/12 Subwoofer:...
- Page 73 7-37 7-37 Amplifier Board Print-layout(top side) for HTB5150D/12 Subwoofer and USB Board for Soundbar:...
- Page 74 7-38 7-38 Amplifier Board Print-layout(bottom side) for HTB5150D/12 Subwoofer and USB Board for Soundbar:...
- Page 76 Waveforms for measure point XP11 Pin20_POWER_derating XP11 Pin12_ AMP MUTE XP11 P13_AMP RST XP11 P9_ AMP SCL XP11 Pin10_AMP SDAXP11 XP11 Pin10_AMP SDAXP11 Pin5_AOBCK XP11 Pin10_AMP SDAXP11 XP11 Pin10_AMP SDA XP11 Pin5_AOBCK Pin5_AOBCK XP11 Pin AOMCLK XP11 Pin4_AOSDATA2...
- Page 77 Waveforms for measure point XP11 Pin1_AOSDATA0 XP11 Pin3_AOSDATA1 XP11 Pin2_LRCK XP11 Pin23_PDWN XP11 Pin22_OTW...
- Page 78 U1 Main IC-MT8580 BDAGO Funtion Block Diagram NAND DDR3 384MB Audio 7.1 CH audio 2 CH audio MT8580 S/PDIF Motor Driver HD video decode HDMI 1.4 837MHz Cortex-A9 x2 Component 400MHz AudioDSPx3 Ethernet CVBS Mali-400 MP HDMI TX/RX 1.4 HDMI 1.4 Ethernet SATA USB 2.0...
- Page 79 10-1 10-1 Exploded View of HTB5150D/12 Soundbar:...
- Page 80 10-2 10-2 Exploded View Of HTB5150D/12 Subwoofer:...
-
Page 81: Revision List
11-1 REVISION LIST Version 1.1 To remove the UART and JTAG port from Main Board schematics to comply with DRM security agreement and Vernace Audio Watermarking.