
Related Manuals for Teac SR-L70i


Summary of Contents for Teac SR-L70i
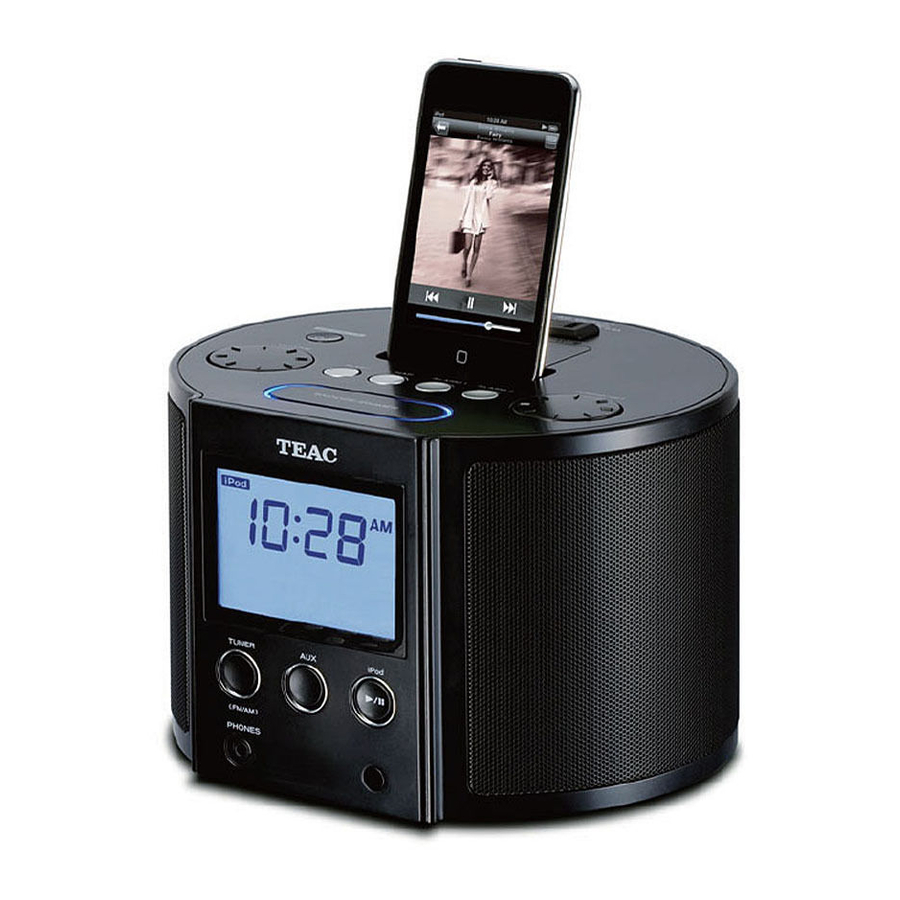
- Page 1 77-20SR70I00020 SR - L70i Hi-Fi Table Radio OWNER’S MANUAL MODE D’EMPLOI MANUAL DEL USUARIO...
- Page 2 C AU T I O N : TO R E D U C E T H E R I SK O F ELECTRIC SHOCK, DO NOT REMOVE COVER (OR BACK). NO USER-SERVICEABLE PARTS INSIDE. REFER SERVICING TO QUALIFIED SERVICE PERSONNEL. The lightning flash with arrowhead s y m b o l , w i t h i n a n e q u i l a t e r a l triangle, is intended to alert the user...
- Page 3 NO USER SERVICEABLE PARTS ARE WITHIN. < IF YOU ARE EXPERIENCING PROBLEMS WITH THIS PRODUC T, CONTAC T TEAC FOR A SERV ICE R EFER R AL . D O NOT USE T HE PRODUCT UNTIL IT HAS BEEN REPAIRED.
-
Page 4: Table Of Contents
Contents Thank you for choosing TEAC. Read this m a n u a l c a r e f u l l y t o g e t t h e b e s t performance from this unit. Before Using the Unit ......4 Battery Precautions . -
Page 5: Battery Precautions
Battery Precautions < Be sure to insert the batteries with correct positive “+” and negative “_” polarities. < Use batteries of the same type. Never use different types of batteries together. < Either rechargeable and non-rechargeable b a t t e r i e s c a n b e u s e d . R e f e r t o t h e precautions on their labels. -
Page 6: Identifying The Parts (Main Unit)
Identifying the Parts (Main Unit) This can be rotated up to 90º in either direction. - Page 7 STANDBY/ON Use this button to turn the unit on or put it into standby mode. VOLUME Turn this knob to adjust the volume. SLEEP Use this but ton to set the Sleep Timer (page 20). Use this but ton to set the Nap Alarm (page 21).
-
Page 8: Identifying The Parts (Remote Control Unit)
Identifying the Parts (Remote Control Unit) MUTING Use this button to mute the sound (page 14). MEMORY In TUNER mode, use this button to store for a p re s e t t h e c u r re nt l y t u n e d s t at i o n (page 19). -
Page 9: Remote Control Unit
The included remote control unit allows the unit to be operated from a distance. When using the remote control, point it towards the remote sensor on the front of the unit. < Even if the remote control is used within its effective operation range, the unit might not respond to the remote if there are any obstacles between them. -
Page 10: Connections
< Read the instructions for each component that you intend to use with this unit. < Be sure to insert each plug securely. To prevent hum and noise, do not bundle the connection cords. Connections iPod (back side) Adjuster SR-L70i AC wall socket... -
Page 11: Battery Compartment
A AUX in plug Analog 2-channel audio signals can be input through this plug. Connect this plug to the output of an iPod, CD player, cassette tape deck, etc. B Dock connector Insert an iPod into this dock (page 14). C CLOCK ADJ Us e t his b u t to n to a djus t th e cl o ck (page 12). -
Page 12: Setting The Clock
Press and hold the CLOCK ADJ button for more than 3 seconds, and release it when “12 HR” or “24 HR” blinks on the display. If you want to change the hour mode, turn the TUNING/SET knob. < If you do not turn the knob or press the button for 8 seconds, timer setting mode will end. -
Page 13: Basic Operation
If an iPod that is in playback mode is inserted into the dock, the SR-L70i automatically turns on and starts playback of the iPod. < You can also turn the unit on by pressing the TUNER button, the AUX button, or the iPod button (y/J). -
Page 14: Listening To An Ipod
SR-L70i speakers and the headphones. Compatible iPod Software If your iPod will not work with the SR-L70i or with the remote control, a software update might solve the problem. Visit the Apple website and download the latest iPod Software. -
Page 15: Previous Track
Selecting iPod mode Press the iPod button (y/J). If an iPod that is playing is inserted into the dock , the SR-L70i automatically star ts outputting the sound. When no iPod is docked, the iPod indicator on the display blinks. -
Page 16: Selecting A Menu Item
Returning to the previous iPod menu Press the MENU button. This button has the same functions as its iPod counterpart. Selecting a menu item Press the PRESET/SCROLL buttons (‡/°) to scroll to the menu item you want, and then press the SELECT button. Listening to an iPod (2) Activating the repeat mode During playback, press the REPEAT button to... -
Page 17: Listening To An External Source
< Turning the volume of the audio player up too high may cause the sound from the SR-L70i to be distorted. If this is the case, reduce the volume of the audio player until the distortion stops and then adjust the volume level of the SR-L70i to a comfortable listening level. -
Page 18: Listening To The Radio
Press the TUNER button. The TUNER indicator ( the display. Press the TUNER button again to select FM or AM. Selecting a station Automatic selection Hold down a Skip button (. or /) for more than 2 seconds and release it when the frequency display begins to change. -
Page 19: Preset Tuning
FM MODE button Pressing this button alternates between Stereo mode and Mono mode. Stereo When an FM stereo broadcast is received, the “STEREO” indicator lights on the display. < If the sound is distorted and the “STEREO” indicator flashes, the signal is not strong enough for good stereo reception. -
Page 20: Timer
Preset Tuning (2) Selecting a preset station I n T U N E R m o d e , p r e s s t h e T U N E R button to select FM or AM. Pr e s s t h e PR E S E T/S C R O LL (‡/°) buttons repeatedly until the desired preset station is found. -
Page 21: Wake Up Timer
Nap Alarm You can set a Nap Alarm so that a buz zer sounds after a set amount of time. The buzzer sounds for 5 minutes. Press the NAP button repeatedly until the desired time appears on the display. The NAP indicator ( ) appears on the display. - Page 22 Turn the TUNING/SET knob to set the hour and minute, and then press the ALARM 1 button. The Timer indicator and source indicator blink. < The Wake Up Timer can be set by 5 minutes’ step. Turn the TUNING/SET knob to set the source, and then press the ALARM 1 button.
-
Page 23: Using The Snooze Function
Turning off a Wake Up Timer If you do not want to use a timer, press the ALARM 1 or ALARM 2 button to turn it off. The corresponding timer indicator ( ) disappears from the display. Press the ALARM 1 or ALARM 2 button again to turn it on. -
Page 24: Troubleshooting
Player Cannot insert the iPod. e Adjust the dock adapter. e Remove dust or obstacles from the SR-L70i dock connector and the iPod, and insert the iPod again. iPod will not play. e Remove the iPod from the dock, wait a few seconds, and insert it again. -
Page 25: Specifications
Specifications Tuner Section Frequency Range FM: 87.5 MHz to 108.0 MHz AM: 520 kHz to 1,710 kHz Speaker System Section Type ......51.5 mm x 2 Impedance . - Page 26 (volume trop for t) dans les écouteurs ou dans le casque peut causer une perte auditive. Sommaire Nous vous remercions d’avoir choisi TEAC. Lisez ce manuel avec attention pour obtenir les meilleures per formances possibles de cet appareil. Avant l’utilisation ......27 Précautions à...
-
Page 27: Avant L'utilisation
é l e c t r i qu e. Si un o bj e t p é n è t re dans l’appareil, consultez votre revendeur ou un SAV TEAC. < Quand vous débranchez l’appareil, tirez toujours par la prise, jamais par le cordon d’alimentation. -
Page 28: Identification Des Parties (Unité Principale)
Identification des parties (Unité principale) Peut tourner à 90º dans les deux directions. - Page 29 STANDBY/ON Utilisez cette touche pour allumer l’appareil ou le mettre en veille (standby). VOLUME Tournez cette molette pour régler le volume. SLEEP Utilisez cette touche pour régler la minuterie d'extinction (page 42). Utilisez cette touche pour régler le minuteur de réveil (page 43). ALARM 1, ALARM 2 Gardez ces touches enfoncées plus de 2 secondes pour passer en mode de réglage...
-
Page 30: Identification Des Parties (Télécommande)
Identification des parties (Télécommande) MUTING (Neutralisation) Utilisez cette touche pour couper le son (page 36). MEMORY (Mémorisation) En mode TUNER, utilisez cette touche pour prérégler (mémoriser) des stations (page 41). FM MODE En mode TUNER, utilisez cette touche pour sélectionner stéréo ou mono (page 41). En mode iPod, utilisez cette touche pour mettre en service la fonction shuffle (lecture aléatoire) (page 38). -
Page 31: Identification Des Parties (Écran)
Identification des parties (Écran) Quand l’appareil est allumé, un de ces indicateurs s’allume pour signaler la source actuelle. S'allume quand la minuterie d'extinction est activée. S’a l l u m e e n m o d e d e s y n t o n i s a t i o n préréglée. -
Page 32: Connexions
< Lisez les instructions qui accompagnent chaque appareil que vous avez l’intention d’utiliser en association avec cet appareil-ci. < Veillez à ce que chaque fiche soit soigneusement insérée. Pour éviter les ronflements et les bruits parasites, évitez d’attacher ensemble les câbles d’interconnexion. Connexions iPod (Arrière) Adaptateur SR-L70i Prise secteur... - Page 33 A Fiche d'entrée AUX IN Des signaux audio analogiques à 2 canaux p e u ve nt ê t re re ç us p a r ce t te f i c h e. Branchez-la à la sortie d'un iPod, lecteur de CD, platine cassette, etc.
-
Page 34: Réglage De L'horloge
Appuyez sur la touche CLOCK ADJ, m a i n t e n e z - l a p r e s s é e p l u s d e 3 secondes et relâchez-la quand “12 HR” ou “24 HR” clignote à l'écran. Si vous désirez changer le cycle de l’horloge, tournez la molette TUNING/SET. -
Page 35: Fonctionnement De Base
ON pour allumer l’appareil. < L’appareil s’allume avec la dernière source sélectionnée. Si un iPod en mode lecture est inséré dans le Dock, le SR-L70i se mettra automatiquement sous tension et entamera la lecture de l’iPod. < Vous pouvez aussi utiliser la touche TUNER, la touche AUX ou la touche iPod (y/J ) pour allumer l’appareil. -
Page 36: Écoute De L'ipod
SR-L70i et des écouteurs. Logiciel iPod compatible Au cas où votre iPod ne fonctionnerait pas avec le SR-L70i ou sa télécommande, une mise à jour du logiciel peut résoudre le problème. Visitez le site web Apple et téléchargez le dernier logiciel pour iPod. - Page 37 Sélectionner le mode iPod Appuyez sur la touche iPod (y/J). Si un iPod en lecture est inséré dans le dock, le SR-L70i commence automatiquement la reproduction du son. S’il n’y a pas d’iPod sur le dock, l’indicateur iPod de l’afficheur clignote.
- Page 38 Pour revenir au menu précédent Appuyez sur la touche MENU. Cette touche a les même fonctions que celle de l’iPod. Sélection d'un élément de menu Appuyez sur les touches PRESET/SCROLL (‡/°) pour faire défiler jusqu’à l’élément. Et puis appuyez sur la touche SELECT. Écoute de l’iPod (2) Pour activer le mode de lecture répétitive...
-
Page 39: Écoute D'une Source Externe
Écoute d’une source externe Branchez la fiche d'entrée AUX IN du SR-L70i à la prise casque (prise de sortie audio) d'un lecteur audio portable. Vous pouvez employer cette méthode de connexion pour écouter un iPod sans connecteur pour dock ou dont l’adaptateur pour dock n’est pas disponible. -
Page 40: Écoute De La Radio
Appuyez sur la touche TUNER. L'indicateur TUNER ( l'écran. Ap p u ye z à n o u ve a u s u r l a t o u c h e TUNER pour sélectionner FM ou AM. Sélection d'une station Recherche automatique M a i n t e n e z e n f o n c é... -
Page 41: Préréglage De Stations
Touche FM MODE Appuyez sur la touche FM MODE fait alterner entre les modes STEREO et MONO. Stéréo Les émissions FM stéréo sont reçues en stéréo et le témoin “STEREO” s’allume à l’écran. < Si le son souffre de distorsion et si le témoin “STEREO”... -
Page 42: Minuterie
Préréglage de stations (2) Comment rappeler des stations préréglées En mode TUNER, appuyez sur la touche TUNER pour sélectionner FM ou AM. Appuyez répétitivement sur la touche P R E S E T/ S C R O L L (‡/° ) j u s q u ’ à ob te nt ion de l a st at ion p ré... - Page 43 Minuteur de réveil Vous pouvez programmer un minuteur de réveil pour qu'il sonne après un temps donné. La sonnerie retentira pendant 5 minutes. Appuyez répétitivement sur la touche NAP jusqu’à ce que la durée voulue s’affiche. L'indicateur NAP ( ) apparaît à l'écran. 30, 60, 90, ou 120 : Selon la sélection, la sonnerie retentira après 30, 60, 90, ou 120 minutes.
- Page 44 Tournez la molette TUNING/SET pour régler les heures et les minutes, puis appuyez sur la touche ALARM 1 ou ALARM 2. L'indicateur de minuterie et l'indicateur de source clignotent. < Le réveil peut être réglé par pas de 5 minutes. S é...
- Page 45 Pour couper le réveil Si vous n’utilisez pas le réveil, appuyez sur la touche AL ARM 1 ou AL ARM 2 pour le couper. L’indicateur de réveil ( l’afficheur. Appuyez à nouveau sur la touche ALARM 1 ou ALARM 2 pour réactiver le réveil. Utilisation de l’alarme de votre iPod touch <...
-
Page 46: Dépannage
Lecteur iPod Impossible d’insérer l’iPod. e Vérifiez l’adaptateur de dock. e Retirez la poussière ou les obstacles du connecteur de dock du SR-L70i et de l’iPod, et réinsérez l’iPod. Pas de lecture. e Retirez l’iPod du dock, attendez quelques secondes, et réinsérez-le. -
Page 47: Caractéristiques Techniques
Caractéristiques techniques Section SYNTONISEUR Plage de fréquences FM : 87,50 MHz à 108,00 MHz AM : 520 kHz à 1.710 kHz Section SYSTÈME DE HAUT-PARLEURS Type ......51,5 mm x 2 Impédance . - Page 48 (volumen) a través de ellos puede dar lugar a problemas de sordera.. Indice Enhorabuena por escoger un TEAC. Lea detenidamente este manual a fin de obtener el mejor rendimiento de esta unidad. Antes de usar esta unidad ....49 Precauciones con las pilas .
-
Page 49: Antes De Usar Esta Unidad
Antes de usar esta unidad Lea esto antes de realizar cualquier operación. < Si esta unidad está encendida, es posible que, al encender la televisión aparezcan líneas en la pantalla, dependiendo del estado de las ondas eléctricas de la emisora de TV. -
Page 50: Identificación De Las Partes
Identificación de las partes (unidad principal) Puede girarlo hasta 90º en ambos sentidos. - Page 51 STANDBY/ON Utilice este botón para encender o apagar la unidad. VOLUME Use estos botones para ajustar el volumen. SLEEP Use este botón para ajustar el temporizador de la función Sleep. (pág. 64) Utilice este botón para ajustar la alarma de siesta.
-
Page 52: Identificación De Las Partes
Identificación de las partes (mando a distancia) MUTING Utilice este botón para anular el sonido. (pág. 58) MEMORY En el modo TUNER, use este botón para prefijar emisoras (presets). (pág. 63) FM MODE En el modo TUNER, use este botón para sele ccionar entre los mo dos s tereo o monoaural. -
Page 53: Identificación De Las Partes
Identificación de las partes (pantalla) Con la unidad encendida, uno de estos indicadores se ilumina para identificar la fuente seleccionada. Se ilumina cuando el temporizador de la función Sleep está activo. S e i l u m i n a e n e l m o d o d e e m i s o r a s prefijadas (presets). -
Page 54: Conexiones
< Lea las instrucciones de todos los componentes que vaya a utilizar con la unidad. < Asegure firmemente cada uno de los conectores. Para evitar zumbidos y ruidos, no permita que los cables audio queden junto con los cables de alimentación de CA. iPod (Parte trasera) Pestaña de dock SR-L70i Toma de CA... - Page 55 A Entrada AUX IN Pu e d e d a r e nt r a d a a s e ñ a l e s a u d i o analógicas de 2 canales a través de esta toma. Conéctela a la salida de un iPod, reproductor de CD, pletina, etc.
-
Page 56: Puesta En Hora Del Reloj
Mantenga pulsado el botón CLOCK ADJ durante más de 3 segundos y deje de pulsarlo cuando en pantalla parpadee la indicación “12 HR” o “24 HR”. Si quiere cambiar el modo de indicación de la hora, gire el mando TUNING/SET. <... -
Page 57: Funcionamiento Básico
Po d co n e l m o d o d e reproducción activo, el SR-L70i se encenderá a u t o m á t i c a m e n t e y c o m e n z a r á l a reproducción del iPod. -
Page 58: Escucha De Un Ipod
Software de iPod compatible Si el iPod no funciona con el SR-L70i o con el m a n d o a d is t a n c ia , e s p o sib l e q u e u n a actualización de software resuelva el problema. - Page 59 Selección del modo iPod Pulse el botón iPod (y/J). Si en el dock hay colocado un iPod que esté reproduciendo datos, el SR-L70i empezará automáticamente a dar salida al sonido. Si no hay un iPod en el dock, el indicador iPod de la pantalla parpadeará.
- Page 60 Para retroceder al menú anterior Pulse el botón MENU. Este botón tiene las mismas funciones que el mismo botón del iPod. Selección de un elemento de menú Pulse los botones PRESET/SCROLL (‡/°) para desplazarse hasta la opción que quiera elegir y pulse el botón SELECT. Escucha de iPod (2) Para activar el modo de repetición Durante la reproducción normal, pulse el...
-
Page 61: Escucha De Una Fuente Externa
Escucha de una fuente externa Conecte la entrada AUX IN del SR-L70i a la salida PHONES (conector de salida a u d i o ) d e u n r e p r o d u c t o r a u d i o portátil. -
Page 62: Escucha De La Radio
Pulse el botón TUNER. El indicador TUNER ( pantalla. Pulse de nuevo el botón TUNER para elegir entre FM o AM. Selección de una emisora Sintonización automática Mantenga pulsado durante más de dos segundos el botón de salto (.o/) y deje de pulsar tan pronto como la indicación de frecuencia comience a cambiar. - Page 63 Botón FM MODE Pulse este botón para cambiar entre los modos stereo y monofónico. Stereo Las emisiones de FM stereo se reciben en stereo y el indicador “STEREO” se ilumina en la pantalla. < Si el sonido se recibe distorsionado y el indicador “STEREO”...
-
Page 64: Presets
Emisoras prefijadas (2) Cómo seleccionar presets En el modo TUNER , pulse el botón TUNER para seleccionar FM o AM. Pulse el botón PRESET/SCROLL (‡/°) de forma repetida hasta localizar el preset de la emisora que quiera. Temporizador (1) Desconexión programada Puede programar esta unidad para que se desconecte después de un periodo de tiempo especificado. - Page 65 Alarma de siesta Puede configurar una alarma de siesta para que suene un zumbido tras un periodo de tiempo determinado. El zumbador suena durante 5 minutos. Pulse el botón NAP repetidas veces hasta que aparezca el valor de tiempo que quiera. El indicador NAP ( ) aparecerá...
- Page 66 Gire el mando TUNING/SET para ajustar las horas y minutos y pulse después el botón ALARM 1 o ALARM 2. El indicador de temporizador y el de fuente parpadearán. < Puede ajustar el despertador en pasos de 5 minutos. Elija una fuente de sonido con los botones TUNING/SET y a continuación pulse ALARM 1.
- Page 67 Para desactivar el despertador Si no va a usar el despertador, pulse el botón ALARM 1 o ALARM 2 para desactivarlo. El indicador de temporizador ( desaparecerá de la pantalla. Pulse de nuevo el botón ALARM 1 o ALARM 2 para reactivar el despertador. Uso de la alarma con su iPod touch <...
-
Page 68: Resolución De Problemas
L i m p i e o d e s p e j e d e o b s t á c u l o s e l conector dock del SR-L70i y el iPod, e inténtelo de nuevo. -
Page 69: Especificaciones
Especificaciones Sección de sintonizador Rango de frecuencias FM: 87.5-108.0 MHz AM: 520-1,710 kHz Sección de altavoces Tipo ......51.5 mm x 2 Impedancia . - Page 72 7733 Telegraph Road, Montebello, California 90640, U.S.A. Phone: (323) 726-0303 TEAC CANADA LTD. 5939 Wallace Street, Mississauga, Ontario L4Z 1Z8, Canada Phone: (905) 890-8008 TEAC MEXICO, S.A. de C.V. Río Churubusco 364, Colonia Del Carmen, Delegación Coyoacàn, CP 04100, México DF, México Phone: (5255)5010-6000 TEAC UK LIMITED Unit 19 &...