Advertisement
Quick Links
EN Installation / User Instructions / Warranty
FR Instructions de montage / Mode d'emploi / Garantie
ES Instrucciones de montaje / Manejo / Garantía
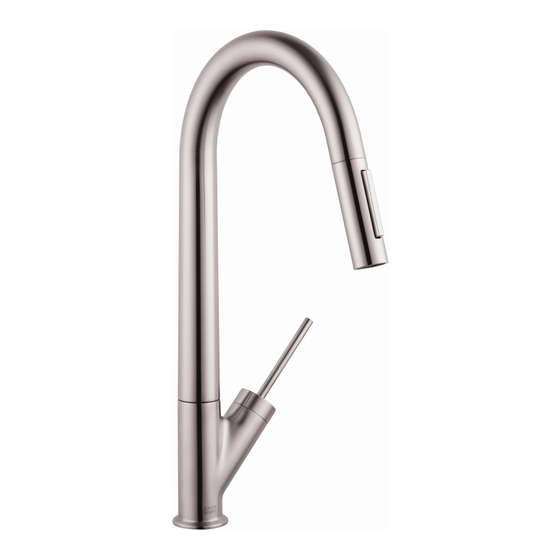
AXOR Starck HighArc 2-Spray Pull-Down
10821XX1
12806XX1
AXOR Starck Prep 2-Spray Pull-Down
10824XX1
AXOR Starck Bar Faucet
10826XX1
I N S T A L L A T I O N
Advertisement

Related Manuals for Axor 10821 1 Series


Summary of Contents for Axor 10821 1 Series
- Page 1 AXOR Starck HighArc 2-Spray Pull-Down 10821XX1 12806XX1 AXOR Starck Prep 2-Spray Pull-Down 10824XX1 EN Installation / User Instructions / Warranty FR Instructions de montage / Mode d'emploi / Garantie AXOR Starck Bar Faucet ES Instrucciones de montaje / Manejo / Garantía 10826XX1 I N S T A L L A T I O N...
-
Page 2: Technical Information
E N G L I S H F R A N A I S T EC HN IC A L I N F ORMAT IO N D ONNÉ ES TEC HN IQUE S Water pressure Pression d’eau Recommended 15 - 75 PSI (0.1 - 0.5 MPa) recommandée 15 - 75 PSI (0.1 - 0.5 MPa) Maximum... -
Page 3: Datos Tecnicos
E S P A Ñ O L DATOS TEC N ICO S TOOLS REQUIRED / OUTILE S UTILES / HERRA MIENTA S ÚTIL ES Presión en servicio recomendada 15 - 75 PSI (0.1 - 0.5 MPa) max. 145 PSI (1 MPa) Temperatura del agua caliente recomendada 120°-140°... - Page 4 AXOR Starck AXOR Starck 10821XX1 10824XX1 7⅝" (194 mm) 12806XX1 Ø1⅛" (28 mm) 9¼" (235 mm) 4⅜" 4⅜" (110 mm) (110 mm) Ø2" Ø2" (51 mm) (51 mm) Ø1⅜" (34 mm) Ø1⅜" (34 mm) 5⅞" (149 mm) 5⅛" (130 mm) ⅜...
- Page 5 INSTALLATION / INSTALLATION / INSTALACIÓN 10821XX1, 12806XX!, 10824XX1 ADJUST TH E SPOUT ROTATION 10826X X1 page 16 AJUSTE Z L A ROTATION DU BEC página 16 AJUSTE L A ROTACIÓN DEL SURTID OR 24 x 15°...
- Page 6 110° 24 x 15°...
- Page 7 E N G L I S H F R A N A I S E S P A Ñ O L Install the handspray hose and Installez le tuyau de douchette et Instale el flexo de la ducha ex- handspray.
- Page 8 E N G L I S H F R A N A I S E S P A Ñ O L Tighten the mounting nut. Serrez l'écrou de montage et les Apriete la tuerca de fijación y los vis de serrage. tornillos.
- Page 9 E N G L I S H F R A N A I S E S P A Ñ O L Do not allow the supply Ouvrez la douille de raccord Abra la conexión rápida empu- hoses to twist. rapide en la poussant vers le jándola hacia arriba.
- Page 10 > 2 min E N G L I S H F R A N A I S E S P A Ñ O L Remove the handspray hose. Retirez le douchette. Retire la ducha. Remove the hose filter. Retirez le filtre. Retire el filtro.
- Page 11 E N G L I S H F R A N A I S E S P A Ñ O L Install the filter in the handspray Installez le filtre dans le tuyau Instale el filtro en la manguera. hose.
- Page 12 R E P L A C E M E N T P A R T S / P I È C E S D É T A C H É E S / R E P U E S T O S AXOR Starck...
- Page 13 U S E R I N S T R U C T I O N S / I N S T R U C T I O N S D E S E R V I C E / M A N E J O ouvert fermé...
- Page 14 C L E A N I N G / N E T T O Y A G E / L I M P I E Z A...
- Page 15 C H E C K V A L V E M A I N T E N A N C E / E N T R E T I E N D E L E S C L A P E T S A N T I - R E T O U R / M A N T E N I M I E N T O D E L A S V Á...
- Page 16 I N S T A L L A T I O N / I N S T A L L A T I O N / I N S T A L A C I Ó N 1 0 8 2 6 X X 1 E N G L I S H F R A N ...
- Page 17 E N G L I S H F R A N A I S E S P A Ñ O L Connect the hot and cold supply Connectez les tuyaux d’arrivée Conecte las mangueras de sumin- hoses to the supplies. d’eau chaude et d’eau froide aux istro de agua caliente y fría a las tuyaux d’alimentation.
- Page 18 2.5 mm E N G L I S H F R A N A I S E S P A Ñ O L Reposition the cam to change the Repositionnez la came pour Reposicione la leva para cambiar rotation. changer la rotation.
- Page 19 2.5 mm E N G L I S H F R A N A I S E S P A Ñ O L Install the 110° cam if a 110° Installez la came de 110°, si Instale la leva de 110°, si rotation is desired.
- Page 20 > 2 min E N G L I S H F R A N A I S E S P A Ñ O L Remove the aerator. Retirez l’aérateur. Retire el aireador. Flush the faucet for at least 2 Rincez le robinet pendant au Lave el grifo durante al menos 2 minutes.
- Page 21 E N G L I S H F R A N A I S E S P A Ñ O L Install the aerator. Installez l’aérateur. Instale el aireador.
- Page 22 R E P L A C E M E N T P A R T S / P I È C E S D É T A C H É E S / R E P U E S T O S AXOR Starck...
- Page 23 U S E R I N S T R U C T I O N S / I N S T R U C T I O N S D E S E R V I C E / M A N E J O ouvert fermé...
- Page 24 C L E A N I N G R E C O M M E N D A T I O N F O R H A N S G R O H E P R O D U C T S Modern bathroom faucets, kitchen faucets and shower products are made from different materials to comply with the needs of the market with regard to design and functionality.
- Page 25 IMPORTANT ⁄ Les residus de produits pour le corps comme les savons liquides, shampooings, gels de douche, teintures pour cheveux, parfums, apres-rasage et vernis a ongles peuvent causer des deteriorations. Rincez le produit avec de l’eau propre après chaque utilisation. ⁄...
-
Page 26: What We Will Do
Hansgrohe, Inc. (ii) a limited warranty on our hansgrohe and AXOR branded products. any hansgrohe or AXOR product sold for display purposes or (iii) hans- ® ® grohe or AXOR products purchased from unauthorized sellers. - Page 27 PRODUCT INSTRUCTIONS AND QUESTIONS OR REPAIR, INCLUDING THE USE OF ABRASIVE OR CAUSTIC CLEANING AGENTS OR “NO-RINSE” CLEANING PRODUCTS. Upon purchase or prior to installation, please carefully inspect your prod- N OTICE TO RES IDENTS OF T H E STATE O F N E W JE RSEY: uct for any damage or visible defect.
- Page 28 AXOR ⁄ Hansgrohe, Inc. 1490 Bluegrass Lakes Parkway Alpharetta, GA 30004 Tel. 800-334-0455 Fax 770-889-1783 axor-design.com...