Swann DVR8-2500 Operating Instructions Manual
8 channel h.264 digital video recorder
Hide thumbs
Also See for DVR8-2500:
- Operating instructions manual (44 pages) ,
- Easy setup manual (4 pages)

Related Manuals for Swann DVR8-2500


Summary of Contents for Swann DVR8-2500
-
Page 1: Operating Instructions
Advanced security made easy DVR8-2500™ 8 Channel H.264 Digital Video Recorder Operating Instructions Operating Instructions SW342-2DE www.swannsecurity.com SR342-2DE-60010-230709... -
Page 2: Before You Begin
Choose something that you’ll remember, but that others would be unlikely to guess. · If you do manage to lock yourself out of the DVR, you’ll need to contact us at the Swann Technical Support Telephone Helpdesk - the number is on the back cover. -
Page 3: Table Of Contents
Contents Before you Begin Table of Contents Package Contents DVR Layout Layout of Remote Control Connecting Cameras to the DVR Starting the DVR Navigating the Menus The Main Menu Hard Drive Setup Setting the Time Configuring the Camera Display Recording Search and Playback Backing up Footage Motion Detection... -
Page 4: Package Contents
Easy Setup Guide Power Adapter with Cable Software CD Network cable USB cable RCA Video Cable RCA to BNC adapters X 4 Security Stickers (4 Pack) If you are missing any of the components above, contact Swann Communications for assistance. -
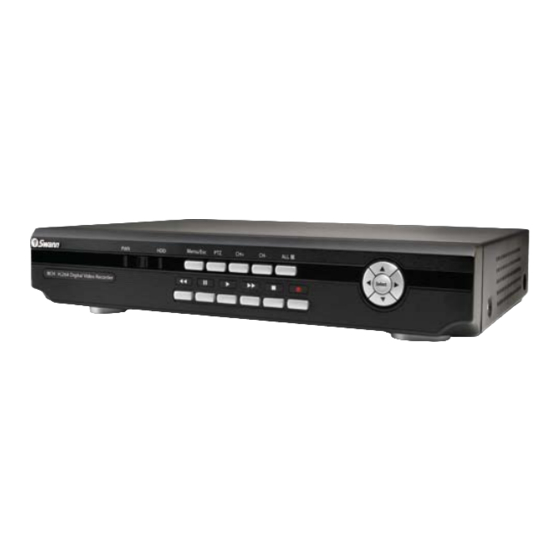
Page 5: Dvr Layout
DVR Layout Front Panel 1 2 3 1. Power Indicator - Lights on when DVR powered 2. Infra red sensor 3. Hard drive indicator - Lights when hard drive is active (flashes when recording, searching etc.) 4. Menu/ESC - Used to enter the main menu or exit a sub menu. -
Page 6: Layout Of Remote Control
Layout of Remote Control 1. 0-9 (digit key pad) - Buttons 1-4 can be used to view channels 1-4 in indi- vidual display mode during recording and playback. - 0-9 can be used to input a password. - 0-9 cannot be used for any other numeric field with a yellow pop up keypad 2. -
Page 7: Connecting Cameras To The Dvr
Connecting Cameras to the DVR Cameras and accessories optional 1. Connect the power and BNC ends of the security camera to an extension cable. 2. Connect the DC end on the extension cables to the 4 way power splitter plugs. 3. -
Page 8: Starting The Dvr
Starting the DVR Once you have connected the DVR and switched the power on it will begin to boot up. During boot up you will see the following screen. The DVR is basically a small, dedicated computer and thus needs about 45 seconds to boot up. Whilst booting, the DVR will show this screen: Once the DVR has booted (up and you have a camera connected to each channel) the DVR will take you straight to the ‘ALL’... -
Page 9: Navigating The Menus
Navigating the Menus This DVR comes with a USB mouse and also a remote control, and also has a full compliment of control buttons on the front panel. So, basically, you have options! Note: The USB mouse must be attached to the upper USB port! The mouse functions just like any PC mouse for easy navigation of the menus. -
Page 10: Hard Drive Setup
Hard drive Setup What’s this? Unlike a VCR which records to a tape, your DVR records footage to the internal hard drive. Therefore, it’s an important first step when configuring your DVR to make sure that the hard drive (HDD) options are correctly set. Think of it like inserting a really, really long tape that you don’t have to rewind. -
Page 11: Setting The Time
Setting the Time Setting the Time & Date It’s important to set the Time & Date before recording footage. That way, when you search for events, they’ll be listed in the right order, and display when they were recorded. To set the Time and Date: Go to the TIME AND DATE submenu. -
Page 12: Configuring The Camera Display
Setting the Time (continued) Configuring custom DST MODE As the standards for daylight savings differ from country to coun- try, and often state to state, you might need to manually tell the DVR exactly when it commences and ends in your locality. To do this, we need to configure the settings in the DST MODE CUSTOM submenu. -
Page 13: Color Setup
Camera Setup Color Setup You can fine tune the look of each channel individually by adjusting the HUE, BRIGHT (brightness), CONTRAST and SATURATION values for each channel. This is useful if peculiar lighting conditions, a non-standard camera or a conspicuously colored object in the frame cause the display to be inconveniently tinted, or over or under exposed. -
Page 14: Recording
Recording In the RECORD SETUP submenu you can choose which channels will be active during recording, change the recording quality, enable & disable audio, select record more and Chunk Size (the maximum size of each recorded file). This submenu contains many of the most important settings on the DVR, and correctly configuring them is important to the ongoing smooth operation of the unit. -
Page 15: Setting The Schedule
Record (continued) Schedule If you choose the TIME SCHEDULE recording option, then a SCHEDULE button will appear on the screen giving you access to set the schedule. Highlight and select this to set the schedule. When using the mouse, you’ll need to left click the schedule button to access the SCHEDULE screen. - Page 16 Record (continued) Schedule (continued) Want Monday through Thursday to run on the same schedule, but don’t want to set it all individually? Too easy. The COPY button in the SCHEDULE screen allows you to copy the schedule for a certain day (that you may have already set) to all of or one of the other days. This saves you time having to set each day separately.
-
Page 17: Search And Playback
Search and Playback Video Search In the VIDEO SEARCH screen you can search for a specific day for a recording and view it in playback mode. This is useful for hunting a specific recording of an incident if you know the time and date it ocured. To search you need to input the date of the video then select the hour of the recording. -
Page 18: File List
Search and Playback (continued) FIle List In the FILE LIST screen you can view each video pack, listed in chronological order. You can set a filter to view files for a specific channel or record mode. Here you can also back up files to a USB flash drive. To filter by the channel on which the recording came from: •... -
Page 19: Backing Up Footage
Backing up Footage Backing up a file • First, insert a USB flash drive into the USB port on the back of the DVR. Note that inserting a flash drive into the mouse port will not work correctly. • Make sure there are no files on the USB flash drive that you wish to keep, as data already on the drive may be lost. -
Page 20: Motion Detection Area
Motion Detection (continued) Motion Detection Area Say, for example, you are trying to monitor your front yard, whilst in the background there is a busy street, and the cars driving past continually set off the motion detection. What can you do about it? Setting only part of the camera’s view to be motion sensitive might be the answer. -
Page 21: Password Control
NOTE: The default password to the DVR is “123456”. If you lose or forget your password (thus locking yourself out of the DVR) you’ll need to contact Swann Technical Support. Our number is on the back of this booklet. However, we strongly advise that you choose a password you’ll remember! It’ll save grief later... -
Page 22: System Menu
System Menu The SYSTEM menu is where most of the advanced settings for the DVR hide out. Most of the time, there isn’t much you’ll need to change here. However, a few settings might need tweaking from time to time, so here’s a quick rundown of what’s what. -
Page 23: Ptz
It is important to use the correct protocol for the PTZ system being used (this will be explicitly stated somewhere in the PTZ cameras documentation). The DVR8-2500 supports Pelco-D and Pelco-P - make sure any PTZ cameras you connect to the DVR use one of these two protocols - and select the most appropriate protocol for your system here. -
Page 24: Data Bit
PTZ (continued) Bit Settings There are several ‘bit’ settings to configure - again, these must match the required settings for the camera system. Consult the camera documentation to learn these values. Data Bit A DATA BIT is one part of a set of data sent to the camera to tell it which way to point. Some PTZ cameras like very short packets of information, others require longer packets of information at a time. - Page 25 PTZ (continued) Onscreen PTZ Controls You can bring up the PTZ Setup window by pressing the PTZ button on the remote control, or by right-clicking the mouse in the live view mode, and choosing PTZ. Here, you’ll be able to aim the camera, as well as alter aspects of the lens and iris configuration, if these features are supported by your camera system.
-
Page 26: Installing The Dvr Software
Installing the DVR Software Installing the DVR software For the best results when using a PC to access the DVR, use the included software which came on the mini-CD included with your DVR. This software is compatible with Windows-based computers only, and will not run under operating systems, such as Mac OS or Linux. - Page 27 Installing the DVR Software (continued) 4. Follow the instructions & click NEXT. 5. Select the destination on your PC hard drive of the software files. Click NEXT to have them stored to the default location.
- Page 28 Installing the DVR Software (continued) 6. Click NEXT. 6. The installation is now complete. Click FINISH.
-
Page 29: Configuring Active
Configuring ActiveX You may need to change the security settings on your PC to be able to view the DVR remotely. If you are having trouble viewing your DVR remotely and are getting messages regarding active X controls the following instructions may help. Changing Security Settings on Internet Explorer 1. -
Page 30: Network Setup
Network Setup Network Setup DHCP The DVR can be configured to operate over a local area network (LAN) or over the Internet (REMOTE ACCESS). The easiest, fastest and most robust network to configure (under most circumstances) is a Dynamic Host Configuration Protocol (DHCP). -
Page 31: D9 Viewer Software
D9 Viewer Software Opening D9 PC viewer For the best results when accessing your DVR via REMOTE ACCESS or a LAN, use the included software. The remote view- ing/playback software is called D9 VIEWER. The interface and functionality of the software is quite similar to the interface and functionality of the DVR. There are, however, some notable differences. - Page 32 D9 Viewer Software: Layout 1. Channel Name 2. Date & Time 3. Live - Click to view live view screen. 4. Replay - Click to view the replay screen. 5. Setup - Click to view the setup screen. 6. Logout - Click to logout. 7.
- Page 33 D9 Viewer Software Replay In the REPLAY screen of the D9 Viewer you can search and playback footage recorded on your DVR. The files are separated by channel and record mode. 1. Click on a date in the calender to view files for that day. Use the arrow buttons on each side of the month or forward.
- Page 34 D9 Viewer Software (continued) Record In the RECORD screen in SETUP you can change the camera record settings. You can turn each channel on or off, select the recording resolution & quality, turn on or off the audio, select a record mode and set up the record schedule. Most of the options that you will find here operate in exactly the same manner as on your DVR.
- Page 35 D9 Viewer Software (continued) Alarm In the alarm screen you can change settings for motion detection. 1. Motion Detection - Status i. Scroll over the dropdown list and LEFT click. ii. Select ON to switch motion detection on for that channel. Selecting OFF will turn motion detec- tion OFF for that channel.
-
Page 36: Password Enable
D9 Viewer Software Network For users with minimal network knowledge it is best to use the DHCP when setting the DVR to view remotely. Note: These settings should already being configured using the DVR. See Network Setup on page 35. 1. -
Page 37: Using Internet Explorer
D9 Viewer Software Viewing Remotely Now that you have configured the DVR and your PC you can view your DVR over the internet. The DVR can be viewed remotely over the internet using the DVR software on the CD included with the DVR or using a web browser (preferably Internet Explorer). -
Page 38: About Ip Addresses
About IP ADDRESSES Internet Protocol (IP) Version 4 is the networking protocol employed by this DVR, and of the Internet as a whole. It allows for approximately four billion (specfically 2 device in the world to have it’s own. Thus, the Internet is broken down into a series of smaller networks (LANs and Intranets) which have a unique IP. -
Page 39: Installing/Changing The Hard Drive
Installing/Changing the HDD Note: the following instructions are for installing or changing the hard drive. If your DVR already has a hard drive pre-installed disregard these steps. 1. Ensure the DVR is unplugged and removed from mains power. 2. Locate and remove the 3 screws on the rear of the DVR. -
Page 40: Troubleshooting
Troubleshooting Problem: My monitor is not showing any display/picture. Solution: Make sure you have connected the VIDEO OUTPUT on the DVR to a VIDEO INPUT on the back of your TV/monitor. Try different channels on your TV or monitor - many TV’s call their component video input confusing things, like AV, TV/AV, AUX, COMPOSITE, CHANNEL 0 and so Problem: My DVR does not switch on. -
Page 41: Technical Specifications
Mouse Support Remote Control Remote Battery Type Optional Additional Feature DVR8-2500 PAL or NTSC 8 x Composite BNC Inputs 2 x Composite BNC Outputs, 1 x VGA Out NTSC: 704 x 480, PAL: 704 x 576 NTSC: 120fps, PAL: 100fps... - Page 42 Notes ________________________________________________________ ________________________________________________________ ________________________________________________________ ________________________________________________________ ________________________________________________________ ________________________________________________________ ________________________________________________________ ________________________________________________________ ________________________________________________________ ________________________________________________________ ________________________________________________________ ________________________________________________________ ________________________________________________________ ________________________________________________________ ________________________________________________________ ________________________________________________________ ________________________________________________________ ________________________________________________________ ________________________________________________________ ________________________________________________________ ________________________________________________________ ________________________________________________________ ________________________________________________________ ________________________________________________________ ________________________________________________________ ________________________________________________________ ________________________________________________________ ________________________________________________________ ________________________________________________________ ________________________________________________________ ________________________________________________________ ________________________________________________________ ________________________________________________________ ________________________________________________________...
-
Page 43: Warranty Information
Swann. The end user is responsible for all freight charges incurred to send the product to Swann’s repair centres. -
Page 44: Technical Support
1-800-627-2799 (Option 1) (M-F, 9am-5pm US PT) See http://www.worldtimeserver.com for information on time zones and the current time in Melbourne, Australia compared to your local time. © Swann Communications 2009 Telephone Helpdesk AUSTRALIA toll free 1300 138 324 (M 9am-5pm AUS ET)