
Related Manuals for Swann DVR8-NET-8000


Summary of Contents for Swann DVR8-NET-8000
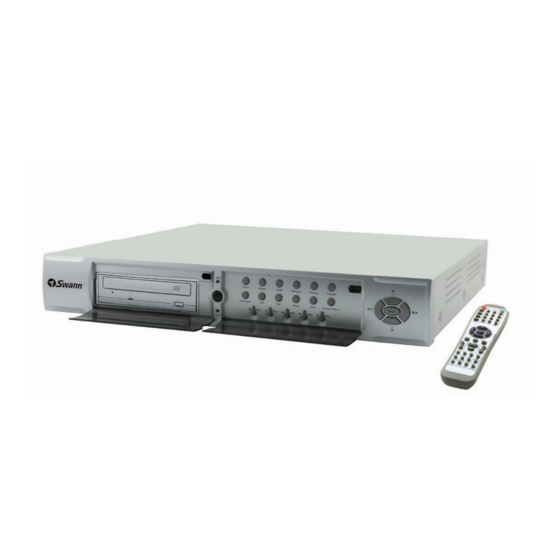
- Page 1 DVR8-NET-8000 8 Camera Digital Video Recorder Multi Function Monitoring & Recording Solution SW243-8N8 Ver 2.0...
-
Page 2: Power Supply
This DVR is precise instrument; do not attempt to repair any component of the DVR by yourself as this will void your warranty. If your DVR malfunctions in any way, please contact a dealer in your area or Swann Technical Support directly. Installation Please choose appropriate site to install the DVR, to ensure well adequate ventilation around the DVR to avoid excessive heat. -
Page 3: Table Of Contents
8 Channel Digital Video Recorder Table of Contents SYSTEM SETUP ..............1 1. U .........................1 SING THE SETUP MENU 2. A ........................1 CCESSING THE 3. S ..........................1 YSTEM ETUP 4. T ..........................2 5. HDD F ..........................3 ORMAT 6. F ..........................4 ACTORY ESET 7. - Page 4 8 Channel Digital Video Recorder DVR ........................25 URN OFF THE ........................25 ORMAL ECORDING ........................25 LARM ECORDING ..........................26 ECORDING .............................26 LAYBACK ..........................26 EARCH 8. T ..........................28 EARCH 9. E ..........................28 VENT EARCH 10. S ........................29 TART EARCH 11.USB B ..........................30 ACKUP 12.CD_RW B ........................31 ACKUP...
-
Page 5: System Setup
8-Channel Digital Video Recorder Before using the DVR, please set up the system according to your needs and location; otherwise the DVR will run in the default settings which may be unsuitable for you. 1. Using the Setup Menu When in setup mode, press UP and DOWN button to move the cursor through the various settings, long press will make the cursor move among the options one by one. -
Page 6: Time/Date Set
8-Channel Digital Video Recorder window will appear, which is illustrated as below. LANGUAGE SET : language set of the DVR, press “RIGHT” or ”LEFT” to change language. PLAY REPEAT: continuously play the record list in HDD, if set to” YES". VIDEO SYSTEM: switch the video format to suit the TV standard of your country, NTSC or BUZZER SOUND: buzzer switcher, if set to “OFF”, the buzzer will not work.. -
Page 7: Hdd Format Set
8-Channel Digital Video Recorder Please press up, down, left, and right buttons to move the cursor, press "LEFT" and "RIGHT" buttons to modify the value. FORMAT: the date display format, which can be different for USA, EURO and Australian users. DISPLAY: if set to “OFF”, the time will not display no the screen. -
Page 8: Factory Reset
8-Channel Digital Video Recorder 6. Factory Reset When the cursor moves to FACTORY RESET, press the enter button, and the Factory Reset window will appear. If you select “YES” and press the enter button, all the DVR settings will reset to default, if you do not want to reset to default settings, please select “NO”. -
Page 9: Firmware Update
8-Channel Digital Video Recorder will display as below: Please enter the current password, then input new password and confirm the password. 8. Firmware Update When the cursor moves to FIRMWARE UPDATE, please press enter button, and the firmware update window will appear. Update Method: There are two methods to update the DVR firmware, USB (for USB thumb drives) and Network (not support) USB update: create a new folder named “firmware”... -
Page 10: Display Setup
8-Channel Digital Video Recorder 9. Display Set When the cursor moves to Display Set, please press the Enter button, the Display Set window will appear. 10. Camera Name When the cursor moves to Camera Name, please press the Enter button, the Camera Name Setup window will appear. -
Page 11: Color Setup
8-Channel Digital Video Recorder Press the up or down button to select channels, press the Enter button to change the channel name. Each channel’s name is a combination of eight characters. Press left or right button to select each character, press LEFT or RIGHT button to modify each character, and then press enter button to save this name. -
Page 12: Autoseq Setup
8-Channel Digital Video Recorder Press LEFT or RIGHT button to select CON/BRI/HUE/SAT, press UP or DOWN button to change the value, if setup over, press UP or DOWN button to change channel. 12. Autoseq Set When the cursor moves to Autoseq Set, please press enter button, the Auto Sequence Setup window will appear. - Page 13 8-Channel Digital Video Recorder you cannot access this menu unless you stop record or play first. OVER WRITE: if set to “YES”, the DVR will automatically overwrite the HDD from the beginning when the HDD is full. If set to “NO”, the DVR will automatically stop recording when the HDD is full.
-
Page 14: Audio Ch Setup
8-Channel Digital Video Recorder 15. Audio CH Set When the cursor moves to Audio CH Set, press the Enter button, the Audio CH Set window will appear, as illustrated below. There are four audio input channels, for each channel you can select anyone of the 8 channels. Although there are four audio input channels, you can only record from one channel’s audio at the same time. -
Page 15: Network Setup
8-Channel Digital Video Recorder 17. Network Set When the cursor moves to Network Set, press the Enter button, and the network setup window will appear. Please note if the Netviewer software is connected to the DVR. You cannot access this menu unless you close the Netviewer software. -
Page 16: Mac Set
8-Channel Digital Video Recorder If one channel here set OFF, this channel will not transmit to the network, so if you want to see a channel from network, you must to set this channel ON. 19. Mac Set When the cursor moves to Mac Set then press the Enter button, the Mac Set window will appear. If you have more than one DVR in a local area network, you have to set each DVR to have an exclusive MAC address, but remember that you have only one chance to modify the MAC address, once you have changed the MAC address, this menu will not appear again. -
Page 17: Motion Detection Settings
8-Channel Digital Video Recorder ALARM ENABLE: alarm trigger switch, can be set to off, N.C(normal closed) or N.O(normal open). If users set it to off, the DVR will ignore the alarm input. MOTION ENABLE: Motion alarm switch, can be set to ON or OFF. If set to off, the DVR will ignore the motion alarm. -
Page 18: Motion Area Set
8-Channel Digital Video Recorder When in night as below, please set to normal level. Note: the above suggestions are a guide only based on testing in a general environment. You will need to select the best parameters according to the actual operation environment you are covering. -
Page 19: Schedule Set
8-Channel Digital Video Recorder If the area marker icon is set to yellow, this area is monitored for motion detection, and if the icon is blue, motion sensing is disabled for that area. 23. Schedule Set When the cursor moves to Schedule Set, press the Enter button, and the schedule setup window will appear. -
Page 20: Backup Set
8-Channel Digital Video Recorder select manual record mode, schedule record mode will be disabled. 24. Backup Set When the cursor moves to Backup Set, press the Enter button, and the backup setup window will appear. There are two types of backup modes, USB and CD_RW. If you select USB backup, plug in the USB device, and press the Enter button, you should see the screen below. -
Page 21: Storage Info
8-Channel Digital Video Recorder 25. Storage Info When the cursor moves to Storage Info, press the Enter button, and the storage info window will appear. 26. Protocol Set When the cursor moves to Protocol Set, press the Enter button, and the Protocol Set window will appear. -
Page 22: Buttons On The Front Panel
8-Channel Digital Video Recorder DOME ADDR: The address of the speed dome camera, changeable from 0x00 to 0xff. PROTOCOL: The protocol of speed dome camera: PELCO-D,PELCO-P,NEON,SAMSUNG The front view of the video-recorder is illustrated as below. 1. Recording/Playing Control Buttons Area 1. -
Page 23: Function Control Area
8-Channel Digital Video Recorder press the button, the play speed will increase from slow to fast and then back to slow. 5. MODE: Mode change key, press this key to switch to shift mode, re-press to change to normal mode. 2. - Page 24 8-Channel Digital Video Recorder will be a watermark symbol in each picture, press watermark key again to clear the display. If not in playing mode, press this button to call PTZ function. 7. 6/Schedule: schedule key, in shift mode, press this button to enter schedule state, if the DVR is in schedule state, there will be a “S”...
-
Page 25: System Connection
8-Channel Digital Video Recorder While selecting menu items, press this button to move up the cursor. 2. Big picture /down: Press this button to see full screen, re-press this button to see the preview channel.. While selecting menu items, press this button to move down the cursor. 3. -
Page 26: Video And Audio Connection
8-Channel Digital Video Recorder Each part of the back panel is illustrated as below: 1. Video input 1-8 2. main output 3. assistant monitor 4. S-video 5. audio input 6. audio output 7. net interface 8. USB port 9. alarm and RS485 port(see below) 10. debug port 11. power Alarm and RS485 port define: 1---12: sensor 1---sensor 12 13,20,24,25: GND... -
Page 27: Alarm Connection
8-Channel Digital Video Recorder 3. Alarm Connection The DVR can support 8 alarm input and 1 alarm output. Alarm input: There are two types of alarm input. A: N.O. Normal open, close when triggered. DVR must set as N.O B: N.C. Normal close open when triggered DVR must set as N.C. Please refer to the picture below, channel 2 to channel 8 are the same as channel 1. -
Page 28: Hard Disk Connection
8-Channel Digital Video Recorder 4. Hard Disk Connection 1. Open the cover of the hard disk enclosure and unlock it using the supplied key. When unlocked, the key will be 2. Carefully lift the handle on the front of the caddy vertical as shown. -
Page 29: Quick User Guideline
8-Channel Digital Video Recorder Note: If the DVR comes with a CD-RW, please follow the steps below. Open the DVR cover, fix the HDD to the DVR HDD shelf of soleplate, then connect the power and digit cable. If you have another HDD, please jump the first one to MASTER and the other to SLAVE, put that HDD on the other HDD shelf, and then connect the power and digit cable. -
Page 30: Alarm Recording
8-Channel Digital Video Recorder and the system is set to automatic overwrite, the recording will not be interrupted but the DVR will automatically begin to overwrite recorded video from the earliest (oldest) recorded area. If the system is set to overwrite disabled, it will stop recording once the HDD is full. 4. -
Page 31: Search Play
8-Channel Digital Video Recorder recording is playing to see faster playback. Press the PLAY button to return to normal speed playing from the current place. Continuous pressing of the FWD button will change the fast-forward between four levels of speed (X2, X4, X8, X16,) in sequence. -
Page 32: Time Search
8-Channel Digital Video Recorder Time Search Move the cursor to Time Search, then press the Enter button and the Time search window will appear, as illustrated as below. The red block below the number means there is recorded video at that time. Press the LEFT and RIGHT buttons to move the cursor along the year, month, day, hour and minutes. - Page 33 8-Channel Digital Video Recorder If you want to search from MASTER HDD to SLAVE HDD, press the SERACH button, and then press Enter button. Press the Menu button to exit. 10. Record Search Move the cursor to the Record Search, press the Enter button, and the record search window will appear.
-
Page 34: Usb Backup
8-Channel Digital Video Recorder If you want to change the between the MASTER HDD and SLAVE HDD, press the mode button, then press Enter button. Press the Menu button to exit. 10. USB Backup If you want to use this function, the first step is to format USB device with “FAT” system on your computer. -
Page 35: Cd_Rw Backup
8-Channel Digital Video Recorder 12. CD_RW Backup This function is only selectable, if your DVR comes with a CD_RW. If you enter CD_RW backup menu, you will see the screen below: Start Time Set: you can set the backup start time: START: backup start time. - Page 36 8-Channel Digital Video Recorder If backup finish, you can use the netviewer soft’s Scandisk function to see the video on CD. If the CD has been written, press USB button to format the CD...
-
Page 37: Usb Update
8-Channel Digital Video Recorder 13. USB Update Using your PC, create a folder called “firmware” in the root directory of your USB memory stick, copy the update files to the folder. Plug the USB device into the DVR, go to the menu of Backup set, check that whether the USB device was detected, go to the Firmware Update menu and select USB method, move to Update Start and press Enter button and the update will start. -
Page 38: Information Display
8-Channel Digital Video Recorder 15. Information Display In shift mode, press display button, the main information of the DVR will display on screen. HDD SIZE: the size of the hard disk HDD USED: the used space of the hard disk. HDD READ: current HDD address for playback OVERWRITE: overwrite time of the HDD NETWORK IP: IP address of the DVR. -
Page 39: Ptz Operation
8-Channel Digital Video Recorder 16. PTZ Operation This DVR can control all speed domes which are connected to the DVR. To control the speed dome, make sure all the lines are correctly connected, first you must set the right protocol, baud rate, and speed dome’s address for each speed dome, please refer to protocol set. -
Page 40: Remote Controller
8-Channel Digital Video Recorder Press the PTZ button one more time to exit from PTZ control. 17. REMOTE CONTROLLER REC: Start or stop recording SCHEDULE: Start Schedule recording function 0~9: Select channel or input password 2x2: Display Quad mode on screen 3x3: Display all 8-channel cameras on screen AUTO: Same with “Auto”... -
Page 41: Pc View Software Operation
8-Channel Digital Video Recorder 18. USING THE NET VIEWER Use the PC view software, you can view the DVR through Internet or intranet, also, you can view and backup the video data on the HDD through a computer. Open the software; you will see the window below: 18.1 Setting Please click... - Page 42 8-Channel Digital Video Recorder 18.2 Login Netviewer Press bottom, you can see the login box. Enter the correct password and click ok to login DVR. <Connect success> <Connect fail > 18.3 Liveplay Click play button to see live picture,...
- Page 43 8-Channel Digital Video Recorder 18.4 Playback After clicking “Playback” tab, net search window will display. First, you have to select the HDD of the DVR. Click the “Get record list” or “Get event list”, if the DVR has record list, you can see the window below: Double click the record list;...
- Page 44 8-Channel Digital Video Recorder 18.7 Save to AVI To record the video to your PC’s HDD with “.avi” file system, just click" AVI" button, and the following window will pop-up Here, select the record channel and click "+" icon to define the file name and save path and click "ok"...
-
Page 45: Ptz Control
8-Channel Digital Video Recorder 18.7 Save to DVR To record the video stream to your PC’s HDD , just click" DVR" button and the video stream will be saved in the directory that you set (the default directory is c:\DVR\) Note: to play the file saved to DVR, just click "FilePlay"... -
Page 46: Exterior Size
8-Channel Digital Video Recorder Main standard & parameter chart Item Specification Video signal NTSC/PAL Composite 1.0V p-p/75Ω BNC × 8 Video input Composite 1.0V p-p/75Ω BNC×2, S-video Video output Audio input -8Db 22KΩ, RCA connector × 4 Audio output -8Db 3KΩ, RCA connector × 2 Alarm input Alarm output Compression standard... -
Page 47: Appendix A: Trouble Shooting Guide
8/16 Channel Digital Video Recorder Q. What kind of camera should I buy for this DVR? A. Any BNC or RCA interface indoor/outdoor/infrared camera will work with the DVR. It doesn’t matter whether it’s a color or black/white camera. However, web cameras that require a USB interface are not compatible with the DVR. - Page 48 8/16 Channel Digital Video Recorder Q. Why cannot I access Time/Date Set, HDD Format Set, Record Set menu? A. Please stop record or play before you access these menu. Q. Why cannot I access Network Set menu? A. Please stop the connection of the PC View soft from Internet before you access Network Set menu.
- Page 49 8/16 Channel Digital Video Recorder Press the ADD or DEC buttons to change the language and press the ENTER button to select your language. Now fully exit the menu system and restart your DVR.
-
Page 50: Appendix B: Record Time Table
8/16 Channel Digital Video Recorder Rec rate field/sec Picture quality Resolution Recording time 60 fps Very high 47 hours 60 fps 125 hours 120 fps Normal 47 hours 1 fps Normal 4500 hours Note: The above figures are from our test with a 250GB hard disk. Just for users’ reference. Different definition and stabilization (objects’... -
Page 51: Appendix C: Internet View/Playback Configurations
8/16 Channel Digital Video Recorder 1. About Networks Users will generally use the following network types and hardware: 1): Local Area Network (LAN): An internal network usually operated via a hub, a switch, or a router and will usually operate within an office or household via wireless or Ethernet cable connections. - Page 52 8/16 Channel Digital Video Recorder MODEM, then the ports have all opened by default. If not, please close fire wall by guidance of the ADSL MODEM user's manual. 3): In case you connect to Internet by proxy server, users should utilize port mapping software and open ports 5000, 5001, and 5002 for the surveillance computer.
- Page 53 (note: you must do this on the server machine to find the correct external IP of the router.) You may also have to place the IP address of the Swann DVR in the “DMZ” of your Firewall to enable the remote viewing interface. Information on how to do this should be detailed in the documentation covering operation of your Firewall.
- Page 54 Any unit which proves defective during the stated period will be repaired without charge for parts or labour, or replaced at the sole discretion of Swann. The repair or replacement will be warranted for either ninety days or the remainder of the original one year warranty period, whichever is longer.