Table of Contents
Advertisement
Available languages
Available languages
Quick Links
FM/MW/SW
Cassette
Car Stereo
Operating Instructions
Manual de instrucciones
ィマ・ホサ。ゥ ム
For installation and connections, see the supplied installation/connections
manual.
Para obtener información sobre la instalación y las conexiones, consulte el manual
de instalación/conexiones suministrado.
テ
サセ コヲwクヒ、ホスuク sアオ。Aスミームィ」エ」ィムェコ。ァヲwクヒ。™スuク sアオサ。ゥ ム。ィ。C
XR-C5200
XR-4900
1999 by Sony Corporation
3-865-814-42 (1)
GB
ES
CT
Advertisement
Chapters
Table of Contents

Related Manuals for Sony XR-4900


Summary of Contents for Sony XR-4900
- Page 1 ィマ・ホサ。ゥ ム For installation and connections, see the supplied installation/connections manual. Para obtener información sobre la instalación y las conexiones, consulte el manual de instalación/conexiones suministrado. テ サセ コヲwクヒ、ホスuク sアオ。Aスミームィ」エ」ィムェコ。ァヲwクヒ。™スuク sアオサ。ゥ ム。ィ。C XR-C5200 XR-4900 1999 by Sony Corporation 3-865-814-42 (1)
-
Page 2: Table Of Contents
Welcome ! Thank you for purchasing this Sony Cassette Player. This unit lets you enjoy a variety of features as well as an optional rotary commander. -
Page 3: Location Of Controls
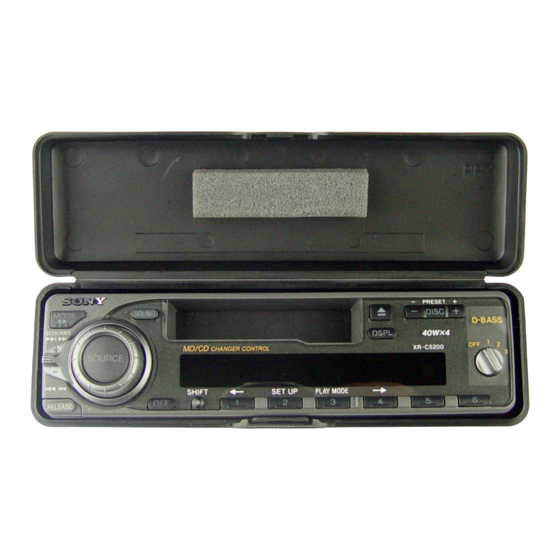
6, 9, 13 8 6 (eject) button 6 DSPL SHIFT SET UP PLAY MODE 9 XR-C5200: PRESET/DISC button XR-4900: PRST button During radio reception: Preset stations select 8 During CD/MD playback*: Disc change 14 0 RELEASE (front panel release) button 4, 16 !¡... -
Page 4: Getting Started
Getting Started Resetting the unit Before operating the unit for the first time or after replacing the car battery, you must reset the unit. Remove the front panel and press the reset button with a pointed object, such as a ballpoint pen. -
Page 5: Setting The Clock
Setting the clock The clock uses a 12-hour digital indication. Example: To set the clock to 10:08 Press (SHIFT), then press (2) (SET UP) repeatedly until “CLOCK” appears. 1 Press (4) (n). The hour indication flashes. 2 Set the hour. to go backward to go forward 3 Press (4) (n). -
Page 6: Cassette Player
Cassette Player Listening to a tape Insert a cassette. Playback starts automatically. If a cassette is already inserted, to start playback, press (SOURCE) repeatedly until “FWD” or “REV” appears. The side facing up is played. The side facing down is played. To change the tape‘s playback direction, press (MODE) (*). -
Page 7: Playing A Tape In Various Modes
Playing a tape in various modes You can play the tape in various modes: • REP (Repeat Play) repeats the current track. • BL SKP (Blank Skip) skips blanks longer than eight seconds. • ATA (Automatic Tuner Activation) turns on the tuner automatically when fast-winding the tape. -
Page 8: Memorizing Only The Desired Stations
Press (SHIFT). Notes • The unit does not store stations with weak signals. If only a few stations can be received, some number buttons will retain their former setting. • When a number is already indicated in the display, the unit stores stations in order from the one currently displayed. -
Page 9: Other Functions
If FM stereo reception is poor — Monaural Mode During radio reception, press (SHIFT), then press (3) (PLAY MODE) repeatedly until “MONO” appears. Press (4) (n) repeatedly until “MONO- ON“ appears. The sound improves, but becomes monaural (“ST” disappears). Press (SHIFT). To return to stereo mode, select “MONO-OFF”... -
Page 10: Using The Rotary Commander
Using the rotary commander The rotary commander works by pressing buttons and/or rotating controls. By pressing buttons (the SOURCE and MODE buttons) (SOURCE) Each time you press (SOURCE), the source changes as follows: TUNER n CD* n MD* n TAPE Pressing (MODE) changes the operation in the following ways;... -
Page 11: Adjusting The Sound Characteristics
Press (SOUND) to adjust the volume and sound menu. Press (DSPL) to change the displayed items. Changing the operative direction The operative direction of controls is factory- set as shown below. To increase To decrease If you need to mount the rotary commander on the right hand side of the steering column, you can reverse the operative direction. -
Page 12: Changing The Sound And Display Settings
Changing the sound and display settings The following items can be set: •CLOCK (page 5). •BEEP – to turn the beep sound on or off. •RM (Rotary Commander) – to change the operative direction of the rotary commander. — Select “NORM” to use the rotary commander in the factory-set position. -
Page 13: With Optional Equipment
With Optional Equipment CD/MD Unit (XR-C5200 only) This unit can control a maximum of ten external CD/MD units in this configuration: CD unit – maximum of five MD unit – maximum of five Any combination up to ten will work. Playing a CD or MD Press (SOURCE) repeatedly to select CD or MD. -
Page 14: Playing Tracks Repeatedly
Locating a specific track — Automatic Music Sensor (AMS) During playback, push the SEEK/AMS control up or down and release for each track you want to skip. To locate succeeding tracks To locate preceding tracks Locating a specific point in a track —... -
Page 15: Additional Information
If you have any questions or problems concerning your unit that are not covered in this manual, please consult your nearest Sony dealer. To maintain high quality sound If you have drink holders near your audio equipment, be careful not to splash juice or other soft drinks onto the car audio. -
Page 16: Maintenance
If the fuse blows again after replacement, there may be an internal malfunction. In such a case, consult your nearest Sony dealer. Warning Never use a fuse with an amperage rating exceeding the one supplied with the unit as this could damage the unit. -
Page 17: Specifications
Optional equipment XR-C5200: CD changer (10 discs) CDX-828, CDX-727, CDX-626 MD changer (6 discs) MDX-65 Other CD/MD changers with the Sony-BUS system Source selector XA-C30 Design and specifications are subject to change without notice. 181 mm in.) 164 mm in.) -
Page 18: Troubleshooting Guide
Troubleshooting guide The following checklist will help you remedy the problems you may encounter with your unit. Before going through the checklist below, check the connections and operating procedures. General Problem No sound. The contents of the memory have been erased. Indications do not appear in the display. - Page 19 When an error occurs during playback of a CD or MD, the disc number of the CD or MD does not appear in the display. The disc number of the disc causing the error appears in the display. If the above-mentioned solutions do not help improve the situation, consult your nearest Sony dealer. Solution Insert the disc magazine in the CD/ MD unit.
- Page 20 ¡Bienvenido! Gracias por adquirir este reproductor de cassettes de Sony. Esta unidad le permitirá disfrutar de distintas funciones, así como de un mando rotativo opcional. Además de las operaciones de reproducción de cassettes y de la radio, es posible ampliar el sistema mediante la conexión de una unidad*...
-
Page 21: Localización De Los Controles
8 Botón 6 (expulsión) 6 DSPL SHIFT SET UP PLAY MODE 9 XR-C5200: Botón PRESET/DISC XR-4900: Botón PRST Durante la recepción de radio: Selector de emisoras memorizadas 8 Durante la reproducción de CD/MD*: Cambio de discos 14 0 Botón RELEASE 4, 16 !¡... -
Page 22: Procedimientos Iniciales
Procedimientos iniciales Restauración de la unidad Antes de utilizar la unidad por primera vez o después de sustituir la batería del automóvil, es necesario restaurar dicha unidad. Presione el botón de restauración con un objeto puntiagudo, como un bolígrafo. Botón de restauración Nota Al presionar el botón de restauración se borrarán los ajustes del reloj y algunas funciones... -
Page 23: Ajuste Del Reloj
Ajuste del reloj El reloj dispone de una indicación digital de 12 horas. Ejemplo: Para ajustar el reloj a las 10:08 Presione (SHIFT) y, a continuación, (2) (SET UP) varias veces hasta que aparezca “CLOCK”. 1 Presione (4) (n). Los dígitos de la hora parpadean. 2 Ajuste la hora. -
Page 24: Reproductor De Cassettes
Reproductor de cassettes Escucha de cintas Inserte el cassette. La reproducción se iniciará de forma automática. Si ya hay un cassette insertado, para iniciar la reproducción pulse (SOURCE) varias veces hasta que aparezca “FWD” o “REV”. La cara orientada hacia arriba está reproduciéndose. -
Page 25: Reproducción De Cintas En Diversos Modos
Reproducción de cintas en diversos modos Es posible reproducir la cinta en los siguientes modos: • REP (Reproducción repetida), que permite repetir el tema actual. •BL SKP (Omisión de espacios en blanco), que omite espacios en blanco superiores a ocho segundos. -
Page 26: Memorización De Las Emisoras Deseadas
Presione (SHIFT). Notas • La unidad no almacena emisoras de señales débiles. Si se reciben pocas emisoras, algunos botones numéricos conservarán sus parámetros anteriores. • Si el visor ya muestra un número, la unidad almacenará las emisoras por orden a partir del actualmente mostrado. -
Page 27: Otras Funciones
Si la recepción de FM en estéreo es de mala calidad — Modo monofónico Durante la recepción de radio, presione (SHIFT) y, a continuación, (3) (PLAY MODE) varias veces hasta que aparezca “MONO”. Presione (4) (n) varias veces hasta que aparezca “MONO-ON”. -
Page 28: Uso Del Mando Rotativo
Uso del mando rotativo Este mando funciona mediante la presión de botones y/o el giro de controles. Mediante la presión de los botones (SOURCE y MODE) (SOURCE) Cada vez que presione (SOURCE), la fuente cambiará de la siguiente forma: TUNER n CD* n MD* n TAPE Al presionar (MODE), el funcionamiento cambiará... -
Page 29: Ajuste De Las Características De Sonido
Presione (SOUND) para ajustar el menú de sonido y el volumen. Pulse (DSPL) para cambiar los elementos mostrados. Cambio de la dirección de funcionamiento La dirección de funcionamiento de los controles está ajustada de fábrica como se muestra en la siguiente ilustración. Para aumentar Para disminuir Si necesita montar el mando rotativo en el lado... -
Page 30: Cambio De Los Ajustes De Sonido Y Visualización
Cambio de los ajustes de sonido y visualización Es posible seleccionar diversos modos: •CLOCK (Reloj) (página 5). •BEEP – que permite activar o desactivar los pitidos. •RM (Mando rotativo) – que permite cambiar la dirección de funcionamiento del mando rotativo. —... -
Page 31: Con Equipo Opcional
Con equipo opcional Unidad de CD/MD (XR-C5200 solamente) Es posible controlar un máximo de diez unidades externas de CD/MD con esta unidad, con la siguiente configuración: Unidades de CD – máximo de cinco Unidades de MD – máximo de cinco Cualquier combinación de hasta diez unidades funcionará. -
Page 32: Reproducción Repetida De Temas
Localización de un tema específico — Sensor de música automático (AMS) Durante la reproducción, desplace el control SEEK/AMS hacia arriba o abajo una vez por cada tema que desee omitir. Para localizar temas posteriores Para localizar temas anteriores Localización de un punto específico de un tema —... -
Page 33: Información Complementaria
Si desea realizar alguna consulta o solucionar algún problema referentes a la unidad que no se mencionen en este manual, póngase en contacto con el proveedor Sony más próximo. Para mantener una alta calidad de sonido Si existen soportes para bebidas cerca del... -
Page 34: Mantenimiento
En tal caso, póngase en contacto con el proveedor Sony más próximo. Advertencia No utilice nunca un fusible con un amperaje superior al del suministrado con la unidad, ya que ésta podría dañarse. -
Page 35: Especificaciones
(10 discos) CDX-828, CDX-727, CDX-626 Cambiador de MD (6 discos) MDX-65 Otros cambiadores de CD/MD con el sistema BUS de Sony Selector de fuente XA-C30 Diseño y especificaciones sujetos a cambios sin previo aviso. 58 181 mm 53 164 mm... -
Page 36: Guía De Solución De Problemas
Guía de solución de problemas La siguiente lista de comprobaciones resulta útil para solucionar los problemas que puedan producirse al utilizar la unidad. Antes de consultar la lista que aparece a continuación, compruebe los procedimientos de conexión y funcionamiento. Generales Problema Ausencia de sonido. - Page 37 El visor mostrará el número del disco que causa el error. Si el problema no se soluciona con las sugerencias anteriormente enumeradas, póngase en contacto con el proveedor Sony más próximo. Solución Inserte el cargador de discos en la unidad de CD/MD.
- Page 38 Sony Corporation...