Table of Contents
Advertisement
Advertisement
Table of Contents

Related Manuals for Nannio Hero3


Summary of Contents for Nannio Hero3
- Page 1 Baby Monitor Hero3 User Manual...
-
Page 2: Safety Instructions
Congratulation! Thanks for your patronage of our products and welcome to nannio Baby Caring World! You can start to take care your baby whenever and wherever you want. This user manual has all the feature operations and troubleshooting necessary to install and operate your nannio Baby monitor. Please review this manual thoroughly to insure proper installation and operation of this product. - Page 3 WARNING: STRANGULATION HAZARD. Children have STRANGLED in cords. Keep this cord out of the reach of children (more than 3.5 feet (1 meter) away). Do not remove the tag. Please make sure you have the following in the packing. 1 x Parent unit 1 x Baby unit 2 x Power Adapter 1 x Wall-Mount Kit...
-
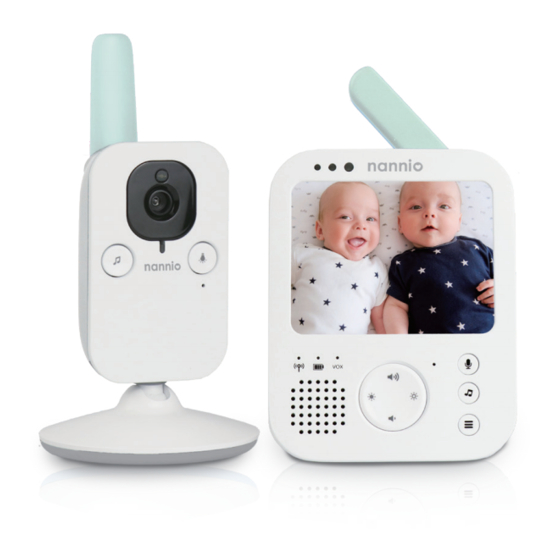
Page 4: Baby Unit
Baby unit Camera Power on light Lullaby on/off button Nightlight Antenna On/off slide Nightlight on/off button Microphone Socket for power adapter Temperature sensor Parent unit Sound level lights Display Link Battery status VOX light Speaker Antenna On/off button Mode button Talk-back Lullaby button Socket for power adapter... - Page 5 Power on the baby monitor Baby unit Parent unit Connect the power adapter with Connect the power adaptor with the the baby unit. parent unit. Note: The parent unit is built-in a rechargeable Li-ion battery. There are 3 battery status indicators: Green light : The battery is fully charged Orange light : The appliance is charging Red light : The battery is almost empty and...
- Page 6 Connect parent unit and baby unit Push the on/off switch on the baby Press the on/off button on the parent unit to the ON position. unit to turn on the unit. Note: When the baby unit is turned on, the power indicator always lights up in green Automatic connection When the parent unit is turned on, it starts to search for the baby...
- Page 7 Placement of baby monitor >2.5m/8.2ft >1-1.5m/3-3.5ft Place the parent unit within the Make sure that the distance between operating range of the baby unit. Make the baby unit and baby is more than sure it is at least 2.5 meters/8.2 feet 1-1.5 meters/3-3.5 feet, because of away from the baby unit to avoid potential strangulation hazards.
-
Page 8: Features And Settings
Features and settings Volume You can adjust the speaker volume of the parent unit to the level you like. Press the top or bottom part of the control button to adjust the volume. The volume icon appears on the display to show the selected volume. -
Page 9: Operation Modes
Operation modes Video•Audio•VOX With the baby monitor turned on, you can choose 3 different modes by pressing the mode button on the side of the parent unit. Video Mode Press the mode button on the side of the parent unit to select the VIDEO mode. -
Page 10: Night Light
VOX Mode Press the mode button on the side of the parent unit to select VOX mode. When the VOX mode is activated, the display and sound of the parent unit turned off. And the VOX light becomes green When sound is picked up by the baby unit, the display and sound of the parent unit turned on immediately. -
Page 11: Two-Way-Talk
Two-way-talk Talk-back You can use the Talk-back button on the parent unit to talk to your baby. Press and hold the “Talk-back” button Speak clearly within a distance of 15-30 cm/0.5-1 ft. While talking, you can see the “Talk-back” on the monitor Note: When the “Talk-back”... - Page 12 Zoom (Digital Pan&Tilt) Press button. Choose the zoom icon and push the icon and choose on. Then you can use to pan and tilt to the position you want. Tip: You can use the top/bottom/right/left part of the control button to choose what image will be shown on the parent unit.
- Page 13 Voice Activation (Sensitivity) Voice Activation (Sensitivity) Press the right part of the control button to The sensitivity level of the baby unit defines access the sensitivity levels. what you hear through the parent unit. When the level is set high, you will hear Press the top or bottom part of the control many sounds, including soft background button to select the desired sensitivity level.
- Page 14 Vibration 1.Press the right part of the control button to access the vibration options. There are 3 options for vibration: On when the parent unit is muted- when volume is set to minimum (muted) the parent unit will vibrate when sound is detected from the baby unit Always on- parent unit will always vibrate when sound is detected from the baby unit and above sensitivity level.
-
Page 15: Temperature Setting
Temperature setting The temperature sensor enables you to Press the right part of the control button monitor the temperature in your baby’s to access the temperature options. room. Tip:You can change the temperature unit from °F to °C by selecting the unit option. Note: The current temperature in your baby's room is shown in the status bar of the parent unit. -
Page 16: Technical Specifications
Technical Specifications Baby unit Auto Infrared Night Vision Auto Out of Range Warning Temperature Sensor Lullabies Yes, 5x Manual Pan-Tilt Auto Infrared Night Vision Auto Out of Range Warning Parent unit LCD Screen 3.5" Talkback Function Vibration Mode Voice Activation Screen Yes, VOX mode Auto Out of Range Warning Battery Low Indicator... -
Page 17: Wall Mount
Wall mount Printing instructions: Print this page in scale 100 % and use the template to accurately mark the position of the holes for the screws on the wall.