Table of Contents
Advertisement
Quick Links
Advertisement
Table of Contents

Related Manuals for Strymon blueSky


Summary of Contents for Strymon blueSky
- Page 1 USER MANUAL...
-
Page 2: Table Of Contents
Favorite Switch Setup and Compare Mode ��������������������������������������������������������������� 15 Configuring MultiSwitch Plus ������������������������������������������������������������������������������������ 17 Using MultiSwitch Plus ���������������������������������������������������������������������������������������������� 18 Saving blueSky Presets with MultiSwitch Plus: ������������������������������������������������������� 18 MIDI Functionality ������������������������������������������������������������������������������������������� 19 Configuring blueSky to Use MIDI ������������������������������������������������������������������������������� 19 Saving Presets in MIDI Mode ������������������������������������������������������������������������������������� 24 MIDI Specifications �����������������������������������������������������������������������������������������... -
Page 3: Knobs And Switches
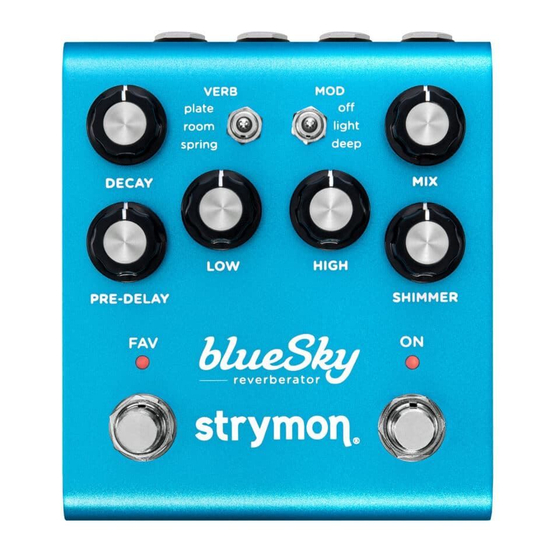
- reverberator Knobs and Switches Front Panel Controls VERB Switches between three reverb types� plate: a high-quality vintage studio plate reverb room: a versatile room ranging in size from a bedroom to an arena spring: a re-creation of the best vintage spring reverbs... - Page 4 - reverberator Knobs and Switches Front Panel Controls Select between light, deep, or no modulation� Controls the reverb mix from full dry at minimum to full wet with no dry signal at maximum� A 50/50 mix occurs at approxi- mately 3 o’clock on the knob�...
-
Page 5: Rear Panel I/O And Control
- reverberator Rear Panel I/O and Control AUDIO INPUT SELECTOR MONO : Use with a mono input signal, such as a guitar� Output is stereo� Use OUT L for mono connection� STEREO : Use with a stereo input signal� Output is stereo�... - Page 6 • 9VDC, center negative • 300mA minimum EXP / MIDI Multifunction communication jack for external control of blueSky’s fea- tures and functions� Can be set to operate in one of the following modes� (See “Configuring the EXP/MIDI Jack” on page 12 for details�)
-
Page 7: Live Edit Functions
- reverberator Live Edit Functions Boost/Cut Boosts or cuts the volume by 3dB when the pedal is engaged� Press and hold the ON footswitch� Once both LEDs flash, release the footswitch� Turn the MIX (BOOST/CUT) knob to smoothly adjust the amount of output level cut or boost�... -
Page 8: Respond/Ignore Midi Expression
Live Edit Functions Respond/Ignore MIDI Expression When set to MIDI mode, this setting determines whether blueSky will respond to MIDI Expression CC# 100, values 0 (heel) to 127 (toe), to control the knob settings in the same manner as a TRS Expression pedal�... -
Page 9: Power Up Modes
Power Up Modes Input Level Selects the input level that is routed to the effect processing� Press and hold the ON footswitch while powering up blueSky� Once both LEDs flash, release the footswitch� Turn the DECAY LEVEL) knob to select the Input Level mode�... -
Page 10: Bypass Mode
Setting blueSky to Buffered Bypass mode preserves the high frequency response of your instrument’s signal through your pedal chain and long cable runs� Press and hold the ON footswitch while powering up blueSky� Once both LEDs flash, release the footswitch� Turn the MIX... -
Page 11: Spillover Mode
Power Up Modes Spillover Mode Setting blueSky to Spillover mode allows the wet reverb signal of the currently selected preset to “spill” into bypass or the next loaded preset� NOTE: Because of the buffer architecture, the current preset must be active for at least 5 seconds before Spillover between presets will be operational�... -
Page 12: Configuring The Exp/Midi Jack
- reverberator Power Up Modes Configuring the EXP/MIDI Jack Press and hold the FAV footswitch while powering up blueSky� Once both LEDs flash, release the footswitch� Turn the MIX (EXP/MIDI JACK) knob to select the function of the rear panel’s EXP/MIDI jack�... - Page 13 - reverberator Configuring the EXP/MIDI Jack (cont�) Press either footswitch to store the EXP/MIDI jack mode and begin using blueSky� NOTE: The EXP/MIDI jack setting persists across power cycles and is not saved per preset� pg 13...
-
Page 14: External Control
NOTE: Your expression pedal assignment is saved per Favorite setting or MIDI preset� NOTE: If blueSky is set to respond to MIDI EXPRESSION and the EXP/MIDI jack is set to MIDI mode, you can send MIDI CC# 100 with values 0 (heel) to 127 (toe) to perform the expression pedal setup�... -
Page 15: Favorite Switch Setup And Compare Mode
To save your sound as the new Favorite setting, press and hold the FAV switch until the LED blinks BLUE� Then, press the FAV footswitch once more to save the Favorite setting� Step on the external footswitch to toggle between your Favorite set- ting and the current setting on blueSky� pg 15... - Page 16 NOTE: Along with the knobs and toggle switches on the face of the pedal, all Live Edit settings and blueSky’s bypass state are stored with the Favorite and MIDI presets� Power Up modes are not stored with the presets�...
-
Page 17: Configuring Multiswitch Plus
- reverberator External Control Configuring MultiSwitch Plus Configure blueSky and MultiSwitch Plus for remote access to three additional presets� Press and hold the FAV footswitch while connecting power to the pedal� Hold until both LEDs stop blinking� Turn the DECAY knob all the way counter-clockwise to set the MIDI channel to Channel 1�... -
Page 18: Using Multiswitch Plus
Step on an illuminated switch to bypass blueSky� Saving blueSky Presets with MultiSwitch Plus: Dial in the sound that you would like to save as your preset on blueSky� Press and hold both footswitches on blueSky until both the LEDs blink GREEN�... -
Page 19: Midi Functionality
EXP/MIDI jack� This requires a Strymon MIDI EXP cable or a MIDI controller/interface, such as Strymon Conduit, with at least one quarter-inch output� NOTE: When using a Strymon MIDI EXP Cable, the MIDI OUT mode must be � (See set to Off page 23 for details�) - Page 20 - reverberator Configuring blueSky to Use MIDI (cont�) STEP 1 – SET EXP/MIDI JACK TO MIDI MODE Press and hold the FAV footswitch while connecting power to the pedal� Once both LEDs flash, release the footswitch� Turn the MIX knob clockwise until the ON LED is...
- Page 21 Once the FAV LED turns BLUE, it will blink until the pedal receives a MIDI Program Change message� Once a message is received, the pedal will be set to the MIDI channel that carried the message and exit the power-up mode to allow you to begin using blueSky� pg 21...
- Page 22 CC #102 with a value of 127 when the ON footswitch is bypassed� This will enable the ON footswitch on if MIDI is properly connected and configured� NOTE: If you are only sending data to blueSky using the Strymon MIDI EXP page 23 cable, the MIDI OUT mode must be set to OFF�...
- Page 23 Press and hold the FAV footswitch while connecting power to the pedal� Once both LEDs flash, release the footswitch� Turn the LOW knob to select what kind of MIDI data is sent from blueSky to other MIDI devices� Both LEDs will flash momentarily to indicate status� • OFF: (default) - No MIDI messages are sent out of blueSky�...
-
Page 24: Saving Presets In Midi Mode
To enter Save mode, press and hold the FAV footswitch� The FAV LED will blink BLUE to indicate that blueSky is waiting to receive a MIDI Program Change message� To save the current state of the pedal to the currently loaded preset location, press and hold the FAV footswitch until its LEDs lights BLUE�... -
Page 25: Midi Specifications
Change 1 instead of 0� In these setups, increment the MIDI Program Change locations above by one� blueSky always powers up in MIDI Patch Bank 0, so if you plan to stay within the first 127 presets, simply send a standard MIDI Program Change message to load a preset�... -
Page 26: Midi Ccs
- reverberator MIDI Specifications (cont.) MIDI CCs blueSky - MIDI CC NUMBERS PARAMETER RANGE ENUMERATION Bank Select (0=Bank 1, 1=Bank 2, 3=Bank 3) Verb Type (1=plate, 2=room, 3=spring) Decay 0-127 0-127 Pre-Delay 0-127 Mod Type (1=off 1, 2=light, 3=deep) -
Page 27: Factory Reset
FAV LED will change colors at the extremes of the knob range and blink to indicate when the reset is taking place� • TURN 1: AMBER • TURN 2: • TURN 3: AMBER • TURN 4: Both LEDs flash RED, blueSky resets and restarts� pg 27... - Page 28 - reverberator Factory Reset (cont.) FACTORY DEFAULT SETTINGS EXP/MIDI Jack: Assigned to Expression mode and configured to control the MIX knob Input Level: Instrument Bypass Mode: True Bypass MIDI Channel: 1 MIDI OUT Mode: Off MIDI Expression: On Live Edit Control 12 o’clock (unity gain)
-
Page 29: Features
MiniSwitch, MultiSwitch Plus, or TRS MIDI connection • Full featured MIDI accessible via TRS supporting MIDI CCs, access to 300 preset locations (requires Strymon MIDI EXP cable or MIDI > TRS interface such as Strymon Conduit) • USB-C jack for controlling via MIDI from a computer or for perform- ing potential future firmware updates •... -
Page 30: Specifications
Use an adapter with the following rating: 9VDC, center negative, 300mA minimum� © 2022 Damage Control Engineering, LLC� Strymon, the Strymon logo, and Damage Control Engineering are trademarks or registered trademarks of Damage Control Engineering, LLC� in the U�S� and/or other jurisdictions� pg 30... -
Page 31: Appendix 1: Sample Settings
- reverberator Appendix 1: Sample Settings pg 31... - Page 32 - reverberator Sample Settings SHIMMERING HEIGHTS GUIDED VOICES VERB plate room light spring deep DECAY HIGH PRE-DELAY SHIMMER MIDI Program Change 0 MIDI Program Change 1 MiniSwitch Favorite MultiSwitch Plus A LOW WAVES SLAPPY SPRING MIDI Program Change 2...
-
Page 33: Appendix 2: Power Up Modes Quick Reference
- reverberator Appendix 2: Power Up Modes Quick Reference pg 33... -
Page 34: General Options
Global parameters and functions can be accessed via a power up proce- dure� All power up functions persist through power cycles� General Options Press and hold the ON footswitch while powering up blueSky� Once both LEDs flash, release the footswitch� Adjust the desired functions with the knobs noted below�... -
Page 35: Midi & Jack Options
MIDI & Jack Options Press and hold the TREMOLO ON footswitch while powering up blueSky� Once both LEDs flash, release the footswitch� Adjust the desired functions with the knobs and buttons noted below� Press either footswitch to store your changes and exit power up mode�... -
Page 36: Appendix 2: Live Edit Controls Quick Reference
- reverberator Appendix 2: Live Edit Controls Quick Reference pg 36... - Page 37 - reverberator Live Edit Controls - Quick Reference blueSky provides adjust several secondary functions that are available on the controls� (Also, see “Live Edit Functions” on page 7)� Live Edit functions are saved per preset� Press and hold the ON footswitch until both LEDs blink to enter Live Edit mode�...
-
Page 38: Strymon Non-Transferable Limited Warranty
In no event will Strymon be liable for more than the amount of the purchase price, not to exceed the current retail price of the prod- uct�...