Table of Contents
Advertisement
Advertisement
Table of Contents
Troubleshooting

Related Manuals for Samsung SyncMaster 192MP


Summary of Contents for Samsung SyncMaster 192MP
- Page 1 SyncMaster 192MP...
- Page 2 Index Main Page Safety Instructions Notational Power Installation Cleaning Other Introduction Unpacking Front Rear Remote Control Setup Connecting Your Monitor Connecting to a Computer Connecting to Other Devices Installing the Monitor Driver Automatic Manual Installing a VESA Base Folding the base / Removing the base Installing a VESA Base Adjusting Your LCD Monitor User Controls...
- Page 3 Safety Instructions - Notational Failure to follow directions noted by this symbol could result in bodily harm or damage to equipment. Prohibited Do not disassemble Do not touch Important to read and understand at all times Disconnect the plug from the outlet Grounding to prevent an electric shock...
- Page 4 Safety Instructions - Power When not used for extended periods of time, set your computer to DPMS. If using a screen saver, set it to the active screen mode. Do not use a damaged or loose plug. This may cause an electric shock or fire. Do not pull the plug out by the wire nor touch the plug with wet hands.
- Page 5 Safety Instructions - Installation Put your monitor in a location with low humidity and a minimum of dust. An electric shock or fire could result inside the monitor. Do not drop the monitor when moving it. This may cause damage to the product or human body. Place the monitor on a flat and stable surface.
- Page 6 Safety Instructions - Installation To prevent rainwater from running along the outdoor antenna cable and entering the house, be sure the outdoor portion of the cable hangs down below the point of entry. If rainwater enters the product, it may cause an electric shock or fire. If you are using an outdoor antenna, be sure to put sufficient distance between your antenna and the electrical wires nearby so that they would not come in contact with each other in case the antenna is knocked over...
- Page 7 Safety Instructions - Cleaning When cleaning the monitor case or the surface of the TFT-LCD screen, wipe with a slightly moistened, soft fabric. Do not spray water or detergent directly on the monitor. This may cause damage, electric shock or a fire. Use the recommended detergent with a smooth cloth.
- Page 8 Safety Instructions - Other Do not remove cover (or back). No user serviceable parts inside. This may cause an electric shock or a fire. Refer servicing to qualified service personnel. If your monitor does not operate normally - in particular, if there are any unusual sounds or smells coming from it - unplug it immediately and contact an authorized dealer or service.
- Page 9 Do not place any heavy objects on the monitor. This may cause malfunction, an electric shock or a fire. Do not place water containers, chemical products or small metal objects on the monitor. This may cause malfunction, an electric shock or a fire. If a foreign substance enters the monitor, unplug the power cord and contact the Service...
- Page 10 Keep all power adaptors apart. Possible fire hazard. Keep power adaptor away from any other heat source. Possible fire hazard. Remove and discard vinyl bag from power adaptor before use. Possible fire hazard. Always keep power adaptor in well-ventilated area. Keep the volume at a proper level when you use the headphones.
-
Page 11: Introduction - Unpacking
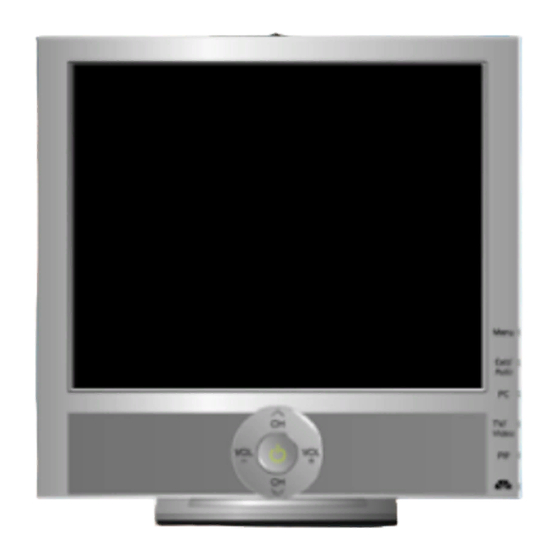
Monitor Quick Setup Guide Signal Cable(15 pin D-Sub) Warranty Card DC Adapter (Not available in all locations) Audio Cable Remote Control Batteries (AAA X 2) Option DVI cable Contact a local dealer or Samsung call center to buy optional items. - Page 12 Introduction - Front For detailed information concerning the monitor functions, refer to Monitor. The monitor's front configuration may vary slightly depending on the monitor model. 1. Menu 2. Exit / Auto 3. Enter 4. Source 5. PIP PIP(Picture in Picture)? Feature allowing one program to be viewed on the entire screen while one or more programs play in small windows superimposed over the base program.
- Page 13 Introduction - Rear For detailed information concerning cable connections, refer to The monitor's rear configuration may vary slightly depending on the monitor model. Connecting Cables A. Power Connection Terminal (14V DC) This product may be used with 90 ~ 264. (Voltage is automatically adjusted by the power adaptor.) Connect the power source plug when all Connecting Your...
- Page 14 Introduction - Remote Control For detailed information of the Remote Control Unit functions, refer to Adjusting Your Monitor > User Controls > User Control Buttons > The remote control's configuration may vary slightly depending on the monitor model. The Remote control may function within a range of 0.23 to 33 feet (7cm to 10m) and 30 degrees to the left and right of the monitor's Remote Control Reception sensor.
-
Page 15: Connecting To A Computer
Setup - Connecting Your Monitor Connecting to a Computer Connecting to other devices Turn on your computer and monitor. If your monitor displays an image, installation is complete. The configuration at the back of the monitor may vary from product to product. 1. -
Page 16: Connecting Av Devices
Setup - Connecting to other devices Connecting to a Computer Connecting to other devices This monitor allows the user to connect it to such input devices as a DVD player, a VCR or camcorder, or a DTV or TV without disconnecting the PC. For detailed information on connecting AV input devices, refer to User Controls The configuration at the back of the monitor may vary from product to product. - Page 17 Setup - Connecting to other devices 1. Connect the CATV or antenna coaxial cable to the Antenna terminal on the rear of the monitor. You need to use a coaxial antenna cable. When using an interior antenna terminal: Check the antenna terminal on the wall first and connect the antenna cable. When using an outdoor antenna: If you are using an outdoor antenna, use a professional for installation if possible.
-
Page 18: Connecting To A Macintosh
Setup - Connecting to other devices 4. Connecting to a Macintosh 1. Connect the power cord to the DC adapter and then connect the adapter jack to the DC POWER port on the monitor. (Voltage is automatically adjusted by the power adaptor.) 2. -
Page 19: Windows Me
1. Insert CD into the CD-ROM driver. 2. Click "Windows ME Driver" 3. Choose your monitor model in the model list, then click the "OK" button. 4. Click the "Install" button in the "Warning" window. 5. Monitor driver installation is completed. http://www.samsung-monitor.com/ (Worldwide) http://www.samsungusa.com/monitor/ (USA) http://www.sec.co.kr/monitor/ (Korea) http://www.samsungmonitor.com.cn/... - Page 20 5. If you can see following Message window, then click the "Continue Anyway" button. Then click "OK" button. This monitor driver is under a certified MS logo. This installation will not damage your system. The certified driver will be posted on Samsung Monitor Homepage http://www.samsung-monitor.com/ 6. Monitor driver installation is completed.
-
Page 21: Windows Xp Operating System
Driver installation is slightly different from one operating system to another. Follow the directions as appropriate for the operating system you have. Prepare a blank disk and download the driver program file at the Internet web site shown here. Internet web site : http://www.samsung-monitor.com/ http://www.samsungusa.com/monitor/ http://www.sec.co.kr/monitor/ http://www.samsungmonitor.com.cn/ To install the monitor driver manually, follow the procedures explained below after checking your operating system. - Page 22 Setup - Installing the Monitor Driver 5. Click "Update Driver.." and select "Install from a list or.." then click "Next" button. 6. Select "Don't search ,I will.." then click "Next" and then click "Have disk". 7. Click the "Browse" button then choose A:(D:\Driver)and choose your monitor model in the model list and click the "Next"...
-
Page 23: Microsoft ® Windows ® 2000 Operating System
Setup - Installing the Monitor Driver This monitor driver is under a certified MS logo. This installation will not damage your system. The certified driver will be posted on Samsung Monitor Homepage http://www.samsung-monitor.com/ 9. Click the "Close" button then click "OK" button continually. -
Page 24: Linux Operating System
Setup - Installing the Monitor Driver ® 3. Microsoft Windows 1. Click "Start" , "Setting" , "Control Panel". 2. Double click "Display" icon. 3. Select the "Settings" tab and click "Advanced Properties" button. 4. Select the "Monitor" tab. 5. Click the "Change" button in the "Monitor Type" area. 6. -
Page 25: Removing The Base
Setup - Installing a VESA base Folding or removing the base Installing a VESA base This monitor supports various types of VESA-standard bases. You need to either fold or remove the base in use in order to install a VESA base. Folding the base Removing the base 1. - Page 26 Setup - Installing a VESA base 1. Lay the LCD monitor face-down on a flat surface with a cushion beneath it to protect the screen. 2. Disconnect the monitor cables. 3. Remove the four bolts that fasten the base to the monitor. 4.
- Page 27 Align the four bolt holes the base with the four bolts Samsung Electronics will not be responsible for damages caused by using a base other than those specified. before installing a VESA base. on the monitor base with the holes...
-
Page 28: Control Buttons
Adjusting Your LCD Monitor - User Controls User control buttons Direct-Access Features The control button configuration may vary slightly depending on the monitor model. Control Buttons Remote Control Buttons | Control Buttons | For more information on the screen adjustment functions, refer to Menu Use this button for open the on-screen menu and exits from the menu screen or closes screen adjustment menu. -
Page 29: Remote Control Buttons
Adjusting Your LCD Monitor User Controls - VOL + Moves from one menu item to another horizontally or adjusts selected menu values. Also adjusts the audio volume. For more information, refer to Direct-Access Features > Volume. Power / Power indicator Use this button for turn the monitor on and off. - Page 30 Adjusting Your LCD Monitor User Controls Adjusts the screen display automatically. 7. MENU Use this button for open the on-screen menu and exits from the menu screen or closes screen adjustment menu. 8. ENTER Activate a highlighted menu item. 9. PRE-CH This button is used to return to the immediately previous channel.
- Page 31 Adjusting Your LCD Monitor User Controls 19. PIP Push the PIP button to PIP screen ON. 20. SOURCE Push the button, the PIP window's signal source changes. 21. SIZE Adjusts the PIP image size in PIP mode. 22. POSITION Changing the Position of the PIP window. Then push button again to circle through available preconfigured modes.
- Page 32 Adjusting Your LCD Monitor User Controls User control buttons Direct-Access Features Direct-Access Features let you display Monitor Adjustment Menu by simply pressing Auto button once. Or they are used to adjust monitor functions. You need to activate functions other than Auto Adjustment only when Auto-Access Features are off.
- Page 33 Adjusting Your LCD Monitor User Controls The monitor display becomes more stabilized if adjusted by Auto Adjustment functions when the monitor is installed for the first time. Try Auto Adjustment before attempting Manual Adjustment. Ensure the clock frequency of the monitor matches that of the computer Video card before carrying out Auto Adjustment. When the Auto button is pressed, the Auto Adjustment screen appears as shown in the animated screen on the center.
- Page 34 Adjusting Your LCD Monitor User Controls comfortable to your eyes depending on your taste. If this is the case, adjust the Brightness and Contrast by using the OSD menu. 4. Volume When OSD is not on the screen, push the VOL - / VOL + button to adjust volume.
- Page 35 Adjusting Your LCD Monitor User Controls 1. Push the button to decrease the channel number. 2. Push the button to increase the channel number. This function is available in TV or PC + TV (PIP) mode only. 6. PIP Every time you push the button, activate a PIP screen. This function is available in PC mode only.
-
Page 36: Input Control
Adjusting Your LCD Monitor - On-Screen Display OSD Functions Screen Adjustment Animation Clips Input Control Picture Control 1. Input Control For detailed information on Screen Adjustment in the Input Control, refer to Adjustment Animation Description Source Use to select PC, TV or other external input source connected to the Monitor. Use to select the screen of your choice. -
Page 37: Picture Control
Adjusting Your LCD Monitor - On-Screen Display 2. Picture Control PC / DVI Mode For detailed information on Screen Adjustment in the Picture Control, refer to Adjustment Animation Description MagicBright™ MagicBright™ is a new feature providing the optimum viewing environment depending on the contents of the image you are watching. - Page 38 DNIe - Digital Natural Image engine Samsung's new technology brings you more detailed images with contrast and white enhancement and 3D noise reduction. A New image compensation algorithm gives brighter, clearer, images to our customers. DNIe technology will match every signal to your eyes.
-
Page 39: Sound Control
Adjusting Your LCD Monitor - On-Screen Display 3. Sound Control For detailed information on Screen Adjustment in the Sound Control, refer to Adjustment Animation Description Mode The Monitor has a built-in high fidelity stereo amplifier. 1) Standard : Choose Standard for the standard factory settings. 2) Music : Choose Music when watching music videos or concerts. -
Page 40: Setup Control
Adjusting Your LCD Monitor - On-Screen Display Description Air/CATV The channel system can be set in several different ways. • Air • STD • HRC • IRC STD, HRC, IRC and Air identify various types of cable TV systems. Contact your local cable company to identify the type of cable system that exists in your particular area. -
Page 41: Self-Test Feature Check
Troubleshooting Check before Calling for Service Check the following items yourself before calling for service. Contact the that you cannot solve by yourself. Self-Test Feature Check Maintenance and Cleaning 1. Self-Test Feature Check Your monitor provides a self test feature that allows you to check whether your monitor is functioning properly. -
Page 42: Maintenance And Cleaning
Finish. Do not use benzene, thinner or other flammable substances, or a wet cloth. We recommend a Samsung cleansing agent is used to prevent damage to the screen. Never use acetone, benzene or thinner. (They may cause flaws or deformation of the screen surface.) The user will be required to pay costs and related expenses for repair of damages caused by him/her. - Page 43 Troubleshooting Check before Calling for Service A monitor recreates visual signals received from the computer. Therefore, if there is trouble with the computer or the video card, this can cause the monitor to become blank, have poor coloring, noise, Video mode not supported, etc. In this case, first check the source of the problem, and then contact a service center or your 1.
-
Page 44: Troubleshooting Problems And Solutions
Troubleshooting Problems and Solutions The following table lists possible problems and their solutions. Before calling for service, check the information in this section to see if you can remedy any problems yourself. If you do need assistance, please call, the phone number on the Information section or contact your Installation Screen Audio... -
Page 45: Problems Related To Audio
Troubleshooting Problems and Solutions Ghost images are shown in the picture. The image is too light or too dark Screen color is inconsistent. Color image is distorted with dark shadows. White color is poor. Power Indicator blinks green. Screen is blank and power indicator light is steady green or blinks every 0.5 or 1 seconds 3. -
Page 46: Troubleshooting - Q & A
Troubleshooting - Q & A Frequently asked questions are summarized here for your reference. Question How can I change the frequency? How can I adjust the resolution? How can I set the Power Saving function? How can I clean the outer case/LCD Panel? Answer Frequency can be changed by reconfiguring the AV card. -
Page 47: Specifications - General
Dimensions / Weight (WxDxH) 433 x 58 x 419.5 mm (Without stand) 433 x 198 x 436 mm / 5.9 kg (With Stand) VESA Mounting Interface SyncMaster 192MP 19.0 inch (Diagonal) 376.32 (H) x 301.056 (V) 0.294 (H) x 0.294 (V) - Page 48 Specifications - General 100mm x 100mm Environmental considerations Operating Storage Plug and Play Capability This monitor can be installed on any Plug & Play compatible system. Interaction of the monitor and computer systems will provide the best operating conditions and monitor settings. In most cases, monitor installation will proceed automatically, unless the user wishes to select alternate settings.
- Page 49 Power saving mode Normal Operation EPA/ENERGY 2000 Green Green, Blinking Less than 62W Less than 2W ® compliant and ENERGY2000 compliant when ® Partner, SAMSUNG has determined that this product meets the ® guidelines for energy efficiency. Power off (110 Vac) Black...
- Page 50 Specifications - Preset Timing Modes If the signal transferred from the computer is the same as the following Preset Timing Modes, the screen will be adjusted automatically. However, if the signal differs, the screen may go blank while the power LED is on. Refer to the Video card manual and adjust the screen as follows. Table 1.
- Page 51 Information - Service Center AUSTRALIA : Samsung Electronics Australia Pty Ltd. Customer Response Centre 7 Parkview Drive, Homebush Bay NSW 2127 Tel : 1300 362 603 http://www.samsung.com.au/ BRAZIL : Samsung Eletronica da Amazonia Ltda. R. Prof. Manoelito de Ornellas, 303, Terro B Chacara Sto.
- Page 52 Gustavo A.Madero C.P.07700, Mexico D.F. Mexico TEL. 52-55-5747-5100 Fax. 52-55-47 52 02 RFC: SEM950215S98 http://www.samsung.com.mx/ IMPORTADO POR: SAMSUNG ELECTRONICS MEXICO. S.A. DE C.V. EXPORTADO POR: Samsung Electronics CO.,LTD. NETHERLANDS/BELGIUM/LUXEMBOURG : Samsung Electronics Benelux B. V. Fleminglaan 12 2289 CP Rijiswijk, NEDERLANDS Service and informatielijn ;...
- Page 53 MPA COMPLEX BUILDING,1st-2nd Floor 175 SOI SUEKSA VIDHAYA SATHON SOI 12 SILOM ROAD ,SILOM,BANGRAK BANGKOK 10500 TEL : 0-2635-2567 FAX : 0-2635-2556 UKRAINE : SAMSUNG ELECTRONICS REPRESENTATIVE OFFICE IN UKRAINE 4 Glybochitska str. Kiev, Ukraine Tel. 8-044-4906878 Fax 8-044-4906887 Toll-free 8-800-502-0000 http://www.samsung.com.ua/ United Kingdom : Samsung Electronics (UK) Ltd.
- Page 54 Information - Terms Sync Signal Sync (Synchronized) Signals refer to the standard signals that are required to display desired colors on the monitor. They are divided into Vertical and Horizontal Sync Signals. These signals display normal color images by the set resolution and frequency. Types of Sync Signals Separate Composite...
- Page 55 Channel Fine Tuning This feature allows the viewer to fine-tune the TV channel to obtain the best viewing conditions. The Samsung Monet TV has both automatic and manual channel fine-tuning features to enable the viewer to adjust their desired settings.
- Page 56 Communications Commission. It is available from the U.S. Government Printing Office, Washington, DC 20402, Stock Number 004-000-00345-4. The party responsible for product compliance: SAMSUNG ELECTRONICS CO., LTD America QA Lab of Samsung 3351 Michelson Drive, Suite #290, Irvine, CA92612 USA Tel) 949-975-7310...
- Page 57 Information - Regulatory MPR II Compliance This monitor complies with SWEDAC(MPR II) recommendations for reduced electric and magnetic fields. European Notice (Europe only) Products with the CE marking comply with the EMC Directive(89/336/EEC), (92/31/EEC), (93/68/EEC) and the Low Voltage Directive (73/23/EEC) issued by the Commission of the European Community. Compliance with these directives implies conformity to the following European Norms: EN55022:1998+A1:2000 - Radio Frequency Interference EN55024:1998 - Electromagnetic Immunity...
- Page 58 Information - Regulatory There are also other characteristics of a computer, such as energy consumption levels, that are important from the viewpoints of both the work (internal) and natural (external) environments. Since all methods of electricity generation have a negative effect on the environment (e.g. acidic and climate-influencing emissions, radioactive waste), it is vital to save energy.
- Page 59 Information - Regulatory TCO'03-Ecological requirements for personal computers (TCO'03 applied model only) Congratulations! The display you have just purchased carries the TCO03 Displays label. This means that your display is designed, manufactured and tested according to some of the strictest quality and environmental requirements in the world.
- Page 60 For recycling information for TCO'03 certified monitors, for the residents in the following countries, please contact the company corresponding to your region of residence. For those who reside in other countries, please contact a nearest local Samsung dealer for recycling information for the products to be treated in environmentally acceptable way.
- Page 61 The Natural Color S/W is the very solution for this problem. It is a color administration system developed by Samsung Electronics in association with Korea Electronics & Telecommunications Research Institute (ETRI). This system is available only for Samsung monitors and makes the color of the images on the monitor the same as the printed or scanned images.
- Page 62 Information - For Better Display For Better Display 1. Adjust computer resolution and screen injection rate (refresh rate) on computer as described below to enjoy the best quality of picture. You can have an uneven quality of picture in the screen if the best quality of picture is not provided in TFT-LCD.
- Page 63 Reproduction in any manner whatsoever without the written permission of Samsung Electronics Co., Ltd. is strictly forbidden. Samsung Electronics Co., Ltd. shall not be liable for errors contained herein or for incidental or consequential damages in connection with the furnishing, performance, or use of this material.