Table of Contents
Advertisement
Quick Links
Advertisement
Table of Contents

Related Manuals for Navkom R7

Summary of Contents for Navkom R7
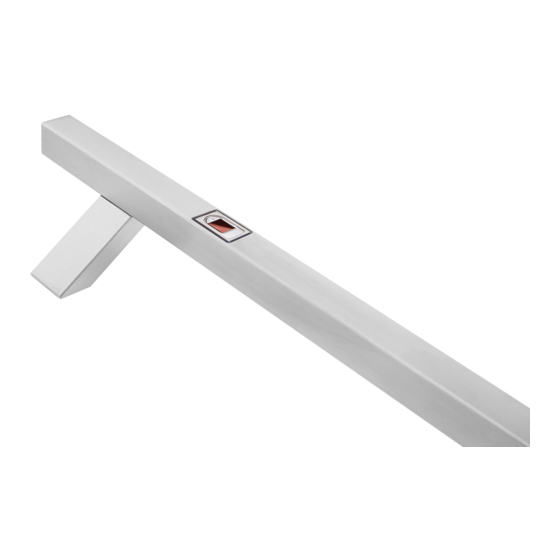
- Page 1 DOOR PROFILE BUILT-IN CONTROL UNIT INSTRUCTION MANUAL...
-
Page 2: Table Of Contents
PLACING YOUR FINGER ON THE SENSOR PROPERLY TABLE OF CONTENTS YOUR FINGERPRINT MUST COVER AT LEAST 70% OF THE SENSOR SURFACE. PLACING YOUR FINGER ON THE SENSOR PROPERLY Users with smaller fingerprints, especially women and children, may need TECHNICAL DATA to press the finger harder to achieve sufficient coverage (applying pressure spreads your finger). -
Page 3: Technical Data
READER COMPONENTS AND FUNCTIONS BEFORE THE FIRST USE OF YOUR FINGERPRINT READER, IT IS RECOMMENDED TO RESET TO FACTORY SETTINGS (Test Function remains on for 1 minute – see p. 5 for more info). ONCE THE FINGERPRINT READER IS RESET, IT IS RECOMMENDED TO IMMEDIATELY ENTER THE ADMINISTRATOR’S FINGERPRINTS. -
Page 4: Reader Control Modes
FINGERPRINT READER SECURITY LOCKDOWN FACTORY RESET PRESS AND HOLD THE BUTTON FOR 10 SECONDS. THE In the event that a finger is placed on the sensor of the fingerprint reader seven times in a row, the reader will PURPLE LED BLINKS 5 TIMES ACCOMPANIED BY FIVE BEEPS. not recognize it and will lock for 30 seconds. -
Page 5: Reader Control Modes (Door Profile Built-In Control Unit)
ANALOGUE READER CONTROL WITH DOOR PROFILE BUILT-IN READER CONTROL MODES (door profile built-in control unit) CONTROL UNIT When using the reader for the first time, you can choose between three different control modes: analogue, app or hybrid control. To choose the control mode, simply start using the reader in your preferred mode. Perform the factory reset. - Page 6 ADMINISTRATOR FINGERPRINTS ENTRY PROCEDURE USER FINGERPRINTS ENTRY PROCEDURE TO START THE USER FINGERPRINTS ENTRY PROCEDURE, PRESS BUTTON ON THE CONTROL UNIT. PRESS BUTTON 1 ON THE CONTROL UNIT TO BLUE START THE ADMINISTRATOR FINGERPRINTS ENTRY The blue LED starts flashing. PROCEDURE.
-
Page 7: Analogue Control By Placing Your Finger On The Sensor
ANALOGUE CONTROL BY PLACING YOUR FINGER ON THE USER FINGERPRINTS DELETION PROCEDURE SENSOR TO START THE USER FINGERPRINTS DELETION PROCEDURE, PRESS BUTTON ON THE CONTROL UNIT. Perform the factory reset. BLUE The blue LED starts flashing. Start by adding administrator fingerprints by placing your finger on the sensor for 5 seconds. FIRST, THE ADMINISTRATOR PLACES A FINGER ON THE SENSOR. -
Page 8: Factory Reset
USER FINGERPRINTS ENTRY PROCEDURE TO START ENTERING USER FINGERPRINTS, PLACE THE ADMINISTRATOR IN THIS CONTROL MODE, INDIVIDUAL FINGERPRINTS CANNOT BE DELETED. YOU CAN FINGER ON THE SENSOR FOR 5 SECONDS. ONLY DELETE THE ENTIRE FINGERPRINT DATABASE (INCLUDING ADMINISTRATORS) BY RETURNING THE DEVICE TO FACTORY SETTINGS. The blue and green LEDs flash alternately. -
Page 9: Hybrid Control
APP FUNCTIONS HYBRID CONTROL Once the fingerprints are entered, you can connect to the reader and control both relays and LED settings Perform the factory reset. in the app. Add your reader in the X-Manager app. Pressing the Touch to open - relay 1 tab will Start by entering administrator fingerprints on the reader/by pressing Button 1 on the control unit/ unlock the door. -
Page 10: App Control
BUTTON FUNCTIONS on the door profile built-in control unit APP CONTROL If you have a door profile built-in control unit, but you wish to operate the reader using the app, buttons 1 and 2 Download the X-manager app to your smartphone or tablet from the Google Play Store will serve as shortcuts to turn on/off the free passage mode and blue lighting. - Page 11 A N D R O I D CONNECTING THE PHONE TO THE READER CONNECTING AN ADDITIONAL PHONE TO THE READER Every new reader needs to be added in the X-manager app A single reader can be managed with more than one phone. before it can be used.
- Page 12 A P P L E A P P L E CONNECTING THE PHONE TO THE READER CONNECTING AN ADDITIONAL PHONE TO THE READER Every new reader needs to be added in the X-manager app A single reader can be managed with more than one phone. before it can be used.
- Page 13 ADDING PEOPLE PRESS THE GREEN TAB TO START ADDING PEOPLE. Enter the person’s name. Choose either administrator or user rights. An administrator can perform all functions including deleting other users and administrators. A user can only open the door. Choose the relay that the person will activate (relay 1, relay 2 or relays 1 and 2 together).
- Page 14 LIST OF ENTERED PEOPLE The settings cannot be changed after the person has been entered. You need to delete the person and add them again with different settings. Administrators are indicated in orange and users in light brown. Certain data is displayed under the name of each person: 0 level of rights (User/Administrator) 0 number of entered fingerprints 0 relay(s) which this person will activate...
- Page 15 SETTINGS All security functions can be performed only with the confirmation of the administrator’s fingerprint. Device name Free entrance mode: enabling this mode allows the door to be opened by any fingerprint, even if it is not stored in the database. The period during which free entrance mode is switched on can be adjusted (1 to 1440 minutes), after which it is automatically turned off.
- Page 16 LED SETTINGS If there is LED lighting in the door, it can be connected to the system and controlled by the X-manager. It is possible to adjust the brightness (1% to 100%) and the schedule for turning the lighting on/off: 24H: The LED lighting will be switched on continuously.
- Page 17 UNLOCK THE DOOR and ACTIVATE RELAY 2 WITH THE APP The user or administrator can unlock the door by clicking on the “Touch to open” tab. Clicking on the “Activate relay 2” tab activates relay 2. Pressing the “Touch to open - relay 1” tab will unlock the door. Pressing the “Activate - relay 2”...
- Page 18 SCHEDULES SCHEDULES CAN BE ASSIGNED TO USERS TO LIMIT THEIR ENTRANCE TIME Click on the Add tab to start assigning a schedule. Write the name of the schedule. There are three options to limit access for individual days of the week: 0 unlimited 24h access 0 no access 0 limited access (from –...