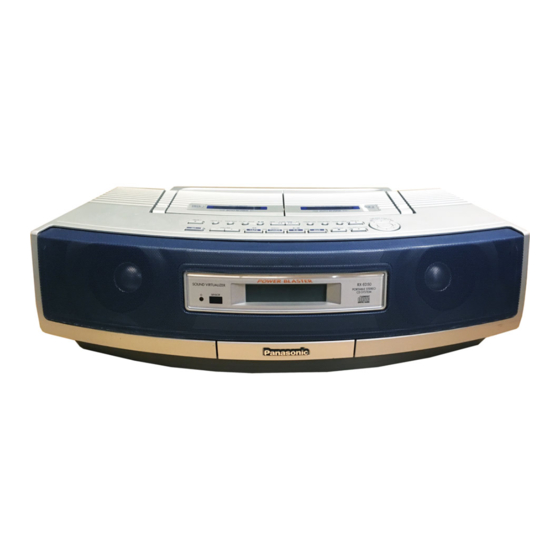
Panasonic RX-ED50 Operating Instructions Manual
Portable stereo cd system
Hide thumbs
Also See for RX-ED50:
- Operating instructions manual (24 pages) ,
- Operating instructions manual (24 pages)
Table of Contents
Advertisement
電 源
スリープ
タイマーフェーダー プログラム
1
2
3
・メモリー
ラジオオート
プリセット
4
5
6
10
7
8
9
0
反転モード カウンターリセット デッキ1/2
AUX
テープ
巻戻し
TPS
早送り
選 局
FMモード/BP
FM/AM
/クリアー
/
音質 S.バーチャライザー 表示切換
プレイモード
音 量
PORTABLE STEREO CD SYSTEM
Note:
The " EB " indication shown on the packing case in-dicates United Kingdom.
Before connecting, operating or adjusting this product, please read these instructions completely.
Please keep this manual for future reference.
EB
GN
Portable Stereo CD System
Operating Instructions
RX-ED50
RQT5142-B
Advertisement
Table of Contents

Related Manuals for Panasonic RX-ED50


Summary of Contents for Panasonic RX-ED50
-
Page 1: Operating Instructions
The “ EB ” indication shown on the packing case in-dicates United Kingdom. Before connecting, operating or adjusting this product, please read these instructions completely. Please keep this manual for future reference. Portable Stereo CD System Operating Instructions RX-ED50 RQT5142-B... -
Page 2: Table Of Contents
CLASS 1 LASER PRODUCT INVISIBLE LASER RADIATION WHEN OPEN. DANGER AVOID DIRECT EXPOSURE TO BEAM. USYNLIG LASERSTRÅLING VED ÅBNING, NÅR SIKKERHEDSAFBRYDERE ADVARSEL ER UDE AF FUNKTION. UNDGÅ UDSÆTTELSE FOR STRÅLING. AVATTAESSA JA SUOJALUKITUS OHITETTAESSA OLET ALTTIINA VARO! NÄKYMÄTÖNTÄ LASERSÄTEILYLLE. ÄLÄ KATSO SÄTEESEEN. OSYNLIG LASERSTRÅLNING NÄR DENNA DEL ÄR ÖPPNAD OCH VARNING SPÄRREN ÄR URKOPPLAD. -
Page 3: Before Use
Caution for AC mains lead (For United Kingdom) (“EB” area code model only) For your safety, please read the following text carefully. This appliance is supplied with a moulded three pin mains plug for your safety and conve- nience. A 5-ampere fuse is fitted in this plug. Should the fuse need to be replaced please ensure that the replacement fuse has a rating of 5-ampere and that it is approved by ASTA or... -
Page 4: Supplied Accessories
RQT5142 Supplied accessories Please check and identify the supplied accessories. Use numbers indicated in parentheses when asking for re- placement parts. Remote control (EUR644864) ....1 pc. AC mains lead . -
Page 5: Power Sources
To household mains socket AC mains lead (R20,D,UM-1) (R6,AA,UM-3) Power sources Operating the unit on AC power FOR UNITED KINGDOM ONLY BE SURE TO READ THE CAUTION FOR THE AC MAINS LEAD ON PAGE 3 BEFORE CON- NECTION. Connect the AC mains lead. The AC mains lead must be disconnected from the unit if you intend to power the unit with batteries. -
Page 6: Location Of Controls
RQT5142 Location of controls Basic controls Number Designation Standby/on switch ( ) ....8 Press to switch the unit from on to standby mode or vice versa. -
Page 7: The Remote Control
PORTABLE STEREO CD SYSTEM PORTABLE STEREO CD SYSTEM (R6,AA,UM3) SENSOR 30˚ 30˚ PORTABLE STEREO CD SYSTEM The remote control Buttons Number Designation Sound virtualizer button (S.VIRTUALIZER) ..22 CD skip/search buttons ( Tuning buttons (–TUNE+) Rewind/fast forward TPS buttons (REW Tape counter reset button (C-RESET) . -
Page 8: Setting The Time
CLOCK/TIMER CLOCK/TIMER PORTABLE STEREO CD SYSTEM PORTABLE STEREO CD SYSTEM RQT5142 Setting the time This is a twenty-four hour clock. The example shows how to set the clock to 13:30. Press [ ] to turn the unit on. Press [CLOCK/TIMER] to select “CLOCK”. Each time the button is pressed: “CLOCK”... -
Page 9: Cds
REW TUNE Displayed when CD not loaded. Label Number of tracks Total playing time Track playing Elapsed time Preparation: (when using batteries) Press [ Press [ TAPE/CD] to switch to CD mode. (Unit comes on when using AC power.) Each time the button is pressed TAPE Press [ CD OPEN/CLOSE] to open the... -
Page 10: Other Modes Of Play
PORTABLE STEREO CD SYSTEM RQT5142 Other modes of play Preparation: Press [ /CLEAR] to switch to CD mode. Remote control only Numbered buttons Direct access play Starts normal play from a selected track Select the track with the numbered buttons. For tracks numbered 10 and over, press [ 10] then the two digits. -
Page 11: Program Play
PORTABLE STEREO CD SYSTEM Program play: Select up to 36 tracks to play in the order you choose Preparation: Press [ /CLEAR] to switch to CD mode. Remote control only Press [PROGRAM]. Enter the track number with the num- bered buttons. For tracks numbered 10 and over, press [ 10] then the two digits. -
Page 12: The Radio: Manual Tuning
RQT5142 The radio: manual tuning Preparation: (when using batteries) Press [ Press [BAND (Unit comes on when using AC power.) Each time the button is pressed Press [ to select a station. “ Press [–,+VOLUME] to adjust the volume. Auto-tuning Press and hold [ the frequency starts changing rapidly. -
Page 13: The Radio: Preset Tuning
Remote control only Tuning is simpler if you preset stations. You can preset 12 FM and 12 AM stations. Preset the stations one at a time. Preparation: Tune to the station you want to preset Press [PROGRAM]. While “ Press the numbered buttons to enter the station into a channel (1 to 12). -
Page 14: Cassettes
Displayed when cassette not loaded. Insert inside the guides Tape counter RQT5142 Cassettes You can play cassettes in either deck 1 or deck 2. Deck 1 is used in this example. Preparation: (when using batteries) Press [ Press [ mode. (Unit comes on when using AC power.) Press [ load a cassette. - Page 15 REW TUNE Number of tracks skipped Current track Number of times the button is pressed 1 2 3 4 5 6 7 Play from this point Cassettes Tape Program Sensor (TPS) TPS finds the beginning of a track and resumes play from there.
-
Page 16: Before Recording
Side A Tab for side “B” Tab for side “A” To re-record Normal tape Present state (e.g., elapsed play time of CD) Present time Tape counter RQT5142 Before recording Use household AC power or new batteries when recording to avoid poor recordings caused by the batteries running down. -
Page 17: Recording Cds
Recording tape Leader tape Tape facing out Insert inside the guides Lights Recording direction Recording CDs (Deck 2 only) Preparation: •Insert a CD ( page 9). •To record from the beginning of the tape Wind on the leader tape. •Select the reverse mode. Press [ DECK 2] to open the deck and load a cassette. -
Page 18: Automatic Cd Recording
RQT5142 Automatic CD recording You can record the whole CD (AUTO) or a selected track(1- REC). If a track is interrupted at the end of the side facing up, it is recorded again on the side facing down. AUTO Recording begins from the side facing up and the reverse mode is set to “... -
Page 19: Recordng The Radio
Lights Recording direction Deck 2 direction Lights (flashes when recording is paused) Recording the radio Preparation: •Wind on the leader tape. •To record from part way through the tape Wind the tape on to where you want to start recording. •Select the reverse mode. -
Page 20: Using The Timer
Start Finish RQT5142 Using the timer The timer has two functions. It can be set to come on at a certain time to wake you up, or it can be set to record the radio. Be aware that weak batteries can cause the timers to malfunction. -
Page 21: The Sleep Timer
Using the timer To cancel the timer Press [ PLAY/REC] to clear the timer indicator from the display. The timers come on at the same time everyday until they are canceled. Checking the settings Press [CLOCK/TIMER] when the unit is off. The settings are shown in the following order. -
Page 22: The Timer Fader
Clear Soft Vocal PORTABLE STEREO CD SYSTEM PORTABLE STEREO CD SYSTEM RQT5142 The timer fader Remote control only Volume fades in gradually when a timer turns the unit on and fades out gradually when the sleep timer turns the unit off. Press [TIMER FADER]. -
Page 23: Using Auxiliary Equipment
AUX IN PHONES Using auxiliary equipment You can play or record sound from other equipment through this unit's AUX IN terminal. Plug type: 3.5 mm stereo Playback Preparation: (when using batteries) Press [ Press [ ] to switch to AUX mode. Start playback on the equipment. -
Page 24: Troubleshooting
Troubleshooting Before requesting service, make the below checks. If you can’t fix the system as described below, or if something not listed here occurs, refer to the enclosed directory to locate an Authorized Service Center convenient to you or contact your dealer. Reference pages are shown as black circled numbers Common problems “E”...