Table of Contents
Advertisement
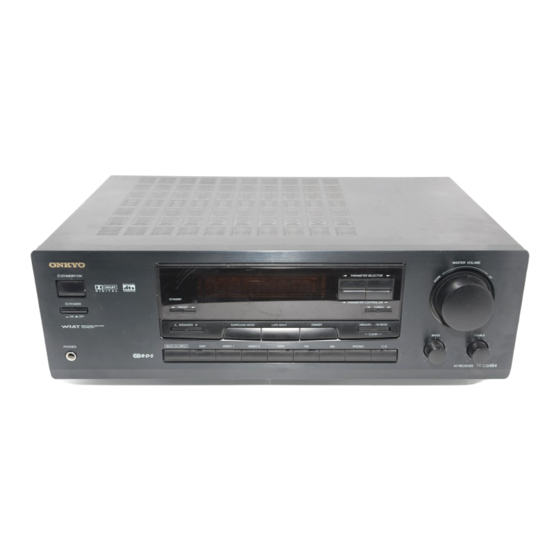
AV Receiver
TX-DS484
Instruction Manual
Thank you for purchasing the Onkyo AV Receiver.
Please read this manual thoroughly before making
connections and turning on the power.
Following the instructions in this manual will enable
you to obtain optimum performance and listening
enjoyment from your new AV Receiver.
Please retain this manual for future reference.
Contents
Before using
Important Safeguards........................ 2
Precautions ....................................... 3
Features............................................. 4
Supplied accessories......................... 4
Before operating this unit ................. 5
Preparation
Audio equipment connections .......... 6
Video equipment connections .......... 7
Connecting other devices ................. 8
Connecting speakers....................... 10
Positioning speakers ....................... 11
Connecting the power..................... 11
Making antenna connections .......... 12
Operation
Speaker setup.................................. 14
Selecting a sound source ................ 17
mode ............................................ 20
Tuning in a radio station................. 23
Using preset radio stations.............. 24
Recording a source ......................... 25
Appendix
Troubleshooting guide.................... 27
Specifications ................................. 28
Control guide
Control positions and names .......... 29
Remote controller RC-427S ........... 30
Using the remote controller ............ 31
Advertisement
Table of Contents

Related Manuals for Onkyo TX-DS484


Summary of Contents for Onkyo TX-DS484
-
Page 1: Table Of Contents
AV Receiver TX-DS484 Instruction Manual Thank you for purchasing the Onkyo AV Receiver. Please read this manual thoroughly before making connections and turning on the power. Following the instructions in this manual will enable you to obtain optimum performance and listening enjoyment from your new AV Receiver. -
Page 2: Important Safeguards
WARNING: TO REDUCE THE RISK OF FIRE OR ELECTRIC SHOCK, DO NOT EXPOSE THIS APPLIANCE TO RAIN OR MOISTURE. CAUTION: TO REDUCE THE RISK OF ELECTRIC SHOCK, DO NOT REMOVE COVER (OR BACK). NO USER-SERVICEABLE PARTS INSIDE. REFER SERVICING TO QUALIFIED SERVICE PERSONNEL. -
Page 3: Precautions
3. AC Fuse The fuse is located inside the chassis and is not user-serviceable. If power does not come on, contact your Onkyo authorized service station. 4. Care From time to time you should wipe the front and rear panels and the cabinet with a soft cloth. -
Page 4: Features
We, ONKYO EUROPE declare in own responsibility, that the ONKYO product described in this instruction manual is in compliance with the corresponding technical standards such as EN60065, EN55013, EN55020 and EN61000-3-2, -3-3 (or EN60555-2, -3). -
Page 5: Before Operating This Unit
REMOTE CONTROL SURROUND CENTER SURROUND SPEAKER SPEAKERS AM FREQUENCY VIDEO 1 STEP 10kHz 9kHz CENTER WOOFER TX-DS484 VIDEO 2 MULT I CH I NPUT 220-230V 120V VOLTAGE SELECTOR PHONO FRONT SPEAKERS 220-230V VOLTAGE SELECTOR – – – Remote control sensor STANDBY indicator 30˚... -
Page 6: Audio Equipment Connections
See page 7 COAXIAL COAXIAL OPTICAL WOOFER PRE OUT DIGITAL INPUT MONI- FRONT SURROUND CENTER WOOFER TX-DS484 MULT I CH I NPUT FRONT SPEAKERS OUTPUT (COAXIAL) OUTPUT (ANALOG) OUTPUT (DIGITAL) CD Player Audio connection cable L (Left) R (Right) Improper connection... -
Page 7: Video Equipment Connections
DIGITAL COAXIAL OUTPUT COAXIAL COAXIAL OPTICAL DIGITAL INPUT FRONT REMOTE CONTROL SURROUND CENTER WOOFER TX-DS484 MULT I CH I NPUT FRONT SPEAKERS VIDEO IN VIDEO IN VIDEO OUT Monitor TV Audio connection cable L (Left) R (Right) Video connection cable... -
Page 8: Connecting Other Devices
MULT I CH I NPUT FRONT SPEAKERS Audio connection cable L (Left) R (Right) Video connection cable V (Video) Monaural audio cable (mono) CENTER REMOTE CONTROL AC OUTLETS CENTER SURROUND AC 230V 50Hz SWITCHED SPEAKER SPEAKERS TOTAL 100W MAX. TX-DS484... - Page 9 – the audio connection cables must also be connected. This receiver’s remote controller does not support control of Onkyo turntables. If the connecting device has two con- nectors lined-up vertically or horizontally, you can use either of them. They both offer...
-
Page 10: Connecting Speakers
OPTICAL WOOFER PRE OUT DIGITAL INPUT MONI- FRONT SURROUND CENTER WOOFER TX-DS484 MULT I CH I NPUT FRONT SPEAKERS – – R ch. L ch. Front Speakers B When you use only one speaker or wish to listen to monaural (mono) sound, a single speaker should never be connected in parallel to both the right and left channel terminals simultaneously. -
Page 11: Positioning Speakers
When you use the TX-DS484 for the first time: AV RECEIVER TX-DS484 When the TX-DS484 is shipped from the factory, the POWER switch is set to ON ( power cord to the AC outlet, the Standby indicator lights up and the unit enters Standby mode as described in Step 2. -
Page 12: Making Antenna Connections
Making antenna connections Slit C To TX-DS484 Insert into the hole. Outdoor Indoor Connecting the 300 ohm ribbon wire: antenna antenna Loosen the screws and wrap the wire around these screws. Then tighten the screws with a screwdriver. 300 ohms... - Page 13 Making antenna connections U.S. and Canadian Other models models Remove the insulation at the tip of the cable, and insert the cable securely, fully to the end of the exposed tip. ANTENNA ANTENNA ANTENNA Connecting the included antennas Connecting the FM indoor antenna: The FM indoor antenna is for indoor use only.
-
Page 14: Speaker Setup
Speaker setup LEVEL π/† buttons Use these buttons to adjust the level of each speaker. PARAMETER SELECTOR PARAMETER CONTROLLER PARAMETER SELECTOR PARAMETER CONTROLLER PARAMETER SELECTOR PARAMETER SELECTOR/ PARAMETER CONTROLLER buttons Use these buttons to set the speaker parameters, such as the type and distance. Speaker setup Before operating your stereo system, you need to set the type and position of the connected speakers. - Page 15 Speaker setup PARAMETER CONTROLLER PARAMETER SELECTOR PARAMETER CONTROLLER PARAMETER SELECTOR PARAMETER CONTROLLER PARAMETER SELECTOR PARAMETER CONTROLLER PARAMETER SELECTOR PARAMETER CONTROLLER PARAMETER SELECTOR 4. Press the PARAMETER SELECTOR® button to display the center speaker size parameter, and press the PARAME- TER CONTROLLER √/® buttons to select “LARGE”, “SMALL”...
- Page 16 Speaker setup PARAMETER CONTROLLER PARAMETER SELECTOR PARAMETER CONTROLLER PARAMETER SELECTOR 1, 3 TEST TONE CH SEL LEVEL Parameter selector This chart shows how the display changes when the PARAMETER SELECTOR buttons are pressed. Selecting a parameter and pressing the PARAMETER CONTROLLER button will change the value or setting for the selected parameter. Subwoofer YES / NO START PARAMETER SELECTOR...
-
Page 17: Selecting A Sound Source
Selecting a sound source Follow the steps below to select a device to play the sound source. 2. Make sure that the SPEAKERS A indicator is lit on the display. If it is not lit, press the SPEAKERS A button. (Refer to the “Speakers selector”... - Page 18 Selecting a sound source MULTI-CH POWER SLEEP DIMMER MODE INPUT INPUT SELECTOR TAPE TUNER PHONO VIDEO-1 VIDEO-2 PRESET TUNER DISC TAPE CH SEL TEST TONE VOLUME LEVEL MUTING REMOTE CONTROLLER RC-427S LEFT CENTER SUBWOOFER POWER MULTI-CH SLEEP DIMMER MODE INPUT INPUT SELECTOR TAPE TUNER...
- Page 19 Switching between digital and analog inputs Either a digital or analog device can be connected to the digital connector. Follow the steps below to select digital or analog TX-DS484 according to the type of the connected device. OPTICAL You can assign digital input to DVD, CD, VIDEO1-2, and TAPE.
-
Page 20: To Enjoy Surround Mode Or Stereo Mode
Select the desired input source. Before Using Surround Mode Surround Modes The TX-DS484’s surround sound enables you to enjoy the pres- ence of a movie theater or concert hall in your room. Before using a Surround mode, make sure the Speaker Setup parameters have been set (refer to page 14). - Page 21 DTS source, a short noise may be heard. This is not a mal- function. 4. The DTS indicator on the TX-DS484 lights up while it plays the DTS source. When playback concludes and the DTS signal trans- mission stops, the TX-DS484 remains in DTS mode and the DTS indicator remains lit.
- Page 22 CLEAR BASS TREBLE Dolby Digital/DTS Surround sound. TAPE PHONO TX-DS484 AV RECEIVER How to set this parameter is explained in the “Speaker setup” sec- tion on page 14. Notes: Dolby Digital sound: “0dB” is recommended. If the low range sounds too loud for your taste, select –10dB or –...
-
Page 23: Tuning In A Radio Station
Press the FM MODE button. The FM MUTE indicator turns off. At this time, the station will be in mono and interstation noise will be heard. Select the station to which you want to listen. MASTER VOLUME TREBLE TX-DS484 AV RECEIVER... -
Page 24: Using Preset Radio Stations
TREBLE VIDEO VIDEO TAPE PHONO AV RECEIVER TX-DS484 MEMORY FM MODE 1. Select the frequency that you want to store in the memory. 2. Press the MEMORY button. 3. Select the desired memory number using PRESET √/® 4. Press the MEMORY button. -
Page 25: Recording A Source
TREBLE record. If you select DVD, VIDEO 1 or VIDEO 2, only the audio will AV RECEIVER TX-DS484 be recorded. If you select FM or AM, set the tuner to the station you want to record. 3. Set the tape deck in recording mode. Start playing the Turntable source. - Page 26 FM MODE CLEAR BASS TREBLE TAPE PHONO AV RECEIVER TX-DS484 2. Press the VIDEO 1 or DVD button. 3. Start playing the video disc player and recording on the 1·3 VDP, DVD player (VIDEO 1) MASTER VOLUME During video tape editing, you can add sound to the recording PARAMETER SELECTOR VCR from various audio program sources.
-
Page 27: Troubleshooting Guide
Turn the power button off and then on again or remove the AC plug from the outlet and then plug it again. Contact your Onkyo Service Center. Press the MUTING button on the remote con- troller to turn it off. -
Page 28: Specifications
Specifications AMPLIFIER SECTION Continuous Average Power output (FTC) All channels: 55 watts per channel min. RMS at 8 ohms, 2 channels driven from 20 Hz to 20 kHz with no more than 0.08% total harmonic distortion. 70 watts min. RMS at 6 ohms, 2 chan- nels driven from 1 kHz with no more than 0.1% total harmonic distortion. -
Page 29: Control Positions And Names
Memory indicator h. FM Mute On/Off indicator i. RDS station received indicator (European model only) j. Multi function display (Frequency and Preset station/Input selector/Sleep time/ Volume level) MASTER VOLUME TUNING MEMORY FM MODE CLEAR BASS TREBLE TX-DS484 AV RECEIVER... -
Page 30: Remote Controller Rc-427S
Remote controller RC-427S POWER SLEEP DIMMER INPUT SELECTOR TAPE TUNER VIDEO-1 VIDEO-2 DISC TAPE CH SEL LEVEL REMOTE CONTROLLER MULTI-CH MODE INPUT PHONO PRESET TUNER TEST TONE VOLUME MUTING RC-427S 1. Power button (POWER) [11] 2. Sleep button (SLEEP) [17, 19] 3. -
Page 31: Using The Remote Controller
2. Press the transport buttons. VOLUME RC-427S Using an Onkyo CD player MULTI-CH INPUT These buttons enables you to control ONKYO CD players that can be remotely controlled. (Refer to page 9.) PRESET 1. Press the CD button. 2. Press the transport buttons. VOLUME... - Page 32 Tel: 201-825-7950 Fax: 201-825-8150 E-mail: onkyo@onkyousa.com ONKYO EUROPE ELECTRONICS GmbH Industriestrasse 20, 82110 Germering, GERMANY Tel: 089 84 93 20 Fax: 089 84 93 226 E-mail: info@onkyo.de ONKYO CHINA LIMITED Units 2102-7, Metroplaza Tower I, 223 Hing Fong Road, Kwai Chung, N.T., HONG KONG Tel: 852 2429 3118 Fax: 852 2428 9039...