Table of Contents
Advertisement
Quick Links
Advertisement
Table of Contents

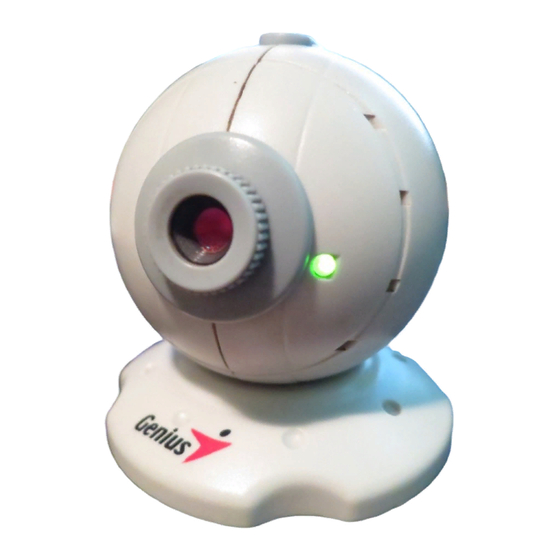
Summary of Contents for Genius VideoCAM WEB V2
- Page 1 All manuals and user guides at all-guides.com Service Manual VideoCAM WEB V2/V3...
-
Page 2: Table Of Contents
All manuals and user guides at all-guides.com Service Manual Table of Contents VideoCAM WEB V2/V3 ......................0 Chapter 1. INTRODUCTION......................2 a. Hardware ...........................2 b. Software ............................2 c. Block Diagram ..........................2 Chapter 2. Testing Procedures ......................3 a. Testing flow chart.........................3 b. Check VCC +5V ..........................5 c. -
Page 3: Chapter 1. Introduction
Chapter 1. INTRODUCTION a. Hardware ♦ PIII 800 MHz or higher above ♦ Connection port : USB b. Software ♦ Win98 above ♦ AP of VideoCAM WEB V2/V3 c. Block Diagram Interface EEPROM ZC0301 AT93C46C Snapshoot X'TAL SOP-8P button 48MHZ... -
Page 4: Chapter 2. Testing Procedures
All manuals and user guides at all-guides.com Service Manual Chapter 2. Testing Procedures a. Testing flow chart START Check VCC REPLACE CABLE Check +3.3V. REPLACE U4 Check +2.5V REPLACE U3 Check U1 Pin13 REPLACE U1,Y1 CLKIN signal REPLACE U1 Check U1 Pin14 CLKOUT signal Version 1.0 Page 3... - Page 5 All manuals and user guides at all-guides.com Service Manual REPLACE U1 Check U1 Pin42 CSCLK signal REPLACE U1 Check U1 Pin39,40 VS&HS YNC signal Check U2 Pin19 REPLACE U2 CS_CLK signal Version 1.0 Page 4...
-
Page 6: Check Vcc +5V
All manuals and user guides at all-guides.com Service Manual b. Check VCC +5V J1 PIN1 Version 1.0 Page 5... -
Page 7: Check U4 Pin 1 +3.3V
All manuals and user guides at all-guides.com Service Manual c. Check U4 Pin 1 +3.3V U4.PIN 1 Version 1.0 Page 6... -
Page 8: Check U3 Pin1 +2.5V
All manuals and user guides at all-guides.com Service Manual d. Check U3 Pin1 +2.5V U3 PIN1 Version 1.0 Page 7... -
Page 9: Check U1 Pin13 Clkin Signal
All manuals and user guides at all-guides.com Service Manual e. Check U1 Pin13 CLKIN signal U1 PIN13 Version 1.0 Page 8... -
Page 10: Check U1 Pin14 Clkout Signal
All manuals and user guides at all-guides.com Service Manual f. Check U1 Pin14 CLKOUT signal U1 PIN14 Version 1.0 Page 9... -
Page 11: Check U1 Pin42 Csclk Signal
All manuals and user guides at all-guides.com Service Manual g. Check U1 Pin42 CSCLK signal U1 PIN42 Version 1.0 Page 10... -
Page 12: Check U1 Pin39,40 Vs&Hs Ync Signal
All manuals and user guides at all-guides.com Service Manual h.Check U1 Pin39,40 VS&HS YNC signal PIN 39 VSYNC SIGNAL PIN 40 HSYNC SIGNAL Version 1.0 Page 11... -
Page 13: Check U2 Pin19 Cs_Clksignal
All manuals and user guides at all-guides.com Service Manual U1 PIN39 U1 PIN40 i.Check U2 Pin19 CS_CLK signal Version 1.0 Page 12... -
Page 14: Chapter 3. Troubleshooting Guide
All manuals and user guides at all-guides.com Service Manual U2 PIN19 Chapter 3. Troubleshooting Guide Problems Condition Probable Reasons Solutions 1. no conection 1. AP couldn’t work 1. PCB defect Change all the parts with VideoCAM below 1. U1 2. U2 3. -
Page 15: Chapter 4. Removal And Replacement
All manuals and user guides at all-guides.com Service Manual Chapter 4. Removal and Replacement Step Description Picture 1. finished products 2. Loose screws Using screwdriver to loose screw and take apart the base from the globe. 3. Take apart Using two palm to loose cover of left. cover of left 4. -
Page 16: Chapter 5. Parts List
All manuals and user guides at all-guides.com Service Manual Chapter 5. Parts list Description Parts number Description Parts number 102100030101 TACK SW 300104005902 102100513000(V2) 201400200200 102100513001(V3) 101900013301 Y1 48MHz 101514800000 101900010000 CABLE 300113005901 Version 1.0 Page 15... -
Page 17: Chapter 6. Tools
All manuals and user guides at all-guides.com Service Manual Chapter 6. Tools 1. Screwdriver cross 2. Oscilloscope 3. Soldering-iron set Version 1.0 Page 16...


