Table of Contents
Advertisement
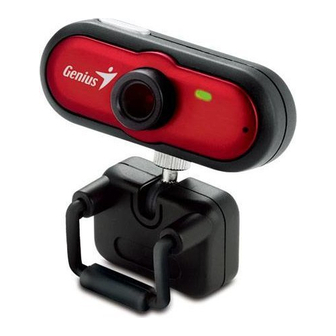
VideoCAM Eye Features
Installing the VideoCAM Eye
1. Please install the driver first and then connect VideoCAM
Eye to the USB port.
2. Installing the VideoCAM Eye driver
Windows Environment
a.
Insert the VideoCAM Eye Installation CD into the CD-ROM drive.
b.
The Autorun screen will bring up the installation screen. Click on
"Driver" then simply follow the on-screen instructions.
c.
Install DirectX from the CD.
Notice:
If the Autorun screen doesn't start, please follow these
steps:
Click on "Start Menu"
Type D:\SETUP.EXE , then click Enter key.
(Assume your CD-ROM is in Drive D)
Mac Environment
a.
Insert the VideoCAM Eye Installation CD into the CD-ROM
drive.
1
SnapShot Button
2
LED Indicator
3
Lens
4
Swivel Base
-1-
English
Advertisement
Table of Contents

Related Manuals for Genius VIDEOCAM EYE


Summary of Contents for Genius VIDEOCAM EYE
- Page 1 2. Installing the VideoCAM Eye driver Windows Environment Insert the VideoCAM Eye Installation CD into the CD-ROM drive. The Autorun screen will bring up the installation screen. Click on “Driver” then simply follow the on-screen instructions. Install DirectX from the CD.
- Page 2 English Double click on the CD-ROM drive Click on the file folder of “VideoCAm Eye Driver OSX 1.0” Click on “VideoCAM Eye Driver Install” then simply follow the on-screen instructions. 3. Insert the VideoCAM Eye’s USB cable to your desktop’s or laptop’s USB port.
- Page 3 English Genius Application (Windows Only) You can use our software to capture the real-time image, record or execute the simply security function. To run the software, please go to the taskbar and follow “Start” Click “Program” Choose “VideoCAM Eye” Click “VideoCAM Eye. Or you may execute the software by simply clicking the shortcut of “VideoCAM Eye”...
- Page 4 English Camera Control NOTE In the camera control section, you can personalize your camera settings for different circumstances. Camera Control: You can set different values for different circumstances and environment -Press “Default” to return to the manufacturer’s settings. Video Proc Amp:...
- Page 5 Also, you can have different compression choices for your images. -Press “Default” to return to the manufacturer’s settings. 2. Preview Mode You can use the function buttons on the control panel to zoom in/out and move upward/downward/left/right.
- Page 6 There are 2 categories of resolution: RGB24 and I420. You can select 5 different image resolutions for each of them. The file size of I420 will be smaller than RGB24. So, I420 may be the better choice for transmission. 3. SnapShot Mode...
- Page 7 English Send photo by e-mail Shoot Continuously Zoom in the image Zoom Out the image Move the image upward Move the image downward Move the image to the left...
- Page 8 “to go back to the “Preview Mode” to make the changes. NOTE You can zoom in/out or move the image to the position you would like, and then take pictures. 4. Video Clip Mode You can record real-time image in this section.
- Page 9 5. Security Monitoring System This Function records any movements that appear in front of your monitor automatically. It can also record anytime until the HD is full. If there’s no movement, it will shut down automatically after four seconds or until it...
- Page 10 English set the software so it works at times when you’re not around. Start recording Stop recording Setup time of the security monitoring system Set up the degree of the variance for every second of recording image. When the differences are over the setup degree, the system will alert you.
- Page 11 With WebCam Monitor, you can take image shots, record video clips, personalize the camera settings for different circumstances, and so on. Snapshot function You can just simply press the snapshot button on the web camera to take pictures. Video Clip You have two ways to record images.
- Page 12 “Stop Recording” b. Record Until MouseClick Go to “Monitor” Click “Record Until MouseClick” Change the file name you would like to save as and the location Click “Save” to start recording stop recording, just click your mouse. Personalized values settings...
- Page 13 English There are four sections to adjust values due to different circumstances. Adjustments: In the section, you can adjust different values toward image itself. -Press “Default” to return to the manufacturer’s settings. Compression: In this section, you can have different compression choices for your images, file type and image quality.
- Page 14 English Source: In this section, you have to make sure that the image source is correspondent to the input device you are using. -Format: Select the correct video system, which depends on the country you are in. VideoCAM Eye: In this section, you can adjust...
- Page 15 Microsoft Windows XP (or you can download from http://www.msnmessenger-download.com) to provide videoconferencing service. Using MSN Messenger as for Videoconferencing If you are using MSN Messenger included with Windows XP, please follow the procedure as below: Click the person’s name you would like to connect with Click -15-...
- Page 16 English the Start cameras button The text message window will display the message: “You have asked to have a video and voice conversation. Please wait for a response or Cancel (Alt +Q) the pending invitation.” the other person will click Accept or Decline to begin or terminate the video and voice conversation.
- Page 17 English NOTE Please make sure you already installed the camera driver and connect the camera to the computer before running video conferencing or video chat. Please make sure you close other webcam programs before running the video conferencing or video chat.