
Related Manuals for Minolta APS Camera


Summary of Contents for Minolta APS Camera
- Page 1 INSTRUCTION MANUAL BASIC OPERATION FOCUS USING THE BUILT-IN FLASH SUBJECT PROGRAM MODES CREATIVE EXPOSURE MODES ADDITIONAL FEATURES APPENDIX...
-
Page 2: New Features
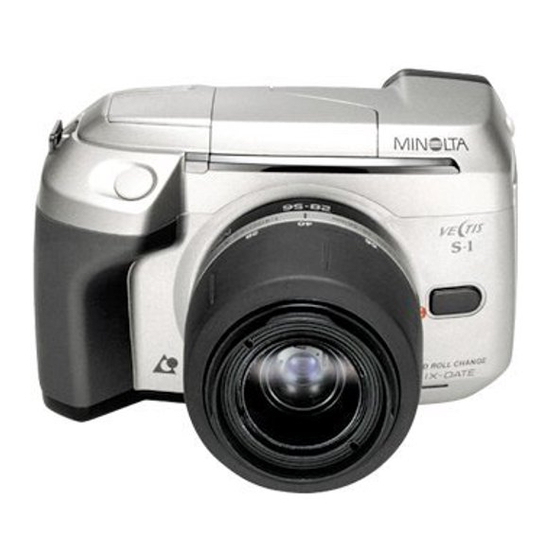
Thank you for purchasing the Minolta Vectis S-1. The Vectis S-1 is an ultra compact IX240 type system camera with many Advanced Photo System™ features such as variable print- aspect-ratio and magnetic storage of date, title, and exposure information. The Vectis S-1 also incorporates the revolutionary TTL side viewfinder. -
Page 3: Table Of Contents
TABLE OF CONTENTS FOR PROPER AND SAFE USE ... 4 NAMES OF PARTS ... 11 QUICK OPERATION ... 16 BASIC OPERATION Attaching the Camera Strap ... 19 Installing the Batteries ... 20 Attaching and Removing the Lens ... 22 Diopter Adjustment ... 24 Handling the Camera ... -
Page 4: For Proper And Safe Use
FOR PROPER AND SAFE USE STANDARD SYMBOLS Various symbols are used throughout this instruction manual and on the product itself for the proper and safe use of this product and to prevent personal injury, injury to others, and property damage. An explanation of the symbols follows. Read and understand each caution thoroughly before reading the main text of this instruction manual. - Page 5 FOR PROPER AND SAFE USE CAUTION Don't walk while looking through the lens or viewfinder. You may trip and fall causing injury. Do not fire the flash near the eyes of people or animals, especially infants and young children. Do not fire the flash if your subject is closer than the minimum flash distance stated in the manual.
- Page 6 FOR PROPER AND SAFE USE Carefully observe the following warnings when using this product near young children, or persons who may have difficulty perceiving the potential danger associated with these products. WARNING Use Caution If caution is not used, the following accidents or others may occur: •...
-
Page 7: Names Of Parts
FOR PROPER AND SAFE USE OPERATING TEMPERATURE AND CONDITIONS • This camera is designed for use from -10° to 50° C (14° to 122° F). • Never leave your camera where it may be subjected to extreme temperatures such as the glove compartment of a car. - Page 8 NAMES OF PARTS Main switch Viewfinder* Film- chamber release (27) Manual- rewind button (33) Command- mode button Exposure- compensation (84)/ Program-reset button (96) Aperture-select (62) button Flash-mode button (42) Title button (71) Control-panel door Date button (67) Data panel Self-timer (75)/ Format-selector switch Drive-mode(76)/ Remote-control (77)
-
Page 9: Data Panel
NAMES OF PARTS Data Panel Subject-program indicators Portrait Mode (48) Landscape Mode (49) Close-up Mode (50) Sports Mode (51) Night Portrait Mode (52) Continuous-drive indicator (76) Flash-mode indicators (42) Remote- control indicator (77) Date mark (67) Self-timer indicator (75) Title mark (71) Exposure-mode indicators (55) Print mark (65) -
Page 10: Quick Operation
QUICK OPERATION 1. Insert battery Using the eyepiece cap, open the battery-chamber cover. Insert the batteries into the chamber, then close and lock the battery-chamber cover. 2. Attach lens Align the red mounting dot on the lens with the one on the camera. -
Page 11: Basic Operation
BASIC OPERATION ATTACHING THE CAMERA STRAP 1. Undo the camera-strap buckle and loop the strap through the upper eyelet of the camera. 2. Redo the camera-strap buckle. 3. Repeat for the lower eyelet. -
Page 12: Installing The Batteries
INSTALLING THE BATTERIES Your camera uses two CR2 batteries to supply power for all camera operations. Please read all warnings in the Safety Cautions section of this manual as well as those supplied by the battery manufacturer. 1. Using the eyepiece cap, turn the battery-chamber cover counter-clockwise and open the battery-... -
Page 13: Attaching And Removing The Lens
ATTACHING AND REMOVING THE LENS Attaching the Lens 1. Remove the camera body cap and rear lens cap as shown. 2. Align the red mounting dot on the lens with the red dot on the camera. 3. Gently insert the lens into the mount and turn it clockwise until it clicks into the locked position. -
Page 14: Diopter Adjustment
DIOPTER ADJUSTMENT If you are near or far sighted, use this control to adjust the eyepiece for your eyesight. The diopter adjustment range is from -4.0 to +2.0 diopters. Adjusting the Diopter 1. Center your subject in the focus frame. 2. -
Page 15: Loading Film
LOADING FILM Your camera uses IX240 type film designed for use in Advanced Photo System cameras. •Your camera has an automatic transport system which loads the film, sets the film speed, and advances the film after each exposure. •Once loaded, the Film Chamber Lock feature prevents the film chamber from being opened until the film is rewound into the cassette. - Page 16 LOADING FILM The film speed appears in the data panel, then the film is advanced to the first frame. When the loading sequence is complete, the frame counter will show the number of frames remaining on the roll. •If the shutter-release button is not pressed after loading, an unexposed ( or partially exposed ( by pressing the rewind button, then the film-chamber release.
-
Page 17: Full Auto Operation
FULL - AUTO OPERATION Full Auto is the camera’s standard operating mode and is suited for use in almost any situation. When the program- reset button is pressed, the camera is returned to fully- automatic operation. See page 96. 1. Press the main switch to turn the camera on. -
Page 18: Rewinding The Film
REWINDING THE FILM Automatic Rewind The camera automatically rewinds the film into the cassette after the last exposure. 1. Wait for the film to completely rewind into the cassette. •While rewinding, the frame counter will count down. •0 will appear in the frame counter and the film is rewound. -
Page 19: Focus
REWINDING THE FILM Mid Roll Change Your camera can reload partially exposed film originally loaded in a Minolta IX240 type cameras with the MRC feature. Minolta Advanced Photo System cameras with the MRC feature set the VEI for partially exposed rolls to . Minolta Advanced Photo System cameras without the MRC feature set the VEI for partially exposed rolls to frames can not be exposed. -
Page 20: Focus Signals
FOCUS SIGNALS When the camera is set to autofocus (AF) mode, pressing the shutter-release button partway down will activate the autofocus system and one of the signals below will appear at the base of the viewfinder. In autofocus mode, the shutter will not release until the focus is confirmed. -
Page 21: Focus Hold
FOCUS HOLD Use focus hold when you want to take a picture with your subject outside the focus frame [ ], or when autofocus is difficult to confirm. 1. Center your subject in the focus frame [ ] and press the shutter-release button partway down. -
Page 22: Manual Focus
MANUAL FOCUS When autofocus is not suitable and focus hold is not possible, focus the lens manually. The autofocus system will monitor focus and indicate when the subject in the focus frame [ ] is in focus. 1. Press the focus-mode button, appear in the data panel viewfinder. -
Page 23: Flash Signals
FLASH SIGNALS In P mode, the built-in flash will pop-up automatically when the shutter-release button is pressed partway down. Once up, the flash will fire when necessary. •The shutter will not release until the flash is charged. •The built-in flash can provide coverage for Advanced Photo System focal lengths as short as 22mm. -
Page 24: Manual Fill-Flash
MANUAL-FILL FLASH/FLASH CANCEL In the manual fill-flash mode, the flash fires every time a picture is taken. When the flash is canceled, the built-in flash will not fire. Manual Fill-Flash Press the flash mode button until the data panel. •When the program-reset button is pressed, the camera returns to the autoflash mode. -
Page 25: Subject Program Modes
SUBJECT PROGRAM MODES SUBJECT PROGRAM SELECTION Subject-program selection lets you choose one of the five subject program modes listed below. These program modes customize the exposure settings for the type of picture you will be taking. Portrait Mode for portrait photography for scenic and travel Landscape Mode photography... -
Page 26: Portrait Mode
PORTRAIT MODE Use Portrait mode when photographing people. Portrait photography benefits from a shallow depth-of-field. A shallow depth-of-field separates the subject from the background. In portrait mode, the camera is set to achieve this effect, leaving you free to compose the picture and capture the perfect expression. -
Page 27: Close-Up Mode
CLOSE - UP MODE Use Close-up mode when photographing objects from short distances. Close-up photography requires accurate focusing; use focus hold, direct-manual focus, or manual focus to ensure sharp focus. The camera will select the best possible aperture and shutter speed for your subject. -
Page 28: Night Portrait Mode
NIGHT PORTRAIT MODE Use Night Portrait mode for taking portraits with scenic backgrounds at night. Night portraits require a balanced exposure between the camera’s flash and the background. In this mode, the camera sets the largest possible aperture and a slower shutter speed to allow the background to appear in the photograph. -
Page 29: Creative Exposure Modes
CREATIVE EXPOSURE MODES CREATIVE EXPOSURE MODES Your camera has four different exposure modes: Aperture- priority, Shutter-priority, Manual, and Program. The exposure modes let you to tailor the degree of camera control needed to capture the desired image. For information on P mode, refer to Full Auto Operation. -
Page 30: A Mode - Aperture Priority
A MODE - APERTURE PRIORITY In A mode, you select the aperture and the camera automatically sets the shutter speed required for proper exposure. Set the camera to A mode when you want to control the range of sharpness (depth-of-field) in an image. See Aperture Control on page 58. -
Page 31: S Mode - Shutter Priority
APERTURE CONTROL Large Aperture The size of the aperture (lens opening) determines the depth- of-field in the final image as well as the intensity of the light falling on the film. Depth-of-field is the area in front of and behind the point where the lens is focused which will appear sharp. - Page 32 S MODE - SHUTTER PRIORITY •If the aperture display in the data panel blinks, the required setting is outside the aperture range of the lens. Turn the control dial until the blinking stops. •The number 60, or 125, displayed in the data panel stands for 1/60th or 1/125th of a second.
- Page 33 M MODE - MANUAL EXPOSURE In M mode, you select both the shutter speed and the aperture. The meter index, in the viewfinder display, will tell you if your exposure is over, under, or the same as the metered exposure. 1.
-
Page 34: Additional Features
ADDITIONAL FEATURES PRINT - QUANTITY SELECT Print-quantity select lets you choose the number of prints you will receive from the lab before taking the picture. Setting the Print Quantity Before taking the picture- 1. Open the control-panel door and press the print button to enter the desired number of prints. -
Page 35: Date/Time Imprinting
PRINT - QUANTITY SELECT Setting the Print Quantity to Zero If someone walked into the picture at the last moment, or you don't need prints, you can set the print quantity to zero after taking the picture. •Zero the print quantity before taking the next picture. •Automatic rewind prevents the last frame from being zeroed. - Page 36 DATE/TIME IMPRINTING 3. Turn the control dial to adjust the blinking item. 4. Repeat steps 2 and 3 until all items in the date and time display are correct. 5. Press the date button, or press the select button until the display stops blinking, to set the updated information.
-
Page 37: Title Imprinting
DATE/ TIME IMPRINTING Imprinting the Date or Time Before taking the picture- 1. Open the control-panel door. 2. Press the date button until the data panel displays the format you want to see on the print. The sequence is as follows: Date ->... - Page 38 TITLE IMPRINTING 3. Press the select button, the first digit of the title code will blink. •Pressing the select button causes the next item to blink, starting at the right and moving to the left. 4. Rotate the control dial to change the value of the blinking number.
-
Page 39: Self-Timer
TITLE IMPRINTING Filmstrip Title Imprinting You can choose a title for the entire roll of film. Both the filmstrip title and the frame title will be imprinted on the back of the photograph. •The filmstrip title will be imprinted on the back of every print. After the film has been rewound and is blinks in the data panel-... -
Page 40: Continuous-Drive Mode
CONTINUOUS - DRIVE MODE In this mode, the camera will release the shutter and advance film as long as the shutter-release button is held down. 1. Press the drive-mode button until the data panel. 2. Press the shutter-release button down and hold. •The camera will continue to release the shutter and advance the film as long as the... -
Page 41: Manual Focus
REMOTE - CONTROL MODE •If the button (release button) is pressed, the lamp on the front of the camera will blink once before the picture is taken. •If the 2s button is pressed, the lamp on the front of the camera will blink for two seconds before the shutter releases. -
Page 42: Bulb
BULB Bulb can only be used in M mode. When set, the shutter will remain open as long as you press the shutter-release button. To avoid blurry pictures, mount the camera on a tripod and use the optional IR Remote Control RC-3 to release the shutter. -
Page 43: Spot Metering
SPOT METERING 14-segment honeycomb pattern The standard metering mode for this camera uses a fourteen segment honeycomb pattern metering system to determine the correct exposure. When you want to set the exposure according to a very small part of the scene, spot metering lets you use a single metering segment to determine correct exposure. -
Page 44: Exposure Compensation
EXPOSURE COMPENSATION Over Exposure Metered Exposure This function lets you compensate the exposure + / – 3 EV in 1/2 EV increments when the camera’s metering system may not be able to accurately determine exposure. More exposure is recommended for very bright scenes, such as snow or beach scenes. -
Page 45: Ftpm Fixed Time Printing Mode
FTPM - FIXED TIME PRINTING MODE with FTPM FTPM ensures that your film will be printed as it was exposed, without compensation by the printer. •FTPM can only be selected for the whole roll of film, not for a specific image on the roll. •Some labs may not be able to read the FTPM data. -
Page 46: Setting The Film Speed Manually
SETTING THE FILM SPEED MANUALLY The film speed can be set manually when you want to override the DX-coded film speed. Film speeds can be set manually from ISO 6 to ISO 6400 in 1/3 EV increments. •The film speed will be set for the entire roll, not for a single exposure. -
Page 47: Wireless/Remote Off Camera Flash Control
WIRELESS/REMOTE OFF - CAMERA FLASH CONTROL Wireless/Remote Off-Camera Flash Control is available with the Minolta accessory flashes: 5400HS, 5400xi, or 3500xi. Wireless/Remote flash lets you experiment with creative lighting techniques using off-camera Normal Flash accessory flashes without the usual tangle of accessory cords and connectors. - Page 48 WIRELESS/REMOTE OFF-CAMERA FLASH CONTROL Taking Pictures In Wireless/Remote Flash Mode 1. Position your camera and 3500xi flash unit using the information on this page. If you are using a flash unit other than the 3500xi off camera, refer to the instruction manual for that flash to determine the aperture, camera to subject distance, and the flash to subject distance.
-
Page 49: Slow-Shutter Sync
WIRELESS/REMOTE OFF - CAMERA FLASH CONTROL Canceling the Wireless /Remote Flash 1. Reattach the accessory flash to the camera. 2. Press the red-eye- reduction/wireless-flash button. •WL will disappear from the data panel. •To cancel wireless/remote-flash mode on the camera only, press the red-eye-reduction/wireless-flash mode button without attaching the flash. -
Page 50: Appendix
APPENDIX PROGRAM-RESET BUTTON The program-reset button quickly returns the camera to fully- automatic operation. Pressing the program-reset button will set the camera as follows: FUNCTION P-MODE SETTING Exposure mode Focus mode Flash mode Exposure Compensation Single-frame advance Film-drive mode Self-timer Wireless/Remote Flash •Title, date, print quantity, red-eye reduction, manual film speed, and AF illuminator settings will not change. -
Page 51: Accessory Information
ACCESSORY INFORMATION This camera is designed to work specifically with lenses, flash units, and other accessories manufactured and distributed by Minolta. Using incompatible accessories with this camera may result in unsatisfactory performance or damage to the camera and accessories. Lenses All V-series lenses can be used with this camera. -
Page 52: Care And Storage
ACCESSORY INFORMATION Accessory Flash Notes •To use an AF series flash unit, the Flash Shoe Adapter FS- 1100 must be attached to the camera. When the flash is on, the flash will fire each time the shutter is released. At no time will the flash’s AF illuminator activate. -
Page 53: Technical Details
CARE AND STORAGE Questions and Service • If you have questions about your camera, contact your local camera dealer or write to the Minolta distributor in your area. • Before shipping your camera for repair, please contact an authorized Minolta Service Facility for details. Important Information for Advanced Photo System Camera Owners The Advanced Photo System includes many possibilities for... -
Page 54: Trouble Shooting
TECHNICAL DETAILS Film Speed Setting: Automatic: ISO 25 to ISO 6400; Manual: ISO 6 to ISO 6400 Splashproof: Equivalent to IPX2 (IEC standard) Power: Two 3-volt CR2 lithium batteries Performance: Performance is based on Minolta's standard test method using 25 exposure IX240 film, a V 22-80mm f/4-5.6 lens, and fresh batteries. -
Page 55: Camera Warnings
CAMERA WARNINGS MODE DISPLAY Light level is beyond the range of available shutter speeds and apertures. Shutter speed and aperture blink Required shutter speed is beyond the range of the camera. 2000, 125, or 30” blinks Required aperture is beyond the range of the lens. -
Page 56: Quick Reference Guide
QUICK REFERENCE GUIDE Program reset Select a subject program mode Set manual fill-flash Set flash cancel Set red-eye reduction Preselecting a title Imprinting a title Portrait Mode Landscape Mode Imprinting Close-up Mode the date/time Sports Mode Night Portrait Mode Setting the print quantity Setting a filmstrip title... - Page 57 Minolta Co. Ltd. 3-13, 2-Chome, Azuchi-Machi, Chuo-Ku, Osaka 541-8556, Japan Minolta GmbH Kurt-Fischer-Strasse 50, D-22923 Ahrensburg, Germany Minolta France S.A. 365 Route de Saint-Germain, F-78420 Carrieres-Sur-Seine, France Minolta (UK) Limited 7 Tanners Drive, Blakelands, Milton Keynes, MK14 5BU, England Minolta Austria Ges. m.b.H. Amalienstrasse 59-61, A-1131 Wien, Austria Minolta Camera Benelux B.V.