Table of Contents
Advertisement
Advertisement
Table of Contents

Related Manuals for Minolta 140


Summary of Contents for Minolta 140
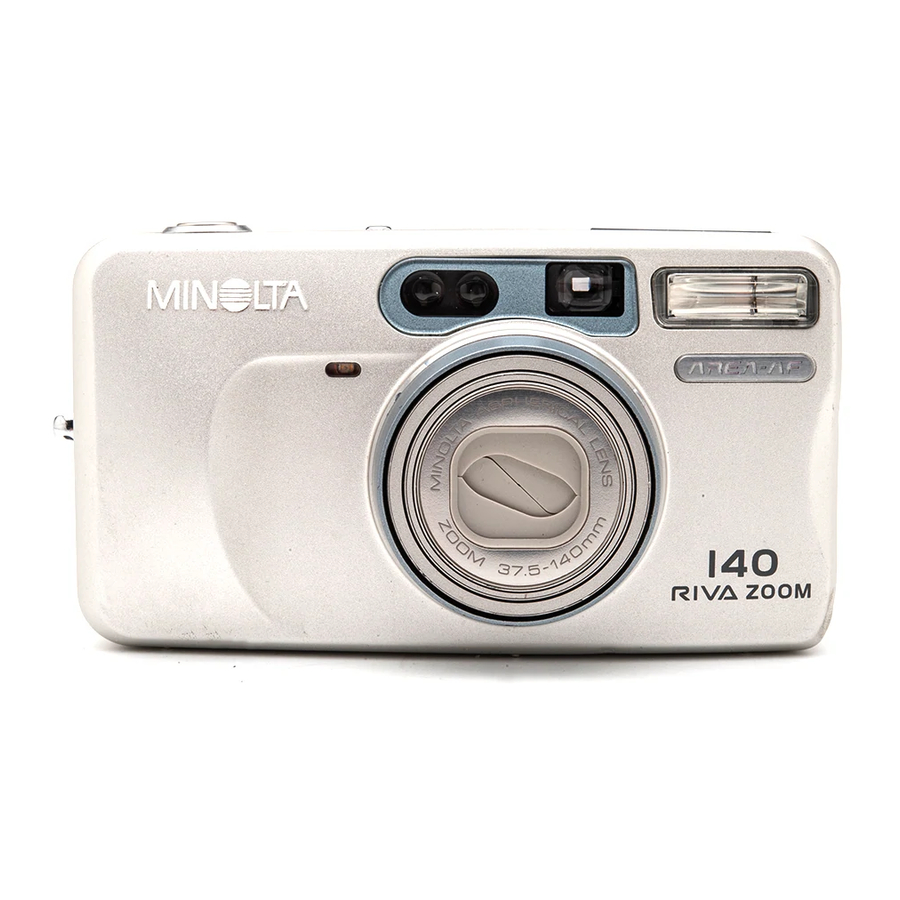
- Page 1 E INSTRUCTION MANUAL...
-
Page 2: Table Of Contents
This is the combined manual for the Freedom/Riva Zoom 140/160 models. The description pertaining to each model is referred to as the “140 model” or “160 model.” For Proper and Safe Use ... 4 GETTING STARTED Names of Parts... 10 Attaching the Camera Strap ... - Page 3 ADVANCED OPERATION Selecting the AF Mode ... 36 Area AF ... 37 Focus-area Indicator Controls ... 38 Spot AF... 40 Focus Lock - Spot AF... 41 Target AF ... 42 Selecting the Flash Mode ... 44 Flash Range ... 46 Autoflash ...
-
Page 4: For Proper And Safe Use
FOR PROPER AND SAFE USE Read and understand all warnings and cautions before using this product. Using batteries improperly can cause them to leak harmful solutions, overheat, or explode which may damage property or cause personal injury. Do not ignore the following warnings: •... - Page 5 • Tape over lithium battery contacts to avoid short-circuiting during disposal; always follow local regulations for battery disposal. • Do not disassemble this product. Electric shock may cause injury if a high voltage circuit inside the product is touched. Take the product to a Minolta Service Facility when repairs are required.
- Page 6 FOR PROPER AND SAFE USE • Do not fire the flash directly into the eyes. It may damage eyesight. • Do not fire the flash at vehicle operators. It may cause a distraction or temporary blindness which may lead to an accident. •...
- Page 7 • Take the product to a Minolta Service Facility when repairs are required. • Do not use or store the product in a hot or humid environment such as the glove compartment or trunk of a car. It may damage the product and batteries which may result in burns or injuries caused by heat, fire, explosion, or leaking battery fluid.
- Page 8 FOR PROPER AND SAFE USE This device complies with Part 15 of the FCC Rules. Operation is subject to the following two conditions: (1) This device may not cause harmful interference, and (2) this device must accept any interference received, including interference that may cause undesired operation.
- Page 9 If this equipment does cause harmful interference to radio or television reception, which can be determined by turning the equipment off and on, the user is encouraged to try to correct the interference by one or more of the following measures: •...
-
Page 10: Names Of Parts
NAMES OF PARTS BODY The 160 quartz-date model is illustrated. AF/Meter window* Remote-control receiver* (Quartz-date model only) Self-timer/Remote-control lamp* (p. 54, 65) * This camera is a sophisticated optical instrument. Care should be taken to keep these surfaces clean. Refer to the care and storage section at the back of this manual (p. 73). Viewfinder window* Flash* (p. - Page 11 Drive-mode/Adjust button (p. 53, 55, 57, 64) Flash-mode/Select button (p. 44, 57) Data panel (p. 12) Eyepiece sensors* (p. 22) Viewfinder* (p. 13) Back cover (p. 19) Date button (p. 57) (Quartz Date model only) AF mode button (p. 36) Shutter-release button (p.
- Page 12 NAMES OF PARTS DATA PANEL All indicators are displayed for clarity. Date/Time display (p. 57 ) (Quartz-Date model only) Flash-mode indicators (p. 44 ) Autoflash Autoflash with red-eye reduction Fill-flash Flash cancel Night Portrait (with red-eye reduction) Exposure Compensation Remote-control indicator (p. 64 ) Continuous-advance indicator (p.
- Page 13 VIEWFINDER All focus frames and focus- area indicators are shown. This camera features a sophisticated matrix AF indication system that indicates the area of focus. Focus-frame Display Area AF (p. 37) For focus-area indicators in Area AF, see pages 24 and 27. Spot AF (p.
- Page 14 NAMES OF PARTS VIEWFINDER Close-framing guide (p. 32)* Focus frames Focus-area indicator (p. 27)** Varies according to the subject. (Area AF) * The close-framing guide appears in Area, spot, and target-AF modes. ** The focus-area indicator is displayed in the Area-AF mode.
- Page 15 VIEWFINDER Focus lamp (green) With the shutter-release button pressed partway down - Glows: focus confirmed Blinks rapidly: subject is too close Blinks slowly: focus not confirmed (p. 30) Flash lamp (orange) With the shutter-release button pressed partway down - Glows: flash is charged and ready Blinks rapidly: flash charging Blinks slowly: camera-shake warning GETTING STARTED...
-
Page 16: Attaching The Camera Strap
ATTACHING THE CAMERA STRAP Button keys 1. Pass the small loop of the strap through the strap eyelet on the camera. 2. Pass the the other end of the strap through the small loop and tighten. • Button keys are attached to the strap. Use the larger key to open the battery-chamber door, and the smaller key to push the manual-rewind button. -
Page 17: Inserting The Battery
INSERTING THE BATTERY • Quartz-date model: after installing the battery, the date and time must be set, see page 59. • When changing batteries, always turn the camera off. The camera uses one 3-volt CR123A or DL123A lithium battery. 1. Open the battery-chamber door using the larger button key on the camera strap. -
Page 18: Battery-Condition Indicator
BATTERY-CONDITION INDICATOR Each time the camera is turned on, an indicator will appear on the data panel to indicate the power status of the battery. The indicator briefly appears. Power is sufficient for all camera operations. The indicator blinks. Power is sufficient for camera operation, but the battery must be replaced soon. -
Page 19: Loading The Film
• Use only DX-coded 35mm film rated between ISO 25 and 3200. • Do not use Polaroid instant 35mm film. Winding problems may result. • ISO 400 film is recommended for best results. • Always load and unload the film in subdued light. - Page 20 LOADING THE FILM 2. Place the film cartridge into the film chamber. 3. Extend the film leader to the film-tip mark. The film must lay flat. • If the film tip extends beyond the index mark, push the excess film back into the cartridge.
- Page 21 4. Close the back cover. • The film automatically advances to the first frame and “ 1 ” appears in the data-panel frame counter. • If the film has been loaded improperly, “0” will blink on the frame counter and the shutter will not release.
-
Page 22: Fully Automatic Operation
FULLY AUTOMATIC OPERATION 1. Press the main switch to turn the camera on. • To conserve battery power, the auto-power- off function will turn the camera off eight minutes after the last operation. • Do not obstruct or hold the lens barrel. 2. - Page 23 T(elephoto): zoom in BASIC OPERATION 3. Look through the viewfinder and press the zoom lever to zoom the lens. • The viewfinder will adjust to match the lens’ field of view. W(ide angle): zoom out Continued on next page.
- Page 24 FULLY AUTOMATIC OPERATION Area-AF frame 4. Place the subject within the Area AF frame. The focus frame will automatically change to a focus-area indicator to confirm the subject. • The Area-AF mode (p. 37) is automatically set when the camera is turned on. •...
- Page 25 5. Press the shutter-release button partway down. • The status of the AF system and flash are indicated by the lamps next to the viewfinder. Focus lamp (green) Glows: focus confirmed Blinks rapidly: subject is too close Blinks slowly: focus not confirmed (p. 30) Flash lamp (orange) Glows: flash is charged and ready Blinks rapidly: flash charging...
- Page 26 FULLY AUTOMATIC OPERATION 6. When the green focus lamp glows, press the shutter-release button all the way down to take the picture. • Press the shutter-release button with slow, steady pressure. • The film automatically advances to the next frame. •...
-
Page 27: Area-Af Focus-Area Indicator
AREA-AF FOCUS-AREA INDICATOR BASIC OPERATION As long as the subject is located within the Area-AF focus frame, even if it is not centered, the camera will automatically locate the subject and indicate it with the focus-area indicator. The shape of focus-area indicator varies with the subject shape, see the sample illustrations below. -
Page 28: Focus Lock - Area Af
FOCUS LOCK - AREA AF The focus-lock function allows the camera to be focused on a certain subject and then the picture can be recomposed to arrange the subject at a different position within the image area. 1. With focus-area indicator around the subject, press and hold the shutter-release button partway down. -
Page 29: Focusing Range
The subject must be within the focusing range of the camera. The minimum focusing distance varies with the focal length of the lens. 140 model 160 model If the subject is too close, the green focus lamp blinks rapidly and the shutter is locked. -
Page 30: Special Focusing Situations
SPECIAL FOCUSING SITUATIONS The camera may not be able to focus in certain situations. At this time, the focus-lock function (p. 28, 41) can be used to focus on an object at the same distance as your subject, and then the image can be recomposed to take the picture. - Page 31 When a low-contrast area fills the focus frame. When the subject is composed of a regular repeating pattern. BASIC OPERATION The green focus lamp will blink slowly to warn that focus cannot be confirmed. The shutter can be released and the focus will be set to infinity;...
-
Page 32: For Closer Subjects
FOR CLOSER SUBJECTS Close-framing guide Actual image (shaded area) Because of parallax, the image seen in the viewfinder and the image recorded with the camera are not exactly the same. Parallax becomes significant with close subjects. A close-framing guide automatically appears in the viewfinder when the image needs to be recomposed to eliminate the effect of parallax. - Page 33 1. With the focus-area indicator on the subject, press and hold the shutter release button partway down. • The green focus lamp should glow to confirm the focus is locked. 2. While pressing the shutter-release button partway down, recompose the picture so that the top of the subject falls below the close-framing guide.
-
Page 34: Rewinding The Film
REWINDING THE FILM The camera automatically rewinds the film after the last exposure is taken. When the cartridge mark blinks on the data panel, the film has been rewound. Open the back cover and remove the film. • The film-chamber lock is release during rewind. - Page 35 • If the rewind motor stops before the film has been completely rewound, all the indicators on the data panel will blink. Remove and insert the battery . • Although more pictures than specified on the film package may be taken, the film processor may only print the number specified on the film cartridge.
-
Page 36: Selecting The Af Mode
SELECTING THE AF MODE Area AF (p. 37) Spot AF (p. 40) Target AF (p. 42) Three auto focus (AF) modes can be selected: Area AF, spot AF, and target AF. Press the AF mode button until the desired AF indicator appears on the data panel. -
Page 37: Area Af
AREA AF Area-AF frame focus-area indicator 1. Press the AF mode button until the Area-AF indicator appears on the data panel. 2. Place the subject within the Area-AF frame. • The focus frame will automatically change to a focus-area indicator to confirm the subject. 3. -
Page 38: Focus-Area Indicator Controls
FOCUS-AREA INDICATOR CONTROLS The display of the focus-area indicator can be controlled with a custom function. CUSt-1:1 - The focus-area indicator automatically appears when looking through the viewfinder. CUSt-1:2 - The focus-area indicator appears when the shutter-release button is pressed partway down. CUSt-1:3 - The focus-area indicator is canceled and will not be displayed. - Page 39 3. Press the AF mode button once to enter the new setting. • The camera will return to the shooting mode automatically after five seconds. Pressing the AF mode button again or pressing the shutter-release button partwary down will also return the camera to the shooting mode. •...
-
Page 40: Spot Af
SPOT AF Spot-AF focus frame The camera focuses on a subject within the spot AF frame. This mode can be used to single out a specific subject from a group. 1. Press the AF mode button until the spot-AF indicator appears on the data panel. -
Page 41: Focus Lock - Spot Af
FOCUS LOCK - SPOT AF The focus-lock function allows the camera to be focused on a certain subject and then the picture can be recomposed to arrange the subject at a different position within the image area. 1. With subject in the focus frame, press and hold the shutter-release button partway down. -
Page 42: Target Af
TARGET AF Target-AF focus frame The target AF is ideal for moving subjects. The camera continually calculates the focus even when the shutter-release button is held partway down. Predictive focus control ensures someone moving toward the camera will be in focus; predictive focus control adjusts the focus during the slight delay between the time the shutter button is pressed and the exposure is made. - Page 43 4. Press the shutter-release button all the way down to take the picture. 2. Place the subject in the target-AF focus frame. 3. Press and hold the shutter-release button partway down until the green focus lamp glows. • Target AF has no focus-lock function. The camera continuously calculates focus while the shutter button is held partway down.
-
Page 44: Selecting The Flash Mode
SELECTING FLASH MODE The following flash modes can be selected: Press the flash-mode button until the desired flash-mode indicator appears on the data panel. Autoflash (p. 47) Autoflash with red-eye reduction (p. 48) Fill-flash (p. 49) - Page 45 Flash cancel (p. 50) Night portrait (p. 51) Exposure compensation (p. 52) (160 model only) • When the camera is turned off, the fill-flash, flash cancel, night portrait, or exposure compensation mode will be reset to autoflash or autoflash with red- eye reduction, whichever of the two modes was set last.
-
Page 46: Flash Range
0.6 - 9.2 m ISO400 (2.0 - 30.2 f t ) The distances are based on use with color negative film. 160 mm 140 mm (140 model) (160 model) 0.8 - 2.1 m 0.95 - 2.0 m (2.6 - 6.9 f t ) (3.1 - 6.6 f t ) -
Page 47: Autoflash
AUTOFLASH The flash will fire automatically in low-light or back-lit situations. • When the orange flash lamp blinks quickly, the flash is charging. The shutter cannot be released until the flash is charged; the orange flash lamp will glow. ADVANCED OPERATION Press the flash-mode button until the autoflash indicator appears on the data panel to set the flash mode. -
Page 48: Autoflash With Red-Eye Reduction
AUTOFLASH WITH RED-EYE REDUCTION Pre-flash Main flash The flash will fire a few short bursts before the main flash burst to reduce red-eye; an effect caused by light reflected from the retina. Used in low-light condition when taking photographs of people or animals, the pre-flashes contract the pupils of the subject’s eyes. -
Page 49: Fill-Flash
FILL-FLASH ADVANCED OPERATION The flash fires with each exposure regardless of the amount of ambient light. Fill-flash can be used to reduce harsh shadows caused by strong direct light or sunshine. Press the flash-mode button until the fill-flash indicator appears on the data panel to set the flash mode. -
Page 50: Flash Cancel
FLASH CANCEL The flash will not fire in this mode. Use flash cancel when flash photography is prohibited, natural light is desired to illuminate the subject, or the subject is beyond the flash range. The camera-shake warning may appear in this mode. Press the flash-mode button until the flash- cancel indicator appears on the data panel to set the flash mode. -
Page 51: Night Portrait
NIGHT PORTRAIT In night-portrait mode, the camera balances the flash and existing light exposure so you can take beautiful portraits at sunset or at night. The flash will fire with each exposure regardless of the amount of ambient light. Red-eye reduction is used with the night-portrait mode. -
Page 52: Exposure Compensation
EXPOSURE COMPENSATION high-key subjects (160 MODEL ONLY) The multi-segment metering can expose for most situations: back lighting, and directly lit snow scenes. However, under certain conditions the meter can be deceived by high-key scenes like white interiors or foggy landscapes. This mode increases the exposure by 1.5 Ev. -
Page 53: Self-Timer
SELF-TIMER The self-timer is used for taking self-portraits. The self-timer delays release of the shutter for approximately 10 seconds after the shutter-release button is pressed. 1. With the camera on a tripod, press the drive-mode button until the self-timer indicator appears on the data panel. 2. - Page 54 SELF-TIMER • To cancel the self-timer, press the drive-mode button again or turn the camera off. • Self-timer is automatically canceled after the shutter is released. 3. Press the shutter-release button all the way down to begin the countdown. • The self-timer indicator will blink on the data panel. The self-timer lamp on the front of the camera will blink slowly during the countdown, then rapidly just before the shutter is released.
-
Page 55: Continuous Advance
CONTINUOUS ADVANCE (160 MODEL) In this mode, the camera continuously takes pictures as long as the shutter-release button is held down. The camera will take one picture every 2.2 seconds. When the flash is used, the rate may be slower because the flash must recharge between frames. - Page 56 CONTINUOUS ADVANCE • Continuous advance remains in effect until the drive mode is reset. • When using target AF, predictive focus control is only active for the first frame of the series. (160 MODEL ONLY) 2. Frame the subject as described in the manual.
-
Page 57: For Owners Of The Quartz-Date Model
FOR OWNERS OF THE QUARTZ-DATE MODEL The quartz-date model has date and time imprinting and remote-control operation. DATE AND TIME IMPRINTING The imprinting feature enables the date or time to be printed onto the lower-right portion of the picture. The date is recorded as the film is advanced to the next frame. - Page 58 FOR OWNERS OF THE QUARTZ-DATE MODEL IMPRINTING THE DATE OR TIME Press the date button to select the date imprinting format. • The display will change as follows: Date imprinting Day/Time imprinting • If the date/time display is blinking, the calendar and clock need to be reset (p. 59).
- Page 59 SETTING THE DATE OR TIME Note: the date and time must be reset each time the battery is replaced. 1. Turn the camera on. Press the date button until “SEt” appears on the data panel. 2. Press the select (SEL) button until the item to be adjusted blinks.
- Page 60 FOR OWNERS OF THE QUARTZ-DATE MODEL 3. Press the adjust (ADJ) button or zoom lever • The numerals continues to change as long as the • Pressing the W side of the zoom lever counts down, 4. Repeat steps 2 and 3 until all items in the 5.
- Page 61 • Pressing the select (SEL) button until the date/time display stops blinking can also set the calendar and clock. CHANGING THE DATE FORMAT 1. Press the date button until “SEt” appears on the data panel. 2. Press and hold the select (SEL) button for more than 2 seconds until all items on the date display blink.
- Page 62 FOR OWNERS OF THE QUARTZ-DATE MODEL 3. Press the adjust (ADJ) button or zoom lever to change the display format. • The date format changes as follows: `Y M D M D`Y 4. Press the date button to set the date format. •...
-
Page 63: Remote Control Operation
REMOTE CONTROL OPERATION The quartz-date model can be controlled by the IR remote control RC-3 (sold separately). The remote control allows remote camera operation up to 5 meters (16.5 feet) away. NAMES OF PARTS ADVANCED OPERATION Emitter window Delay button Release button Battery chamber Continued on next page. - Page 64 FOR OWNERS OF THE QUARTZ-DATE MODEL TAKING PICTURES USING THE REMOTE CONTROL 1. Place the camera on a tripod. Point the camera so that the subject is within in the focus frames. 2. Press the drive-mode button until the remote-control indicator appears on the data panel...
- Page 65 3. Point the remote control toward the front of the camera and press either the release button (•) or the delay button (2s) to take the picture. • If the release button (•) is pressed, the self- timer/remote-control lamp on the front of the camera will blink once before the picture is taken.
- Page 66 FOR OWNERS OF THE QUARTZ-DATE MODEL • To save power, the camera automatically shuts down if the shutter is not released in approximately 8 minutes. • Under fluorescent or extremely bright lighting, or with backlit subjects, the remote control may not operate or the effective distance may be reduced. •...
- Page 67 FOCUS LOCK IN REMOTE CONTROL MODE 2. Place the subject in the focus frames and press the shutter- release button partway down to confirm the focus; the green focus lamp will glow and remain lit. • It the focus lamp does not remain lit after pressing the shutter-release button partway down, the focus was not locked.
- Page 68 FOR OWNERS OF THE QUARTZ-DATE MODEL 4.Point the remote control toward the front of the camera, press either the release button (•) or delay button (2s). • The focus lock will remain in effect after the picture is taken allowing multiple remote-control pictures to be made.
- Page 69 CHANGING THE REMOTE-CONTROL BATTERY The remote control uses a 3V lithium battery (CR2032). When pressing the remote-control buttons does not release the shutter, the battery needs to be replaced. The supplied battery should be sufficient for approximately ten years of operation. 1.
-
Page 70: Viewfinder Brightness
VIEWFINDER BRIGHTNESS The relative brightness of the AF frame or focus-area indicator can be adjusted. The brightness of the frame lines will continue to adjust automatically in relation to the new level. 1. Press and hold the AF mode button for about •... - Page 71 3. Press the adjust button or zoom lever until the desired brightness level is displayed. 4. Press the AF mode button or press the shutter-release button partway down to set the brightness level. • The data-panel display returns to normal. •...
- Page 72 MINOLTA HISTORY On February 20th, 1962, John Glenn became the first American to orbit the Earth. On board his Friendship 7 spacecraft was a Minolta Hi-matic camera to record that historic event. The 4 hour, 55 minute, and 23 second flight orbited the Earth three times at an average speed of 28,000 kph (17,500 mph).
-
Page 73: Appendix
CARE AND STORAGE OPERATING TEMPERATURE AND CONDITIONS • This camera is designed for use from -10 to 40°C (14 to 104°F). • Never leave the camera where it may be subjected to extreme temperatures such as in the glove compartment of a car. •... - Page 74 CARE AND STORAGE • When photographing in cold weather, it is recommend that you keep the camera and spare batteries inside your coat to keep them warm when you are not shooting. Cold batteries will regain some of their charge when they warm •...
- Page 75 CLEANING • Keep the AF window clean to ensure accurate focus. • If the camera body is dirty, gently wipe it clean with a soft, clean, dry cloth. • To clean the lens surface, first brush away any dust or sand then, if necessary, moisten a lens tissue with lens cleaning fluid and gently wipe the lens in a circular motion, starting from the center.
- Page 76 CARE AND STORAGE STORAGE When storing the camera for extended periods, please follow these guidelines: • Store the camera in a cool, dry, well-ventilated area away from dust and chemicals. For very long periods, place the camera in an airtight container with a silica gel drying agent.
- Page 77 CAMERA ERROR If all the indicators on the data panel blink, or the data panel is blank and the camera will not function with a recently installed battery, remove and reinsert the battery. If the camera does not resume normal operation, or the camera malfunctions repeatedly, contact an authorized Minolta Service Facility.
-
Page 78: Technical Specifications
TECHNICAL SPECIFICATIONS Camera Type: 35mm lens-shutter camera Lens: 37.5-140mm f/5.4 - 11.7 lens (140 model) 37.5-160mm f/5.4 - 12.4 lens (160 model) 6 elements in 6 groups Focusing Range: (140 model) ( W ): 0.6m - ∞ (2.0 ft - ∞) 0.6m - ∞ (2.0 ft - ∞) ( T ): 0.80m - ∞... - Page 79 Battery performance: approx. 10 rolls based on Minolta's standard test method using 24-exposure rolls with flash for 50% of the exposures. Viewfinder: Magnification: 0.38X - 1.35X (140 model); 0.38X - 1.51X (160 model) Field of View: 85% (at 3m) Eye-relief: 17.3mm from the viewfinder frame Dimensions: 110.5 x 60.5 x 46.5 mm...
- Page 80 Minolta Co., Ltd. Minolta Europe GmbH Reparatur/Repair Minolta France S.A. Minolta (UK) Limited Minolta Austria Ges. m.b.H. Minolta Camera Benelux B.V. Belgian Branch Minolta (Schweiz) AG Minolta Svenska AB Finnish Branch Minolta Portugal Limitada Minolta Corporation Head Office Los Angeles Branch Minolta Canada Inc.