EnGenius DuraFon 4X Manual
Hide thumbs
Also See for DuraFon 4X:
- Manual (29 pages) ,
- Workshop manuals (25 pages) ,
- Quick reference (4 pages)
Table of Contents
Advertisement
Quick Links
EnGenius DuraFon 4X User's Manual
Table of Contents
Safety Instructions ....................................................... 3
General Safety Instructions ...................................... 3
Product Safety Instructions ...................................... 3
Battery Safety Instructions ....................................... 5
Regulatory Information................................................. 6
Congratulations............................................................ 7
Equipment Checklist .................................................... 8
Handset Illustration ...................................................... 9
Handset Features ........................................................ 9
Handset Features ...................................................... 10
Basic Handset Features ......................................... 10
Additional Handset Features .................................. 11
Base Illustration ......................................................... 13
Basic Base Station Features .................................. 14
Additional Base Station Features ........................... 15
Administrator Features ........................................... 15
Charger Illustration..................................................... 17
Charger Features....................................................... 18
Getting Started........................................................... 19
Base Station Installation......................................... 19
Handset and Charger Installation ........................... 20
Basic Operations........................................................ 21
Operation Modes.................................................... 21
A. Base Operation Modes................................... 21
B. Handset Operation Modes.............................. 21
Making a Telephone Call........................................ 22
Making a 2-Way/ Intercom Call .............................. 22
Handset to Handset Calls ................................... 23
Making a Broadcast................................................ 23
Redial ..................................................................... 24
Receiving a Telephone Call ................................... 24
Receiving an Intercom Call .................................... 24
Ending a Call .......................................................... 25
Adjusting Receiver (Earpiece) Voice Volume ......... 25
Placing a Call On Hold ........................................... 25
Mute ....................................................................... 25
Do Not Disturb (Silent Ring) ................................... 25
Key Guard .............................................................. 26
To View Missed Call(s)........................................... 26
Advertisement
Table of Contents

Related Manuals for EnGenius DuraFon 4X


Summary of Contents for EnGenius DuraFon 4X
-
Page 1: Table Of Contents
EnGenius DuraFon 4X User’s Manual Table of Contents Safety Instructions ............3 General Safety Instructions ........3 Product Safety Instructions ........3 Battery Safety Instructions ........5 Regulatory Information..........6 Congratulations............7 Equipment Checklist ............ 8 Handset Illustration ............9 Handset Features ............ - Page 2 Battery Recharge and Replacement ...... 26 Advanced Operations ..........27 Handset Registration..........27 Advanced Registration: .......... 27 Handset Group Subscription ........28 Call Transfer............29 3-Way Conferencing..........29 Call Forwarding ............30 Auto-Attendant (AA) ..........31 Call Waiting ............32 AA Configuration by Administrator ......
-
Page 3: Safety Instructions
Safety Instructions Caution: Your wireless telephone gives you freedom and flexibility to stay in touch while you move around. However, the safe and responsible use of the phone depends entirely on you. When using your phone equipment, safety instructions should be followed to avoid the risks of fire, electric shock, injury to person, and damage to property. - Page 4 1. Read and understand all instructions. 2. Follow all warnings and instructions including those marked on the product. 3. Changes or modifications to this product not expressively approved by the manufacturer will void the warranty and the FCC authorization to operate the equipment. Use only manufacturer provided accessories.
-
Page 5: Battery Safety Instructions
Battery Safety Instructions 1. Use only manufacturer approved Lithium-Ion (Li-Ion) rechargeable batteries and charger. Do not use other types of rechargeable batteries or non-rechargeable batteries. The batteries could short-circuit, and the battery enclosure may be damaged causing a hazardous condition. 2. -
Page 6: Regulatory Information
Regulatory Information DuraFon 4X FCC ID: NI3-SP922 IC: 3616A-SP922 This device complies with Part 15 of the FCC Rules. Operation is subject to the following two conditions: 1) this device may not cause harmful interference, and 2) this device must accept any interference received, including interference that may cause undesired operation. -
Page 7: Congratulations
2-way radios. Members of work group(s) can be in contact with their co-workers while leaving phone lines available for incoming and outgoing calls. Handsets that are within range of each other can use the 2-way feature even while out of range of the base station. DuraFon 4X can support up to 90 handsets. -
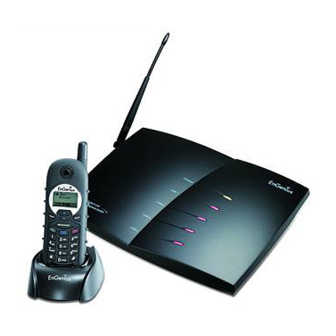
Page 8: Equipment Checklist
Equipment Checklist In a Base + Handset package, please find the following components: Base Station x 1 Base Antenna x 1 Base AC/DC Adaptor x 1 Handset x 1 Low Profile Handset Antenna x 1 Optimal Performance Handset Antenna x 1 1700mA Li-ion Battery Pack x 1 Charger x 1 Charger AC/DC Adaptor x 1... -
Page 9: Handset Illustration
Handset Illustration Antenna Receiver 4-line LCD Battery pack Travel charger Headset jack jack (2.5mm) -
Page 10: Handset Features
Handset Features Basic Handset Features 1. 4-line LCD (Liquid Crystal Display) a. The LCD display has LED (Light Emitting Diode) for backlighting. b. The 1 line of LCD consists of icons. c. Icons explanation from left to right (1) RSSI (Receive Signal Strength Indicator) During a call, the number of bars is proportional to the radio signal... -
Page 11: Additional Handset Features
b. Intercom calls are digital, full duplex, and are conducted without the assistance from the base. 5. BROADCAST a. Half duplex broadcasting to handsets for immediate announcement 6. Left/Right Soft Keys a. Make menu selection. 7. Up( ) /Down( ) Scrolling Keys a. - Page 12 6. DND (Do Not Disturb, i.e., Silent Ring) 7. Three Call Logs a. Called Log: Stores 10 phone numbers (up to 28 digits each) dialed most recently. Can perform last-number redial on all 10 numbers. b. Received Call Log: 10 entries (14-digit phone number, 14- character names, and time stamp), needs Caller ID service from local telephone company.
-
Page 13: Base Illustration
16. Call Timer a. Display call time duration for current call during and immediately after the call 17. Text Messaging: a. Editing Message: from a handset, users can edit the short text message for up to 50 characters. Up to 5 messages can be edited and stored. -
Page 14: Basic Base Station Features
Basic Base Station Features 1. Antenna a. The antenna port has a reverse thread connector; to remove antenna or cable, turn clockwise; to install, turn counterclockwise. Improper installation may damage the connector b. When using an outdoor antenna, locate the antenna (not the base station itself) as high as possible for a clear transmission path. -
Page 15: Additional Base Station Features
b. Reset button is indented to prevent accidental system reset. c. All handsets (including administrator) and additional base(s) need to be re-registered after a base station reset. 4. Registration Key (REG) Enters registration mode along with handset, assigns handset ID (10-99). 5. - Page 16 3. Call Transfer to PBX Extension a. When install the DuraFon 4X is installed behind a PBX system, you can pre-program the feature code of call transfer function. b. Need to adjust the Flash time to match your PBX setting.
-
Page 17: Charger Illustration
Charger Illustration DC In Spare Battery Charging Slot Spare Battery Charging Indicator Handset Charging Slot... -
Page 18: Charger Features
Charger Features 1. DC In Connects to Charger AC Adaptor. 2. Handset Charging Slot a. Charge handset battery when handset is placed in cradle. b. Refer to the handset LCD for charging status (1) Charging: LCD screen showed “Charging” (2) Fully Charged: battery status bar stands still and the LCD screen would display “Fully Charged”... -
Page 19: Getting Started
3. Plug one end of the phone cord into one of the 4 phone jacks marked L1 – L4 and plug the other end into the telephone outlet. Since DuraFon 4X has the built-in “line detection” feature, it is okay to plug in the phone jacks in random order. -
Page 20: Handset And Charger Installation
company automatically finds a free line. In a hunt group, the Call Waiting and the Caller ID with Call Waiting (or called Type II Caller ID) features are unnecessary because a 2 call will come in on a separate line, rather than on the same line. For call coming in on a separate line, the phone system’s built-in Call Waiting feature will alert the user and allow the user to toggle between 2 lines. -
Page 21: Basic Operations
Basic Operations Operation Modes Both the base station and handset have levels of operation at which time only certain procedures of functions can be performed. A. Base Operation Modes 1. IDLE mode- this is the default mode. The intercom, broadcast, and volume keys are active in IDLE mode. -
Page 22: Making A Telephone Call
Main menu Sub-menu 1.Dialed 1.KeyGuard 2.Received 3.Missed 2.PhoneBook 1.Ring Volume 3.Call Logs 2.Ring Tone 3.Key Volume 4.Key Tone 4.Sound 1.Dial Prefix 2.Group Select 3.Forwarding 4.Clear 5.Settings 5.Naming 6.Contrast 7.Backlight 6.Registration 8.Line Select 9.PBX Options 7.Text Message 0.Language 8.Unused Not Applicable 1.Auto Attndnt 9.Admin 2.System... -
Page 23: Handset To Handset Calls
The EnGenius Industrial Cordless Phone System offers private, Intercom/ 2-way radio calls independent of the base station. Intercom/ 2-way communication can be placed from handset to handset. Handset to Handset Calls 1. Press Intercom key followed by a two-digit handset ID or Group ID. -
Page 24: Redial
You can press the SILENT (Left) soft key if you choose to ignore the call. The SILENT key operation is valid only for the current call. You can silent all broadcast by turning off the ringer to set auto-silence from the handset menu. Redial 1. -
Page 25: Ending A Call
Ending a Call To end a telephone or intercom call, press END key or place handset into charging cradle. Adjusting Receiver (Earpiece) Voice Volume 1. Voice volume can only be adjusted during a call. 2. There are 6 levels of volume selections. Default as volume 4. scrolling key to adjust. -
Page 26: Key Guard
off the ringer until it is turn on again from the menu. 2. For temporary silencing the ringer when an incoming call arrives, press SILENT (Left) soft key. Key Guard 1. To prevent accidental dialing, you can press Menu (Right) soft key, then press “1”... -
Page 27: Advanced Operations
Advanced Operations Handset Registration 1. If your handset is purchased as part of a system, it has been pre- registered with the base station at the factory. 2. If the Handset ID reads “00,” that means it is a new handset or the ID has been erased. -
Page 28: Handset Group Subscription
2. Administrator handsets can perform advanced registration function as long as in range with the base station. The base station does not need to be in registration mode. 3. De-register a Handset ID by administrator: a. Make sure that the administrator handset is within the coverage range of the base station. -
Page 29: Call Transfer
3. Group Selections: a. Press handset Menu-5 to enter the handset setting menu b. Press number “2”, handset enters group select menu. c. Press soft key and enter two-digit group number (01- 09) to add membership in a group. d. Repeat for all desired groups. e. -
Page 30: Call Forwarding
c. Two handsets and one phone line can now talk simultaneously. Any one party can drop out of the 3- way conferencing, leaving the remaining two parties still in conversation. 5. 3-Way Conferencing with a Second Phone Line: a. Press number “1” and enter a phone number to call another phone line. -
Page 31: Auto-Attendant (Aa)
4. The calls can be routed to either a Handset ID or an extension number of the wired PBX system. There can be only one operator for the AA, which is either an DURAFON 4X handset or the wired PBX operator. -
Page 32: Call Waiting
Call Waiting 1. A handset, while talking on one phone line, can be informed of the arrival of a new incoming phone call. 2. For example, suppose that Handset 15 is talking on Line 1. When a new call comes in on, say, Line 4, and the caller enters extension number “15”... -
Page 33: Line Dedication
iv. Press “4” to turn AA On/Off: This can be done separately for each phone line by using Up/Down arrows to scroll through Line 1 to Line 4, and press “On” or “Off” soft key to urn AA On/Off. When AA is turned off, users will be asked whether to dedicate a particular to either a handset or a calling group. -
Page 34: Change System Settings By Administrator
If set to On, when pressing TALK or entering a phone number followed by pressing TALK key, the handset LCD display will show “Select Line” followed by available lines (1-4). Select from one of the available lines i.e. press “1” to select line 1 and press “2” to select line 2. - Page 35 Phone Book mode. b. Press a key that corresponds to the first character of the name you are looking for. c. For example, you are looking for “EnGenius”, and then press the number “3” once. d. Use scrolling key to locate the exact record you are looking for.
- Page 36 scrolling key or the alphabetical search method to locate the record to be erased or edited. b. Press OPTION soft key to enter editing menu. c. Press “1” to erase the desinated phone entry. d. LCD shown “Are you sure?” Press to double confirm your change.
- Page 37 Menu Operations Main menu Sub-menu 1.Dialed 1.KeyGuard 2.Received 3.Missed 2.PhoneBook 1.Ring Volume 2.Ring Tone 3.Call Logs 3.Key Volume 4.Key Tone 4.Sound 1.Dial Prefix 2.Group Select 3.Forwarding 4.Clear 5.Settings 5.Naming 6.Contrast 7.Backlight 6.Registration 8.Line Select 9.PBX Options 7.Text Message 0.Language 8.Unused Not Available 1.Auto Attndnt 9.Admin...
- Page 38 d. The two-digit index on the upper right corner of the LCD display shows the location in ascending order, with 01 being the most recent call. e. While viewing any of the three call logs, press DIAL (Left) soft key to dial the phone number.
- Page 39 to scroll through options: On, Off, and 8 Seconds. Default = 8 seconds, meaning that the backlight is always on. The 8-second option will turn off the backlight after 8 seconds of inactivity. ii. Press SAVE (Left) soft key to save setting. h.
- Page 40 Press OPTION soft key to erase or edit the current message: (1) Press “1” and confirm to erase message. Subsequent messages will be moved up in the Outbox. (2) Press “2” to edit message. Follow the instructions above for entering a new message. g.
-
Page 41: Technical Specifications
Technical Specifications Electrical Specifications Base Station Portable Handset Frequency 902-928 MHz 902-928 MHz RF Power Peak: 708 mW Peak: 708 mW Average: 304 mW Average: 76 mW Channel Spacing 200 kHz 200 kHz Number of Channels 128 Modulation MSK Multiple Access Frequency Hopping TDMA Frequency Hopping TDMA Frequency Hopping 100 per second 100 per second... - Page 42 Weight 32 ounces 6.17 ounces Notes: 1. NA = Not Applicable. 2. The manufacturer reserves the right to change designs and specifications without notice.