
Related Manuals for Husqvarna 115 127127 IR


Summary of Contents for Husqvarna 115 127127 IR
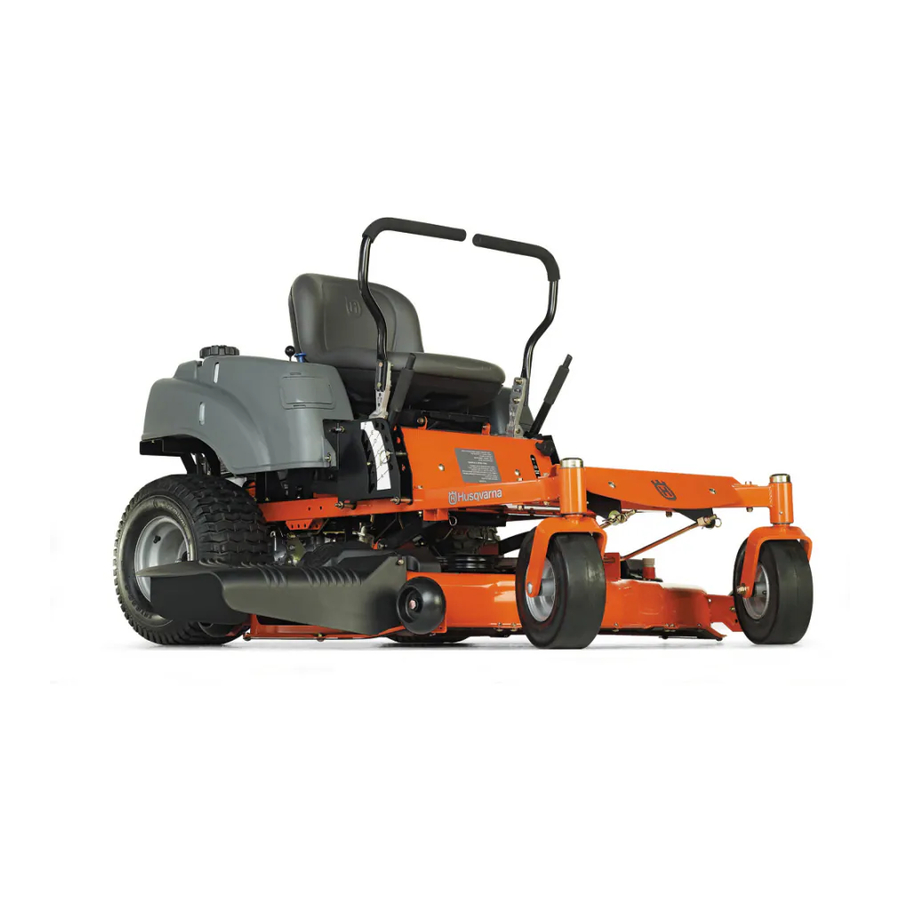
- Page 1 Operator Manual RZ4219 / 965881101 RZ4620 / 965881201 RZ5424 / 965881301 RZ5422 / 965881401 RZ4619 / 965921501 Please read the operator’s manual carefully and make sure you understand the instructions before using the machine. English...
- Page 2 In order to implement improvements, specifications and designs can be altered without prior notification. Note that no legal demands can be placed based on the information contained in these instructions. Use only original parts for repairs. The use of other parts voids the warranty. Do not modify or install non-standard equipment to the unit without consent from the manufacturer.
-
Page 3: Table Of Contents
INTRODUCTION ... 5 Driving and Transport on Public Roads ... 5 Towing... 5 Operating ... 5 Good Service ... 6 Manufacturing Number ... 6 SyMBOlS AND DECAlS ... 7 SAfETy ... 9 Safety Instructions ... 9 Personal Safety Equipment ... 11 Slope Operation ... - Page 4 WARNING! Failure to follow cautious operating practices can result in serious injury to the operator or other persons. The owner must understand these instructions, and must allow only trained persons who understand these instructions to operate the mower. Each person operating the mower must be of sound mind and body and must not be under the influence of any mind altering substance.
-
Page 5: Introduction
Congratulations Thank you for purchasing a Husqvarna ride-on mower. This machine is built for superior efficiency to rapidly mow primarily large areas. A control panel easily accessible to the operator and a hydrostatic transmission regulated by steering controls both contribute to the machine’s performance. -
Page 6: Good Service
Good Service Husqvarna’s products are sold all over the world and only in specialized retail stores with complete service. This ensures that you as a customer receive only the best support and service. Before the product is delivered, the machine has, for example, been inspected and adjusted by your retailer. See the certificate in the Service Journal in this operator’s manual. -
Page 7: Symbols And Decals
Choke Do not touch parts discharge deck Noise emissions to the surroundings in accordance with the European Union’s directive. The machine’s emission is stated in the chapter TECHNICAl DATA and on the decals. Only machines for European market fuel Husqvarna-... - Page 8 Whole body Severing of fingers exposure to and toes thrown objects Moving sharp blades under cover -Husqvarna SyMBOlS AND DECAlS Keep a safe distance from the machine Do not open or remove safety shields while...
-
Page 9: Safety
Operate machine only in daylight or good artificial light. • Do not operate the machine while under the influence of alcohol or drugs. SAfETy Read the operator’s manual before starting the machine Clear the area of objects before mowing 8011-512 8011-513 Husqvarna... - Page 10 • Clean any oil or fuel spillage before operating or storing the machine. • Allow machine to cool before storage. -Husqvarna SAfETy Never take passengers WARNING! Engine exhaust and certain vehicle components contain or emit chemicals considered to cause cancer, birth defects, or other reproductive system damage.
-
Page 11: Personal Safety Equipment
SAfETy Personal protective equipment Mow up and down, not side to side WARNING! Do not drive up or down hills with slopes greater than 10 degrees. And do not drive across any slopes. 8011-670a 6003-004 Husqvarna... - Page 12 • Use extra care when approaching blind corners, shrubs, trees, or other objects that may block your view of a child. -Husqvarna SAfETy Be extra cautious when driving on slopes Never allow children to operate the machine Keep children away from work area...
-
Page 13: Safe Handling Of Gasoline
Never fill the fuel tank indoors WARNING! The engine and the exhaust system become very hot during operation. There is risk for burns if touched. Allow engine and exhaust system to cool at least two (2) minutes before refueling. 8011-516 Husqvarna... -
Page 14: General Maintenance
Ensure that nuts and bolts, especially the fastening bolts for the blade attachments, are properly tightened, torqued and that the equipment is in good condition. -Husqvarna SAfETy Never drive the machine in an enclosed space WARNING! Use protective glasses for maintenance work. - Page 15 Allow the machine to cool before putting it in storage. SAfETy Do not smoke when performing maintenance on the battery. The battery can explode and cause serious injury/damage. Risk of sparking 6003-009 8009-728 Husqvarna...
-
Page 16: Transport
Do not lift! The machine is not intended to be lifted by hand. -Husqvarna SAfETy Regularly clean deck WARNING! Escaping hydraulic oil under... -
Page 17: Controls
This operator’s manual describes the Husqvarna Zero Turn Rider. The rider is fitted with either a Kohler or Briggs & Stratton four-stroke overhead valve engine developing 19-24 horse power*. Control Locations Motion control levers Parking brake Throttle control Blade switch... -
Page 18: Steering Control Levers
Use extra care when using this maneuver. If the steering controls are in uneven positions when standing still or do not fit in the slots for moving the controls outward, they can be adjusted. -Husqvarna CONTROlS Steering controls WARNING! -
Page 19: Parking Brake
In order to engage the mower deck, pull the knob out; the mower blades are disengaged when the knob is depressed. CONTROlS Parking brake released CHOKE Throttle control CHOKE Blade switch 8058-020 BLADES ON DOWN BLADES OFF 8052-001 BLADES ON DOWN BLADES OFF 8052-001 Husqvarna-... -
Page 20: Ignition Switch
They are accessed by tilting the seat forward. They are flat pin fuses of the same type used in automobiles. There are two fuses with ratings and functions: 20 Amp Primary fuse 7.5 Amp Mower deck coupling -Husqvarna CONTROlS CHOKE Ignition switch CHOKE... -
Page 21: Fuel Tank
Use fresh fuel the next season. See Storage Instructions for additional information. Never use engine or carburetor cleaners in the fuel tank or permanent damage may occur. 8058-021 Husqvarna-... -
Page 22: Fuel Shut Off Valve
In order to obtain an even cutting height, it is important that the air pressure in all tires is 15 psi / 103 kPa / 1 bar. -Husqvarna CONTROlS Fuel shut off valve in the CLOSED position The mower deck’s lifting lever... -
Page 23: Hour Meter
Rotate the knob clockwise (as viewed from the operation position) to increase the speed on the left lever. Rotate counterclockwise to decrease speed. CONTROlS Lengthways adjustment CHOKE Hour meter Tracking knob 8058-023 BLADES ON DOWN BLADES OFF 8052-001 8058-020 Husqvarna-... -
Page 24: Operation
IMPORTANT INFORMATION When control levers are in the reverse position they return to neutral when released. This may cause the mower to suddenly stop. -Husqvarna OPERATION Steering To move forward and backward The direction and speed of the mower’s movements is effected by the movement of the control lever(s) on each side of mower. -
Page 25: Before Starting
Disengage the mower blades by pressing the blade switch downwards. OPERATION Mower deck lifting lever Pull parking brake upwards to activate. CHOKE Blade switch 8058-019 8058-020 BLADES ON DOWN BLADES OFF 8052-001 Husqvarna-... - Page 26 Move the steering controls outward to the locked (outer) neutral position. Move the throttle to the middle position. If the engine is cold, the choke control should be pulled up. -Husqvarna OPERATION Place controls in neutral position CHOKE Set the throttle...
- Page 27 If your battery is too weak to start the engine, it should be recharged. (See “Battery” in the Maintenance Section.) OPERATION Turn to the start position Return to run position CHOKE Set the engine speed STOP 8050-780 STOP 8050-781 BLADES ON DOWN BLADES OFF 8056-001 Husqvarna-...
-
Page 28: Jumper Cables
To remove cables, reverse order • Remove BLACK cable first from chassis and then from the fully charged battery. • Remove RED cable last from both batteries. -Husqvarna OPERATION Jumper cable connection 8011-642... -
Page 29: Running
Push the release button on the cutting height lever and move lever to the pin, release the button. Set the cutting height with the cutting height adjustment lever. OPERATION Parking brake released Secure selected cutting height Mower deck lifting lever 8058-020 8058-024 8058-019 Husqvarna-... -
Page 30: Operating On Hills
Pull the control levers back to the center of the mower and press forward to regain forward motion. • Make all turns slowly. -Husqvarna OPERATION CHOKE Set blade engagement and throttle control Place controls in neutral position Parking brake released... -
Page 31: Mowing Tips
Clear the lawn of stones and other objects that can be thrown out by the blades. Mowing pattern WARNING! Never drive the rider on terrain that slopes more than 10 degrees. Mow slopes up and down, never side to side. Avoid sudden directional changes. 8011-603 Husqvarna-... -
Page 32: Stopping The Engine
IMPORTANT INFORMATION Leaving the ignition switch in any other position than “OFF” will cause the battery to be discharged. -Husqvarna OPERATION CHOKE Disengage the mower deck and move throttle to minimum Mower deck lifting lever... -
Page 33: Manual Transport
WARNING! Make no adjustments without: • the engine stopped, • the ignition key removed, • the parking brake activated OPERATION Bypass linkage, EZT engaged Bypass linkage, EZT locked in the bypass position 8058-032 8058-032 Husqvarna-... -
Page 34: Maintenance
Clean the engine’s cooling air intake 2) Clean the air cleaner’s pre-filter 2) (foam) Clean the air cleaner’s filter cartridge 2) (paper filter) Check/adjust the parking brake Inspect muffler/spark arrester -Husqvarna MAINTENANCE Performed by authorized service workshop. Daily Before After ●... - Page 35 Performed by authorized service workshop. Weekly Maintenance interval least in hours once each After year ● ● ● ● ● ● ● ● ● ♦ ♦ In dusty 100 300 ● ● ● ● ● ● ● ● ♦ ♦ Husqvarna-...
-
Page 36: Battery
Reconnect RED battery cable to positive (+) battery terminal with bolt and hex nut. Connect BlACK grounding cable to negative (-) battery terminal with remaining hex bolt and hex nut Replace terminal boot cover. lower seat -Husqvarna MAINTENANCE STANDARD BATTERy 12.6V 12.4V 12.2V 12.0V... -
Page 37: Ignition System
IMPORTANT INFORMATION In order to be able to drive, the driver must sit in the seat and release the parking brake before the steering controls can be moved into the neutral position, otherwise the engine will stop. 8011-054 8058-026 Husqvarna-... -
Page 38: Engine Cooling Air Intake
Check that the choke cable is mounted in the upper lever, see illustration. Push the choke cable’s outer casing as far to the left as possible and tighten the clamping screw. -Husqvarna MAINTENANCE Check and clean the cooling air intake Adjusting the throttle cable... -
Page 39: Air Filter
Do not use compressed air to clean the air filter. Do not wash the paper filter. Do not oil the paper filter. Do not tap filter to clean this could cause damage to the sealing. Air filter 8011-736 8011-737 Husqvarna-... -
Page 40: Kohler Engine - 24 Hp
Reinstall the precleaner (if equipped) over the paper air cleaner element and install on the base. Secure with the latch. Close and latch the door. -Husqvarna MAINTENANCE IMPORTANT INFORMATION Operating the engine with loose or damaged air cleaner components could allow unfiltered air into the engine causing premature wear and failure. -
Page 41: Briggs & Stratton Engine - 19 Hp
IMPORTANT INFORMATION Do not use compressed air to clean the air filter. Filter should be assembled dry and not be oiled. MAINTENANCE Pull up on handle Remove air filter element 8009-406 8009-409 Husqvarna-... - Page 42 Align the tabs on the cover with the slots in the housing and replace air filter cover. Pull the handle outwards. Secure the handle in the air filter cover and press inwards to close. -Husqvarna MAINTENANCE Remove precleaner Align the tabs Close the cover...
-
Page 43: Briggs & Stratton Engine - 22 Hp
IMPORTANT INFORMATION Operating the engine with loose or damaged air cleaner components could allow unfiltered air into the engine causing premature wear and failure. MAINTENANCE Loosen cover screws Remove filter Reinstall filter 8009-406 8019-014 8019-015 Husqvarna-... -
Page 44: Fuel Filter
Remove the screws and open the pump, no hoses need be removed. The filter can be cleaned with a brush if necessary. Replace the filter on the console. -Husqvarna MAINTENANCE Fuel filter Fuel pump air filter 8011-468 8009-147... -
Page 45: Tire Pressures
Visually check that no damage is found on the lever, cables, or switch belonging to the parking brake. Perform a standstill test and check that there is sufficient braking action. To adjust the parking brake, contact the Husqvarna service workshop. IMPORTANT INFORMATION The machine must be absolutely standing still when applying the parking brake. -
Page 46: V-Belts
Double check belt routing to make sure it the decal affixed to the deck, and the belt does not have any twist. Correct as needed. Replace belt shields on both mandrel housings and secure with fasteners. -Husqvarna MAINTENANCE Belt Shields Removing deck belt matches 1. -
Page 47: Cutting Blades
Install and tighten blade bolt securely. Torque blade bolt to 90 ft/lbs (122 Nm). IMPORTANT INFORMATION Special blade bolt is heat treated. Replace with a Husqvarna bolt if required. Do not use lower grade hardware than specified. MAINTENANCE Check the blades 1. -
Page 48: Adjusting The Mower Deck
NOTE: This will place the mower deck in a base measurement position. Additional adjustment may be required to achieve desired cut for the type of grass or conditions being mowed. -Husqvarna MAINTENANCE Lift link adjustment nut Deck front adjustment nuts... -
Page 49: Anti-Scalp Rollers
The rollers should be approximately ¼" (6.5 mm) from ground. Do not adjust the rollers to support the deck. IMPORTANT INFORMATION The anti-scalp rollers must not be used for gauge wheels or the roller and deck may be damaged. MAINTENANCE Anti-scalp rollers 8050-830 Husqvarna-... -
Page 50: Cleaning
Pull the wheel out of the yoke and take care of the spacers. Install in reverse order. Tighten caster bolt. Hardware Check daily. Inspect the entire machine for loose or missing hardware. -Husqvarna MAINTENANCE Clean regularly 1. Caster yoke 2. Caster bolt 3. Caster long spacer 4. -
Page 51: Lubrication
Should this happen, attempt to clean them with spirits. If the belt continues to slip after cleaning, it must be replaced. Gasoline or other petroleum products must not be used to clean belts. lubricate with oil can level check Husqvarna- 8050-832... -
Page 52: Cables
If a grease gun without a rubber hose is used, the foot plate must be removed. lubricate with a grease gun, one zerk, 2-3 strokes. Use only good quality bearing grease. -Husqvarna lUBRICATION Lubricating the front wheels Deck spindle 8011-731... -
Page 53: Deck Outer Spindle
Avoid skin contact; wash with soap and water in case of spills. lUBRICATION Deck outer spindle (with belt shield removed) Changing the oil filter 8061-025 8011-734 Husqvarna-... -
Page 54: Engine Oil Levels
Transmission The transmission is maintenance free and there is no need for level checks or oil changes. If a leak occurs, replace the unit or contact your Husqvarna dealer. -Husqvarna lUBRICATION Remove the dipstick The dipstick markings... -
Page 55: Troubleshooting
• Water in fuel • Clogged air filter • Clogged air filter • fouled spark plugs • Carburetor incorrectly adjusted • Air trapped in hydraulic system • Blades are loose • Blades are incorrectly balanced • Engine is loose Husqvarna-... - Page 56 Problem Engine overheats Battery not charging The machine moves slowly, unevenly, or not at all Mower deck not engaging Transaxle leaks oil Uneven mowing results -Husqvarna TROUBlESHOOTING Cause • Clogged air intake or cooling fins • Engine overloaded • Poor ventilation around engine •...
-
Page 57: Storage
Service When ordering spare parts, please specify the purchase year, model, type, and serial number. Always use genuine Husqvarna spare parts. An annual check-up at an authorized service workshop is a good way to ensure that your machine performs its best the following season. -
Page 58: Schematics
3. MOTION CONTROL LEVERS OUT 4. PTO IN OFF POSITION SOLENOID BRAKE SW. RIGHT MOTION CONTROL LEVER LEFT MOTION CONTROL LEVER SEAT SW. ELECTRIC CLUTCH -Husqvarna SCHEMATICS ENGINE PIGTAIL 7.5 AMP PTO SW. ENGINE GROUND KEY SWITCH POSITIONS POSITION 1 - OFF... -
Page 59: Technical Data
Air cooled Standard Electric Hydrostatic transaxles Dual levers, foam gripped 0-6 mph / 0-9.7 km/h 0-3.5 mph / 0-5.6 km/h Mechanical parking brake 13 x 5.0-6, 4 ply 18 x 7.5-8 15 PSI / 103 kPa / 1 bar Husqvarna-... - Page 60 Weight Base Machine length Base Machine Height Base Machine Width Overall Width, Chute Up Overall Width, Chute Down -Husqvarna TECHNICAl DATA RZ4219 / 965881101 42" / 107cm 1.5 - 4" / 3.8 - 10.2 cm 21" / 53.3 cm Standard...
- Page 61 Air cooled Standard Electric Hydrostatic transaxles Dual levers, foam gripped 0-6 mph / 0-9.7 km/h 0-3.5 mph / 0-5.6 km/h Mechanical parking brake 13 x 5.0-6, 4 ply 18 x 9.5-8 15 PSI / 103 kPa / 1 bar Husqvarna-...
- Page 62 Weight Base Machine length Base Machine Height Base Machine Width Overall Width, Chute Up Overall Width, Chute Down -Husqvarna TECHNICAl DATA RZ5424 / 965881301 54" / 137cm 1.5 - 4" / 3.8 - 10.2 cm 18¼" / 46.4 cm Standard...
- Page 63 Air cooled Standard Electric Hydrostatic transaxles Dual levers, foam gripped 0-6 mph / 0-9.7 km/h 0-3.5 mph / 0-5.6 km/h Mechanical parking brake 13 x 5.0-6, 4 ply 18 x 7.5-8 15 PSI / 103 kPa / 1 bar Husqvarna-...
- Page 64 Weight Base Machine length Base Machine Height Base Machine Width Overall Width, Chute Up Overall Width, Chute Down -Husqvarna TECHNICAl DATA RZ4619 / 965921501 46" / 117cm 1.5 - 4" / 3.8 - 10.2 cm 22¾" / 57.8 cm Standard...
-
Page 65: Accessories
Metric Standard Hardware Grade 10.9 ft./lbs 18.8 35.2 62.2 9 ft/lb (12 Nm) 18 ft/lb (25 Nm) 33 ft/lb (44 Nm) 52 ft/lb (70 Nm) 80 ft/lb (110 Nm) flangelock Screw w/flangelock Nut ft./lbs 1912 Grade 12.9 ft./lbs 21.8 43.5 1205 Husqvarna-... -
Page 66: Conformity Certificates
Engine manual. Take care of them as they are valuable documents. CE requirements The Declaration of Conformity is included in the literature packet. When this product is worn out and no longer used, it should be returned to the reseller or other party for recycling. -Husqvarna... -
Page 67: Warranty
To obtain the benefit of this warranty, the product believed to be defective must be delivered to an authorized Husqvarna retailer in a timely manner, no later than thirty (30) days from date of the operational problem or failure. The product must be delivered at the owner’s expense. -
Page 68: Service Journal
The need and advantages of leaving the machine for service every 300 hours. The effects of service and maintaining a service journal on the machine’s resale value. Application areas for mulching. 15. fill in the sales papers -Husqvarna SERVICE JOURNAl Date, mtr reading, stamp, sign □ □ □... - Page 69 SERVICE JOURNAl Action Date, mtr reading, stamp, sign After the First 5-8 Hours □ 1. Change engine oil. Husqvarna-...
- Page 70 3. Check the tire pressures. 4. Check battery with cables. 5. lubricate according to lubrication chart. 6. Check/clean the engine’s cooling air intake. 7. Clean the air cleaner’s prefilter (foam). -Husqvarna SERVICE JOURNAl Date, mtr reading, stamp, sign □ □...
- Page 71 (shorter intervals for dusty operating conditions). 3. Change engine oil. 4. lubricate according to lubrication chart. 5. Check/adjust the parking brake. 6. Change hydraulic pump oil and filter. SERVICE JOURNAl Date, mtr reading, stamp, sign □ □ □ □ □ □ Husqvarna-...
- Page 72 5. Replace the fuel filter. 6. Check V-belts. 7. Check tighten caster wheel axle bolts (every 200 hours). 8. Change the air filter’s paper cartridge. 9. Change hydraulic pump oil and filter. (200 hours) -Husqvarna SERVICE JOURNAl Date, mtr reading, stamp, sign □ □...
- Page 73 4. Check/adjust the mower deck. 5. Clean the combustion chamber and grind the valve seats. 6. Check the engine valve clearance. 7. Replace the air cleaner’s prefilter (foam). SERVICE JOURNAl Date, mtr reading, stamp, sign □ □ □ □ □ □ □ Husqvarna-...
- Page 74 6. Check/adjust the cutting height. 7. Check/adjust the parking brake (50 hours). 8. Clean/change the spark plugs (100 hours). 9. Change the fuel filter (100 hours). 10. Check the engine valve clearance. -Husqvarna SERVICE JOURNAl Date, mtr reading, stamp, sign □ □...
- Page 76 P/N 115 127127 IR 10/15/08...