Advertisement
Quick Links
*47327849*
47327849
Model BE467F
Deadbolt mounting screws
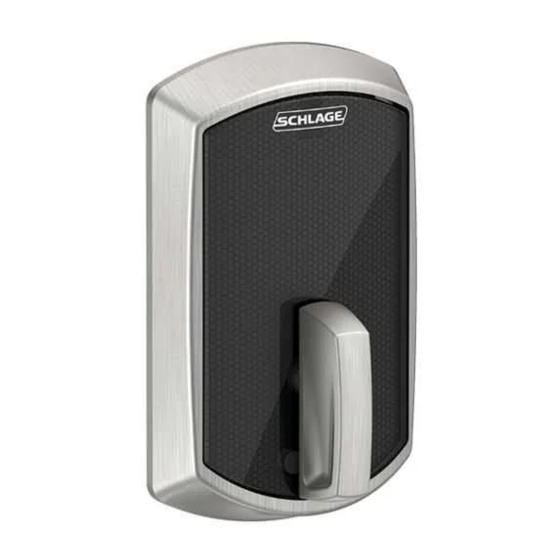
Outside assembly
Credentials not included.
Tools Needed
• Phillips screwdriver
• Tape measure
Optional
• Flathead screwdriver
• Torx™ screwdriver
ENGAGE™ WEB & MOBILE APPLICATIONS
Search for "Allegion ENGAGE" in the Apple App Store or
Google Play store to download the app.
Navigate to portal.allegionengage.com to access your
account online.
Access online interactive
instructions, user guide,
warranty, and reference
information.
alle.co/control
Schlage Control™
Smart Deadbolt
Door preparation:
See template in
package.
Contact Product Support
1-877-671-7011.
Bolt/Strike
Screws (4)
Bolt
IMPORTANT NOTES
• Install and test lock with door open to avoid being locked in
or out.
CAUTION
Use provided bolt!
Do NOT use a power drill for installation!
Check door dimensions.
See consumer.schlage.com/Service-Support for door
preparation instructions if dimensions are different.
Crossbore
Diameter
2
¹⁄₈
" (53 mm)
Installation Instructions
Cover screws
Inside cover
Inside assembly
Backset
2
³⁄₈
" OR 2
³⁄₄
"
(60 mm OR 70 mm)
1" (25 mm)
Hole
Minimum 4"
(102 mm)
Door Thickness
1³⁄₈" to 1³⁄₄"
Advertisement

Related Manuals for Schlage Control BE467F


Summary of Contents for Schlage Control BE467F
- Page 1 ENGAGE™ WEB & MOBILE APPLICATIONS Check door dimensions. Search for “Allegion ENGAGE” in the Apple App Store or See consumer.schlage.com/Service-Support for door Google Play store to download the app. preparation instructions if dimensions are different. Navigate to portal.allegionengage.com to access your account online.
-
Page 2: Install The Lock
Install the lock Install the strike into the frame. Drill pilot holes ¹⁄₈” x 3” deep, 2 places. Install bolt and strike. Optional CAUTION Use provided bolt! Adjust bolt length, if necessary. Measure the backset. If the measurement is 2³⁄₈” (60 mm) no Backset adjustment is necessary. - Page 3 Install the inside cover. Install the inside assembly on the inside of the door. CAUTION Bolt must remain retracted! Thumbturn should be pointed towards hinges, Route the cable with longer side on top. through the hole in Align the slot with the inside assembly.
- Page 4 *47327849* 47327849 Schlage Control™ Cerradura inteligente con tecnología Engage Schlage Control™ Modelo BE467F Modèle BE467F Serrure intelligente Instrucciones para la instalación dotée de la technologie Engage Instructions d’installation Tornillos de tapa Vis du couvercle Tornillos de montaje de cerradura Vis de montage du pêne dormant...
- Page 5 Verifique las dimensiones de la puerta. Preparación de la instalación Vérifiez les dimensions de la porte. Préparation de l’installation Consulte consumer.schlage.com/Service-Support para conocer las instrucciones de preparación de puerta si las Herramientas necesarias Preparación de la puerta: dimensiones son diferentes.
- Page 6 Si lo desea, cambie a una placa frontal con esquinas Instalar la unidad externa. cuadradas. Installez l’assemblage extérieur. Si désiré, installez la têtière à angle vif. Utilizar un destornillador Presionar la placa frontal PRECAUCIÓN plano para quitar la placa con esquinas cuadradas frontal.
- Page 7 Conectar el cable fuera de la unidad interna. Instalar la unidad interna del lado interior de la puerta. Branchez le câble dans l’assemblage interne. Installez l’assemblage interne à l’intérieur de la porte. PRECAUCIÓN MISE EN GARDE PRECAUCIÓN El conector encaja de Le connecteur s’insère ¡El perno debe permanecer retraído! una sola manera.
- Page 8 Asegurar la tapa interna con dos tornillos. Fixez le couvercle interne avec deux vis. Tamaño real (2) Taille réelle (2) Probar la cerradura. Testez le fonctionnement de la serrure. Extender y luego retraer el perno con un pasador interno. Faites sortir et se rétracter le pêne en utilisant la saillie interne.