
Related Manuals for Brother RJ-3230B


Summary of Contents for Brother RJ-3230B
- Page 1 User's Guide RJ-3230B RJ-3250WB © 2021 Brother Industries, Ltd. All rights reserved.
-
Page 2: Table Of Contents
Home > Table of Contents Table of Contents Before You Use Your Brother Machine ....................1 Definitions of Notes ............................2 Safety Precautions ............................3 General Precautions ............................7 Trademarks and Licenses ..........................8 Open Source Licensing Remarks ........................9 Important Note ............................. - Page 3 Enable/Disable Wi-Fi .......................... 84 Network Features............................85 Synchronize Time with the SNTP Server Using Web Based Management ........86 Brother Management Tools .......................... 89 Security ..............................90 Before Using Network Security Features ..................... 91 Configure Certificates for Device Security ....................92 Supported Security Certificate Features ....................
- Page 4 Linerless Platen Upgrade (Optional: PA-LPR-004) ................197 Single Active Docking Station (Optional: PA-CR-005)..............200 4-bay Active Docking Station (Optional:PA-4CR-003)..............207 Product Dimensions ........................... 215 Brother Help and Customer Support......................223 Compatible Operating Systems ......................... 225 ® International ENERGY STAR Qualification Statement (USA and Canada Only)........226...
-
Page 5: Before You Use Your Brother Machine
Home > Before You Use Your Brother Machine Before You Use Your Brother Machine • Definitions of Notes • Safety Precautions • General Precautions • Trademarks and Licenses • Open Source Licensing Remarks • Important Note... -
Page 6: Definitions Of Notes
Home > Before You Use Your Brother Machine > Definitions of Notes Definitions of Notes We use the following symbols and conventions throughout this User's Guide: DANGER indicates an imminently hazardous situation which, if not avoided, will DANGER result in death or serious injuries. -
Page 7: Safety Precautions
Home > Before You Use Your Brother Machine > Safety Precautions Safety Precautions Follow these guidelines to avoid the risk of smoke or heat generation, explosion, fire, or injury. DANGER Rechargeable Li-ion Battery Carefully observe the following precautions for the rechargeable Li-ion battery (hereafter referred to as “rechargeable battery”). - Page 8 WARNING Printer • DO NOT use the printer where its use is prohibited, such as on an airplane. This could affect the airplane’s equipment, resulting in an accident. • DO NOT use the printer in special environments, such as near medical equipment. Electromagnetic waves may cause the medical equipment to malfunction.
- Page 9 • DO NOT allow metal objects to come into contact with connectors and ports. • DO NOT pull on the cord when disconnecting the AC Adapter cord. Hold the plug and pull it out of the electrical outlet. • DO NOT damage, twist, severely bend, pull on, place objects on, or bind the AC Adapter and Car Adapter.
- Page 10 • DO NOT store the printer in an area exposed to high temperatures, high humidity, direct sunlight, or dust. These could cause discoloration or a malfunction. Related Information • Before You Use Your Brother Machine...
-
Page 11: General Precautions
Home > Before You Use Your Brother Machine > General Precautions General Precautions Printer • Depending on the area, material, and environmental conditions, the label may unpeel or become permanently affixed, and the color of the label may change or be transferred to other objects. Before affixing the label, check the environmental conditions and the material. -
Page 12: Trademarks And Licenses
• The Bluetooth word mark and logos are registered trademark owned by Bluetooth SIG, Inc. and any use of such marks by Brother Industries, Ltd. is under license. Other trademarks and trade names are those of their respective owners. •... -
Page 13: Open Source Licensing Remarks
Before You Use Your Brother Machine > Open Source Licensing Remarks Open Source Licensing Remarks This product includes open source software. To see the Open Source Licensing Remarks, go to your model's Manuals page on the Brother support website at support.brother.com. Related Information •... -
Page 14: Important Note
Otherwise, some of your machine's functions may not be available. • When replacing or disposing of your machine, Brother strongly recommends resetting it to its factory settings to remove all personal information. Related Information •... -
Page 15: Set Up Your Printer
Home > Set Up Your Printer Set Up Your Printer • Parts Description • Control Panel Overview • LCD Overview • LED Patterns and Indications • Install the Battery • Charge the Battery • Turn Power On/Off • Set the Language •... -
Page 16: Parts Description
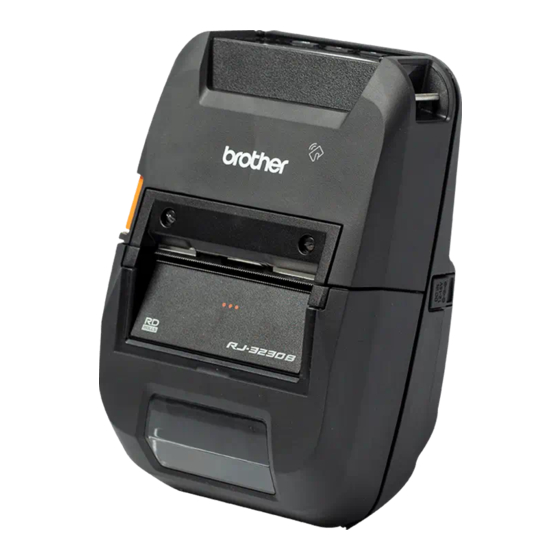
Home > Set Up Your Printer > Parts Description Parts Description 1. Upper Tear Bar 2. Lower Tear Bar 3. Paper Exit Slot 4. Roll Compartment Cover 5. Roll Cover Release Lever 6. Interface Cover 7. USB TypeC Port 8. Shoulder Strap Slots 9. -
Page 17: Control Panel Overview
Home > Set Up Your Printer > Control Panel Overview Control Panel Overview 1. LED Indicator 2. LCD (Feed) / OK Button Function Operation Feed the paper When the paper type is set to Die-cut Label or Media With Marks: Press to automatically feed the paper to the print position. - Page 18 Function Operation Turn off the printer While the printer is turned on, press the (Power) button until the message System Off appears on the LCD. (If the Auto Power Off feature is enabled in the Device Settings, the printer will turn itself off automatically after the selected period of inactivity.) Start the printer in mass storage mode If you press and hold the (Power) button while also pressing the...
-
Page 19: Lcd Overview
Home > Set Up Your Printer > LCD Overview LCD Overview 1. Update Indicates the FTP connectivity and update status. There is new data. Data update is unsuccessful. (flashing) Cannot connect to the server. (flashing) 2. Menu Key Lock Displays when the Menu Key Function in Printer Setting Tool is set to Disable. 3. - Page 20 Charging Not Charging (The battery cannot be charged if its temperature is above 104°F (40°C) or below 32°F (0°C).) No icon Charging is finished or paused 9. Battery level Indicates the remaining battery level. Full High Half 10. Printer status Displays the printer status.
-
Page 21: Led Patterns And Indications
Charging complete (when power is turned on) Power on Not charging (when power is turned on) Charging Boot mode If the indicator is lit in red (Boot mode), contact Brother Customer Service. Battery level: low (Flashing rapidly every two seconds) Sleep mode and charging... - Page 22 LED Indicator Status Database search error Battery error (if the battery is not fully charged after the specified amount of time) Set clock error Remaining battery error The peeler function cannot be used due to strong ambient light. Related Information •...
-
Page 23: Install The Battery
Home > Set Up Your Printer > Install the Battery Install the Battery Make sure you charge the Rechargeable Li-ion battery (PA-BT-006) either in the printer or on the battery charger before initial use. 1. Unlock the battery, and then remove it. 2. -
Page 24: Charge The Battery
Home > Set Up Your Printer > Charge the Battery Charge the Battery >> Tips on Using the Battery >> Charge the Battery Using a USB Cable >> Charge the Battery Using an AC Adapter (Optional) >> Charge the Battery Using a Car Adapter (Optional) >>... - Page 25 Charge the Battery Using an AC Adapter (Optional) The AC Adapter and AC power cord are optional accessories. When purchasing the printer, purchase the correct AC Adapter and AC power cord for the region where the printer will be used. 1.
- Page 26 • LCD Overview • Single Active Docking Station (Optional: PA-CR-005) • 4-bay Active Docking Station (Optional:PA-4CR-003) • Battery Charger (Optional: PA-BC-003)
-
Page 27: Turn Power On/Off
Home > Set Up Your Printer > Turn Power On/Off Turn Power On/Off • To turn on the printer, press The Power LED lights in green. • To turn off the printer, press until the message [System Off] appears on the LCD. NOTE When the printer is connected to the AC Adapter, it turns on automatically by default. -
Page 28: Set The Language
Home > Set Up Your Printer > Set the Language Set the Language 1. Press the Menu / b (Select) button to select the [Settings] menu, and then press the (Feed) / OK button. 2. Select [Language], and then press the (Feed) / OK button. -
Page 29: Load The Roll
Home > Set Up Your Printer > Load the Roll Load the Roll >> Load the Roll >> Change the Media Roll Holders to Use Custom-Size Media >> Use the Roll Holder Stop >> Tear-Off Media Load the Roll 1. Push the Roll Cover Release Lever to open the Roll Compartment Cover. a. - Page 30 5. If the LCD shows [Select Media] or [Auto Detect], select the option you want. To configure these settings later, go to the [Media]. NOTE For best performance, use genuine Brother media. • When using die-cut labels, set the paper type to Die-cut Label, and press the (Feed) / OK button after inserting the roll.
- Page 31 5. Insert the roll. For more information, , see Related Topics.. 6. Close the Roll Compartment Cover and press until it locks into place. 7. If the LCD automatically shows [Select Media] or [Auto Detect], select the option you want. To configure these settings later, go to the [Media] menu Use the Roll Holder Stop The Roll Holder Stop prevents the Roll Guides from closing.
- Page 32 1. Upper Tear Bar 2. Lower Tear Bar CAUTION Do not touch the Tear Bar blade. • The default [Tear Bar] setting is set to [Upward]. (When Linerless is set to On in the Advanced tab of the Printer Setting Tool, the [Tear Bar] setting is not available.) •...
-
Page 33: Attach The Belt Clip
Home > Set Up Your Printer > Attach the Belt Clip Attach the Belt Clip 1. Attach the Belt Clip to the Belt Clip Hook on the printer, as shown: a. Belt Clip Hook 2. Attach the Belt Clip to your belt, as illustrated. •... -
Page 34: Install Software
Home > Install Software Install Software • Install Printer Drivers and Software on a Computer • Connect the Printer to a Computer or Mobile Device... -
Page 35: Install Printer Drivers And Software On A Computer
Install Printer Drivers and Software on a Computer To print from your computer, install the printer driver and P-touch Editor on your computer. 1. In the address bar, type install.brother and download the Software/Documentation installer. http://install.brother 2. Double-click the downloaded installer, and follow the on-screen instructions. -
Page 36: Available Applications
P-touch Transfer Allows you to transfer firmware and other parameter packages to the printer. Express To download the installer, go to your model's Downloads page on the Brother support website support.brother.com P-touch Update Confirm and update software and firmware to the latest version. -
Page 37: Connect The Printer To A Computer Or Mobile Device
Home > Install Software > Connect the Printer to a Computer or Mobile Device Connect the Printer to a Computer or Mobile Device • Connect the Printer to a Computer Using a USB Cable • Connect the Printer to a Computer Using Wi-Fi •... -
Page 38: Connect The Printer To A Computer Using A Usb Cable
Home > Install Software > Connect the Printer to a Computer or Mobile Device > Connect the Printer to a Computer Using a USB Cable Connect the Printer to a Computer Using a USB Cable NOTE The USB TypeC cable is not included. 1. -
Page 39: Connect The Printer To A Computer Using Wi-Fi
Home > Install Software > Connect the Printer to a Computer or Mobile Device > Connect the Printer to a Computer Using Wi-Fi Connect the Printer to a Computer Using Wi-Fi Related Models: RJ-3250WB The following Wi-Fi connection methods are available: >>... - Page 40 b. Select Wireless LAN for Selected Interface in the General tab, and select Infrastructure for Communication Mode in Wireless Settings in the Wireless LAN tab. 5. Start the Printer Setting Tool on your Windows computer, and click the Communication Settings button. Select Wireless Settings in the Wireless LAN tab.
- Page 41 Using Infrastructure Mode and Wireless Direct Simultaneously 1. Set the printer to Infrastructure Mode and Wireless Direct. • From the LCD menu: a. Press the Menu / b (Select) button to select the [WLAN] menu, and then press the (Feed) / OK button.
-
Page 42: Connect The Printer To A Computer Using Bluetooth Connection
Home > Install Software > Connect the Printer to a Computer or Mobile Device > Connect the Printer to a Computer Using Bluetooth Connection Connect the Printer to a Computer Using Bluetooth Connection Follow the manufacturer's recommendations for your Bluetooth-equipped devices (computers and mobile devices) or Bluetooth adapter, and install any necessary hardware and software. -
Page 43: Connect The Printer To A Mobile Device Using Nfc (Android)
Home > Install Software > Connect the Printer to a Computer or Mobile Device > Connect the Printer to a Mobile Device Using NFC (Android) Connect the Printer to a Mobile Device Using NFC (Android) The default pairing settings will vary depending on your model and region. 1. -
Page 44: Create And Print Labels Using Your Computer
Home > Create and Print Labels Using Your Computer Create and Print Labels Using Your Computer • Create Labels Using P-touch Editor (Windows) • Print Labels Using P-touch Editor (Windows) • Create Labels and Print without Installing Software and Drivers •... -
Page 45: Create Labels Using P-Touch Editor (Windows)
Create Labels Using P-touch Editor (Windows) To use your printer with your computer, install P-touch Editor and the printer driver. For the latest drivers and software, go to your model's Downloads page on the Brother support website at support.brother.com. 1. Start the P-touch Editor •... -
Page 46: Main Window Of P-Touch Editor Express Mode (Windows)
Home > Create and Print Labels Using Your Computer > Create Labels Using P-touch Editor (Windows) > Main Window of P-touch Editor Express Mode (Windows) Main Window of P-touch Editor Express Mode (Windows) Express mode allows you to quickly create layouts including text and images. 1. -
Page 47: Main Window Of P-Touch Editor Professional Mode (Windows)
Home > Create and Print Labels Using Your Computer > Create Labels Using P-touch Editor (Windows) > Main Window of P-touch Editor Professional Mode (Windows) Main Window of P-touch Editor Professional Mode (Windows) Professional mode allows you to create layouts using a wide-range of advanced tools and options. 1. -
Page 48: Main Window Of P-Touch Editor Snap Mode (Windows)
Home > Create and Print Labels Using Your Computer > Create Labels Using P-touch Editor (Windows) > Main Window of P-touch Editor Snap Mode (Windows) Main Window of P-touch Editor Snap Mode (Windows) Snap mode allows you to capture all or a portion of your computer screen and print it as an image. Related Information •... -
Page 49: Print Labels Using P-Touch Editor (Windows)
Home > Create and Print Labels Using Your Computer > Print Labels Using P-touch Editor (Windows) Print Labels Using P-touch Editor (Windows) >> Express Mode >> Professional Mode >> Snap Mode Express Mode Configure the settings in the Print screen before printing. •... -
Page 50: Insert The Date And Time Into A Label
Home > Create and Print Labels Using Your Computer > Print Labels Using P-touch Editor (Windows) > Insert the Date and Time into a Label Insert the Date and Time into a Label 1. In P-touch Editor, open the label layout you want to edit. 2. -
Page 51: Create Labels And Print Without Installing Software And Drivers
Home > Create and Print Labels Using Your Computer > Create Labels and Print without Installing Software and Drivers Create Labels and Print without Installing Software and Drivers • Print Using the USB Interface (Mass Storage Mode) • Print Image Data without Using the Printer Driver... -
Page 52: Print Using The Usb Interface (Mass Storage Mode)
Home > Create and Print Labels Using Your Computer > Create Labels and Print without Installing Software and Drivers > Print Using the USB Interface (Mass Storage Mode) Print Using the USB Interface (Mass Storage Mode) The mass storage feature allows you to send a file to the printer using the USB interface, without installing the printer driver. -
Page 53: Print Image Data Without Using The Printer Driver
Home > Create and Print Labels Using Your Computer > Create Labels and Print without Installing Software and Drivers > Print Image Data without Using the Printer Driver Print Image Data without Using the Printer Driver • The mass storage mode supports the JPEG image printing. •... -
Page 54: Print Labels Using The Printer Driver (Windows)
Home > Create and Print Labels Using Your Computer > Print Labels Using the Printer Driver (Windows) Print Labels Using the Printer Driver (Windows) 1. Connect the printer to a computer. 2. Open the document you want to print. 3. Select the print command in your application. 4. -
Page 55: Print Labels Using Mobile Devices
Home > Print Labels Using Mobile Devices Print Labels Using Mobile Devices • Available Software • AirPrint Overview • Transfer Templates Created on a Computer to the Printer Using a Mobile Device... -
Page 56: Available Software
(RJ-3230B) Brother offers various applications for use with your printer, including applications to print directly ™ from your iPhone, iPad, iPod touch, and Android mobile devices. -
Page 57: Airprint Overview
Home > Print Labels Using Mobile Devices > AirPrint Overview AirPrint Overview Related Models: RJ-3250WB AirPrint is a printing solution for Apple operating systems that allows you to wirelessly print photos, email, web pages and documents from your iPad, iPhone and iPod touch without the need to install a driver. For more information, visit Apple’s website. -
Page 58: Transfer Templates Created On A Computer To The Printer Using A Mobile Device
Home > Print Labels Using Mobile Devices > Transfer Templates Created on a Computer to the Printer Using a Mobile Device Transfer Templates Created on a Computer to the Printer Using a Mobile Device Make sure Mobile Transfer Express is installed on your mobile device. Use P-touch Transfer Manager to save template data created using P-touch Editor in either BLF or PDZ format. -
Page 59: Transfer Templates To The Printer (P-Touch Transfer Manager) (Windows)
Home > Transfer Templates to the Printer (P-touch Transfer Manager) (Windows) Transfer Templates to the Printer (P-touch Transfer Manager) (Windows) • Transfer Templates to the Printer Using P-touch Transfer Manager (Windows) • Distribute Templates to be Transferred to Users Without Using P-touch Transfer Manager (Windows) -
Page 60: Transfer Templates To The Printer Using P-Touch Transfer Manager (Windows)
Home > Transfer Templates to the Printer (P-touch Transfer Manager) (Windows) > Transfer Templates to the Printer Using P-touch Transfer Manager (Windows) Transfer Templates to the Printer Using P-touch Transfer Manager (Windows) • Notes on Using P-touch Transfer Manager (Windows) •... -
Page 61: Notes On Using P-Touch Transfer Manager (Windows)
Home > Transfer Templates to the Printer (P-touch Transfer Manager) (Windows) > Transfer Templates to the Printer Using P-touch Transfer Manager (Windows) > Notes on Using P-touch Transfer Manager (Windows) Notes on Using P-touch Transfer Manager (Windows) Because some P-touch Editor functions are not available with the printer, keep the following points in mind when using P-touch Editor to create templates. -
Page 62: Transfer Templates From The Computer To The Printer (Windows)
Home > Transfer Templates to the Printer (P-touch Transfer Manager) (Windows) > Transfer Templates to the Printer Using P-touch Transfer Manager (Windows) > Transfer Templates from the Computer to the Printer (Windows) Transfer Templates from the Computer to the Printer (Windows) You can transfer templates and other data to the printer and save backups of your data on the computer. - Page 63 1. Start the P-touch Editor • Windows 10/Windows Server 2016/Windows Server 2019: Click Start > Brother P-touch > P-touch Editor, or double-click the P-touch Editor icon on the desktop. • Windows 8.1/Windows Server 2012/Windows Server 2012 R2: Click the P-touch Editor icon on the Apps screen, or double-click the P-touch Editor icon on the desktop.
- Page 64 Home > Transfer Templates to the Printer (P-touch Transfer Manager) (Windows) > Transfer Templates to the Printer Using P-touch Transfer Manager (Windows) > Transfer Templates from the Computer to the Printer (Windows) > Main Window of P-touch Transfer Manager (Windows) Main Window of P-touch Transfer Manager (Windows) 1.
- Page 65 Icon Button name Function Backup Retrieves the templates and other data saved in the printer and saves it on the computer. Open Opens the selected template. Search Allows you to search for templates or other data registered to P-touch Library. Display Style Changes the file display style.
- Page 66 Home > Transfer Templates to the Printer (P-touch Transfer Manager) (Windows) > Transfer Templates to the Printer Using P-touch Transfer Manager (Windows) > Transfer Templates from the Computer to the Printer (Windows) > Transfer Templates or Other Data from the Computer to the Printer (Windows) Transfer Templates or Other Data from the Computer to the Printer (Windows) To transfer templates from a mobile device to the printer, see Related Information.
- Page 67 4. Do one of the following: • Drag the template or other data you want to transfer and place it in the new folder. • To transfer multiple templates or other data, drag the files you want to transfer, and then place them in the new folder.
- Page 68 Data type Maximum number of Restriction details transferable items • Wide images may be cropped. • You can confirm the available space in the transfer file memory by printing the Printer Setting Report. See Available memory in the report for the available space. The available space appearing in Available memory: ****B may be different from the actual available space.
- Page 69 A confirmation message appears. • You can also transfer individual items to the printer without adding them to a folder. Select the template or other data you want to transfer, and then click Transfer. • Multiple items and folders can be selected and transferred in one operation. 8.
-
Page 70: Back Up Templates Or Other Data Saved In The Printer (Windows)
Home > Transfer Templates to the Printer (P-touch Transfer Manager) (Windows) > Transfer Templates to the Printer Using P-touch Transfer Manager (Windows) > Back up Templates or Other Data Saved in the Printer (Windows) Back up Templates or Other Data Saved in the Printer (Windows) •... -
Page 71: Delete Printer Data (Windows)
Home > Transfer Templates to the Printer (P-touch Transfer Manager) (Windows) > Transfer Templates to the Printer Using P-touch Transfer Manager (Windows) > Delete Printer Data (Windows) Delete Printer Data (Windows) To delete all templates and other data saved on the printer, do the following: 1. -
Page 72: Create Transfer Files And Transfer Package Files (Windows)
Home > Transfer Templates to the Printer (P-touch Transfer Manager) (Windows) > Transfer Templates to the Printer Using P-touch Transfer Manager (Windows) > Create Transfer Files and Transfer Package Files (Windows) Create Transfer Files and Transfer Package Files (Windows) Use P-touch Transfer Manager to save template data created using P-touch Editor in BLF or PDZ format, and transfer the files in this format to a printer from a computer or mobile device. - Page 73 Template Transfer Method File Format via Bluetooth Mass storage From a computer P-touch Transfer Express Mass storage 1. Create the template using P-touch Editor, and then transfer it to P-touch Transfer Manager. • For more information, see Related Information. • When transferring a new template, make sure you specify a Key Assign number (in P-touch Transfer Manager) that is not currently used.
-
Page 74: Distribute Templates To Be Transferred To Users Without Using P-Touch Transfer Manager (Windows)
Distribute Templates to be Transferred to Users Without Using P-touch Transfer Manager (Windows) Transfer templates to the printer using P-touch Transfer Express. To download the latest version of P-touch Transfer Express, go to your model's Downloads page on the Brother support website at support.brother.com. •... - Page 75 • Windows 7 Click Start > All Programs > Brother P-touch > P-touch Editor, or double-click the P-touch Editor icon on the desktop. P-touch Editor starts. 2. Open the template you want. 3. Click File > Transfer Template > Transfer.
- Page 76 The template is saved as a Transfer Package file (PDZ). Distribute the Transfer Package File (PDZ) and P-touch Transfer Express to Others If you already have downloaded P-touch Transfer Express, it is not necessary for the administrator to send the Transfer Express folder. In this case, you can simply move the distributed Transfer Package file to the downloaded folder, and then double-click PtTrExp.exe.
- Page 77 1. Turn on the printer. 2. Connect the printer to the computer using a USB cable. 3. Double-click the PtTrExp.exe file received from the administrator. 4. Do one of the following: • To transfer a single Transfer Package file (PDZ) within the folder containing the PtTrExp.exe file, click Transfer.
-
Page 78: Store Or Manage Templates (P-Touch Library)
Home > Store or Manage Templates (P-touch Library) Store or Manage Templates (P-touch Library) • Edit Templates Using P-touch Library (Windows) • Print Templates Using P-touch Library (Windows) • Search Templates Using P-touch Library (Windows) -
Page 79: Edit Templates Using P-Touch Library (Windows)
Windows 8.1/Windows Server 2012/Windows Server 2012 R2: Click the P-touch Library icon on the Apps screen. • Windows 7 Click Start > All Programs > Brother P-touch > P-touch Tools > P-touch Library. The main window appears. Overview of the Toolbar Icons Icon... -
Page 80: Print Templates Using P-Touch Library (Windows)
Click the P-touch Library icon on the Apps screen. • Windows 7 Click Start > All Programs > Brother P-touch > P-touch Tools > P-touch Library. The main window appears. 2. Select the template you want to print, and then click Print. -
Page 81: Search Templates Using P-Touch Library (Windows)
Windows 8.1/Windows Server 2012/Windows Server 2012 R2: Click the P-touch Library icon on the Apps screen. • Windows 7 Click Start > All Programs > Brother P-touch > P-touch Tools > P-touch Library. The main window appears. 2. Click Search. The Search dialog box appears. - Page 82 Settings Details Multiple Parameters Determines how the program searches when multiple criteria are specified. If you select AND, the program searches for files meeting all of the criteria. If you select OR, the program searches for files meeting any of the criteria.
-
Page 83: Network
Home > Network Network • Important Information for Security • Wireless Network Settings • Network Features • Brother Management Tools... -
Page 84: Important Information For Security
Home > Network > Important Information for Security Important Information for Security • The default password to manage this machine’s settings is located on the back of the machine and marked "Pwd". We recommend immediately changing the default password to protect your machine from unauthorized access. -
Page 85: Wireless Network Settings
Home > Network > Wireless Network Settings Wireless Network Settings Related Models: RJ-3250WB • Use the Wireless Network • Enable/Disable Wi-Fi... -
Page 86: Use The Wireless Network
Home > Network > Wireless Network Settings > Use the Wireless Network Use the Wireless Network Related Models: RJ-3250WB • Before Configuring Your Machine for a Wireless Network... - Page 87 Make sure you know your wireless router/access point's Network Name (SSID) and Network Key (Password). If you cannot find this information, consult the manufacturer of your wireless router/access point, your system administrator, or Internet provider. Brother cannot provide this information. Related Information •...
-
Page 88: Enable/Disable Wi-Fi
Home > Network > Wireless Network Settings > Enable/Disable Wi-Fi Enable/Disable Wi-Fi Related Models: RJ-3250WB 1. Press the Menu / b (Select) button to select the [WLAN] menu, and then press the (Feed) / OK button. 2. Do one of the following: •... -
Page 89: Network Features
Home > Network > Network Features Network Features • Synchronize Time with the SNTP Server Using Web Based Management... -
Page 90: Synchronize Time With The Sntp Server Using Web Based Management
Home > Network > Network Features > Synchronize Time with the SNTP Server Using Web Based Management Synchronize Time with the SNTP Server Using Web Based Management The Simple Network Time Protocol (SNTP) is used to synchronize the time used by the machine for authentication with the SNTP time server. - Page 91 Home > Network > Network Features > Synchronize Time with the SNTP Server Using Web Based Management > Configure Date and Time Using Web Based Management Configure Date and Time Using Web Based Management Configure date and time to synchronize the time used by the machine with the SNTP time server. This feature is not available in some countries.
- Page 92 Home > Network > Network Features > Synchronize Time with the SNTP Server Using Web Based Management > Configure the SNTP Protocol Using Web Based Management Configure the SNTP Protocol Using Web Based Management Configure the SNTP protocol to synchronize the time the machine uses for authentication with the time kept by the SNTP time server.
-
Page 93: Brother Management Tools
Home > Network > Brother Management Tools Brother Management Tools Use one of Brother's management tools to configure your Brother machine's network settings. Go to your model's Downloads page at support.brother.com to download the tools. Related Information • Network... -
Page 94: Security
Home > Security Security • Before Using Network Security Features • Configure Certificates for Device Security • Use SSL/TLS • Use SNMPv3 • Use IEEE 802.1x Authentication for a Wired or a Wireless Network... -
Page 95: Before Using Network Security Features
Home > Security > Before Using Network Security Features Before Using Network Security Features Your machine employs some of the latest network security and encryption protocols available today. These network features can be integrated into your overall network security plan to help protect your data and prevent unauthorized access to the machine. -
Page 96: Configure Certificates For Device Security
Home > Security > Configure Certificates for Device Security Configure Certificates for Device Security You must configure a certificate to manage your networked machine securely using SSL/TLS. You must use Web Based Management to configure a certificate. • Supported Security Certificate Features •... -
Page 97: Supported Security Certificate Features
Home > Security > Configure Certificates for Device Security > Supported Security Certificate Features Supported Security Certificate Features Your machine supports the use of multiple security certificates, which allows secure management, authentication, and communication with the machine. The following security certificate features can be used with the machine: •... -
Page 98: Step By Step Guide For Creating And Installing A Certificate
Certificate from a CA 1. Create a Certificate Signing Request (CSR) using Web Based Management. 2. Install the certificate issued by the CA on your Brother machine using Web Based Management. 3. Install the certificate on your computer. Related Information •... -
Page 99: Create A Self-Signed Certificate
Home > Security > Configure Certificates for Device Security > Create a Self-signed Certificate Create a Self-signed Certificate 1. Start your web browser. 2. Type "https://machine's IP address" in your browser's address bar (where "machine's IP address" is the machine's IP address). For example: https://192.168.1.2 •... -
Page 100: Create Csr And Install A Certificate From A Certificate Authority (Ca)
Home > Security > Configure Certificates for Device Security > Create CSR and Install a Certificate from a Certificate Authority (CA) Create CSR and Install a Certificate from a Certificate Authority (CA) If you already have a certificate from an external trusted CA, you can store the certificate and private key on the machine and manage them by importing and exporting. - Page 101 Home > Security > Configure Certificates for Device Security > Create CSR and Install a Certificate from a Certificate Authority (CA) > Create a Certificate Signing Request (CSR) Create a Certificate Signing Request (CSR) A Certificate Signing Request (CSR) is a request sent to a Certificate Authority (CA) to authenticate the credentials contained within the certificate.
- Page 102 10. Click Save. • Follow your CA's policy regarding the method to send a CSR to your CA. • If you are using the Enterprise root CA of Windows Server 2012/2012 R2/2016/2019, we recommend using the Web Server for the certificate template to securely create the Client Certificate. If you are creating a Client Certificate for an IEEE 802.1x environment with EAP-TLS authentication, we recommend using User for the certificate template.
- Page 103 Home > Security > Configure Certificates for Device Security > Create CSR and Install a Certificate from a Certificate Authority (CA) > Install a Certificate on Your Machine Install a Certificate on Your Machine When you receive a certificate from a CA, follow the steps below to install it into the print server: Only a certificate issued with your machine's CSR can be installed onto the machine.
-
Page 104: Import And Export The Certificate And Private Key
Home > Security > Configure Certificates for Device Security > Import and Export the Certificate and Private Key Import and Export the Certificate and Private Key Store the certificate and private key on your machine and manage them by importing and exporting them. •... - Page 105 Home > Security > Configure Certificates for Device Security > Import and Export the Certificate and Private Key > Import a Certificate and Private Key Import a Certificate and Private Key 1. Start your web browser. 2. Type "https://machine's IP address" in your browser's address bar (where "machine's IP address" is the machine's IP address).
- Page 106 Home > Security > Configure Certificates for Device Security > Import and Export the Certificate and Private Key > Export the Certificate and Private Key Export the Certificate and Private Key 1. Start your web browser. 2. Type "https://machine's IP address" in your browser's address bar (where "machine's IP address" is the machine's IP address).
-
Page 107: Import And Export A Ca Certificate
> Configure Certificates for Device Security > Import and Export a CA Certificate Import and Export a CA Certificate You can import, export, and store CA certificates on your Brother machine. • Import a CA Certificate • Export a CA Certificate... - Page 108 Home > Security > Configure Certificates for Device Security > Import and Export a CA Certificate > Import a CA Certificate Import a CA Certificate 1. Start your web browser. 2. Type "https://machine's IP address" in your browser's address bar (where "machine's IP address" is the machine's IP address).
- Page 109 Home > Security > Configure Certificates for Device Security > Import and Export a CA Certificate > Export a CA Certificate Export a CA Certificate 1. Start your web browser. 2. Type "https://machine's IP address" in your browser's address bar (where "machine's IP address" is the machine's IP address).
-
Page 110: Manage Multiple Certificates
In Web Based Management, navigate to the Certificate or CA Certificate screen to view certificate content, delete, or export your certificates. Maximum Number of Certificates Stored on Brother Machine Self-signed Certificate or Certificate Issued by a CA CA Certificate We recommend storing fewer certificates than allowed, reserving an empty spot in case of certificate expiration. -
Page 111: Use Ssl/Tls
Home > Security > Use SSL/TLS Use SSL/TLS • Introduction to SSL/TLS • Manage Your Network Machine Securely Using SSL/TLS • Print Documents Securely Using SSL/TLS... -
Page 112: Introduction To Ssl/Tls
Home > Security > Use SSL/TLS > Introduction to SSL/TLS Introduction to SSL/TLS Secure Socket Layer (SSL) or Transport Layer Security (TLS) is an effective method of protecting data sent over a local or wide area network (LAN or WAN). It works by encrypting data, such as a print job, sent over a network, so anyone trying to capture it will not be able to read it. - Page 113 Home > Security > Use SSL/TLS > Introduction to SSL/TLS > Brief History of SSL/TLS Brief History of SSL/TLS SSL/TLS was originally created to secure web traffic information, particularly data sent between web browsers and servers. For example, when you use Internet Explorer for Internet Banking and you see https:// and the little padlock icon in the web browser, you are using SSL.
- Page 114 Home > Security > Use SSL/TLS > Introduction to SSL/TLS > Benefits of Using SSL/TLS Benefits of Using SSL/TLS The primary benefit of using SSL/TLS is to guarantee secure printing over an IP network by restricting unauthorized users from reading data sent to the machine. SSL's key selling point is that it can be used to print confidential data securely.
-
Page 115: Manage Your Network Machine Securely Using Ssl/Tls
Home > Security > Use SSL/TLS > Manage Your Network Machine Securely Using SSL/TLS Manage Your Network Machine Securely Using SSL/TLS • Configure a Certificate for SSL/TLS and Available Protocols • Access Web Based Management Using SSL/TLS • Install the Self-signed Certificate for Windows users with Administrator Rights... - Page 116 Home > Security > Use SSL/TLS > Manage Your Network Machine Securely Using SSL/TLS > Configure a Certificate for SSL/TLS and Available Protocols Configure a Certificate for SSL/TLS and Available Protocols Configure a certificate on your machine using Web Based Management before you use SSL/TLS communication.
- Page 117 Home > Security > Use SSL/TLS > Manage Your Network Machine Securely Using SSL/TLS > Access Web Based Management Using SSL/TLS Access Web Based Management Using SSL/TLS To manage your network machine securely, use Web Based Management with the HTTPS protocol. •...
- Page 118 Home > Security > Use SSL/TLS > Manage Your Network Machine Securely Using SSL/TLS > Install the Self-signed Certificate for Windows users with Administrator Rights Install the Self-signed Certificate for Windows users with Administrator Rights The following steps are for Microsoft Internet Explorer. If you use another web browser, consult the documentation for your web browser to get help with installing certificates.
- Page 119 13. Click Yes, if the fingerprint (thumbprint) is correct. 14. Click OK. Related Information • Manage Your Network Machine Securely Using SSL/TLS...
-
Page 120: Print Documents Securely Using Ssl/Tls
Home > Security > Use SSL/TLS > Print Documents Securely Using SSL/TLS Print Documents Securely Using SSL/TLS • Print Documents Using SSL/TLS... - Page 121 Home > Security > Use SSL/TLS > Print Documents Securely Using SSL/TLS > Print Documents Using SSL/TLS Print Documents Using SSL/TLS To print documents securely with IPP protocol, use the IPPS protocol. 1. Start your web browser. 2. Type "https://machine's IP address" in your browser's address bar (where "machine's IP address" is the machine's IP address).
-
Page 122: Use Snmpv3
Home > Security > Use SNMPv3 Use SNMPv3 • Manage Your Network Machine Securely Using SNMPv3... -
Page 123: Manage Your Network Machine Securely Using Snmpv3
Home > Security > Use SNMPv3 > Manage Your Network Machine Securely Using SNMPv3 Manage Your Network Machine Securely Using SNMPv3 The Simple Network Management Protocol version 3 (SNMPv3) provides user authentication and data encryption to manage network devices securely. 1. -
Page 124: Use Ieee 802.1X Authentication For A Wired Or A Wireless Network
Home > Security > Use IEEE 802.1x Authentication for a Wired or a Wireless Network Use IEEE 802.1x Authentication for a Wired or a Wireless Network • What Is IEEE 802.1x Authentication? • Configure IEEE 802.1x Authentication for a Wired or Wireless Network Using Web Based Management (Web Browser) •... -
Page 125: What Is Ieee 802.1X Authentication
IEEE 802.1x is an IEEE standard for wired and wireless networks that limits access from unauthorized network devices. Your Brother machine (supplicant) sends an authentication request to a RADIUS server (Authentication server) through your access point or hub. After your request has been verified by the RADIUS server, your machine can access the network. -
Page 126: Configure Ieee 802.1X Authentication For A Wired Or Wireless Network Using Web Based Management (Web Browser)
Home > Security > Use IEEE 802.1x Authentication for a Wired or a Wireless Network > Configure IEEE 802.1x Authentication for a Wired or Wireless Network Using Web Based Management (Web Browser) Configure IEEE 802.1x Authentication for a Wired or Wireless Network Using Web Based Management (Web Browser) •... - Page 127 Option Description No Verification The server certificate can always be trusted. The verification is not performed. CA Cert. The verification method to check the CA reliability of the server certificate, using the CA certificate issued by the CA that signed the server certificate. CA Cert.
-
Page 128: Ieee 802.1X Authentication Methods
Extensible Authentication Protocol-Flexible Authentication via Secured Tunneling (EAP-FAST) has been developed by Cisco Systems, Inc., which uses a user ID and password for authentication, and symmetric key algorithms to achieve a tunneled authentication process. The Brother machine supports the following inner authentication methods: • EAP-FAST/NONE •... -
Page 129: Update
Home > Update Update • Update P-touch Editor • Update the Firmware... -
Page 130: Update P-Touch Editor
Software icon on the desktop. • Windows 7 Click Start > All Programs > Brother P-touch > P-touch Update Software, or double-click the P-touch Update Software icon on the desktop. 2. Click the Computer software update icon. 3. Select the Printer and Language options using the drop-down lists. - Page 131 Related Information • Update...
-
Page 132: Update The Firmware
Software icon on the desktop. • Windows 7 Click Start > All Programs > Brother P-touch > P-touch Update Software, or double-click the P-touch Update Software icon on the desktop. 3. Click the Machine update icon. 4. Select the Printer option, make sure the machine is connected correctly, and then click OK. - Page 133 NOTE Do not turn off the printer or disconnect the cable during the update process and data transfer. 7. Check the content to be updated, and then click Start to begin the update. The firmware update begins. Related Information • Update...
-
Page 134: Printer Settings
Home > Printer Settings Printer Settings • Change Printer Settings Using the Printer Setting Tool (Windows) • Apply Setting Changes to Multiple Printers (Windows) • Change Printer Settings Using Web Based Management • Confirm Printer Settings • Change Printer Settings Using the Printer... -
Page 135: Change Printer Settings Using The Printer Setting Tool (Windows)
Windows 8.1/Windows Server 2012/Windows Server 2012 R2: Click the Printer Setting Tool icon on the Apps screen. • Windows 7 Click Start > All Programs > Brother > Label & Mobile Printer > Printer Setting Tool. The main window appears. 1. Printer Lists the connected printers. - Page 136 NOTE To open Paper Size Setup, you must be logged on with administrator rights. 6. Exit Closes the window. 3. Make sure the printer you want to configure appears next to Printer. If a different printer appears, select the printer you want from the drop-down list. 4.
-
Page 137: Communication Settings Of The Printer Setting Tool (Windows)
>> Settings Dialog Box >> Menu Bar >> General Tab >> Wired LAN/Wireless LAN Tabs (RJ-3250WB)Wired LAN Tab(RJ-3230B) >> Wireless Direct Tab (RJ-3250WB) >> Bluetooth Tab Settings Dialog Box 1. Menu Bar Provides access to various commands grouped under each menu title (the File, Tools, and Help menus) according to their functions. - Page 138 Clicking Apply applies all settings in all tabs to the printer. If the Disable these settings check box is selected, the settings are not applied. 7. Items When the Current Status menu is selected, the current settings appear in the settings display/change area. Select the item for the settings you want to change.
- Page 139 • When importing the computer's wireless settings, administrator privileges for the computer are needed. • Only personal security authentication settings (open system, public key authentication, WPA/WPA2- PSK, and WPA3 SAE up to 63 characters) can be imported. Enterprise security authentication (such as EAP-FAST), WPA2-PSK (TKIP) and WPA-PSK (AES) settings cannot be imported.
- Page 140 Type the path to the folder on the FTP server where you want to export the log data. NFC Pairing Settings Establish a Bluetooth or Wireless Direct connection using the NFC function. Wired LAN/Wireless LAN Tabs (RJ-3250WB)Wired LAN Tab(RJ-3230B) TCP/IP TCP/IP (Wireless) •...
- Page 141 • Enable this address Enables the specified static IPv6 address. • Primary DNS Server IPv6 Address/Secondary DNS Server IPv6 Address Specifies the DNS server IPv6 addresses. • IPv6 Address List Displays the list of IPv6 addresses. Wired 802.1x Authentication Configures IEEE 802.1x authentication. •...
- Page 142 To specify higher level security settings: When performing certificate verification with the EAP-FAST, PEAP, EAP-TTLS, or EAP-TLS authentication methods, the certificate cannot be specified from the Printer Setting Tool. After the printer is configured to connect to the network, specify the certificate by accessing the printer from a web browser.
- Page 143 Sets whether to automatically reconnect to a previously connected Apple device (iPad, iPhone, or iPod touch). Low Energy • Minimum Security Mode Select the minimum security level when using the Low Energy Only mode. • Pairing requires user confirmation on printer If this check box is selected when using the Low Energy Only mode, it is necessary to perform additional printer button operations when pairing with Low Energy compatible devices.
-
Page 144: Device Settings Of The Printer Setting Tool (Windows)
Home > Printer Settings > Change Printer Settings Using the Printer Setting Tool (Windows) > Device Settings of the Printer Setting Tool (Windows) Device Settings of the Printer Setting Tool (Windows) Use Device Settings in the Printer Setting Tool to specify or change printer settings when connecting the printer and computer with a USB cable or via a Bluetooth connection. - Page 145 5. Exit Exits the Device Settings window and returns to the main window of the Printer Setting Tool. 6. Apply Applies the settings to the printer. To save the specified settings in a command file, select the Save in Command File command from the drop-down list. The saved command file can be used with the mass storage mode to apply the settings to a printer.
- Page 146 • Delete Print Log Deletes the print log stored in the printer. • Option Settings If the Do not display an error message if the current settings cannot be retrieved at startup check box is selected, a message is not displayed the next time. Basic Tab •...
- Page 147 Shows the [Select Media] screen for ten seconds after you close the Roll Compartment Cover. Feed Feeds the label automatically when you close the Roll Compartment Cover. Auto Detect Performs Auto Detect automatically when you close the Roll Compartment Cover. The printer displays the detected paper size, and then displays the Ready screen.
- Page 148 • Media Sensor (Transmissive/Gap) Detection Sensitivity Adjusts the sensitivity of gap (spacing) detection for die-cut labels. Luminescence Adjustment Adjusts the amount of light emitted by the transmissive/gap sensor. • Media Sensor (Reflective/Bar) Mark Detection Sensitivity Adjusts the sensitivity of black mark detection. Luminescence Adjustment Adjusts the amount of light emitted by the reflective/black mark sensor.
-
Page 149: P-Touch Template Settings Of The Printer Setting Tool (Windows)
• For more information on P-touch Template Settings, see the P-touch Template Manual/Command Reference (English only). You can download the latest version from the Brother support website at support.brother.com/manuals. 1. Default Command Mode Specifies the P-touch Template mode as the default mode. To change the mode, select the mode by accessing the Management tab in the Device Settings window. - Page 150 23h 24h 40h 5Bh 5Ch 5Dh 5Eh 60h 7Bh 7Ch 7Dh 7Eh To change the characters, see the P-touch Template Manual/Command Reference (English only). You can download the latest version from the Brother support website at support.brother.com/manuals. 7. Command Prefix Character Specifies the prefix character code identifying commands used in P-touch Template mode.
-
Page 151: The Paper Size Setup Feature Of The Printer Setting Tool (Windows)
Home > Printer Settings > Change Printer Settings Using the Printer Setting Tool (Windows) > The Paper Size Setup Feature of the Printer Setting Tool (Windows) The Paper Size Setup Feature of the Printer Setting Tool (Windows) Use the Paper Size Setup in the Printer Setting Tool to add paper sizes not available in the Paper Size list of the printer driver. - Page 152 NOTE When the list is imported, the entire contents of the Currently Registered Paper Sizes list will be replaced with the imported paper formats. 6. Export Exports the paper formats in the Currently Registered Paper Sizes list to a file. The exported formats can then be distributed to other computers.
- Page 153 2. Paper Types Select the paper type. 3. Detailed settings Specify details for the paper format to be added. 4. Advanced Printing Adjustments Click this button to display the Advanced Printing Adjustments dialog box and make advanced printing adjustments for each paper format. 5.
- Page 154 The settings for Media Sensor (Transmissive/Gap) in the Device Settings dialog box can influence the detection and calibration results. Make sure you specify the appropriate values. Example settings: Setting EX1 Setting EX2 Device Settings Paper Size Setup Actual effect 5. Media Sensor (Reflective/Bar) Adjust the precision with which the reflective/black mark sensor detects black marks and the amount of light emitted by the sensor.
- Page 155 If the printer driver has been installed on the recipient’s computer, only the paper formats need to be distributed. 1. At the sender’s computer, specify the paper format settings, and then click Export. The following files are created: RJ-3230B bsr323ed.ptd bsr323ed.txt pdt4537.bin RJ-3250WB bsr325ed.ptd...
-
Page 156: Apply Setting Changes To Multiple Printers (Windows)
Home > Printer Settings > Apply Setting Changes to Multiple Printers (Windows) Apply Setting Changes to Multiple Printers (Windows) >> Communication Settings >> Device Settings Communication Settings 1. After applying settings to the first printer, disconnect the printer from the computer, and then connect the second printer to the computer. -
Page 157: Change Printer Settings Using Web Based Management
Home > Printer Settings > Change Printer Settings Using Web Based Management Change Printer Settings Using Web Based Management You can use a standard web browser to change your printer's settings using the Hyper Text Transfer Protocol (HTTP) or Hyper Text Transfer Protocol over Secure Socket Layer (HTTPS). When using Web Based Management, the following operations are available: •... -
Page 158: Set Or Change A Login Password For Web Based Management
Home > Printer Settings > Change Printer Settings Using Web Based Management > Set or Change a Login Password for Web Based Management Set or Change a Login Password for Web Based Management We recommend changing the default login password to prevent unauthorized access to Web Based Management. -
Page 159: Confirm Printer Settings
Home > Printer Settings > Confirm Printer Settings Confirm Printer Settings You can print a Printer Settings Report without connecting the printer to a computer or mobile device. 1. Turn on the printer. 2. Load a 3" (76 mm) media into the printer. 3. -
Page 160: Change Printer Settings Using The Printer
Home > Printer Settings > Change Printer Settings Using the Printer Change Printer Settings Using the Printer 1. Press the Menu / b (Select) button to select the menu option, and then press the (Feed) / OK button. 2. Press the Menu / b (Select) button to select an option, and then press the (Feed) / OK button. -
Page 161: Settings Tables
Home > Printer Settings > Change Printer Settings Using the Printer > Settings Tables Settings Tables The Settings tables describe the menu selections and options. Some settings may differ depending on the firmware (printer software) version. >> [WLAN] >> [Bluetooth] >>... - Page 162 Level 1 Level 2 Descriptions • Auto-detected media • Media settings obtained using the Auto Detect function. Auto Detect Automatically adjust the sensor sensitivity and detect the length of the set paper. Specify Settings in advance. Configure the settings before performing Auto Detect. Settings Width Select the paper width to be auto-detected.
- Page 163 Related Information • Change Printer Settings Using the Printer...
-
Page 164: Routine Maintenance
Home > Routine Maintenance Routine Maintenance • Maintenance... -
Page 165: Maintenance
Home > Routine Maintenance > Maintenance Maintenance Maintenance of the printer may be carried out as required. However, some environments may require more frequent maintenance (for example, dusty environments). >> Clean the Printer (Exterior) >> Clean the Print Head >> Clean the Roller >>... - Page 166 Clean the Paper Exit Slot • If adhesive accumulates at the paper exit slot and media becomes jammed, or if the paper exit slot becomes dirty, wipe the paper exit slot with a lint-free cloth dipped in isopropyl alcohol or ethanol. 1.
- Page 167 Related Information • Routine Maintenance...
-
Page 168: Troubleshooting
Home > Troubleshooting Troubleshooting • If You Are Having Difficulty with Your Machine • Error and Maintenance Messages • Printing Problems • Network Problems • Version Information • Reset the Printer • Battery Charger (Optional) Problems • Active Docking Station (Optional) Problems •... -
Page 169: If You Are Having Difficulty With Your Machine
Insert the media correctly. For more information, see Related Information. If you still have problems, see Related Information. If after reading the topics you are unable to resolve the problem, visit the Brother support website at support.brother.com. Related Information •... -
Page 170: Error And Maintenance Messages
Cause/Solution Batt.VeryPoor Replace The battery may be depleted. Replace the battery with a new one. battery Visit the Brother support website at support.brother.com. Cannot Update Data Try • Check the FTP server setting of the Remote Update function. updating the data again. - Page 171 You can also charge the battery using a USB cable (not included). System Error! XX If the error message is displayed, contact Brother customer service. WPS did not connect 1 Try The Wi-Fi router/access point could not be found or multiple Wi-Fi routers/ to connect again access points were found.
-
Page 172: Printing Problems
• Has a print error or transmission error occurred? Turn off the printer, and then turn it on again. If there is still a problem, contact Brother Customer Service. The printer does not feed paper. • Is there dirt or lint on the roller preventing it from rotating freely? Clean the roller. - Page 173 Problem Solution 1. Media Sensor • Make sure there are no items blocking the sensor. When printing via the USB cable, the Is the printer set for sequential printing? If so, set print mode to buffered printer repeatedly pauses, and then printing.
- Page 174 • Is the adapter cord securely connected? Make sure the cord is connected correctly. • If the LED Indicator or the LCD still does not light up, contact Brother Customer Service. A data transmission error appears on • Is the correct port selected? the computer.
- Page 175 • Device Settings of the Printer Setting Tool (Windows) • Maintenance • Reset the Printer • Change Printer Settings Using the Printer Setting Tool (Windows)
-
Page 176: Network Problems
Home > Troubleshooting > Network Problems Network Problems >> Network Setup Problems >> Cannot Print over the Network / Printer Is Not Found on the Network Even after Successful Installation >> Security Software Problems >> Check the Operation of Network Devices Network Setup Problems Problem Solution... - Page 177 Incorrect port numbers are being The following port number is used for Brother network features: used for the Brother network features BRAdmin Light: Port number 161 / Protocol UDP For more information about how to open the port, see the instructions for the security software or contact its manufacturer.
- Page 178 Problem Solution settings, such as the IP address. Related Information • Troubleshooting Related Topics: • Change Printer Settings Using the Printer Setting Tool (Windows)
-
Page 179: Version Information
Home > Troubleshooting > Version Information Version Information Problem Solution I do not know the current version of the You can confirm the version number of the firmware by printing the Printer printer's firmware. Settings Report. For more information, see Related Topics. I want to confirm whether I am using Use the P-touch Update Software to confirm whether you have the latest the latest version of the software. -
Page 180: Reset The Printer
Home > Troubleshooting > Reset the Printer Reset the Printer Reset the internal memory of your printer to clear all the saved label files, or if the printer is not operating correctly. >> Reset Settings Using the LCD >> Reset Data Using the Printer Setting Tool Reset Settings Using the LCD You can reset settings on the printer. -
Page 181: Battery Charger (Optional) Problems
Home > Troubleshooting > Battery Charger (Optional) Problems Battery Charger (Optional) Problems If you experience any problems that you cannot resolve, contact your Brother dealer or Brother customer service for assistance. Problem Solution The Charge Indicator turned off, but the Charging stopped because the battery became too hot or too cold. -
Page 182: Active Docking Station (Optional) Problems
Home > Troubleshooting > Active Docking Station (Optional) Problems Active Docking Station (Optional) Problems If you experience any problems that you cannot resolve, contact your Brother dealer or Brother customer service for assistance. Problem Solution The Charging LED turned off, but the Charging stopped because the battery became too hot or too cold. -
Page 183: Linerless Platen Upgrade (Optional) Problems
Home > Troubleshooting > Linerless Platen Upgrade (Optional) Problems Linerless Platen Upgrade (Optional) Problems Problem Solution The print quality is poor. • Install the Linerless Platen Upgrade correctly. • Clean the print head. The printer does not feed paper. • Install the Linerless Platen Upgrade correctly. -
Page 184: Appendix
Home > Appendix Appendix • Specifications • Software Development Kit • Optional Accessories • Product Dimensions • Brother Help and Customer Support • Compatible Operating Systems • ® International ENERGY STAR Qualification Statement (USA and Canada Only) -
Page 185: Specifications
118.11" (3000 mm) Minimum Print Length 0.5" (12.7 mm) Using Brother's print test data (10% coverage, 2.99" × 1.14" (76 mm × 29 mm)) at 73.4°F (23°C) when performing continuous printing using a USB connection with a new, fully-charged battery. Printer Size Weight (including the battery) Approximately 1.78 lb (807 g) - Page 186 Maximum number of printed labels Charging time About 3 hours Using Brother's print test data (10% coverage, 2.99" × 1.14" (76 mm × 29 mm)) at 73.4°F (23°C) when performing continuous printing using a USB connection with a new, fully-charged battery. Media Specification The media material may affect the print quality.
- Page 187 Media Sensor Transmissive, Reflective Compatible Operating Systems For the latest list of compatible software, visit support.brother.com. Related Information • Appendix Related Topics: • Load the Roll...
-
Page 188: Software Development Kit
Home > Appendix > Software Development Kit Software Development Kit Software Development Kit (SDK) is available from the Brother Developer Center (https:// support.brother.com/g/s/es/dev/en/index.html). ™ The b-PAC SDK and the SDKs for mobile devices (Android , iPhone, and iPad) can also be downloaded. (The SDKs available are subject to change without notice.) -
Page 189: Optional Accessories
Home > Appendix > Optional Accessories Optional Accessories • Battery Charger (Optional: PA-BC-003) • Label Peeler (Optional: PA-LP-007) • Linerless Platen Upgrade (Optional: PA-LPR-004) • Single Active Docking Station (Optional: PA-CR-005) • 4-bay Active Docking Station (Optional:PA-4CR-003) -
Page 190: Battery Charger (Optional: Pa-Bc-003)
Home > Appendix > Optional Accessories > Battery Charger (Optional: PA-BC-003) Battery Charger (Optional: PA-BC-003) • Battery Charger Overview • Charge the Battery Using the Battery Charger • Mount the Battery Charger on the Wall • Connect Multiple Battery Chargers Together... - Page 191 Home > Appendix > Optional Accessories > Battery Charger (Optional: PA-BC-003) > Battery Charger Overview Battery Charger Overview Parts Description 1. Charge Indicator 2. Battery Charging Terminals 3. Battery Compartment 4. Locking Expansion Slot 5. DC Connector OUT 6. DC Connector IN 7.
- Page 192 Home > Appendix > Optional Accessories > Battery Charger (Optional: PA-BC-003) > Charge the Battery Using the Battery Charger Charge the Battery Using the Battery Charger To charge the rechargeable Li-ion battery, use the Battery Charger (PA-BC-003) together with the AC Adapter (PA-AD-600A, sold separately).
- Page 193 Home > Appendix > Optional Accessories > Battery Charger (Optional: PA-BC-003) > Mount the Battery Charger on the Wall Mount the Battery Charger on the Wall Use two screws to mount the Battery Charger to a wall. • Install the screws vertically with the spacing shown below. Ensure the screws are correctly secured with wall anchors or studs.
- Page 194 Home > Appendix > Optional Accessories > Battery Charger (Optional: PA-BC-003) > Connect Multiple Battery Chargers Together Connect Multiple Battery Chargers Together Up to four battery chargers can be connected in-line together. >> Connect the Battery Chargers >> Disconnect the Battery Chargers Connect the Battery Chargers 1.
- Page 195 Related Information • Battery Charger (Optional: PA-BC-003)
-
Page 196: Label Peeler (Optional: Pa-Lp-007)
Home > Appendix > Optional Accessories > Label Peeler (Optional: PA-LP-007) Label Peeler (Optional: PA-LP-007) • Install the Label Peeler • Enable the Label Peeler Function... - Page 197 Home > Appendix > Optional Accessories > Label Peeler (Optional: PA-LP-007) > Install the Label Peeler Install the Label Peeler This printer is compatible with the Label Peeler (PA-LP-007). Parts Description Label Peeler Assembly Screws (2 each) 1. Push the Roll Cover Release Lever to open the Roll Compartment Cover. a.
- Page 198 The upper tear bar and lower tear bar cannot be used when the Label Peeler is installed. 4. Peel off a few labels. Then, set the Roll so that the next label does not cover the Media Sensor area. a. Media sensor 5.
- Page 199 7. Set Exit Position to Peeler in the Basic tab of the Printer Setting Tool. NOTE • When Peeler is set to Exit Position, [Tear Bar] in [Settings] and [Auto Detect] in [Media] cannot be selected on the printer's LCD. •...
- Page 200 Home > Appendix > Optional Accessories > Label Peeler (Optional: PA-LP-007) > Enable the Label Peeler Function Enable the Label Peeler Function When printing using the printer driver, enable the Use Peeler Function setting. 1. Do one of the following: •...
-
Page 201: Linerless Platen Upgrade (Optional: Pa-Lpr-004)
Home > Appendix > Optional Accessories > Linerless Platen Upgrade (Optional: PA-LPR-004) Linerless Platen Upgrade (Optional: PA-LPR-004) • Install the Linerless Platen Upgrade... - Page 202 Home > Appendix > Optional Accessories > Linerless Platen Upgrade (Optional: PA-LPR-004) > Install the Linerless Platen Upgrade Install the Linerless Platen Upgrade This printer is compatible with linerless media. Parts Description Linerless Platen Assembly Screws (2) 1. Push the Roll Cover Release Lever to open the Roll Compartment Cover. a.
- Page 203 The lower tear bar cannot be used when the Linerless Platen Upgrade is installed. 4. Set Linerless to On in the Advanced tab of the Printer Setting Tool. NOTE • When Linerless is set to On, [Tear Bar] in [Settings] and [Auto Detect] in [Media] cannot be selected on the printer's LCD.
-
Page 204: Single Active Docking Station (Optional: Pa-Cr-005)
Home > Appendix > Optional Accessories > Single Active Docking Station (Optional: PA-CR-005) Single Active Docking Station (Optional: PA-CR-005) • Single Active Docking Station Overview • Charge the Battery Using the Single Active Docking Station • Connect the Printer to a Wired LAN Network via Single Active Docking Station •... - Page 205 Home > Appendix > Optional Accessories > Single Active Docking Station (Optional: PA-CR-005) > Single Active Docking Station Overview Single Active Docking Station Overview Parts Description Single Active Docking Station 1. Docking Station Terminals 2. Ethernet (LAN) LED 3. Charging LED 4.
- Page 206 Home > Appendix > Optional Accessories > Single Active Docking Station (Optional: PA-CR-005) > Charge the Battery Using the Single Active Docking Station Charge the Battery Using the Single Active Docking Station The Single Active Docking Station (PA-CR-005) cannot recharge the printer's battery without being connected to an AC power outlet using the AC Adapter (PA-AD-600A).
- Page 207 Use a Low Carbon Steel Extended Prong Retaining Cotter Pin (not included): Length: 1.97" (50 mm), Pin Diameter: 0.08" (2 mm) 1. Diameter: 0.09" (2.3 mm) 2. Length: 1.62" (41.2 mm) To purchase the Cotter Pin, contact your local Brother dealer. Related Information • Single Active Docking Station (Optional: PA-CR-005)
- Page 208 Home > Appendix > Optional Accessories > Single Active Docking Station (Optional: PA- CR-005) > Connect the Printer to a Wired LAN Network via Single Active Docking Station Connect the Printer to a Wired LAN Network via Single Active Docking Station Use an Ethernet (LAN) connection to configure your printer and upgrade its firmware.
- Page 209 Cradle LAN Setting WLAN Setting Connection type when using the Single Active Docking Station WLAN No connection enabled Related Information • Single Active Docking Station (Optional: PA-CR-005) Wireless Direct function is not affected.
- Page 210 Home > Appendix > Optional Accessories > Single Active Docking Station (Optional: PA-CR-005) > Mount the Single Active Docking Station on the Wall Mount the Single Active Docking Station on the Wall 1. Drill four holes in a commercially available board according to the spacing of the screw holes of the Single Active Docking Station.
-
Page 211: 4-Bay Active Docking Station (Optional:pa-4Cr-003)
Home > Appendix > Optional Accessories > 4-bay Active Docking Station (Optional:PA-4CR-003) 4-bay Active Docking Station (Optional:PA-4CR-003) • 4-bay Active Docking Station Overview • Charge the Battery Using the 4-bay Active Docking Station • Connect the Printer to a Wired LAN Network via 4-bay Active Docking Station •... - Page 212 Home > Appendix > Optional Accessories > 4-bay Active Docking Station (Optional:PA-4CR-003) > 4-bay Active Docking Station Overview 4-bay Active Docking Station Overview Parts Description 4-bay Active Docking Station 1. Ethernet (LAN) LED 2. Charging LED 3. Docking Station Terminals 4.
- Page 213 Related Topics: • Active Docking Station (Optional) Problems...
- Page 214 Home > Appendix > Optional Accessories > 4-bay Active Docking Station (Optional:PA-4CR-003) > Charge the Battery Using the 4-bay Active Docking Station Charge the Battery Using the 4-bay Active Docking Station The 4-bay Active Docking Station cannot recharge the printer's battery without being connected to an AC power outlet using the AC adapter (PA-AD-600A).
- Page 215 1. Eject Button Related Information • 4-bay Active Docking Station (Optional:PA-4CR-003)
- Page 216 Home > Appendix > Optional Accessories > 4-bay Active Docking Station (Optional:PA-4CR-003) > Connect the Printer to a Wired LAN Network via 4-bay Active Docking Station Connect the Printer to a Wired LAN Network via 4-bay Active Docking Station Use an Ethernet (LAN) connection to configure your printer and upgrade its firmware. NOTE Make sure that the Ethernet (LAN) cable is fully inserted in the Ethernet (LAN) Port.
- Page 217 Related Information • 4-bay Active Docking Station (Optional:PA-4CR-003)
- Page 218 Home > Appendix > Optional Accessories > 4-bay Active Docking Station (Optional:PA-4CR-003) > Mount the 4-bay Active Docking Station on the Wall Mount the 4-bay Active Docking Station on the Wall 1. Drill four holes in a commercially available board according to the spacing of the screw holes of the 4-bay Active Docking Station.
-
Page 219: Product Dimensions
Home > Appendix > Product Dimensions Product Dimensions All measured values are in millimeters. Printer Front view / Back view Top view / Bottom view... - Page 220 Side view Battery Charger Front view / Back view...
- Page 221 Top view / Bottom view Side view Cross section...
- Page 222 Single Active Docking Station Front view / Back view Top view / Bottom view...
- Page 223 Side view Cross section...
- Page 224 4-bay Active Docking Station Top view / Bottom view...
- Page 225 Back view Side view...
- Page 226 Cross section Related Information • Appendix...
-
Page 227: Brother Help And Customer Support
For the location of a Brother authorized service center, visit www.brother.ca/support. Ordering Accessories and Supplies For best quality results use only genuine Brother supplies, which are available at most Brother retailers. If you cannot find the supplies you need and have a Visa, MasterCard, Discover, American Express credit card, or PayPal account, you can order directly from Brother. - Page 228 Related Information • Appendix...
-
Page 229: Compatible Operating Systems
Home > Appendix > Compatible Operating Systems Compatible Operating Systems For the latest list of compatible software, visit support.brother.com. Related Information • Appendix... -
Page 230: International Energy Star ® Qualification Statement (Usa And Canada Only)
The purpose of the International ENERGY STAR Program is to promote the development and popularization of energy-efficient office equipment. ® As an ENERGY STAR Partner, Brother Industries, Ltd. has determined that this product meets the ENERGY ® STAR specifications for energy efficiency. Related Information •... - Page 231 USA/CAN Version A...