
Related Manuals for HUSTLER Super S


Summary of Contents for HUSTLER Super S
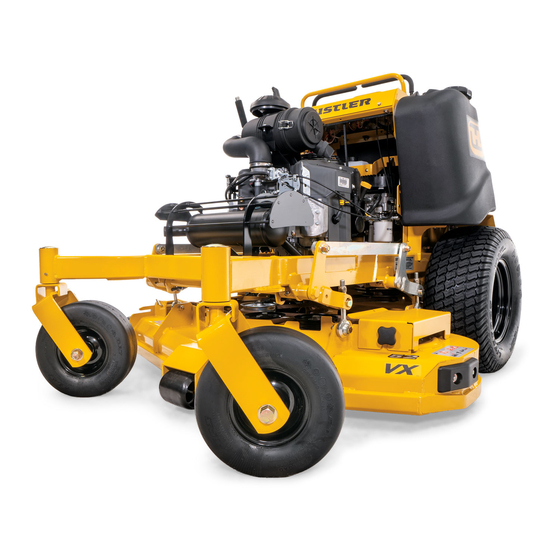
- Page 1 Hustler Super S ® ® General Service Manual 200 South Ridge Road Hesston, Kansas 67062 127180 REV A...
- Page 2 WARNING The engine exhaust from this product contains chemicals known to the state of California to cause cancer, birth defects or other reproductive harm. NOTICE OF REQUIREMENT OF SPARK ARRESTER MUFFLER This equipment may create sparks that can start fires around dry vegetation. California Public Resources Code Section 4442.6 provides that it is unlawful to use or operate an internal combustion engine on any forest-covered, brush-covered, or grass-covered land unless the engine is equipped with a spark arrester maintained in effective working order.
-
Page 3: Table Of Contents
General Information ..........1-1 Hustler Service Program . - Page 4 Belts ............6-4 Deck Belt Adjustment.
-
Page 5: General Information
Clear away heavy build-up of grease, oil and dirt, especially ® in the engine compartment and under the seat platform areas; minute dust particles are abrasive to close-tolerance This manual is part of a service package for the Hustler ® engine and hydraulic assemblies. Super S mowers. - Page 6 REV A 127180...
-
Page 7: Safety
SAFETY • Do not smoke while refueling. Extinguish all cigarettes, cigars, pipes and other sources of ignition. • Do not remove fuel cap or fill tank with engine running or while engine is hot. Clean up any This safety alert symbol is used to call attention to a gasoline spills. -
Page 8: Operation Precautions
Understand Machine Operation Always maintain a safe distance from people and pets when mowing. Only qualified and trained personnel should operate Always be aware of what is behind the machine before the equipment. backing up. Carefully read the operator’s manual and all manuals ... -
Page 9: Maintenance Precautions
• Do not allow open flame near the battery when them. charging. Use original Hustler replacement parts or parts that • Hydrogen gas forms inside the battery. This gas ®... - Page 10 • Do not overfill the battery. Avoid Acid Burns • Electrolyte may overflow and damage paint, Sulfuric acid in battery electrolyte is poisonous. It is wiring or structure. When cleaning the battery, strong enough to burn skin, eat holes in clothing and use soap and water.
-
Page 11: Torque
TORQUE Standard Torques The following chart lists the standard torque values for the threaded fasteners found in this manual. Torque all cap screws, nuts and set screws to these values unless a different torque is shown in the Special Torques section. Size ft-lbs N•m... - Page 12 REV A 127180...
-
Page 13: Power Unit Maintenance
POWER UNIT MAINTENANCE Steering Adjustments 36" Mowers Steering control lever neutral adjustment The mower’s steering has been factory adjusted to eliminate creeping when the steering control levers are in the neutral position. However, should the mower begin to creep, the steering control lever linkage can be adjusted. Fine adjustment to the unit’s steering is made with the transmission’s control rod. -
Page 14: Steering Control Lever Stops
48"/52"/60" Mowers 36" Mowers A. Rod end jam nuts Figure 4-4 NOTE: To make this adjustment the mower engine must not be running. A. Jam nuts B. Steering control lever NOTE: Neutral adjustment must be done before proceed- ing. Figure 4-3 1. - Page 15 6. Repeat for the other side. 2. Pivot the forward stop back until it contacts both steering handles. Tighten the cap screws on the forward stop. Figure 4-7 48"/52"/60" Mowers A. Steering handles C. Cap screws B. Forward stop A. Steering control lever stop screw Figure 4-7 B.
-
Page 16: Neutral Switch Adjustment
Neutral Switch Adjustment 5. Move the steering control lever on the slower speed side forward until it makes contact with the steering control lever stop. Turn the speed adjusting screw OIf the engine does not start unless one or both of the down until it makes contact with the steering handle steering control levers is moved, then one or both of the stop (finger tight). -
Page 17: Operator Presence Switch Adjustment
Operator Presence Switch Adjustment 48"/52"/60" Mowers The operator presence switch will need to be adjusted if the engine dies when the deck clutch is engaged and while the park brake is disengaged: For 36" mowers 1. Loosen the hardware that attach the plunger bracket to the mower frame. -
Page 18: Park Brake
36" mower, left side shown 48"/52"/60" Mowers A. Carriage bolts C. Slot B. Treadlock plate Figure 4-14 36"mower, right side shown A. Hardware D. Operator presence switch B. Switch bracket C. Spring Figure 4-13 Park Brake Park Brake Adjustment 36" Before adjustmenting, check the tire air pressure. -
Page 19: Belts
Figure 4-17 operator’s platform to the uphill side. Inspect the Belts machine and involve your Hustler Dealer to resolve ® the problem before continuing to operate. Inspect belts frequently for wear and serviceability. -
Page 20: Hydraulic System
Replace the drain plug before adding system oil. The system filter is located at the left rear of the engine. Use a Hustler approved filter element only. When changing ® the filter use a standard oil filter wrench. The threads are A. - Page 21 48"/52"/60" Mower shown 48"/52"/60" Mower shown A. Hydraulic fill reservoir C. Full cold line A. Hydraulic reservoir Figure 4-20 Figure 4-22 36" Mower shown Hydraulic Pump Flow Test The design purpose of the Bi-Directional Flow Test Kit is to allow the technician to isolate the pump from the wheel motor and determine if the pump is acceptable.
- Page 22 Flow Test Kit. (Special care should be taken to prevent 2. Open the restriction valve all the way. contamination debris from entering pump or wheel motor 3. For the pump being tested, move the steering control system ports). levers in full forward motion. (It will be necessary to NOTE: Using the Bi-Directional Flow Test Kit, determina- lock the steering control levers into full forward tion of directional flow is not necessary.
- Page 23 Test Example: PG/PL or PJ Pump RESTRICTION VALVE BI-DIRECTIONAL FLOW METER 300 psi (21 bar) reading 7 gpm (26 l/min) (1st reading) CONNECTIONS TO THE FWD/RVS LINES DIS- CONNECTED FROM WHEEL MOTOR RESTRICTION VALVE BI-DIRECTIONAL 1100 psi (76 bar) reading 3 gpm (11 l/min) (2nd reading) FLOW METER...
-
Page 24: Jackshaft Replacement
Jackshaft Replacement The following procedures should be performed with the vehicle drive wheels off the ground, then repeated under normal operating conditions. The following procedures should be performed when replacing the jackshaft assembly or the attached hydraulic Potential for serious injury! Never work under the pump. -
Page 25: Caster Fork With Tapered Bearings Replacement
2. Apply a light coating of grease to the caster pocket P. Set screw hole H. Spider gear before installing the outer bearing races. I. Gasket 3. Use the Hustler Bearing Race Installation Kit (p/n ® 124351) to install the outer races into the caster Figure 4-23 pocket bore. -
Page 26: Tapered Wheel Bearing Replacement
7. Make sure the bearings outer race is correctly aligned 10. Install the upper bearing. Figure 4-27 before pressing the outer race into the fully-seated position against caster pocket shoulder. Figure 4-25 A. Upper bearing B. Tapered roller bearing race Figure 4-27 11. - Page 27 A. Wheel D. Flat washer E. Lock nut B. Fork C. Axle bolt Figure 4-30 6. Remove and discard the tapered roller bearings and outer bearing races. Figure 4-31 FULLY ASSEMBLED A. Top cap B. Plug Figure 4-29 2. Place mower securely on jack stands and do not allow the mower to move.
- Page 28 Assembly 5. Insert the bushings through the seal openings and push them in until they contact the tapered roller 1. Press the new outer bearing races into the wheel bearings. Figure 4-34 housing until they are fully seated against the housing shoulder.
-
Page 29: Tires
Tires It is important for level mowing that the tires have the same amount of air pressure. The recommended pressures are: Drive wheels ....8–12 psi (55–83 KPa) Only pneumatic tires are approved for the drive tires on this mower. - Page 30 REV A 4-18 127180...
-
Page 31: Engine Maintenance
The machine must be sitting level when checking oil. Refer to engine manual maintenance schedule recommendation and capacities. Hustler Motor Oil is ® recommended. Change the engine oil and filter after the first 5 hours of A. Oil drain valve... -
Page 32: Engine Air Filter
Vanguard engine (EFI) shown Kawasaki FS541V engine A. Air filter cover Figure 5-3 Kawasaki FX600V/FX691V/FX850V/FX850V EFI engine A. Oil drain valve B. Drain hose Figure 5-2 Engine Air Filter These mowers come equipped with two different styles of air filters; integrated or canister. The required servicing for these two filter types is different from one to the other. -
Page 33: Fuel Evaporation System Filter
engine unless it is excessively restricting the air flow and Kawasaki FX691V/FX850V engine engine performance is affected. The reason is simple. The media in the filter must be porous to allow air to pass through it. When dirty air passes through the filter, the dirt plugs some of the holes in the media and actually acts as part of the filter media. - Page 34 The fuel hose is connected to the fuel tank as shown. It 36" Mowers with Kawasaki engines connects the fuel tank to the engine’s fuel pump. Figure 5-7, Figure 5-8, Figure 5-9, & Figure 5-10 48"/52"/60" Mowers with Kawasaki engines A.
- Page 35 The vapor lines are connected to the fuel tank as shown. 36" Mowers with Kawasaki engines They connect the fuel tank to the engine’s vapor port. Figure 5-11, Figure 5-12, Figure 5-13, & Figure 5-14 48"/52"/60" Mowers with Kawasaki engines A.
- Page 36 Engine RPM Settings The engine rpm’s are set at the factory for maximum mowing efficiency. Occasionally it may be necessary to check and adjust the settings. The idle speeds should be set as follows: Kawasaki FS541V ENGINE SPEEDS Model No. ending with: high idle Model NO.
-
Page 37: Deck Adjustments
DECK ADJUSTMENTS Deck Leveling 48”/52”/60” Decks Leveling the deck must be done in the following manner and order: 1. Check tire pressures to make certain they are properly inflated before starting level deck. recommended pressures are as follows: Drive wheels tire pressure ..8–12 psi Gauge wheels tire pressure. -
Page 38: Blades
To adjust the spring tension, loosen the jam nut on the Replace any blade which is bent, cracked or broken. eyebolt. Then, tighten the eyebolt until the spring is the appropriate length as shown in the table. Never attempt to straighten a bent blade by heating, DECK SIZE SPRING LENGTH or weld a cracked or broken blade as the blade may... - Page 39 Comparison of Warped and Straight Blades A 15/16" wrench is required to remove the 5/8" cap screw holding the blade to the spindle shaft. NOTE: A blade holding tool (P/N 381442) is available from Hustler Turf Equipment. ® It is designed to prevent the blades from rotating when they are being removed or installed on the spindle.
-
Page 40: Belts
When mounting blades, rotate them after installation to 36” Deck shown make sure blade tips do not touch each other or sides of the mower. Belts Inspect belts frequently for wear and serviceability. Replace a belt that shows signs of: •... - Page 41 3. Remove the deck covers. Figure 6-10 36” Deck shown 36” Deck shown A. 1/2” drive breakover bar D. 1/2” square hole B. Deck drive belt E. 1/2” drive extension A. Deck covers C. Idler arm plate Figure 6-10 Figure 6-12 4.
- Page 42 10. Install the belt guide shoulder bolt. Make sure the belt is routed between the shoulder bolt and the pulley. Figure 6-11 11. Install the deck covers. Figure 6-10 12. Attach the negative battery cable. Never operate the mower without the deck covers in place.
- Page 43 7. Route the new deck drive belt around the clutch pulley, 48”/52”/60” Decks right and center spindle pulleys and idler pulleys. Make certain the belt is routed properly. Figure 6-18 & Figure 6-19 8. Grasp the belt at the two locations shown in Figure 6-17 and pull the belt over the left spindle pulley.
- Page 44 A. Electric clutch pulley Figure 6-19 REV A 127180...
-
Page 45: Electrical
ELECTRICAL Electrical Schematic – Kawasaki 48"/52"/60" 127180 REV A... -
Page 46: Electrical Schematic - Kawasaki Efi 52"/60
Electrical Schematic – Kawasaki EFI 52"/60" REV A 127180... -
Page 47: Electrical Schematic - Vanguard 60
Electrical Schematic – Vanguard 60" 127180 REV A... -
Page 48: Electrical Schematic - Kawasaki 36
Electrical Schematic – Kawasaki 36" REV A 127180... -
Page 49: Maintenance Schedule
Perform initial hydraulic system oil and filter change must be after the first 50 hours (one week) of mower operation. Thereafter, replace filter ® and oil in the reservoir annually or every 500 hours, whichever comes first. Hustler Full Synthetic 20W50 Hydrostatic Transmission Oil is recommended. - Page 50 Change engine oil filter per the engine manufacturer’s recommendations. Refer to Engine Owner’s Manual for recommendations and other maintenance items. Service more often under dusty or dirty conditions. Use caution when servicing to prevent dust contamination in the engine. Do not clean filter element.
- Page 51 Maintenance Locator Chart 36"/48"/52"/60" with Kawasaki Engine FX600V/FX691V/FX850V 1. Engine Oil Fill & Dipstick 2. Fuel Filter 3. Engine Air Cleaner 4. Engine Oil Drain Valve 5. Battery 6. Fuel Tank 7. Hydraulic Oil Reservoir 8. Hydraulic Oil Filter 9. Front Wheel Bearing Zerks (2) Figure 8-1 10.
- Page 52 Vanguard engine with Oil Guard™ 1. Engine Oil Dipstick 2. Fuel Filter 3. Engine Air Cleaner 4. Engine Oil Filter and Fill 5. Battery 6. Fuel Tank 7. Hydraulic Oil Reservoir 8. Hydraulic Oil Filter 9. Front Wheel Bearing Zerks (2) 10.
- Page 53 48"/52"/60" Mowers 36" Mowers Figure 8-5 Figure 8-6 Figure 8-7 48"/52"/60" Decks 1. Engine Oil Fill & Dipstick 2. Fuel Filter 3. Engine Air Cleaner 4. Engine Oil Drain Valve 5. Battery 6. Fuel Tank 7. Hydraulic Oil Reservoir 8. Hydraulic Oil Filter 9.
- Page 54 REV A 127180...
-
Page 55: Troubleshooting
TROUBLESHOOTING SUGGESTED SYMPTOMS PROBABLE CAUSES SUGGESTED REMEDIES SYMPTOMS PROBABLE CAUSES REMEDIES Mower jerky when Steering control linkage Adjust linkage starting or operates in needs adjustment Starting motor does not Park brake lever not in park Place park brake lever in one direction only crank brake position... - Page 56 REV A 127180...
- Page 57 INDEX PAGE PAGE Avoid Acid Burns ....... . . 2-4 Maintenance Locator Chart .