Advertisement
Quick Links
CLEI: BVM6P10A_ _
Product P/N: 1187602G2
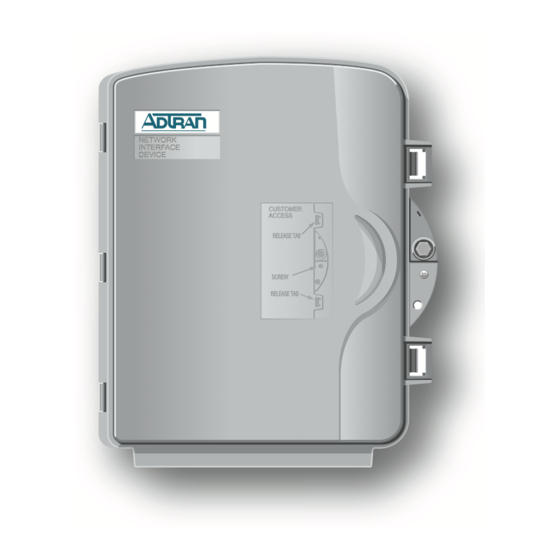
Exterior View
DESCRIPTION
The Total Access
300 Gigabit Passive Optical Network (GPON)
®
Optical Network Terminal (ONT) is a 2 POTS, 2 Gigabit Ethernet
optical Fiber to the Home (FTTH) interface. The figure above
illustrates the GPON ONT (P/N 1187602G2) front panel and inner
enclosure.
GPON technology provides a consistent and common approach to
advancing the public communications network using:
♦
Traditional telephone services is Plain Old Telephone Service
(POTS)
♦
High speed data services
♦
Video services (CATV overlay or video over IP).
The GPON network consists of an Optical Line Terminal (OLT)
located at the central office and a set of Optical Network Terminals
(ONTs) located at the customer's premises. Between them lies the
Optical Distribution Network (ODN) consisting of fibers and passive
splitters or couplers.
In order to allow for the transmission of downstream and upstream
traffic on one single fiber, different wavelengths are used for each
direction. Downstream traffic uses 1490 nm, while upstream traffic
is carried on 1310 nm. For overlay TV distribution, a second
downstream wavelength of 1550 nm is used. The ONT employs
optical diplexers (or triplexers, in the case of TV overlay) to separate
the wavelengths.
INSTALLATION
After unpacking the GPON ONT, inspect it for damage. If damage is
noted, file a claim with the carrier and then contact ADTRAN. For
more information, refer to the warranty.
NOTE: For complete, illustrated, installation procedures refer to the
Total Access 300 GPON 2 POTS, 2 GigE Installation and
Maintenance Practice (P/N 61187602G2-5).
Inner Module Removal
The Outside Plant (OSP) ONT consists of an external enclosure to
provide environmental protection and an internal electrical module.
To separate the inner and outer boxes prior to installation complete
the following:
1. Place the ONT horizontally on a flat surface and open outer
door.
2. Open the inner box Craft door by loosening the security screw.
3. Open door and loosen the retaining screw.
4. Remove the ground Screw if installed.
5. Lift out the ONT inner module.
Mount the Enclosure
Use a maximum of a #10 screw to fit properly in the diameter of the
mounting holes. Complete the following steps to mount the
enclosure:
Total Access 300
GPON 2 POTS, 2 GigE
Interior View
(Exterior Cover Removed)
1. Using the enclosure as a template and a carpenter's level,
mark the locations for the three mounting holes on the surface
to be mounted.
2. Pre-drill the marked locations and install fasteners or anchors
appropriate to the mounting surface and the weight of the ONT
(approximately 5 pounds).
3. Mount the ONT to the side of the subscriber's premise.
Route Fiber Drop Cable
The Outer enclosure offers several alternatives for Fiber installation.
These include:
♦
Corning Optitap
connection
TM
♦
Pre-terminated Drop cable
♦
Drop cable and Field splice or Field termination
The Optitap adaptor (purchased separately) must be mounted to the
plate provided in the outer enclosure.
For other drop cable types the Fiber may be routed through a riser
conduit. It can then be terminated at the bulk head adapter
provided with the outer enclosure.
In all cases route tie-wraps through the cut-outs in the grommet
slots at the bottom of the ONT. Place the fiber drop in the channel of
the ONT and securely fasten it to the mounting surface with a tie
wrap.
Ground Wire Connection
Complete the ground connection by completing the following steps:
1. Insert a #6 solid copper ground wire through the rubber grom-
met in the middle channel on the ONT and terminate it into
one of the two termination points on the ground bar.
2. Route the ground wire 12 inches below finished grade by the
shortest and most direct route to the AC power ground system
(Multi Grounded Neutral (MGN)) of the customer premise free
of any sharp bends.
3. Attach the ground wire to the side of the subscriber's premise
with stainless steel half moon clamps or tie-wrap the ground
wire to the riser conduit of the Buried Fiber Drop.
4. Clean the MGN connector with emery cloth to insure a stable
connection.
5. Attach the ground wire from the ONT to the MGN connector
with the appropriate UL approved ground clamp/fitting.
6. Coat the connection with a metal corrosion preventative.
7. Attach a Warning Ground Tag to this grounding connection.
Local Power Source Wiring
WARNING: Before making any power connections to this
equipment, verify the power is off (fuse removed/
breaker tripped).
This equipment should only be operated from the
type of certified/listed power supply recommended
by the manufacturer.
CAUTION: Use caution when routing wires and cables. Avoid severe
bending and routing over sharp edges. Use grommet
material when possible to avoid wear on cable insulation.
To reduce the risk of fire, use minimum no. 26 AWG
telecommunications line cord.
Installation of the Local Power Source (LPS) will be dictated by on-
site conditions and local telephone company practices.
1. Install the Local Power Source (LPS) wire run from the ONT to
the connector of the LPS via the customer provided PVC
conduit (or method used by your local telephone company
practice).
2. If necessary, tie wrap both the #6 ground wire and LPS wire
run to the Buried Fiber Drop riser conduit.
Issue Date: 0802
Document P/N: 61187602G2-22A
Advertisement

Related Manuals for ADTRAN Total Access 300


Summary of Contents for ADTRAN Total Access 300
- Page 1 After unpacking the GPON ONT, inspect it for damage. If damage is 7. Attach a Warning Ground Tag to this grounding connection. noted, file a claim with the carrier and then contact ADTRAN. For more information, refer to the warranty.
- Page 2 TECHNICAL SUPPORT 800.726.8663 Warranty: ADTRAN will replace or repair this product within the warranty period if it does not meet its RETURN FOR REPAIR 256.963.8722 published specifications or fails while in service. Warranty information can be found online C A U T I O N ! at www.adtran.com/warranty.