Garmin StreetPilot III Owner's Manual & Reference
Portable gps with auto-routing and voice
Hide thumbs
Also See for StreetPilot III:
- Quick start manual (21 pages) ,
- Quick reference manual (13 pages) ,
- Owner's manual and reference manual (6 pages)

Related Manuals for Garmin StreetPilot III


Summary of Contents for Garmin StreetPilot III
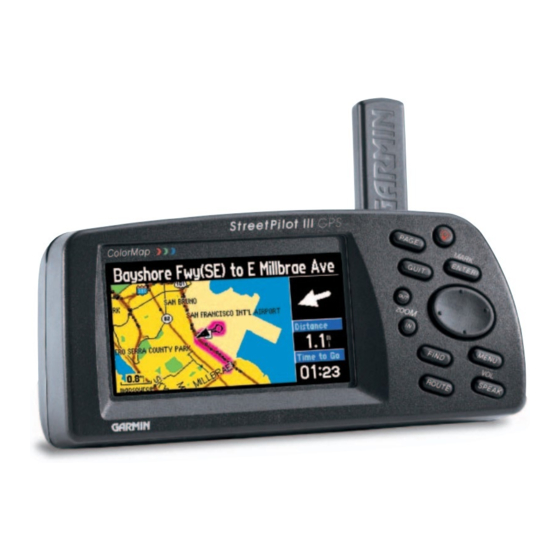
- Page 1 StreetPilot portable GPS with auto-routing and voice ™ owner’s manual reference guide...
- Page 2 Information in this document is subject to change without notice. Garmin reserves the right to change or improve its products and to make changes in the content without obligation to notify any person or organization of such changes.
-
Page 3: Introduction
12-volt power adapter, or by six AA batteries. Voice commands are clearly heard through a speaker which is built into the power adapter cable. The StreetPilot III can easily be viewed in any lighting condition, due to its 4-inch, high resolution, 16-color display. The unit’... -
Page 4: Table Of Contents
Main Menu ......36 GPS Information Page ....37 Sky View and Signal Strength Bars . -
Page 5: Fcc Compliance
FCC Compliance The StreetPilot III complies with Part 15 of the FCC interference limits for Class B digital devices FOR HOME OR OFFICE USE. These limits are designed to provide reasonable protection against harmful interference in a residential installation, and are more stringent than “outdoor” requirements. -
Page 6: Warnings And Cautions
WARNING: For use in vehicles, it is the sole responsibility of the owner/operator of the StreetPilot III to place and secure the GPS unit so that it will not interfere with the vehicle operat- ing controls and safety devices, obstruct the driver’ s view of driving conditions, or cause damage or personal injury in the event of an accident. - Page 7 States, which is solely responsible for its accuracy and maintenance. The system is subject to changes that could affect the accuracy and performance of all GPS equipment. Although the StreetPilot III is a precision NAVigation AID (NAVAID), any NAVAID can be misused or misinterpreted and, therefore, become unsafe.
-
Page 8: Software License Agreement
CONDITIONS OF THE FOLLOWING SOFTWARE LICENSE AGREEMENT. PLEASE READ THIS AGREEMENT CAREFULLY. Garmin grants you a limited license to use the software embedded in this device (the “Software”) in binary executable form in the normal operation of the product. Title, ownership rights and intellectual property rights in and to the Software remain in Garmin. -
Page 9: Limited Warranty
Garmin retains the exclusive right to repair or replace the unit or software or offer a full refund of the purchase price at its sole discretion. SUCH REMEDY SHALL BE YOUR SOLE AND EXCLUSIVE REMEDY FOR ANY BREACH OF WARRANTY. -
Page 10: Unit Description
Press PAGE key to select a different screen. Battery Door (Back Side) To open, turn metal D-ring counterclockwise 1/4 turn and pull battery door away from unit. StreetPilot III Description Detachable Antenna Rotate upright for best satellite reception. Cartridge Door (Bottom) Insert programmed card for increased map detail and information lookup capability. -
Page 11: Keypad Usage
Keypad Usage POWER (Red Bulb Symbol) – Press and hold to turn the StreetPilot III on and off. Press momentarily while power is on to display the backlight/contrast adjustment window. PAGE – Switches between main pages and returns display from an option window back to a main page. -
Page 12: Battery Installation
Battery Installation The StreetPilot III uses six (6) AA batteries, which are installed at the back of the unit. Alkaline, rechargeable, Lithium, or Ni-Cad batteries can be used. Battery life will vary due to a variety of factors, including surrounding temperature and the use of backlighting. You may fi nd that Lithium batteries provide longer life in colder conditions. -
Page 13: Features/Data Entry
Features and Data Entry The following features and data entry procedures are referred to throughout this manual. Cursor— A highlighted area on the screen which can be moved up/down/left/right with the ROCKER KEYPAD to select individual fi elds on the display. Moving the cursor to a given location allows you to begin data entry or scroll through a list. -
Page 14: Unit Pages At A Glance
PAGE Unit Pages at a Glance All of the information needed to operate the StreetPilot III is found on ‘pages’—display screens. There are three main pages, the Map, Trip Information, and Current Route. A fourth screen is avail- able during navigation, the Next Turn page. Press the PAGE or QUIT key to switch back and forth between pages. -
Page 15: Reference Section
If the StreetPilot III has yet to calculate your location, there is a fl ashing question mark over the vehicle pointer and the status text displays ‘Acquiring Satellites’, ‘Searching for Satellites’, or ‘Locating Satellites’. -
Page 16: Map Page Navigation Info
When you are not driving on roads that are present in the maps, you may see a circle drawn around the position pointer. This is the ‘accuracy circle’. The StreetPilot III uses both map resolution and GPS accuracy in defi ning your location to a point within this “accuracy circle”. The smaller the circle, the more accurate your location. -
Page 17: Zooming, Panning And Pointing
Zooming, Panning and Pointing There are three main actions you can perform on the Map page: zooming, panning, and pointing. The map display has 24 map scales (from 120 feet to 800 miles) which are selected by pressing the IN and OUT zoom keys. - Page 18 Reference Map Page Once the ‘Waypoint Created’ page appears, the waypoint is stored in memory. The ‘Waypoint Created’ page appears with a default three digit number for its name which can be changed to something a little more meaningful (up to 10 characters in length).
-
Page 19: Routing To A Map Feature Or Location
‘Waypoint Marked’ page appears, the waypoint is marked. 2. The StreetPilot III will automatically assign a three-digit number as the waypoint name, but you may select any name you want, up to ten characters in length. To change the name, highlight the identifi... -
Page 20: Map Page Options
Reference Map Page Options The Options menu on the Map page allows you to customize the Map page. You can adjust the size of the map by using the ‘Select Layout’ option. Map Page Options Like each of the main pages, the Map page is menu driven. With the Map page displayed, pressing MENU will display an options menu, allowing you to customize the page to your preferences and/or select special features which specifi... - Page 21 Select Layout— Selects between Square Map and Wide Map. Square Map shows the map on one half of the display, navigation information on the other half. Navigation information includes direc- tion to next turn, vehicle speed, distance to next turn, time to next turn, and driving instructions in text format.
- Page 22 Reference Map Page Options Selecting ‘North Up’ will display the map with North at the top. Selecting ‘Track Up’ will automatically rotate the map to keep your current direction of travel at the top of the screen. The ‘Normal’ setting for map detail is usually the best setting for typical operation.
-
Page 23: Next Turn Page
Next Turn Page Map Orientation Route Line Map Scale Distance to Go The Next Turn page displays in detailed format the features of the next turn in the route. When a route is being navigated, it shows for ten seconds. The top-view map is oriented to the inbound direc- tion for the turn. -
Page 24: Current Route Page
Driving Instructions Direction of Turn When the StreetPilot III is navigating a Route, the Current Route page is displayed between the Map page and the Trip Information page (the Current Route page is only available during navigation). The page shows a pointer which indicates the direction of travel from your current location to the destination, a list of the next three turns and the destination (turn direction arrow, turn description, distance and time for each). - Page 25 It is often desirable to view the Next Turn page from the Current Route page. To view the Next Turn Page from the Current Route Page: 1. With the Current Route page displayed, highlight the turn you want to see and press ENTER. 2.
-
Page 26: Trip Information Page
Be certain to reset the Trip Computer before beginning a trip (instructions on resetting are on page 25). If you make frequent stops, leave the StreetPilot III powered on and receiving satellites. This will allow the unit to accurately measure elapsed time during the trip. However, some vehicles disconnect power to the cigarette lighter when the ignition is turned off. - Page 27 Shown to the right of the odometer. – Total Time The total length of time that the StreetPilot III has been tracking your location, since the – Trip Computer was last reset. This is always equal to Driving Time plus Stopped Time.
-
Page 28: Marking Your Location As A Waypoint
1. Press and hold ENTER. The ‘Waypoint Marked’ page appears, with a default three-digit name for the new Waypoint in the upper-left portion of the page. The StreetPilot III captures the location from the instant at which you pressed ENTER, so you do not need to be concerned about moving around or losing satellite reception, your Waypoint is safely stored. -
Page 29: Using The Find Menu
Using the Find Menu You can use the FIND key to search for Waypoints, Cities or Exits that are included in the Street- Pilot III basemap. In addition, if you are using City Navigator or MetroGuide (optional) map data, you can search for Points of Interest, Addresses, or Intersections (you must have the data card inserted in the unit to use these functions). -
Page 30: Finding A Waypoint
Finding a Waypoint Waypoints that you have created and stored in the StreetPilot III can be found by selecting the ‘Waypoints’ option of the Find menu. You can fi nd a waypoint from a list of waypoints ‘By Name’ or ‘Nearest’... -
Page 31: Finding An Exit
Finding an Exit You can use the Find Exit option to locate a nearby exit on an interstate highway. Exits are listed only by ‘Nearest’. You can also search for exits on interstates other than the nearest one by choosing ‘Select Exit Road’... -
Page 32: Finding A Point Of Interest
‘Emergency & Government’. Finding a Point of Interest You must have a data card in the StreetPilot III with MapSource City Navigator or MetroGuide map data to search for points of interest, otherwise this option is unavailable. To locate a point of interest: 1. -
Page 33: Finding An Address Or An Intersection
Finding an Address or an Intersection You must be using MapSource City Navigator (included) or MetroGuide (optional) data which provides this type of map information, otherwise these options are not selectable. To locate an address: 1. Press the FIND key to display the Find Feature menu. Select the ‘Addresses’ option and then press ENTER to display the ‘Find Address’... -
Page 34: Recently Found Places
You can choose to save the selection as a waypoint, show it on the map, or route to it. Make your selection and press ENTER. Using the Routes Menu The Routes menu gives you seven options to manage the StreetPilot III Routes feature. To access the Routes menu, press the Route key. The seven options are as follows: Recalculate Recalculates the active route for faster time or shorter distance. - Page 35 To start a new Route: 1. Press the ROUTE key to view the Routes menu. Select ‘New’ and press ENTER. The Find Destination window appears. 2. Follow the instructions given on pages 27-32 to select a Find Destination item. Once the Information page is displayed for the item you found, select ‘Route to It’...
- Page 36 (the route name can be edited here by selecting it, press- ing ENTER and using the ROCKER KEYPAD to change the name). 2. Press ENTER (‘OK’ button) to confi rm the name and save the route . The StreetPilot III can hold up to 50 saved routes.
- Page 37 To add a Via Point: 1. Press the ROUTE key to view the Routes menu. Select ‘Via Point’ and press ENTER, then, select ‘Add Via Point’ and press ENTER again (note that if the active route does not contain any via points, the ‘Add Via Point’...
-
Page 38: Deleting And Renaming Routes
You can access the Main menu by pressing the Menu key twice. Deleting and Renaming Routes You can delete a single route or all of the routes that exist in the StreetPilot III. You can also rename a route. To delete a single Route: 1. -
Page 39: Gps Information Page
(solid signal strength bar). Once a fi x has been calculated, the StreetPilot III will then update your position, ground track and ground speed by selecting and using the best satellites in view. -
Page 40: Receiver Status
Receiver Status As soon as the StreetPilot III has collected the necessary data to calculate a fi x, the status fi eld will indicate a 2D or 3D status (for ‘2D’, you may need to enter your elevation). Receiver status is indicated at the top left corner of the page. -
Page 41: Poor Satellite Reception' Menu
GPS for indoor use. Updating your approximate location will ensure that the StreetPilot III is searching for the correct satellites and is useful if you have traveled over 500 miles with the unit turned off. If the unit has been stored without batteries and the displayed date is incorrect, the StreetPilot III will not know the current positions of the GPS satellites. -
Page 42: Gps Information
This option is useful if you’ve relocated a long distance (greater than 500 miles) away from the last location where the StreetPilot III was used. In such instances, without initialization, the StreetPilot III may be looking for the wrong group of satellites. -
Page 43: Mapsource Information Page
To turn individual MapSource maps on or off: 1. MapSource data must fi rst be uploaded to a cartridge and installed in your StreetPilot III. 2. Select the ‘MapSource Info’ option from the Main menu, then use the ROCKER KEYPAD to scroll through the list of available maps. - Page 44 5. Use the UP key to return to the fi le tab area and select another fi le tab, if desired. At some point in time, you may desire to restore the default System Setup settings of the StreetPilot III. This can be done by selecting the option called ‘Restore Original Settings.’ To restore the original settings: 1.
-
Page 45: General' Tab
• Battery Saver: with a less frequent satellite signal updating process to conserve battery power. • GPS Off: allows you to operate the StreetPilot III indoors, which saves even more battery power since the unit is not receiving satellite information. The ‘Use Indoors’ option on the Map page options menu sets the operating mode to ‘GPS Off’. -
Page 46: Guidance' Tab
• SPEAK Key Only: the unit will only speak when the SPEAK key is pressed (it will not talk otherwise). Battery Type Used to designate the type of batteries currently used to power the StreetPilot III; – Alkaline or Ni-Cad (Nickel Cadmium). - Page 47 This setting is recommended if you frequently have a different preference for your routes. • No: this setting skips the Route Preference page before route calculations. The StreetPilot III will use your current Route Preference for all route calculations. This setting is recommended if you usually have the same preference for your routes.
- Page 48 • U-Turns: if checked, the StreetPilot III will not direct you to make a U-turn unless absolutely necessary. • Toll Roads: if checked, the StreetPilot III will avoid entering toll roads, but will still do so if the other alternatives take you too far out of your way.
-
Page 49: Time' Tab
‘Safety’ Tab The StreetPilot III is equipped with a ‘Safe Mode’ feature to improve driver safety. By default, this feature is enabled, but can be turned off to allow a passenger to operate the unit. When your vehicle is moving, ‘Safe Mode’ disables the StreetPilot III functions which require signifi cant operator attention and may become a distraction while driving. -
Page 50: Track Log' Tab
“http://www.garmin.com/products/spIII/agree.html” ‘Track Log’ Tab The StreetPilot III automatically records a history of your locations in the ‘Track Log’, creating an electronic ‘bread crumb’ trail of the path you have traveled. Once the log is full, new track points will replace the oldest track points. The beginning of the track contains the earliest point while the end contains the most recent ones. -
Page 51: Interface' Tab
The ‘Interface’ fi le tab provides the following input/output format settings: • Garmin: the proprietary format used to exchange waypoint, route, track log data with a PC. The format used for database updates and to save optional MapSource CD-ROM data to an installed data cartridge (also optional). - Page 52 ENTER, select the desired rate and press ENTER again. 5. For Garmin DGPS and RTCM In/NMEA Out, the ‘Beacon’ fi eld may be set to ‘Scan’ or ‘Manual’. If ‘Manual’ is selected, enter the beacon frequency and bit rate in the appropriate fi elds.
-
Page 53: Appendices
Vehicle Installation The StreetPilot III is portable, allowing you to easily carry the unit from vehicle to vehicle or take it with you once you reach your destination. A Dash Mount kit consisting of a mounting bracket, mounting base, required hardware and adhesive pads is included with the StreetPilot III. You may choose to use the non-skid friction mount (available for purchase separately if not included with your StreetPilot III), which is designed for convenient temporary mounting for your StreetPilot III. - Page 54 Appendix A Vehicle Installation NOTE: Allow the permanent adhesive to set 24 hours before using the dash mount. If permanent adhesive is later removed, use rubbing alcohol to clean any adhesive residue. Repositionable adhesive should only be used on clean, dust-free surfaces. Installing the Mounting Base with Disk Adhesive 1.
-
Page 55: Vehicle Installation
Attaching the External Speaker System with 12VDC Adapter to the StreetPilot III 1. Locate the power connector on the rear of the StreetPilot III (behind the rubber weather cap). The connector is “keyed” with a notch located between two of the four pins. - Page 56 Adjusting the Mounting Bracket’s Viewing Angle 1. Tilt the StreetPilot III forwards or backwards by pressing and holding down on the adjustment button on the back side of the bracket assembly (see fi gure at left). Adjust the unit as desired and release the button.
-
Page 57: Appendix B: Wiring And Interfacing
Consult the wiring diagrams at the side and bottom of the page for proper connections. (The male connector on the back of the StreetPilot III and wiring leads are illustrated to the right, wiring lead color coding is illustrated below.) -
Page 58: Appendix C: Optional Accessories
Programmable Data Card Non-Skid Friction Mount Optional Accessories In addition to the standard accessories included with your StreetPilot III (listed on the outside of the product box), the following optional/replacement accessories are designed to enhance the operation of the StreetPilot III. -
Page 59: Optional Accessories
• PC Interface Cable with Cigarette Lighter Adapter Handheld/Portable Antenna Allows you to connect the StreetPilot III to a vehicle’ s electrical system on one end, and a PC, beacon receiver, marine autopilot or other compatible device on the other. -
Page 60: Appendix D: Maintenance
(transferring it to MapSource). Water Immersion The StreetPilot III is waterproof to IEC Standard 529 IPX7. It can withstand immersion in 1 meter of water for 30 minutes. Prolonged submersion can cause damage to the unit. After submersion, be certain to remove the batteries and data card and dry the compartments before reuse. -
Page 61: Appendix E: Time Offset
ENTER. If the desired time zone is not pre-programmed into the StreetPilot III, you’ll need to enter the time offset manually. To do this, select ‘Other’ as the time zone. Once selected, a ‘UTC Offset’ fi eld appears directly adjacent to ‘Other’, allowing you to manually enter the difference between UTC and... -
Page 62: Appendix F: Using Diacritical Marks
Letters with diacritical marks are sorted together with those without diacritics. For example, the “Ç” is sorted in the StreetPilot III’ s alphabet as a “C”, and the “Д is sorted as a “D”. This means that sorted lists may contain a mix of diacritic marks for a given letter. Also note that the “Þ” character appears at the end of the alphabet on the StreetPilot III. - Page 63 Meißen, Germany (appears as “MEISSEN” in your StreetPilot III). If you wish to save a city/POI as a waypoint, the StreetPilot III will assign a waypoint name to this location. Keep in mind that, although diacritical marks appear when using the FIND key, they are not supported in most other StreetPilot III functions.
-
Page 64: Appendix G: Using Mapsource And Data Cards
With City Navigator data in your StreetPilot III, simply enter an address or intersection, or search for a point of interest using the FIND key, and the StreetPilot III will automatically plan a route and provide turn-by-turn directions to that location. -
Page 65: And Data Cards
StreetPilot III. Connect the Street- Pilot III to the PC using the supplied PC cable. Insert the data card into the StreetPilot III. Run the MapSource program, select the desired maps and transfer the map data. Using this method to program your data card is MUCH slower than using a USB connection. -
Page 66: Appendix H: Messages
Appendix H Messages The StreetPilot III uses an on-screen message system to alert you to unit operating characteristics. Messages Press the ENTER key to acknowledge and return to the page you were viewing. Using City or Postal Code May Help – More addresses or intersections were found than can be displayed. - Page 67 This Route Has Too Many Via Points – The route entered contains too many via points (intermediate destinations) and can only be navigated in an off-road, or point-to-point fashion. Note that the StreetPilot III only supports up to 100 user-specifi ed via points.
- Page 68 Appendix H Too Many Maps on Data Card – The data card contains more maps than the unit software can process. Track Memory is Full – Track log memory is full. No additional track log data can be stored without Messages deleting old data to create memory space.
-
Page 69: Appendix I: Specifi Cations
StreetPilot III Specifi cations Physical Case: Rugged; fully gasketed Size: 3.2”H x 6.8”W x 2.6”D (8.0 x 17.3 x 6.5 cm) Weight: 1.4 pounds (635 g) Display: 3.4”W x 1.8”H (8.6 x 4.5 cm), (305 x 160 pixels), high-contrast, 16-color backlit LCD... - Page 70 2-20 hours based on backlight setting Specifi cations subject to change without notice. 1. The temperature rating for the StreetPilot III may exceed the usable range of some batteries. Alkaline batteries can rupture at high temperatures. 2. With optional Garmin GBR 21/23 Beacon Receiver Input.
-
Page 71: Appendix J: Index
Exits 29 FCC Compliance 3 Features 8, 9, 11 Field 11 File Tabs 19-20, 42-50 Find 9, 27-32 Full Screen Map 13, 18 GPS Information Page 36-40 GPS Mode 43 Guidance 44 Appendix J Index Initialization 38-40 Installation 3, 4, 51-54... - Page 72 Appendix J Index Navigation 13-14, 17, 21-23 New Elevation 40 New Location 40 Next Turn Page 21 Night Mode 20 NMEA Output Formats 49 North Up Orientation 20, 37, 40 Odometers, Trip 24-25 On-Screen Button 11 Orientation 20, 37, 40 Overzoom 15 PAGE Key 9 Pointer 15-16...
- Page 74 For the latest free software updates throughout the life of your Garmin products, visit the Garmin web site at www.garmin.com. © Copyright 2002-2003 Garmin Ltd. or its subsidiaries Garmin International, Inc. 1200 E 151 Street, Olathe, KS 66062 U.S.A. Garmin (Europe) Ltd.