Advertisement
Table of Contents
- 1 Table of Contents
- 2 Safety Information
- 3 Safety Instructions
- 4 Installation
- 5 Product Description
- 6 Control Panel
- 7 Before First Use
- 8 Daily Use
- 9 Clock Functions
- 10 Using the Accessories
- 11 Additional Functions
- 12 Hints and Tips
- 13 Care and Cleaning
- 14 Troubleshooting
- 15 Energy Efficiency
- 16 Environmental Concerns
- Download this manual
Advertisement
Table of Contents

Related Manuals for Electrolux EOD3C50TX


Summary of Contents for Electrolux EOD3C50TX
- Page 1 User Manual Oven EOD3C50TX EOD5C50Z electrolux.com/register...
-
Page 2: Table Of Contents
WE’RE THINKING OF YOU Thank you for purchasing an Electrolux appliance. You’ve chosen a product that brings with it decades of professional experience and innovation. Ingenious and stylish, it has been designed with you in mind. So whenever you use it, you can be safe in the knowledge that you’ll get great results every time. -
Page 3: Safety Information
SAFETY INFORMATION Before the installation and use of the appliance, carefully read the supplied instructions. The manufacturer is not responsible for any injuries or damage that are the result of incorrect installation or usage. Always keep the instructions in a safe and accessible location for future reference. -
Page 4: Safety Instructions
Disconnect the appliance from the power supply before • carrying out any maintenance. If the mains power supply cable is damaged, it must be • replaced by the manufacturer, its Authorised Service Centre or similarly qualified persons to avoid an electrical hazard. WARNING: Ensure that the appliance is switched off before •... - Page 5 • The electrical installation must have an isolation device which lets you disconnect Built in depth of the appli‐ 548 mm the appliance from the mains at all poles. ance The isolation device must have a contact Depth with open door 1022 mm opening width of minimum 3 mm.
- Page 6 • Open the appliance door carefully. The • Before maintenance, deactivate the use of ingredients with alcohol can cause appliance and disconnect the mains plug a mixture of alcohol and air. from the mains socket. • Do not let sparks or open flames to come •...
-
Page 7: Installation
• Cut off the mains electrical cable close to the appliance. the appliance and dispose of it. 3. INSTALLATION 3.1 Building in WARNING! Refer to Safety chapters. www.youtube.com/electrolux www.youtube.com/aeg How to install your AEG/Electrolux Oven - Column installation (*mm) min. 550 min. 560 ENGLISH... - Page 8 (*mm) min. 550 min. 560 3.2 Securing the oven to the cabinet ENGLISH...
-
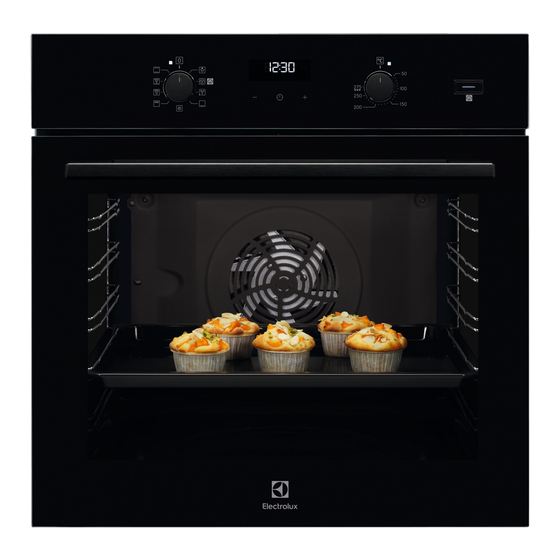
Page 9: Product Description
4. PRODUCT DESCRIPTION 4.1 General overview Control panel Knob for the heating functions Power lamp / symbol Display Control knob (for the temperature) Temperature indicator / symbol Plus Steam Heating element Lamp Cavity embossment Shelf support, removable Shelf positions 4.2 Accessories To bake and roast or as pan to collect fat. -
Page 10: Before First Use
5.3 Display A. Clock functions B. Timer 6. BEFORE FIRST USE WARNING! Refer to Safety chapters. 6.1 Before first use The oven can emit an odour and smoke during preheating. Make sure that the room is ventilated. Step 1 Step 2 Step 3 Set the clock Clean the oven... - Page 11 7.2 Setting the function: True Fan Cooking PLUS WARNING! Risk of burns and damage to the appliance. Step 1 Make sure that the oven is cold. Step 2 Fill the cavity embossment with tap wa‐ ter. The maximum capacity of the cavity embossment is 250 ml.
-
Page 12: Clock Functions
Heating func‐ Application Heating func‐ Application tion tion This function is designed to To bake pizza. To make inten‐ save energy during cooking. sive browning and a crispy bot‐ When you use this function, the tom. Moist Fan Baking Pizza Function temperature in the cavity may differ from the set temperature. - Page 13 8.2 How to set: Clock functions How to set: Time of Day - flashes when you connect the oven to the electrical supply, when there was a power cut or when the timer is not set. - press to set the time. After approximately 5 sec., the flashing stops and the display shows the time.
-
Page 14: Using The Accessories
9. USING THE ACCESSORIES devices. The high rim around the shelf WARNING! prevents cookware from slipping of the shelf. Refer to Safety chapters. 9.1 Inserting accessories A small indentation at the top increases safety. The indentations are also anti-tip Wire shelf: Push the shelf between the guide bars of the shelf support and make sure that the feet point down. -
Page 15: Additional Functions
Step 1 Pull out the right and left hand telescopic Step 2 Put the wire shelf on the telescopic runners. runners and carefully push them into the oven. 10. ADDITIONAL FUNCTIONS 10.1 Cooling fan 10.2 Safety thermostat When the oven operates, the cooling fan Incorrect operation of the oven or defective turns on automatically to keep the surfaces of components can cause dangerous... - Page 16 11.2 Moist Fan Baking - recommended accessories Use the dark and non-reflective tins and containers. They have better heat absorption than the light colour and reflective dishes. Ramekins Pizza pan Baking dish Flan base tin Ceramic Dark, non-reflective Dark, non-reflective Dark, non-reflective 8 cm diameter, 5 28 cm diameter...
- Page 17 (°C) (min) Savory pastry, 16 baking tray or dripping pan 35 - 45 pieces Short crust biscuits, baking tray or dripping pan 40 - 50 20 pieces Tartlets, 8 pieces baking tray or dripping pan 30 - 40 Vegetables, poached, baking tray or dripping pan 35 - 45 0.4 kg...
-
Page 18: Care And Cleaning
(°C) (min) Sponge True Fan Wire shelf 2 and 4 40 - 60 Preheat the oven for cake, cake Cooking 10 minutes. mould Ø26 Short bread True Fan Baking tray 140 - 150 20 - 40 Cooking Short bread True Fan Baking tray 2 and 4 140 - 150... - Page 19 Clean all accessories after each use and let them dry. Use a soft cloth with warm water and a mild detergent. Do not clean the accessories in a dishwasher. Do not clean the non-stick accessories using abrasive cleaner or sharp-edged objects. Accessories 12.2 How to clean: Cavity embossment...
- Page 20 Before the catalytic cleaning Turn off the oven and wait until it is Remove all accessories. Clean the oven floor and the inner cold. door glass with warm water, soft cloth and mild detergent. Clean the oven with catalytic cleaning Step 1 Step 2 Step 3...
- Page 21 Step 6 Pull the door trim to the front to remove it. Step 7 Hold the door glass panel by its top edge and carefully pull it out. Make sure the glass slides out of the supports completely. Step 8 Clean the glass panels with water and soap.
-
Page 22: Troubleshooting
......... Serial number (S.N.) ......... 14. ENERGY EFFICIENCY 14.1 Product Information and Product Information Sheet* Supplier's name Electrolux EOD3C50TX 949499309 Model identification EOD5C50Z 949499311 Energy Efficiency Index 95.3 Energy efficiency class Energy consumption with a standard load, conventional mode 0.95 kWh/cycle Energy consumption with a standard load, fan-forced mode 0.81 kWh/cycle... -
Page 23: Environmental Concerns
Volume 72 l Type of oven Built-In Oven EOD3C50TX 30.4 kg Mass EOD5C50Z 30.5 kg * For European Union according to EU Regulations 65/2014 and 66/2014. For Republic of Belarus according to STB 2478-2017, Appendix G; STB 2477-2017, Annexes A and B. - Page 24 electrolux.com...