
Related Manuals for Electrolux EOD3H54X


Summary of Contents for Electrolux EOD3H54X
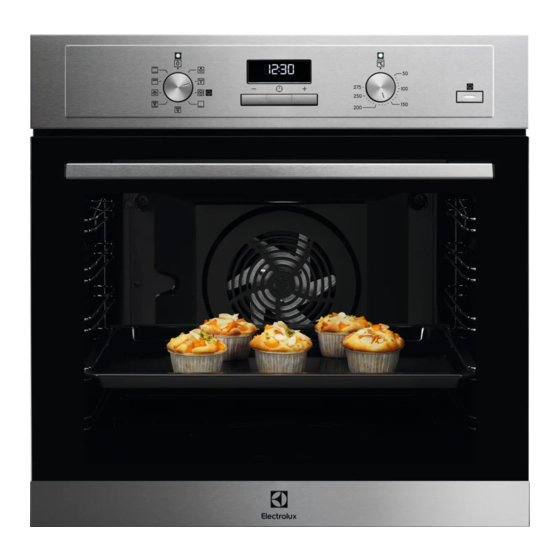
- Page 1 EOD3H54X Oven User Manual Get the most out of your appliance For quick access to manuals, how-to guides, support and more through our photo registration visit electrolux.com/register...
-
Page 2: Table Of Contents
14. ENERGY EFFICIENCY.................. 31 WE’RE THINKING OF YOU Thank you for purchasing an Electrolux appliance. You’ve chosen a product that brings with it decades of professional experience and innovation. Ingenious and stylish, it has been designed with you in mind. So whenever you use it, you can be safe in the knowledge that you’ll get great results every time. -
Page 3: Safety Information
ENGLISH SAFETY INFORMATION Before the installation and use of the appliance, carefully read the supplied instructions. The manufacturer is not responsible for any injuries or damage that are the result of incorrect installation or usage. Always keep the instructions in a safe and accessible location for future reference. -
Page 4: Safety Instructions
Always use oven gloves to remove or put in • accessories or ovenware. Before carrying out any maintenance, disconnect the • appliance from the power supply. WARNING: Ensure that the appliance is switched off • before replacing the lamp to avoid the possibility of electric shock. - Page 5 ENGLISH • The shock protection of live and insulated parts must be fastened in Height of the back 576 mm such a way that it cannot be removed of the appliance without tools. Width of the front of 595 mm •...
- Page 6 • This appliance is for household use • This appliance is for cooking only. purposes only. It must not be used for • Do not change the specification of this other purposes, for example room appliance. heating. • Make sure that the ventilation •...
-
Page 7: Installation
• To repair the appliance contact the children or pets from becoming Authorised Service Centre. trapped in the appliance. 3. INSTALLATION 3.1 Building in WARNING! Refer to Safety chapters. www.youtube.com/electrolux www.youtube.com/aeg How to install your AEG/Electrolux Oven - Column installation (*mm) min. 550 min. 560... - Page 8 (*mm) min. 550 min. 560 3.2 Securing the oven to the cabinet...
-
Page 9: Product Description
ENGLISH 4. PRODUCT DESCRIPTION 4.1 General overview Control panel Knob for the heating functions Power lamp / symbol Display Control knob (for the temperature) Temperature indicator / symbol Plus Steam Heating element Lamp Cavity embossment - Aqua cleaning container Shelf support, removable Shelf positions 4.2 Accessories •... -
Page 10: Before First Use
5.3 Display A. Clock functions B. Timer 6. BEFORE FIRST USE WARNING! Refer to Safety chapters. 6.1 Before first use The oven can emit an odour and smoke during preheating. Make sure that the room is ventilated. Step 1... - Page 11 ENGLISH 7.1 How to set: Heating function Step 2 Turn the control knob to se‐ lect the temperature. Step 1 Turn the knob for the heat‐ Step 3 When the cooking ends, ing functions to select a turn the knobs to the off po‐ heating function.
- Page 12 Heating Application Heating Application function function This function is de‐ To bake pizza. To make signed to save energy intensive browning and during cooking. When a crispy bottom. Moist Fan Pizza Func‐ you use this function, Baking tion the temperature in the cavity may differ from To defrost food (vegeta‐...
-
Page 13: Clock Functions
ENGLISH 8. CLOCK FUNCTIONS 8.1 Clock functions Clock function Application To set, change or check the time of day. Time of Day To set how long the oven works. Duration To set a countdown. This function has no effect on the operation of the oven. -
Page 14: Using The Accessories
How to set: Minute Minder Step 2 - press to set the time. The function starts automatically after 5 sec. When the set time ends, the signal sounds. Step 3 Press any button to stop the signal. Step 4 Turn the knobs to the off position. -
Page 15: Additional Functions
ENGLISH Wire shelf, Deep pan: Push the tray between the guide bars of the shelf support and the wire shelf on the guide bars above. 9.2 Using telescopic runners Make sure you push back the telescopic runners fully in the oven before you close Do not oil the telescopic runners. - Page 16 Count the shelf positions from the bottom Cooking meat and fish of the oven floor. Use a deep pan for very fatty food to prevent the oven from stains that can be Your oven may bake or roast differently permanent.
- Page 17 ENGLISH FROZEN READY MEALS (°C) (min) Lasagne, use 200 ml 180 - 200 35 - 50 Use 100 ml of water. Set the temperature to 110 °C. FOOD REGENERATION (min) Bread rolls 10 - 20 Bread 15 - 25 Focaccia 15 - 25 Meat 15 - 25...
- Page 18 Conventional True Fan Cooking Cooking CAKES (min) (°C) (°C) Shortbread 3 (2 and 4) 20 - 30 Cake dough mould Buttermilk 60 - 80 Cake cheesecake mould, Ø 26 cm Strudel 60 - 80 Baking tray Jam tart 30 - 40 Cake mould, Ø...
- Page 19 ENGLISH Conventional True Fan Cooking Cooking CAKES (min) (°C) (°C) Eclairs, two 2 and 4 35 - 45 Baking tray levels Plate tarts 45 - 70 Cake mould, Ø 20 cm Rich fruit 110 - Cake cake mould, Ø 24 cm Preheat the empty oven.
- Page 20 Conventional Cook‐ True Fan Cooking FLANS (min) (°C) (°C) Pasta flan, preheating is 40 - 50 not needed Vegetable flan, preheat‐ 45 - 60 ing is not needed Quiches 50 - 60 Lasagne 180 - 190 180 - 190...
- Page 21 ENGLISH Conventional True Fan Cooking Cooking MEAT (min) (°C) (°C) Whole duck 120 - 150 Whole goose 150 - 200 Rabbit, cut in pieces 60 - 80 Hare, cut in pieces 150 - 200 Whole pheasant 90 - 120 Use the second shelf position. Conventional True Fan Cook‐...
- Page 22 GRILL (kg) (min) (min) 1st side 2nd side Fish fillet, 4 pieces 12 - 14 10 - 12 Toasted sandwiches, 4 - 6 5 - 7 Toast, 4 - 6 2 - 4 2 - 3 11.5 Turbo Grilling Preheat the empty oven.
- Page 23 ENGLISH FISH (STEAMED) (°C) (min) Whole fish, 1 - 210 - 220 40 - 60 1.5 kg 11.6 Defrost (kg) Defrosting Further defrost‐ time (min) ing time (min) Chicken 100 - 140 20 - 30 Place chicken on an upturned saucer placed on a large plate.
- Page 24 FRUIT FRUIT Plums 8 - 10 Apple slices 6 - 8 Apricots 8 - 10 Pears 6 - 9 11.8 Moist Fan Baking - recommended accessories Use the dark and non-reflective tins and containers. They have better heat absorption than the light colour and reflective dishes.
- Page 25 ENGLISH (°C) (min) Victoria sand‐ baking dish on wire 35 - 50 wich shelf Poached fish, baking tray or dripping 35 - 45 0.3 kg Whole fish, 0.2 baking tray or dripping 25 - 35 Fish fillet, 0.3 kg pizza pan on wire shelf 170 30 - 40 Poached meat, baking tray or dripping...
- Page 26 (°C) (min) Small Conven‐ Baking 20 - 30 cakes, tional Cook‐ tray 20 per tray Small True Fan Baking 150 - 20 - 35 cakes, Cooking tray 20 per tray Small True Fan Baking 2 and 150 - 20 - 35...
-
Page 27: Care And Cleaning
ENGLISH (°C) (min) Toast, 4 Grill Wire max. 2 - 3 minutes Preheat the oven shelf first side; 2 - 3 for 3 minutes. pieces minutes sec‐ ond side Beef bur‐ Grill Wire max. 20 - 30 Put the wire shelf ger, 6 shelf and on the fourth lev‐... - Page 28 12.2 How to clean: Cavity embossment Clean the cavity embossment to remove limestone residue after cooking with steam. Step 1 Step 2 Step 3 Pour: 250 ml of white vine‐ Let the vinegar dissolve Clean the cavity with warm gar into the cavity emboss‐...
- Page 29 ENGLISH Step 5 Turn off the oven. Step 6 Wait until the oven is cold. Dry the cavity with a soft cloth. 12.5 How to remove and install: Door The oven door has two glass panels. You can remove the oven door and the internal glass panel to clean it.
-
Page 30: Troubleshooting
Step 8 Clean the glass panels with wa‐ ter and soap. Dry the glass pan‐ els carefully. Do not clean the glass panels in the dishwasher. Step 9 After cleaning, install the glass panel and the oven door. The screen-printing zone must face the inner side of the door. -
Page 31: Energy Efficiency
Serial number (S.N.) ......... 14. ENERGY EFFICIENCY 14.1 Product Information and Product Information Sheet* Supplier's name Electrolux Model identification EOD3H54X 949499371 Energy Efficiency Index 81.2 Energy efficiency class Energy consumption with a standard load, con‐ 0.93 kWh/cycle ventional mode Energy consumption with a standard load, fan- 0.69 kWh/cycle... - Page 32 Mass 28.5 kg * For European Union according to EU Regulations 65/2014 and 66/2014. For Republic of Belarus according to STB 2478-2017, Appendix G; STB 2477-2017, Annexes A and B. For Ukraine according to 568/32020. Energy efficiency class is not applicable for Russia.
- Page 36 www.electrolux.com/shop...