LaCie 2big NAS User Manual
Hide thumbs
Also See for 2big NAS:
- Quick install manual (14 pages) ,
- User manual (245 pages) ,
- User manual (434 pages)
Table of Contents
Advertisement
Quick Links
Advertisement
Table of Contents

Related Manuals for LaCie 2big NAS


Summary of Contents for LaCie 2big NAS
- Page 1 LACIE NAS OS 4 USER MANUAL CLICK HERE TO ACCESS AN UP-TO-DATE ONLINE VERSION of this document. You will find the most recent content as well as expandable illustrations, easier navigation, and search capability. LaCie 2big NAS LaCie 5big NAS Pro...
-
Page 2: Box Content
Congratulations on your purchase of a LaCie professional NAS (network-attached storage device). This manual guides you through the process of connecting the LaCie NAS device to your network and assists you in troubleshooting any issues that might arise. If you encounter problems, check Getting Help. -
Page 3: Minimum System Requirements
Computer with an Ethernet network adapter Ethernet switch or router 10/100/1000 (Mb/s) Important info: Your LaCie product's performance can be affected by such external forces as network activity, hardware, distance, and setup. For optimal performance, use Gigabit Ethernet equipment. LaCie NAS OS 4 User Manual... -
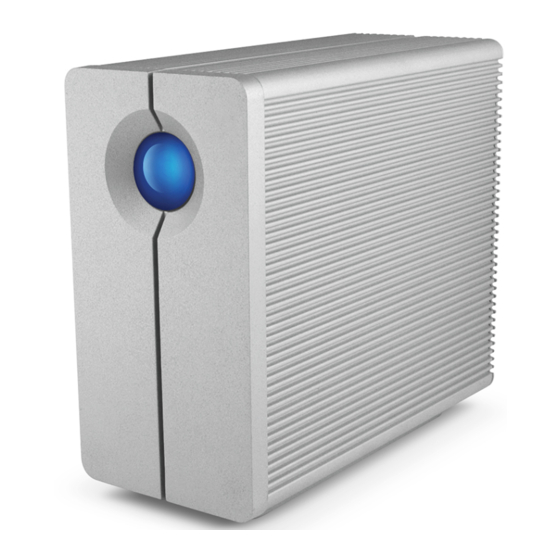
Page 4: Views Of The Product
VIEWS OF THE PRODUCT FRONT VIEW LaCie 2big NAS LaCie 5big NAS Pro Front LED button: The LED button signals the status and health of the device. For further details, see Behavior and Button Functions. LaCie NAS OS 4 User Manual... -
Page 5: Rear View
Left drive status LED (see LED Behavior and Button Functions) ON/OFF Gigabit Ethernet USB 2.0 expansion eSATA expansion Right drive status LED (see LED Behavior and Button Functions) Drive tray handle Drive lock Power connector LaCie NAS OS 4 User Manual... - Page 6 LED Behavior and Button Functions) Drive tray handle Drive lock USB 2.0 expansion (x2) USB 3.0 expansion (x2) Gigabit Ethernet (x2) VGA port (for maintenance) Power connector Reset button (see LaCie NAS Rescue: 5big NAS Pro) LaCie NAS OS 4 User Manual...
- Page 7 The front and rear LEDs indicate drive status and activity. This section describes the behavior of the LED indicators. Note that even if you have turned off the front LED using Device Manager > Settings, events triggering a red light will always cause the front LED to turn on. LaCie NAS OS 4 User Manual...
- Page 8 The power supply has been cut and the UPS has run out of reserve power; the product is preparing to shut Solid red Solid red for non-functional disks RAID has failed and data has been lost Off for disconnected disks Disks are disconnected LaCie NAS OS 4 User Manual...
-
Page 9: Front Button
A long push can result in data loss and should only be used when a short push does not work. Factory settings/rescue LaCie 2big NAS: The front LED button can be used in tandem with the ON/OFF switch to revert the device to its factory settings (see Reset to Factory Conditions: 2big NAS). -
Page 10: Hard Disk Heat Management
DUAL COOLING - 5BIG NAS PRO With its dual cooling design, the LaCie 5big NAS Pro is built to protect against overheating. The 5big's solid aluminum casing diverts and dissipates heat, keeping the drives cooler even after extended periods of activity. - Page 11 HEAT DISSIPATION DESIGN - 2BIG NAS The LaCie 2big NAS Pro's metal body is ideal for naturally dissipating internal drive heat. Its unique design draws heat away from the internal drive toward the external casing. The large surface area of the heat sink casing absorbs internal heat and dissipates it, keeping the drive safe and prolonging its life and reliability.
-
Page 12: Connect To The Network
LaCie 2big NAS LaCie 5big NAS Pro Caution: Only use the AC adapter supplied with your specific LaCie device. Do not use a power supply from another LaCie device or another manufacturer. Using any other power cable or power supply may cause damage to the device and void your warranty. - Page 13 Step 2: Power on the LaCie 5big Power on the device. LaCie 2big NAS: Push the power button on the back of the device to the ON position. LaCie 5big NAS Pro: Lightly push the the front LED button. The front LED turns on and then blinks. The front LED blinks for approximately three minutes before turning solid blue.
-
Page 14: Next Steps
Note: The steps below should be completed by the administrator of the device. Perform the steps below on a PC or Mac connected to the same network as your LaCie NAS: Launch your preferred internet browser and type the default address for the LaCie NAS: Windows workstations (no Bonjour) - http://lacie-2big-nas or http://lacie-5big-pro Mac OS X and Windows workstations running Bonjour - http://lacie-2big-nas.local or... - Page 15 Hard Drives to review compatible hard drives. LaCie recommends selecting disks that are equal in storage capacity. For example, if the first disk slot has a 1TB hard disk, fill the second slot with a 1TB hard disk. LaCie NAS OS 4 User Manual...
-
Page 16: Installation Steps
Step 1: Update the LaCie USB key The included USB flash drive allows you to boot the LaCie 5big and run the NAS OS Rescue and Install (LaCie key). However, before running the Rescue and Install, it is highly recommended that you download the most recent version of the software as it may have been updated since you received your NAS. - Page 17 (Step 3), the system provides the MAC and IP addresses. If the monitor is receiving a signal but the image is black, try connecting a USB keyboard to one of the USB ports also located on the back of the LaCie 5big.
- Page 18 Connect the LaCie key to one of the USB ports on the LaCie 5big. Caution: Only use the AC adapter supplied with your specific LaCie device. Do not use a power supply from another LaCie device or another manufacturer. Using any other power cable or power supply may cause damage to the device and void your warranty.
- Page 19 Step 3: Remove the sticker and power on the LaCie 5big Remove the sticker on the back of the enclosure. Press the front LED button to power on the device. Important info: Power the device on before inserting hard disks into the drive slots.
- Page 20 LaCie 5big NAS Pro Hard Disk Trays Hard drives Hard disk tray screws. Use only the screws that are provided with your LaCie 5big. Phillips head screwdriver. Confirm that the head of the screwdriver is the proper size for the disk tray screws.
- Page 21 Gently push the hard drive tray handle firmly until you feel it snap into place. Once the disk tray handle is flush with the back of the enclosure, you can lock it. LaCie NAS OS 4 User Manual...
- Page 22 If you are adding more than one hard disk, insert full hard drive trays into empty slots in the enclosure. Make certain to follow the slot numbers. For example, the second hard disk should be inserted into disk slot 2, the third disk into disk slot 3, etc. LaCie NAS OS 4 User Manual...
- Page 23 Note: The steps below should be completed by the NAS's administrator. Perform the steps below on a PC/Mac connected to the same network as your LaCie 5big. During this process, the hard disks you have inserted into the 5big NAS Pro will be formatted and all data deleted.
- Page 24 IP address, and MAC address. It also provides quick access to shares and NAS OS. See Seagate Network Assistant for instructions. Configure your NAS: For details on how to configure and use your LaCie NAS, go to Shares: Access and Transfer File Device Manager.
- Page 25 CHOOSE COMPATIBLE HARD DRIVES Review the following before adding hard drives to your LaCie 2big NAS: The LaCie 2big NAS has been tested and certified for use with select Seagate hard drives. Go to Network Hard Drives to review compatible hard drives.
- Page 26 INSTALLATION STEPS Step 1: Connect and power on the diskless 2big NAS Make sure that the disk slots are empty. You will be prompted to insert disks in Step 3. Connect the Ethernet cable to the Ethernet port on the back of the product and to an available Ethernet port on your router.
- Page 27 Step 2: Remove the disk tray sticker and empty disk tray(s) Note on illustrations: To reduce complexity in the images, the Ethernet and Power cables have been removed. LaCie recommends that you maintain both connections while continuing with the installation steps. Remove the sticker from the back of the device.
- Page 28 Draw out the disk tray by inserting your finger into the space behind the disk tray handle and pulling to disengage it. Grasp the disk tray handle and carefully extract it. LaCie NAS OS 4 User Manual...
- Page 29 Repeat the process if you are adding a second disk. LaCie NAS OS 4 User Manual...
- Page 30 LaCie 2big NAS disk tray Hard disk Disk tray screws. Use only the screws that are provided with your LaCie NAS. Phillips head screwdriver. Make certain that the screwdriver is the correct size for the disk tray screws. Caution: To avoid potential problems caused by electrostatic discharge (ESD), it is recommended that you do not touch the hard disk’s printed circuit board.
- Page 31 Note on illustrations: To reduce complexity in the images, the Ethernet and Power cables have been removed. LaCie recommends that you maintain both connections while continuing with the installation steps. Carefully insert the full disk tray into an empty disk slot. You will feel resistance when the disk tray is most of the way in the bay.
- Page 32 The disk LEDs on the rear of the product will blink blue. Wait a full minute before moving on to the next step. LaCie NAS OS 4 User Manual...
- Page 33 Step 5: Initialize the new disks During this process, the hard disks you have inserted into the LaCie NAS will be formatted and all data deleted. Press and hold the front button for at least 5 seconds. Once the LED begins to blink blue and red, release the button.
- Page 34 Windows workstations (no Bonjour) - http://lacie-2big-nas Mac OS X and Windows workstations running Bonjour - http://lacie-2big-nas.local Enter the MAC addresses for your 2big NAS. It is not necessary to enter the colons. Choose Start Install. Choose Continue at the prompt to install NAS OS. To accommodate the installation, all data stored on the hard disks will be deleted.
- Page 35 IP address, and MAC address. It also provides quick access to shares and NAS OS. See Seagate Network Assistant for instructions. Configure your NAS: For details on how to configure and use your LaCie NAS, go to Shares: Access and Transfer File Device Manager.
- Page 36 Follow the directions below to remove a failed hard drive or a hard drive that you wish to swap for another disk with greater capacity. Caution: After continuous use of the LaCie NAS, hard drives may be hot. Use caution when removing a hard drive.
- Page 37 Grasp the tray handle and carefully extract the drive. To reuse the disk tray, unfasten the drive's screws and affix the new disk to the tray. Detailed instructions are available at Connect to the Network: Diskless LaCie 5big NAS Pro. LaCie NAS OS 4 User Manual...
- Page 38 Disk Insertion For instructions on fixing a hard drive to the disk tray, go to Connect to the Network: Diskless LaCie 5big NAS Pro. Carefully insert the tray into an empty hard drive bay. Make certain to press the drive tray handle firmly until you feel the drive snap into place.
-
Page 39: Getting Help
GETTING HELP If you are having problems with your LaCie product, consult the table below for a list of available resources. Order Source Description Location Concise steps to Quick follow for getting your Either a printed leaflet or accessory box and included in the... -
Page 40: Troubleshooting Topics
Q: IP address problem? A: By default the LaCie NAS is configured to retrieve its IP address from a DHCP server. If your network is managed by a DHCP server and you cannot access your LaCie NAS, try checking your DHCP server's log. To find the IP address for your LaCie NAS, run Seagate Network Assistant. - Page 41 A: The VGA signal reverts to energy saving mode within a few minutes. If the monitor appears to be receiving a signal but no image is present, try to connect a USB keyboard to one of the LaCie 5big NAS Pro's USB ports. Tap on one of the keys to view the LaCie 5big NAS Pro VGA signal.
- Page 42 Data Recovery: Enable FTP Access to the data on your LaCie 5big NAS Pro. Once enabled, you can use FTP client software or a web browser to back up the data stored on your LaCie 5big NAS Pro.
- Page 43 The VGA signal reverts to energy saving mode within a few minutes. If the monitor appears to be receiving a signal but no image is present, try to connect a USB keyboard to one of the LaCie 5big NAS Pro's USB ports. Tap on one of the keys to view the LaCie 5big NAS Pro VGA signal.
- Page 44 Seagate Network Assistant If you do not see the LaCie 5big NAS Pro in Seagate Network Assistant, confirm that your LaCie 5big NAS Pro is: Connected to the same network as the workstation you are using. Connected to the same network as your computer. Also, confirm that the 5big NAS Pro is connected to the network using its LAN 1 Ethernet port.
- Page 45 NAS OS 3 key. The software that you download onto the LaCie key NAS is not the NAS OS. Rather, it is a utility to run the NAS OS Rescue so that you can install or repair the NAS OS.
- Page 46 Step 2: Back up and power off the LaCie 5big NAS Pro The LaCie NAS Rescue will attempt to repair or reset the NAS OS. To guarantee that data stored on the LaCie 5big NAS Pro is preserved, LaCie highly recommends that you back up all shares before moving forward with the Rescue.
- Page 47 While you are pushing the reset button with the drive lock tool, turn on the LaCie 5big NAS Pro by pushing the front LED button. DO NOT remove the drive lock tool as the LaCie 5big NAS Pro powers on. Doing so will prevent the LaCie 5big NAS Pro from using the LaCie USB Key as the boot device.
- Page 48 The reset button is required when disks are present in the NAS since it sets the boot priority to the key. If there are no disks in the NAS, the device will boot directly from the LaCie key. LaCie NAS OS 4 User Manual...
- Page 49 Step 5: Launch the LaCie 5big NAS Pro Rescue Go to Seagate Network Assistant to select LaCie-5big-pro > Web Access…. If the LaCie NAS Rescue does not appear, enter the IP address or name in your browser's address bar (URL). For example, http://192.168.10.40 or http://lacie-5big-pro.local.
- Page 50 The LED blinks red. Within five seconds, press the front button once to confirm the reset. The front LED blinks blue for several seconds. The front LED blinks red/blue during a system reset. The LaCie 2big NAS is ready when it reboots and the front LED is static blue.
- Page 51 The table below provides the maximum amount of elements allowed for specific features. Feature Maximum Users 2048 Groups Shares iSCSI Targets Unlimited (5big NAS Pro) and 16 (2big NAS) Volumes 5 (5big NAS Pro) and 2 (2big NAS) Volume size 108TB LaCie NAS OS 4 User Manual...
-
Page 52: Legal Info
LEGAL INFO COPYRIGHTS Copyright © 2016 LaCie. All rights reserved. No part of this publication may be reproduced, stored in a retrieval system, or transmitted in any form or by any means, electronic, mechanical, photocopying, recording or otherwise, without the prior written consent of LaCie. -
Page 53: Canada Compliance Statement
LICENCES AND FREE SOFTWARE Your LaCie product ships with copyrighted software that are licensed under the GPL, AFL, Apache, Apple, BSD, GNU LGPL, MIT, OpenLDAP, OpenSSL, PHP, Python, and Creative Common. It also includes free software, the source code for which can be downloaded from the LaCie website: www.lacie.com/support/... -
Page 54: Japan Compliance Statement
This is a Class B product based on the standard of the Voluntary Control Council for Interference from Information Technology Equipment (VCCI). If this is used near a radio/TV receiver, it may cause radio interference. Install the equipment according to the manual. This statement does not apply to the LaCie CloudBox. -
Page 55: Health And Safety Precautions
LaCie be held liable for the recovery or restoration of this data. To help prevent the loss of your data, LaCie highly recommends that you keep TWO copies of your data; one copy on your external hard disk, for instance, and a second copy either on your internal hard disk, another external hard disk or some other form of removable storage media. -
Page 56: General Use Precautions
II). Do not expose the LaCie device to temperatures outside the range of 5º C to 30º C (41º F to 86º F); or to operational humidity beyond 10-80%, non-condensing, or non-operating humidity beyond 10-90%, non-condensing. -
Page 57: Warranty Information
LaCie (“LaCie”) warrants, to the original purchaser, that this equipment shall be free of defects in materials and workmanship for a period of one (1), two (2), three (3), or five (5) years, depending on the model, from LaCie's date of original shipment when the equipment is used normally and is properly serviced when needed. If you discover a defect covered by the warranty set forth above, your sole and exclusive remedy will be for LaCie, in its sole discretion to (i) repair or replace the product at no charge to you;... - Page 58 Any loss, corruption or destruction of data while using a LaCie drive is the sole responsibility of the user, and under no circumstances will LaCie be held liable for the recovery or restoration of this data. To help prevent the loss of your data, LaCie highly recommends that you keep TWO copies of your data;...
-
Page 59: Note To Australian Customers
Within the 15 calendar days of purchase, should you experience an issue with your new LaCie product, we ask you to return the product to the place where it was originally bought. You will be required to give a proof of purchase.