Husky HPRO72MWC20BLK Use And Care Manual
Hide thumbs
Also See for HPRO72MWC20BLK:
- Use and care manual (10 pages) ,
- Use and care manual (39 pages) ,
- Use and care manual (9 pages)
Table of Contents
Advertisement
Quick Links
USE AND CARE GUIDE
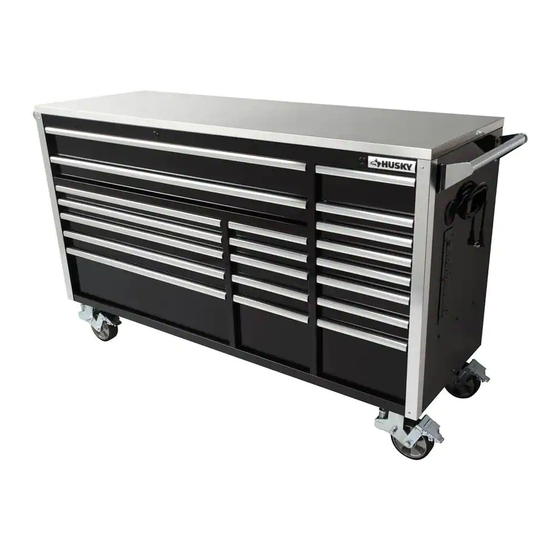
Husky Professional Duty 72 in. 20-Drawer Mobile Work Bench
Questions, problems, missing parts?
Before returning to the store, call
Husky Customer Service
8 a.m – 7 p.m., EST, Monday-Friday
9 a.m – 6 p.m., EST, Saturday
1-888-HD-HUSKY
HUSKYTOOLS.COM
We appreciate the trust and con dence you have placed in Husky through the purchase of this cabinet. We strive to continually
create quality products designed to enhance your home. Visit us online to see our full line of products available for your home
THANK YOU
improvement needs. Thank you for choosing Husky!
Store SKU # 1006636633
Internet SKU # 1006581370
Model # HPRO72MWC20BLK
Advertisement
Chapters
Table of Contents

Related Manuals for Husky HPRO72MWC20BLK


Summary of Contents for Husky HPRO72MWC20BLK
- Page 1 THANK YOU We appreciate the trust and con dence you have placed in Husky through the purchase of this cabinet. We strive to continually create quality products designed to enhance your home. Visit us online to see our full line of products available for your home...
-
Page 2: Table Of Contents
Table of Contents Table of Contents ..........2 Assembly ............... 6 ....... - Page 3 CAUTION: RISK OF ELECTRICAL SHOCK: This unit has one power supply cord. Make sure the cord is unplugged before any servicing or cleaning. HUSKYTOOLS.COM Please contact 1-888-HD-HUSKY for further assistance.
-
Page 4: Warranty
Warranty This Husky Professional Grade product includes a Limited Lifetime Warranty, whereas the manufacturer warrants the product to be free from defects in materials and workmanship for the product’s useful life. If any part of this product is found to be defective, the manufacturer’s only obligation, and purchaser’s exclusive remedy, is to provide replacement parts at the manufacturer’s discretion, provided that the product has not... - Page 5 Package Contents (continued) NOTE: The keys are inside top drawer. Part Description Quantity Cabinet Cabinet handle Storage hook HUSKYTOOLS.COM Please contact 1-888-HD-HUSKY for further assistance.
-
Page 6: Assembly
Assembly after removing the wood pallet and all CAUTION: packaging, use the Hex key (BB) or a 12mm socket Two people are recommended for assembly. wrench to tighten all 16 caster bolts, which may have CAUTION: become loose during shipment. Attaching the Cabinet Handles Attaching the Storage Hook □... -
Page 7: Operation
Retain This Label For Key Identification ONE KEY FOR ALL YOUR LOCKS □ Please see the Kwikset Smartkey® supplemental instructions for keying and re-keying the locks. HUSKYTOOLS.COM Please contact 1-888-HD-HUSKY for further assistance. -
Page 8: Cordless Power Tool Battery Chargers
Cordless Power Tool Battery Chargers □ See Charger’s Owner’s Manual for proper use and care of charger and batteries. Follow all Warnings and Instructions provided with your battery charger. □ Place chargers and electrical connections in till. □ Chargers are for use in dry locations only. Do NOT expose to liquid, vapor, or rain. Should your charger become wet, Do NOT attempt to use. - Page 9 Replacement Parts For assistance with replacement parts please call 1-888-HD-HUSKY. Part Part# Description Quantity MC08515700 Cabinet Handle AD03043400 Swivel Caster AY04016500 Kwikset Smartkey® Lock MB15003500 PA18022600 Badge PA06103600 Drawer Liner AJ02027400 Drawer Slide (pairs) MB05023100 Caster Bolt MJ06000100 Caster Washer...
- Page 10 Questions, problems, missing parts? Before returning to the store call Husky Customer Service 8 a.m. - 7 p.m., EST, Monday-Friday 9 a.m. - 6 p.m., EST, Saturday 1-888-HD-HUSKY HUSKYTOOLS.COM Retain this manual for future use.
- Page 11 THANK YOU hutch We appreciate the trust and con dence you have placed in Husky through the purchase of this We strive to continually create quality products designed to enhance your home. Visit us online to see our full line of products available for your home...
-
Page 12: E N A N C E
Table of Contents Table of Contents ..........2 Assembly ............... 6 Safety Information ..........2 Cordless Power Tool Battery Chargers ....11 Warranty ..............4 .... - Page 13 CAUTION: RISK OF ELECTRICAL SHOCK: This unit has one power supply cord. Make sure the cord is unplugged before any servicing or cleaning. HUSKYTOOLS.COM Please contact 1-888-HD-HUSKY for further assistance.
-
Page 14: Warranty
Warranty This Husky Professional Grade product includes a Limited Lifetime Warranty, whereas the manufacturer warrants the product to be free from defects in materials and workmanship for the product’s useful life. If any part of this product is found to be defective, the manufacturer’s only obligation, and purchaser’s exclusive remedy, is to provide replacement parts at the manufacturer’s discretion, provided that the product has not... - Page 15 Package Contents (continued) NOTE: Hutch keys are attached to door. Part Description Quantity Hutch Shelf LED Light (YLED 301-S) Transformer HUSKYTOOLS.COM Please contact 1-888-HD-HUSKY for further assistance.
-
Page 16: Assembly
Assembly The 72 in. Hutch is designed to speci cally t only on the Husky Professional Duty 72 in. 20-Drawer Workbench , which includes the following products: 72 in. 20-Dr. Professional Duty Workbench Model # HPRO72MWC20BLK SKU # 1006636633 / 1006581370 27.5 in. - Page 17 Use 8 pcs M6*48mm ange bolts (BB) to secure the Hutch along the sides and back to the Workbench. Tighten with a 8mm socket or wrench. □ Be careful not to over tighten. HUSKYTOOLS.COM Please c ontact 1-888-HD-HUSKY for further assistance.
- Page 18 Attach the LED light □ The LED light has been pre-installed on the shelf. Remove any packing materials and the nylon cable ties bundled at both ends of the LED light. Nylon cable □ Insert the power cable into the end of the LED xture, and reposition so it’s centered on the shelf. Note: The back of the LED xture is magnetic and attaches directly to the articulating holder under the shelf.
- Page 19 Secure the LED Transformer (D) to the back of the Hutch using the 2 the Transformer Holders (GG) with 4 pcs Hex socket button cap bolt (EE). □ Tighten with Hex Key (HH). HUSKYTOOLS.COM Please contact 1-888-HD-HUSKY for further assistance.
- Page 20 □ Use the Cable clips (FF) to attach the power cord from the LED light and route the wire along the backwall to connect to the Motion Sensor(II). Double-sided tape on back Attach the Storage Hooks □ Hex button botton cap bolt Attach the Storage Hooks (DD) for the power cord on the back of the Hutch with 12 pcs (EE).
-
Page 21: Cordless Power Tool Battery Chargers
This product has been coated with an industrial UV-resistant power coating for a durable and long lasting finish. To help protect the coating, do not allow harsh chemicals to remain on the surface for extended periods of time. HUSKYTOOLS.COM 11 11 Please contact 1-888-HD-HUSKY for further assistance. -
Page 22: Replacement Parts
Replacement Parts For assistance with replacement parts please call 1-888-HD-HUSKY. Part Part# Description Quantity PA18022600 Badge Kwikset Smartkey® Lock AY04016400 MB15003600 AA99014600 Outlet DB12746700 Outlet Panel Cover RA99020100 Rubber Grommet ML990558R5 Storage Hook MF05018900 Storage Hook Bolt Shelf DB12745300 AA99017400... - Page 23 Questions, problems, missing parts? Before returning to the store call Husky Customer Service 8 a.m. - 7 p.m., EST, Monday-Friday 9 a.m. - 6 p.m., EST, Saturday 1-888-HD-HUSKY HUSKYTOOLS.COM Retain this manual for future use.