Table of Contents
Advertisement
Available languages
Available languages
Quick Links
Cat. No. / No de cat.
2868-20, 2869-20
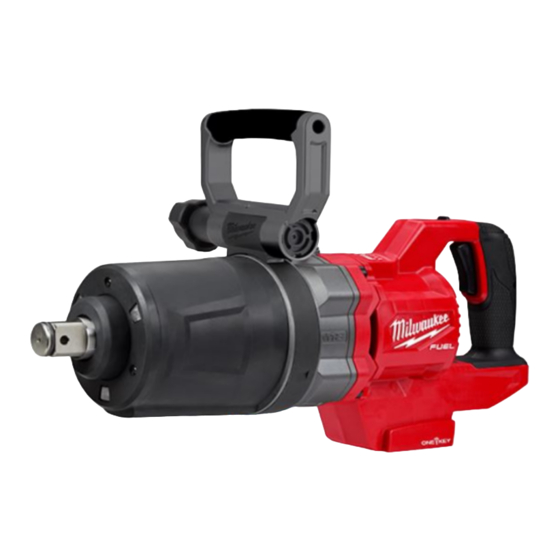
M18 FUEL™ 1" D-HANDLE HIGH TORQUE IMPACT WRENCH
WITH ONE-KEY™
M18 FUEL™ 1" D-HANDLE EXT. ANVIL HIGH TORQUE IMPACT
WRENCH WITH ONE-KEY™
CLÉ À CHOCS À COUPLE ÉLEVÉ À POIGNÉE EN « D » DE 1"
AVEC ONE-KEY™ M18 FUEL™
CLÉ À CHOCS À COUPLE ÉLEVÉ D'ENCLUME ÉTENDUE À
POIGNÉE EN « D » DE 1" AVEC ONE-KEY™ M18 FUEL™
LLAVE DE IMPACTO DE ALTO TORQUE DE EMPUÑADURA EN
D DE 1" CON ONE-KEY™ M18 FUEL™
LLAVE DE IMPACTO DE ALTO TORQUE DE 1" CON MANGO EN
D CON ONE-KEY™ M18 FUEL™
WARNING
WARNING
AVERTISSEMENT
AVERTISSEMENT
comprendre le manuel.
comprendre le manuel.
ADVERTENCIA
ADVERTENCIA
To reduce the risk of injury, user must read and understand operator's manual.
To reduce the risk of injury, user must read and understand operator's manual.
Afin de réduire le risque de blessures, l'utilisateur doit lire et bien
Afin de réduire le risque de blessures, l'utilisateur doit lire et bien
Para reducir el riesgo de lesiones, el usuario debe leer y entender el manual.
Para reducir el riesgo de lesiones, el usuario debe leer y entender el manual.
OPERATOR'S MANUAL
MANUEL de L'UTILISATEUR
MANUAL del OPERADOR
Advertisement
Table of Contents

Related Manuals for Milwaukee M18 FUEL 2868-20


Summary of Contents for Milwaukee M18 FUEL 2868-20
- Page 1 OPERATOR'S MANUAL MANUEL de L'UTILISATEUR MANUAL del OPERADOR Cat. No. / No de cat. 2868-20, 2869-20 M18 FUEL™ 1" D-HANDLE HIGH TORQUE IMPACT WRENCH WITH ONE-KEY™ M18 FUEL™ 1" D-HANDLE EXT. ANVIL HIGH TORQUE IMPACT WRENCH WITH ONE-KEY™ CLÉ À CHOCS À COUPLE ÉLEVÉ À POIGNÉE EN « D » DE 1" AVEC ONE-KEY™...
-
Page 2: General Power Tool Safety Warnings
GENERAL POWER TOOL • Do not overreach. Keep proper footing and balance at all times. This enables better control SAFETY WARNINGS of the power tool in unexpected situations. Read all safety warnings, instruc- WARNING • Dress properly. Do not wear loose clothing or tions, illustrations and specifica- jewelry. -
Page 3: Specifications
Do not use this tool if you do not understand these operating instructions or you feel the work is beyond 3. Control switch your capability; contact Milwaukee Tool or a trained 4. Trigger professional for additional information or training. 5. Handle •... - Page 4 SYMBOLOGY Use only sockets and other acces- WARNING sories specifically designed for Volts use on impact wrenches and drivers. Other sockets and accessories might shatter or break Direct Current causing injury. Attaching and Removing Accessories No Load Revolutions per Minute (RPM) 1.
-
Page 5: Operation
Using the Control Switch MODE SETTINGS The control switch may be set to three positions: for- Max Speed - Select the max RPM to be reached ward, reverse and lock. Due to a lockout mechanism, when running the tool in forward. the control switch can only be adjusted when the trig- Bolt Removal - Select the max RPM to be reached ger is not pressed. -
Page 6: Maintenance
Return the tool, battery pack, and charger Repairs to a MILWAUKEE service facility for repair. After six months to one year, depending on use, return the For repairs, return the tool, battery pack and charger tool, battery pack and charger to a MILWAUKEE to the nearest authorized service center. -
Page 7: Sécurité Électrique
MILWAUKEE to be defective in material or workman- outil électrique. Ne pas suivre l’ensemble des règles ship for a period of five (5) years** after the date of purchase unless et instructions peut entraîner une électrocution, un... -
Page 8: Utilisation Et Entretien De L'outil Électrique
• Utiliser l’outil électrique, les accessoires, les • Porter l’équipement de protection individuel embouts etc. conformément à ces instructions requis. Toujours porter une protection oculaire. en tenant compte des conditions de travail et de Selon les conditions, porter aussi un masque anti- la tâche à... -
Page 9: Spécifications
; No de Cat. 2868-20 veuillez contacter Milwaukee Tool ou un professionnel formé pour recevoir plus d’information ou formation. • Maintenir en l’état les étiquettes et les plaques d’identification.Des informations importantes y... -
Page 10: Montage De L'outil
ONE-KEY™ MONTAGE DE L'OUTIL Pour de plus amples renseignements sur la fonc- Ne recharger la batterie AVERTISSEMENT tion ONE-KEY™ de cet outil, veuillez visiter le site qu’avec le chargeur spéci- milwaukeetool.com/One-Key. Pour télécharger fié. Pour les instructions de charge spécifiques, l’application ONE-KEY™, visitez l’App Store d’Apple lire le manuel d’utilisation fourni avec le chargeur ou Google Play à... - Page 11 PARAMÈTRES DE MODES Indicateur ONE-KEY™ Vitesse maximale - Sélectionner la quantité maximale Bleu uni Le mode sans fil est engagé et prêt de Tr/Min à achever lorsque l’outil est en marche pour le configurer à l'aide de l’appli avant. ONE-KEY™. Enlèvement de boulons - Sélectionner la quantité...
-
Page 12: Communication Sans Fil
MILWAUKEE réparera ou remplacera toute pièce d’un la batterie de la pile à pièces pour la réinitialiser. outil électrique qui, après examen par MILWAUKEE, s’est avérée être affectée d’un vice de matériau ou de fabrication et ce pendant une Remplacez la batterie si le problème persiste. -
Page 13: Seguridad En El Área De Trabajo
L’enregistrement de la garantie n’est pas nécessaire pour bénéficier coincidir con el tomacorriente. Nunca modifique de la garantie en vigueur sur un outil électrique MILWAUKEE. La date de fabrication du produit servira à établir la période de garantie, si el enchufe de ninguna manera. No utilice adap- aucune preuve d’achat n’est fournie lorsqu’une demande de service... -
Page 14: Uso Y Cuidado De Las Herramientas Eléctricas
• Utilice equipo de protección personal. Siempre sea reparada antes de que se utilice. Muchos use protección para los ojos. El equipo de protec- accidentes son ocasionados por herramientas ción, tal como una máscara contra polvo, calzado eléctricas con mantenimiento deficiente. •... -
Page 15: Especificaciones
No utilice esta her- ramienta si no entiende estas instrucciones de uso o si considera que el trabajo a realizar supera sus capacidades, comuníquese con Milwaukee Tool o con un profesional capacitado para recibir capacitación o información adicional. - Page 16 SIMBOLOGÍA Cómo colocar y desmontar el soporte colgante para herramientas Volts 1. Para colocar, coloque la argolla del soporte col- gante para herramientas. Corriente continua 2. Coloque el soporte colgante para herramientas sobre los dos orificios para tornillos en la caja de Revoluciones por minuto sin carga (RPM) engranajes.
- Page 17 La herramienta se envía con los MODOS preestab- OPERACION lecidos, como a continuación: Con el fin de minimizar el ADVERTENCIA riesgo de lesiones, siempre MODO 1 MODO 2 MODO 3 MODO 4 utilice la protección de ojos adecuada indicada Tipo de Impulsión Impulsión Impulsión...
- Page 18 Si aun asi la herramienta no trabaja correctamente, regrésela, con el cargador y la batería, a un centro de servicio MILWAUKEE.
-
Page 19: Comunicación Inalámbrica
ONE-KEY™ Para reducir el riesgo de le- ADVERTENCIA siones, descarga eléctrica o Riesgo de quem- ADVERTENCIA daño a la herramienta, nunca la sumerja en adura química. líquidos ni permita que estos fluyan dentro de la Este dispositivo contiene una batería misma. - Page 20 Al devolver la herramienta eléctrica a un DE COMERCIABILIDAD O IDONEIDAD PARA UN FIN O USO ESPE- Centro de Servicio de la fábrica de MILWAUKEE o a una Estación CÍFICO; EN LA MEDIDA EN QUE DICHO DESCONOCIMIENTO NO de Servicio Autorizada de MILWAUKEE, se requiere que el flete esté...