Canon IMAGEFORMULA DR-2020U User Manual
Canon scanner user manual
Hide thumbs
Also See for IMAGEFORMULA DR-2020U:
- Reference manual (40 pages) ,
- Brochure & specs (2 pages) ,
- User manual (77 pages)

Related Manuals for Canon IMAGEFORMULA DR-2020U


Summary of Contents for Canon IMAGEFORMULA DR-2020U
- Page 1 User Manual Please read this manual before using the scanner. After you finish reading this manual, keep it in a safe place for future reference.
- Page 2 PACKAGE, YOU ARE DEEMED TO AGREE TO BE BOUND BY THIS AGREEMENT. This legal document is a license agreement between you and Canon Electronics Inc. (“Canon”). BY OPENING THE SEALED DISK PACKAGE, YOU ARE DEEMED TO AGREE TO BE BOUND BY THE TERMS OF THIS AGREEMENT.
- Page 3 AMENDMENT TO THIS AGREEMENT SHALL BE EFFECTIVE UNLESS SIGNED BY A DULY AUTHORIZED REPRESENTATIVE OF CANON. Should you have any questions concerning this Agreement, or if you desire to contact Canon for any reason, please write to Canon’s local affiliate.
- Page 4 If such changes or modifications should be made, you could be required to stop operation of the equipment. Canon U.S.A. Inc. One Canon Plaza, Lake Success NY 11042, U.S.A. Tel. No. (516)328-5000 RADIO INTERFERENCE REGULATIONS (For 120 V models)
- Page 5 MUST BE RECYCLED OR DISPOSED OF ACCORDING TO LOCAL, STATE OR FEDERAL LAWS. Trademarks • Canon and the Canon logo are registered trademarks, of Canon Inc. in the United States and may also be trademarks or registered trademarks in other countries.
-
Page 6: Preface
The documentation for the scanner consists of the Reference Guide, which is supplied with the scanner, and the User Manual (this manual) and CapturePerfect 3.0 Operation Guide, which are provided in electronic form and are registered in the Canon DR-2020U menu during software installation. ● Reference Guide This describes setup procedures and basic operations for the scanner. -
Page 7: Symbols Used In This Manual
WARNING Indicates a warning concerning operations that may lead to death or injury to persons if not performed correctly. To use the scanner safely, always pay attention to these warnings. CAUTION Indicates a caution concerning operations that may lead to injury to persons, or damage to property if not performed correctly. -
Page 8: Table Of Contents
Documents That Cannot Be Scanned with the Feeder... 21 Placing Documents into the Feeder... 22 Documents That Contain Differently-Sized Pages ... 22 When the Scanner Is in the Sleep Mode... 22 Placing Documents on the Flatbed ... 23 When the Scanner Is in Sleep Mode... 23 Placing Cards into the Business Card Feeder ... - Page 9 Configuring the Scanner Settings ... 52 Before Using Adobe Acrobat 9.0... 55 Mode-Dependent Function Limitations ... 57 Scanner Operation Settings ... 58 Opening the Scanner Properties Screen ... 58 Scanner Property Settings ... 59 Maintenance ... 60 Routine Cleaning ... 60 Cleaning the Scanner...
-
Page 10: Before Using The Scanner
Before Using the Scanner Important Safety Instructions To ensure the safe operation of this scanner, be sure to read the safety warnings and precautions described below. Installation Location The performance of this scanner is affected by the environment in which it is installed. -
Page 11: Power Supply
In addition, do not use the supplied AC adapter with devices other than the scanner. ● If you have any questions regarding the power supply, contact your local 220 - 240 V Type authorized Canon dealer or service representative for further information. -
Page 12: Moving The Scanner
● Do not use power cords or AC adapters other than the power cord and AC adapter provided with this scanner. ● Do not attempt to dismantle the scanner or modify it in any way, as this is dangerous and may lead to a fire or electric shock. -
Page 13: Disposal
CAUTION ● Do not install the scanner on a surface that is unstable, tilted, or in an area subject to excessive vibrations, as this may cause the scanner to fall, resulting in personal injury or damage to the scanner. ● Do not block the ventilation openings. Doing so may cause the scanner to overheat, creating a risk of fire. -
Page 14: Features
Multiple Methods for Document Feeding ● Scan multipage documents at up to 20 pages per minute (for single- sided documents) using the built-in feeder. The scanner can detect documents that are loaded into the feeder and begin scanning automatically using the auto-start function. - Page 15 ● Skip Blank Page The scanner scans both sides of a document and skips saving the image of any side it determines to be a blank page. Two-Sided Documents Images with Blank Page with a Blank Side ● Dropout Color Specify one color (red, blue, or green) to be omitted while scanning documents.
-
Page 16: Installation Requirements
Note • Use the latest USB 2.0 driver made available by Microsoft. For details, contact your local authorized Canon dealer. • Operation is not guaranteed with all USB interfaces, even if present as standard equipment on the computer. If the USB interface that is standard-equipped on your computer does not operate properly, use the recommended Hi-Speed USB 2.0 interface card. -
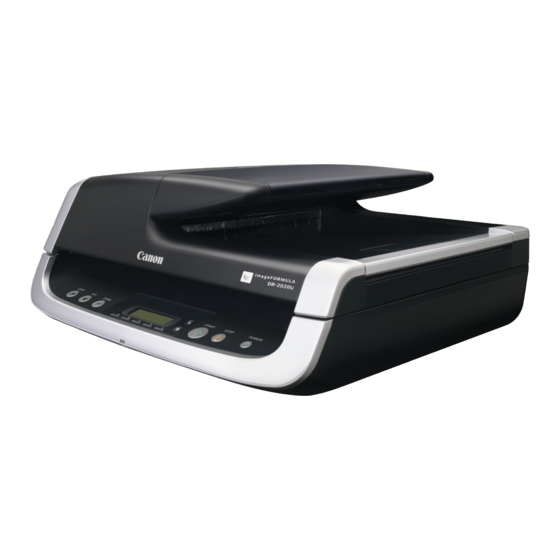
Page 17: Names And Functions Of Parts
This presses documents placed on the flatbed against the glass. Scanning Glass (Feeder) Lock Switch Use this to lock the inner parts of the scanner into place when not using the scanner. Scanning Glass (Flatbed) Place documents here with their scanning sides facing down. -
Page 18: Operation Panel
Press this button to stop scan procedures or clear error displays, such as those for paper jams. POWER Button Press this button to turn the scanner ON, and the power indicator will light. When you press and hold this button (for 2 seconds) while the scanner is turned ON, the scanner and power indicator will turn OFF. -
Page 19: Rear
The business card feeder is open (waiting for cards to be placed). Error Displays Communication error with computer. When an error occurs, a message indicating the nature of the error appears. You can use the scroll keys to scroll longer messages. For details on the error messages and their solutions, Rear... -
Page 20: Handling Documents
Handling Documents Feeding Methods There are three feeding methods (feeder, flatbed, business card feeder) for scanning documents with this scanner. The types of documents that can be scanned with each method are as follows. Feeder (See p. 22.) Width: 5.5" to 8.5" (140 mm to 216 mm) Length: 3.9"... -
Page 21: Documents That Cannot Be Scanned With The Feeder
• Do not wear loose clothing or jewelry that may get caught in the scanner while you are using it. Doing so may result in personal injury. Be extra careful of neckties and long hair. If anything becomes caught in the scanner, immediately disconnect the power plug from the power outlet to stop the scanner. -
Page 22: Placing Documents Into The Feeder
When the Scanner Is in the Sleep Mode When the scanner is not operated for a specific amount of time, it automatically enters the sleep mode. The scanner automatically exits the sleep mode if you initiate scanning from a computer. However, to initiate scanning from the scanner’s operation panel, you must exit the... -
Page 23: Placing Documents On The Flatbed
When the Scanner Is in Sleep Mode When the scanner is not operated for a specific amount of time, it automatically enters the sleep mode. The scanner automatically exits the sleep mode if you initiate scanning from a computer. However, to initiate scanning from the scanner’s operation panel, you must exit the... -
Page 24: Placing Cards Into The Business Card Feeder
• Scan plastic cards on the flatbed. When the Scanner Is in Sleep Mode When the scanner is not operated for a specific amount of time, it automatically enters the sleep mode. The scanner automatically exits the sleep mode if you initiate scanning from a computer. However, to initiate scanning from the scanner’s operation panel, you must exit the... -
Page 25: Scanning
DR-2020U, allows you to scan using easy-to-follow on-screen instructions. • ISIS/TWAIN Driver The ISIS/TWAIN driver is used for this scanner. Open the driver to configure the scanning conditions if you are performing scanning operations. (See p. 48.) IMPORTANT Operation of the ISIS/TWAIN driver is not guaranteed with all application programs. -
Page 26: Scanning With Captureontouch
Using CaptureOnTouch allows you to scan using easy-to-follow on- screen instructions. In addition, by assigning scan functions to the buttons on the DR-2020U scanner’s operation panel, you can perform scanning procedures without your computer. The following describes the output procedures for the two screens found in CaptureOnTouch. - Page 27 Select Scan Job Register the scanning conditions and output methods as jobs, and then select a job that matches your intended purpose to begin scanning. Register jobs ▼ Select job ▼ Scan document ▼ Output scanned images You can also select registered jobs using the buttons on the operation panel.
-
Page 28: Outputs Methods
CaptureOnTouch icon appears on the taskbar. • You can also restart from the Windows Start menu. From the Windows taskbar, click [Start], point to [All Programs], point to [Canon DR-2020U], and then click [CaptureOnTouch]. CaptureOnTouch starts and the main screen appears. (CaptureOnTouch), CaptureOnTouch... -
Page 29: Scanner Settings
Scanner Settings Configure various scan settings, such as the scanning method and document size. [Scan First] and [Select Scan Job] share the same scanner setting items. [Scan First] [Select Scan Job] If you select [Scan First], you can If you select [Select Scan Job], you... -
Page 30: Scanning With The Start Button
STOP button. • If this procedure is performed immediately after turning the scanner ON or while the power indicator is not lit, the following appears on the computer display. In this case, scanning begins after the scanner finishes warming up. Warm up may take up to 30 seconds. - Page 31 While scanning is in progress, the number of pages scanned is displayed in addition to the scanner settings. When document scanning is finished, the output method selection screen appears. Specify the output method. Configure settings for the output method. • [Save to folder] Specify the file name, format, and destination for the image file to be saved.
- Page 32 • [Attach to E-mail] Specify the file name and format for the image file to be attached to the e-mail. To use this function, you must specify the MAPI-compatible (Microsoft Messaging Application Programming Interface) e-mail application (such as Windows Mail and Outlook Express) that you want to use as the default application for your operating system.
- Page 33 Click the output button to output the scanned images. The name of the output button differs depending on the selected output method. The completion screen appears after the scanned images are output. Press the STOP button on the operation panel. The display panel message clears.
-
Page 34: Scanning With The Job Buttons
Scanning with the Job Buttons Under default settings, the following jobs are assigned to the job buttons on the scanner. When you load a document into the scanner and press a job button, CaptureOnTouch starts and scanning begins. The following describes the procedure for scanning. -
Page 35: Scanning With The User Defined Job Buttons
You can change the settings for the output method here. For details on output method settings, see “Outputs Methods” on Click the output button to continue and output the scanned images. The name of the output button differs depending on the selected output method. - Page 36 Hint If you select a registered job and click [Job list/edit], the [Job editing] dialog box appears allowing you to edit the settings of the selected job. Select an [Unconfigured] job number from the job list. The title bar display changes to [Register new job]. Hint If you select a job that is already registered, the title bar display returns to [Job editing].
-
Page 37: E-Mail Settings
Configure the settings to assign the job to a job button on the scanner. Click the button to which you want to assign the job, and the job will be executed when that button is pressed. If you do not want to assign a button, click [Do not assign button]. - Page 38 Configure the settings for the mail server. • Enter the mail server address in [Mail Server]. • If necessary, enter the port number to use for sending mail in [Port number]. • Specify the authentication method for the mail server in the [Authentication method] list box.
-
Page 39: Scanning With The Registered Jobs
Hint If this procedure is performed immediately after turning the scanner ON or while the power indicator is not lit, the following appears on the computer display. In this case, scanning begins after the scanner finishes warming up. Warm up may take up to 30 seconds. -
Page 40: Other Methods For Scanning
Other Methods for Scanning You can also operate CaptureOnTouch from a computer. This section describes the procedures for this method. Scanning from the Taskbar Menu Taskbar menu Click (CaptureOnTouch), and click a registered job or [Scan First] in the menu that appears. Scanning from the Main Screen Double-click (CaptureOnTouch) to display the main screen, and... -
Page 41: Scanning With Captureperfect 3.0
Scanning with CapturePerfect 3.0 CapturePerfect 3.0 is an ISIS-compliant application developed for Canon document scanners. For more information on CapturePerfect 3.0, refer to the CapturePerfect 3.0 Operation Guide. Scanning with CapturePerfect The following scanning methods are available for selection from the [Scan] menu in CapturePerfect 3.0. -
Page 42: Scan To Presentation
The [Select Scanner] dialog box appears. Select [CANON DR-2020U], and click [Settings]. The [Configure Device Settings] dialog box appears. IMPORTANT If [CANON DR-2020U] does not appear, try installing the ISIS/ TWAIN driver again. Configure the default page size. IMPORTANT Clicking [Default] in the properties dialog box for the ISIS driver... - Page 43 The [Scan Batch to File Setting] dialog box appears. Click [Scanner Setting], and configure the scanner settings. The properties dialog box for the scanner driver appears. Configure the scanning conditions. Hint • To scan using the flatbed, set [Feeder/Flatbed] to [Flatbed] or [Auto].
- Page 44 • If [Feeding Option] is set to [Automatic Feeding] or [Panel- Feeding], documents placed in the feeder tray are scanned. If there are no documents in the feeder, the scanner enters the standby state. • If the [Feeding Option] is set to [Automatic Feeding], documents are scanned whenever the feeder tray sensor detects documents.
-
Page 45: Registering Jobs And Scanning
When scanning is complete, select [Exit] from the [File] menu to quit CapturePerfect. Registering Jobs and Scanning You can register the scanning conditions and scan mode in advance as a job with CapturePerfect. By selecting [Scan Job] from the [Scan] menu, you can specify these registered jobs and perform scanning. - Page 46 [Scan To Mail]: Attaches scanned images to an e-mail message and sends it. [Scan To Print]: Prints scanned images to a specified printer. Click [Detail Settings]. A settings dialog box based on the specified function appears. [Scan To PC]: Specify the file name, format, and destination for the image file to be saved.
- Page 47 [Delete]. Executing Scan Jobs Select a job title from the list box in the job registration toolbar. Place the documents into the scanner. For details on placing documents, see “Placing Documents into the Feeder” on p. Select [Scan Job] from the [Scan] menu.
-
Page 48: Configuring The Isis/Twain Driver
Configuring the ISIS/TWAIN Driver You can open the ISIS/TWAIN driver to configure scan conditions and settings when scanning documents with ISIS/TWAIN-compliant applications (such as CaptureOnTouch). This section describes the layout and features of the ISIS/TWAIN driver. Driver Layout and Features The ISIS/TWAIN driver consists of the following four tabs. -
Page 49: [Brightness] Tab
You can also click [Gamma] to configure gamma correction settings. [Image processing] Tab Configure the image processing settings. Hint The [Reverse Image] check box does not appear if the driver is opened from an ISIS-compliant application. [Others] Tab Configure the settings related to scanner operations while scanning. -
Page 50: Basic Condition Settings
Basic Condition Settings This section provides an overview of the basic setting items that are needed to configure the scanner settings. Specifying the Basic Conditions for Scanning When scanning documents, make sure to specify the Mode, Page Size, Dots per inch, and Scanning Side, from the [Basic] tab. -
Page 51: Scanning Custom Page Sizes
[Feeder/Flatbed] Specify whether to scan documents using the feeder or the flatbed when the business card feeder is closed. If [Auto] is selected, scanning occurs from the feeder only when documents are placed in the feeder. (If there are no documents in the feeder, the documents placed on the flatbed are scanned.) Hint •... -
Page 52: Configuring The Scanner Settings
Configuring the Scanner Settings Configure the scanning conditions based on the desired scanning results. When you want to delete blank pages in two-sided documents Set [Scanning Side] to [Skip blank page] in the [Basic] tab to delete scanned blank pages in a document. - Page 53 When you want to enhance contours in images Adjust the [Edge emphasis] setting in the [Image processing] tab. When you want to eliminate black borders around scanned images Select the [Border Removal] check box in the [Image processing] tab. The black borders that surround scanned images are removed. When you want to reverse the black and white in scanned images (TWAIN driver only) Select the [Reverse Image] check box in the [Image processing] tab.
- Page 54 When you want to clarify text that is difficult to read Set [Mode] to [Advanced Text Enhancement] or [Advanced Text Enhancement ll] in the [Basic] tab. The background surrounding the text is removed or processed, emphasizing the text for easy reading. When you want to remove the black spots in scanned images while scanning documents with punch holes Select the [Punch Hole Removal] check box in the [Image processing]...
-
Page 55: Before Using Adobe Acrobat 9.0
Before Using Adobe Acrobat 9.0 There are two methods for scanning a document from the scanner using the bundled Adobe Acrobat 9.0 software. One method is degrees degrees Presets (Black &... - Page 56 Scanner Options dialog box. From the [User Interface] drop-down list, select [Show Scanner’s Native Interface], and then click [OK] to close the dialog box. The scanner runs the Custom Scan, and the Native Interface (the machine’s own scanner settings screen) is displayed.
-
Page 57: Mode-Dependent Function Limitations
Mode-Dependent Function Limitations Depending on the [Mode] setting selected in the [Basic] tab, some of the settings in each of the driver tabs may be disabled as follows. [Brightness] tab ✓ : Available for setting — : Not available for setting Scanning Mode Black and White Error Diffusion... -
Page 58: Scanner Operation Settings
Select [CANON DR-2020U USB], and then click [Properties]. Hint • If the scanner does not appear in the list, check that the scanner is turned ON and connected to the computer, and then click [Update]. • In Windows Vista, the [User Account Control] screen appears. -
Page 59: Scanner Property Settings
ON and OFF when your computer turns ON and OFF. If [The scanner turns on in conjunction with the PC] is selected, the scanner automatically turns ON or OFF when your computer is turned ON or OFF. -
Page 60: Maintenance
Cleaning the Scanner Use a cloth dampened with water and thoroughly wrung out to clean the outside of the scanner, and use a clean dry cloth to wipe the scanner dry. Cleaning the Feed Path Dust or paper particles in the document feed inlet or inside the feeder can cause spots to appear in scanned images. -
Page 61: Cleaning The Roller Unit And Separation Pad
Close the feeder gently. CAUTION When closing the feeder, be careful not to get your fingers caught, as this may result in personal injury. Cleaning the Roller Unit and Separation Pad If streaks appear in scanned images, or if scanned documents become dirty, the roller unit and separation pad may be dirty. -
Page 62: Attaching The Roller Unit And Separation Pad
Press the separation pad down gently until it snaps into place, and make sure it is securely attached. Attach the roller unit. Insert the shaft pin of the roller unit into the notch on the scanner ( ), and attach the lock lever vertically ( ). - Page 63 Contact your local authorized Canon dealer. When replacing the parts, first replace the separation pad. If performance does not improve, replace the roller unit as well.
-
Page 64: Troubleshooting
Troubleshooting This section describes the problems that may occur while using the scanner and how to resolve them. It you cannot resolve a problem, contact your local authorized Canon dealer or your service representative. Common Problems and Solutions Problem 1 The scanner will not turn on. - Page 65 Close the business card feeder. If this procedure is performed immediately after turning the scanner ON or while the power indicator is not lit, the following appears on the computer display. In this case, scanning begins after the scanner finishes warming up.
-
Page 66: Software Troubleshooting
“None” as the image file compression format before scanning. If CapturePerfect cannot open some PDF files Some PDF files created by non-Canon programs cannot be opened by CapturePerfect. Q & A (Useful tips) Here are some useful tips for scanning documents. - Page 67 A sample file name is displayed as the [File name] in the [File name settings] dialog box. How can I skip blank pages, and scan only non-blank pages? Specify [Skip Blank Page] on the scanner driver setting screen, then “Can I copy or scan. How do I scan cards? Set business cards in the business card feeder.
-
Page 68: Paper Jams
CapturePerfect Scan using the scan batch print function. Alternatively, register a job with a printer selected as the output destination. How do I save scanned data in a shared folder? CaptureOnTouch ➜ For Scan First scanning, select [Save to folder] on the output method selection screen, and specify the shared folder as the save destination on the Output Setting screen. - Page 69 IMPORTANT Remove the document carefully, and do not pull with excessive force. Should the document tear, always be sure to remove any pieces of paper remaining in the scanner. Close the feeder cover gently. CAUTION When closing the feeder cover, be careful not to get your fingers caught, as this may result in personal injury.
-
Page 70: Uninstalling The Software
Uninstalling the Software Some scanner malfunctions can be resolved by reinstalling the software. Be sure to perform the procedure below to uninstall the software before reinstalling it. Uninstalling the ISIS/TWAIN Driver This section describes how to uninstall the ISIS/TWAIN driver as an example using Windows Vista. - Page 71 Click [Yes]. Click [Finish].
-
Page 72: Appendix
Appendix Specifications Scanner Type Desktop ADF/flatbed scanner Document Size Feeder Width: 5.5" to 8.5" (140 mm to 216 mm) Length: 3.9" to 14.0" (100 mm to 356 mm) Thickness: 13 to 32 lb bond (52 to 128 g/m (0.002" to 0.006" (0.06 mm to 0.15 mm)) Capacity: 50 sheets or stacked to a height of 0.2"... -
Page 73: Replacement Parts
Product Code: 4048B001 Separation Pad Product Code: 4048B002 • For details on replacing the roller unit and separation pad, “Cleaning the Roller Unit and Separation Pad” on p. • For further details on replacement, contact your local authorized Canon dealer. -
Page 74: External Dimensions
External Dimensions 1.97" (50 mm) 17.3" (440 mm) 2.36" (60 mm) -
Page 75: Index
Business card feeder ... 24 Feeder ... 22 Flatbed ... 23 Lock switch ... 12 Maintenance ... 60 Moving the scanner ... 12 Names and functions of parts ... 17 Operation panel ... 17 Options ... 73 Paper jams ... 68 POWER button ... - Page 76 Replacement parts Roller unit ... 61 Separation pad ... 61 Scanning CaptureOnTouch ... 26 CapturePerfect ... 41 Job buttons ... 34 Other method ... 40 Registered jobs ... 39 START button ... 30 User defined job buttons ... 35 Scanning glass Feeder ...
- Page 77 CANON ELECTRONICS INC. 1248, SHIMOKAGEMORI, CHICHIBU-SHI, SAITAMA 369-1892, JAPAN CANON U.S.A. INC. ONE CANON PLAZA, LAKE SUCCESS, N.Y. 11042, U.S.A. CANON CANADA INC. 6390 DIXIE ROAD, MISSISSAUGA, ONTARIO L5T 1P7, CANADA CANON EUROPA N.V. BOVENKERKERWEG 59-61, P.O.BOX 2262, 1180 EG AMSTELVEEN, THE NETHERLANDS CANON LATIN AMERICA, INC.