HotSpring HIGHLIFE GRANDEE Owner's Manual
Hide thumbs
Also See for HIGHLIFE GRANDEE:
- Owner's manual (132 pages) ,
- Pre-delivery instructions (20 pages) ,
- Owner's manual (46 pages)

Related Manuals for HotSpring HIGHLIFE GRANDEE


Summary of Contents for HotSpring HIGHLIFE GRANDEE
- Page 1 HIGHLIFE COLLECTION ® | E N V OY | VA N G U A R D | S O V E R E I G N | T R I U M P H G R A N D E E | A R I A ™...
- Page 2 Prior to registering, you will need the serial number that is located within the equipment compartment of your HOT SPRING spa. To register please go to http://www.hotspring.com/hot-tub-owners/hot-tub-product-warranty-registration or simply scan the QR code below: FOR YOUR RECORDS...
-
Page 3: Table Of Contents
TABLE OF CONTENTS TABLE OF CONTENTS SAFETY INFORMATION SPA CARE AND MAINTENANCE IMPORTANT SAFETY INSTRUCTIONS ......1 DRAIN & REFILL INSTRUCTIONS ........28 IMPORTANT SPA INSTRUCTIONS ........3 PREVENTION OF FREEZING ..........28 GETTING STARTED FILTER SYSTEM ..............29 FILTER CARTRIDGES REMOVAL & CLEANING .....29 SPA FEATURES.............. -
Page 4: Safety Information
• A ground terminal (pressure wire connector) is provided on the afety nformatIon control box inside the unit to permit connection of a minimum 6 solid copper bonding conductor between this point and any ² IMPORTANT SAFETY metal equipment, metal water pipe, metal enclosures of electrical equipment, or conduit within 1.5 m (5') of the unit as needed to comply INSTRUCTIONS with local requirements. - Page 5 HEALTH PROBLEMS AFFECTED BY SPA USE • Be sure your spa is connected to the power supply correctly - use a licensed electrical contractor. • Pregnant women should consult a physician before using spa. • Disconnect the spa from the power supply before draining the spa or •...
-
Page 6: Important Spa Instructions
SPA SHELL AVOIDING THE RISK OF SKIN BURNS Your HOT SPRING spa has an acrylic shell. Stains and dirt generally will not adhere to your spa’s surface. A soft rag should easily remove • To reduce the risk of injury, before entering a spa the user should most dirt. -
Page 7: Getting Started
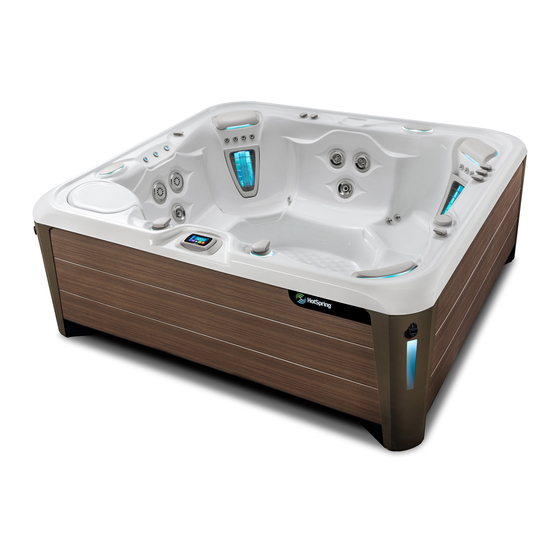
ettInG tarted SPA FEATURES (Your spa may look different) 1) Remote control panel can be removed from the spa and used as a remote inside or outside the spa. 2 ) The SmartJet system lets you divert water ™ to different combinations of jets simply by turning the lever. -
Page 8: Quick Start-Up Instructions
SPRING dealer or online at: jets can be altered (except the ones found in the FootWell system) ™ www.HotSpring.com/planning-tools/pre-delivery-instructions using the COMFORT CONTROL lever. FOOTSTREAM jets located in the FOOTWELL are not adjustable. Turn the faceplate to increase and decrease the jet pressure. - Page 9 • Have pH/Alkalinity Up & Down available. in the position. • Know the "Hardness" of your water, contact your dealer to help you 4. USING A TEST STRIP AND APPLICABLE CHEMICALS with this information. See Water Quality and Maintenance for more adjust Total Alkalinity (TA) to 80 ppm, Calcium Hardness (CH) to information.
-
Page 10: Equipment Compartment Door
11. TEST WATER WEEKLY OR BEFORE EACH TIME 10. RECHECK the Total Alkalinity (TA) at 80 ppm, Calcium Hardness THE SPA IS USED. (CH) at 100 ppm (if using a Salt System 50 ppm), then spa water pH at between 7.2 and 7.8. using a FRESHWATER 5-way test strip. Make sure you adjust your Total Alkalinity first, as IMPORTANT: an out-of-balance condition will affect your ability to adjust the pH... -
Page 11: Water Quality And Maintenance
FRESHWATER 5-way Test Strips degradation to the bottom of the cover. This type of damage is considered chemical abuse and is not covered under the terms of the limited warranty. *For more information visit www.hotspring.com/save-water Water Quality and Maintenance Page 8... -
Page 12: Fundamentals Of Water Maintenance
corrosion, and irritates spa users. A high pH level will neutralize FUNDAMENTALS OF sanitizer, promote scaling and cloud water. The recommended WATER MAINTENANCE pH reading is between 7.2 - 7.8. To lower the pH level, use HOT SPRING FRESHWATER pH/Alkalinity Down (sodium bisulfate). •... -
Page 13: The Hot Spring Spa Water Maintenance Program
FRESHWATER SALT SYSTEM IMPORTANT: DO NOT use tri-chlor chlorine, bromo-chloro-dimethyl- (OPTIONAL) hydantoin (BCDMH), or any type of compressed bromine or chlorine, The Salt System converts water and sodium chloride salt into acid or any type of sanitizer which is not recommended by WATKINS chlorine sanitizer. -
Page 14: Vanishing Act Instructions
VANISHING ACT INSTRUCTIONS (Your spa may look different) HEATER RETURN Instructions for Use: IMPORTANT: • Always make sure water is balanced and properly sanitized, After filling your hot tub, use a test strip to measure the using the EPA approved sanitizer, before entering your hot hardness level of the water. -
Page 15: Vacation Water Care Instructions
OZONE MAINTENANCE LONG TIME PERIODS (5-14 DAYS) (OPTIONAL) Reduced or no ozone bubbles coming from heater return (clogged Prior to leaving: ozone injector) or no ozone, clean the injector: 1. At least one day before you leave, set the temperature to its lowest 1. -
Page 16: Water Terminology
Eventually the soap build-up in the water will be concentrated, Oxidizer: The use of an oxidizing chemical is to prevent the buildup resulting in an unclean feeling on the bather’s skin, which is impossible of contaminants, maximize sanitizer efficiency, minimize combined to remedy. -
Page 17: Operating Instructions
remote should remain in the dock until fully charged. Under normal peratInG nStructIonS conditions a fully drained battery will take 6-8 hours to recharge. Contact your authorized HOT SPRING Dealer for replacement of your WIRELESS REMOTE CONTROL Lithium Ion battery. OPERATING YOUR REMOTE CARE OF YOUR REMOTE: The HOT SPRING Wireless Control... -
Page 18: Temperature Control
MEMORY SCREEN Home Screen Features - Continued Press on Home screen to display Memory screen. Press this icon to access the first Lights Lights screens. Status Indicators Summer Timer This indicator is on whenever the Summer Timer is ON or Auto Clean is activated. - Page 19 TEMPERATURE LOCK TEMPERATURE ºF/ºC SETTING Press on Home screen to display Temperature Lock. Press on Home screen to display first Settings screen, then press to display Temperature in second Settings screen . The Temperature Lock feature prevents changing the desired water temperature setting.
-
Page 20: Jets Control Screen
Salt System Cycle Okay JETS CONTROL SCREEN LIGHTS CONTROL SCREEN ton is On Normal functioning screen Press on the Home screen to display the Jets screen. Press on the Home screen to access the primary Lights screen. Salt System NOTE: If lights are off when NOTE: If jets are off when is pressed on the Home screen, pressed on the Home screen, low... -
Page 21: Docking Tray Function Buttons
DOCKING TRAY FUNCTION BUTTONS SOVEREIGN 1st Press Jet on low speed 2nd Press Jet on high speed 3rd Press Jet Off TRIUMPH, PRODIGY, JETSETTER LX & JETSETTER 1st Press Jet on high speed 2nd Press Jet Off Pairing Dock with Remote: Pairing is only required if the remote is within range of the dock and the In the event the remote is not nearby, you can still operate the Jets and screen on the remote continues to read "Searching for Spa". -
Page 22: Jet Menu
JET MENU GRANDEE (MODEL GGNE) JET PUMP 1-JET SYSTEM 1 JET PUMP 2-JET SYSTEM 1 Right SMARTJET lever in position Left SMARTJET lever in position 1 MOTO-MASSAGE DX jet 1 MOTO-MASSAGE DX jet 10 directional PRECISION jets 8 directional PRECISION jets 2 SOOTHINGSTREAM jets 1 directional hydromassage jet 1 Water Feature... -
Page 23: Envoy (Model Kkne)
ENVOY (MODEL KKNE) JET PUMP 2-JET SYSTEM 1 JET PUMP 1-JET SYSTEM 1 Left SMARTJET lever in position Right SMARTJET lever in position 2 rotary PRECISION jets 4 HYDROSTREAM jets 7 directional PRECISION jets 2 SOOTHINGSTREAM jets 1 FOOTSTREAM jets 1 MOTO-MASSAGE DX jet 4 directional PRECISION jets d) 1 Water Feature... -
Page 24: Vanguard (Model Vvne)
VANGUARD (MODEL VVNE) JET PUMP 1-JET SYSTEM 1 1 MOTO-MASSAGE DX jet 4 directional PRECISION jets 1 MOTO-MASSAGE DX jet 1 FOOTSTREAM jet 1 directional hydromassage jet JET PUMP 2-JET SYSTEM 2 JET PUMP 2-JET SYSTEM 1 SMARTJET lever in position SMARTJET lever in position... -
Page 25: Aria (Model Arne)
ARIA (MODEL ARNE) JET PUMP 1 4 PRECISION jets 4 HYDROSTREAM jets 1 directional hydromassage 1 MOTO-MASSAGE DX jet 1 FOOTSTREAM jet JET PUMP 2-JET SYSTEM 1 JET PUMP 2-JET SYSTEM 2 SMARTJET lever in position SMARTJET lever in position 2-dual port rotary jets 2 directional hydromassage 4 PRECISION jets above MOTO-MASSAGE DX... -
Page 26: Sovereign (Model Iine)
SOVEREIGN (MODEL IINE) JET SYSTEM 1 SMARTJET lever in position 1 MOTO-MASSAGE DX jet 4 directional PRECISION jets 10 directional PRECISION jets 1 directional hydromassage jets 4 directional PRECISION (calf) jets JET SYSTEM 2 SMARTJET lever in position 1 MOTO-MASSAGE DX jet 1 directional hydromassage jet 2 SOOTHINGSTREAM jets 3 Jet-Cluster system (2-dual port rotary, 1-directional... -
Page 27: Triumph (Model Trhne)
TRIUMPH (MODEL TRHNE) JET SYSTEM 1 SMARTJET lever in position 1 MOTO-MASSAGE DX jet 4 Directional PRECISION jets in Lounge (feet) 4 Directional PRECISION jets (calf jets) 4 Directional HYDROSTREAM jets 4 Directional PRECISION jets JET SYSTEM 2 SMARTJET lever in position 1 MOTO-MASSAGE DX jet 4 Directional PRECISION jets (calf jets) -
Page 28: Prodigy (Model Hne)
PRODIGY (MODEL HNE) JET SYSTEM 1 SmartJet lever in position 1 MOTO-MASSAGE DX jet 4 directional PRECISION jets 1 FOOTSTREAM jet 2 dual port rotary jets 2 SOOTHINGSTREAM jets JET SYSTEM 2 SmartJet lever in position 1 MOTO-MASSAGE DX jet 10 directional PRECISION jets 3 Jet-Cluster system (2-dual port rotary, 1-directional hydromassage) -
Page 29: Jetsetter Lx (Model Jtne)
JETSETTER LX (MODEL JTNE) JET SYSTEM 1 SMARTJET lever in position 1 FOOTSTREAM jet 4 HYDROSTREAM jets 4 directional PRECISION jets 1 MOTO-MASSAGE DX jet 4 directional PRECISION (calf) jets JET SYSTEM 2 SMARTJET lever in position 3 Jet-Cluster system on front right (2-dual port rotary jets, 1 directional hydromassage jet) 4 directional PRECISION jets 4 HYDROSTREAM jets... -
Page 30: Jetsetter (Model Jjne)
JETSETTER (MODEL JJNE) JET SYSTEM 1 SMARTJET lever in position 1 FOOTSTREAM jet 4 HYDROSTREAM jets 4 directional PRECISION jets 1 MOTO-MASSAGE DX jet JET SYSTEM 2 SMARTJET lever in position 3 Jet-Cluster system on front right (2-dual port rotary jets, 1 directional hydromassage jet) 4 HYDROSTREAM jets 1 MOTO-MASSAGE DX jet... -
Page 31: Spa Care And Maintenance
• Blending warm water with the cold tap water so it exceeds are and 10° C (50° F) during the refilling process will also achieve the same results if that is an option for you. aIntenance PREVENTION OF FREEZING Your HOT SPRING spa is manufactured from the highest quality, most durable materials available. -
Page 32: Filter System
b) BELLAFONTANA water feature, if applicable (plug 2 openings and cartridges within the filter compartment after each cleaning will help to use the shop vac to pull water from the 3 opening). extend their service life. IMPORTANT: The frequency and duration of use, and the number of c) Filter compartment and MOTO-MASSAGE DX niche, if applicable occupants all contribute to determining the appropriate time between (removal of the faceplate may be necessary). -
Page 33: Care Of The Exterior
CARE OF THE SPA COVER To remove and replace the spa pillows: WARNING: The cover is a manual safety cover that meets or 1. Carefully pull and lift on one end of pillow to stretch pillow (longer) exceeds all prevailing requirements of ASTM 1346-91 for spa safety until the pillow is released from the plastic retainer. -
Page 34: Cover Lifter System
COVER LIFTER SYSTEM HOW TO CLOSE THE COVER 1. Standing alongside the cover, place one hand on the upper corner Clearance required behind cover when open: of the cover and gently push forward in the direction of the spa. The cover will rotate forward to cover half of the spa. -
Page 35: Electrical Requirements
CONDUIT INSTALLATION INSTRUCTIONS lectrIcal eQuIrementS To connect the electrical service, first detach the equipment INSTALLATION compartment door as follows: • See page 47 for Door Removal Instructions IMPORTANT: Fill the spa with water before turning on the power. • Slide each of the 3 clips to the left and lower clip (if clip Your HOT SPRING spa has been carefully designed to give you doesn't slide, slightly loosen the 2 screws holding the clip). -
Page 36: Installation Instructions
nStallatIon nStructIonS a build-up of water around the spa. When building a new room for the spa it is recommended that a floor drain be installed. The humidity will naturally increase with the spa installed. Water may get into woodwork SITE PREPARATION and produce dry rot, mildew, or other problems. -
Page 37: Spa Leveling Instructions
SPA LEVELING INSTRUCTIONS The following pages illustrate base support diagrams indicating the recommended shimming points. In order for your HOT SPRING spa to operate properly, and the internal plumbing to drain completely, the spa must be level. NOTICE: Though designed for outdoor installation, your HOT SPRING spa is not impervious to damage that may be caused by insects, WARNING: WATKINS WELLNESS recommends that a structural rodents, or other living creatures. -
Page 38: Ground Preparation
charge, the crane operator will lift your spa over walls, buildings, or INSTALLATION NOTES: any other obstruction and place it as close to the installation site as • If stepping stones or railroad ties are selected for the spa foundation, possible. -
Page 39: Grandee
GRANDEE Grandee Dimensions NOTE: All dimensions are approximate; measure your spa before making critical design or pathway decisions. (Front view) DOOR 6" (15.0 cm) ELECTRICAL CONNECTION 44" (112.0 cm) (2.5" (6.5 cm) Height from ground) ELECTRICAL CONNECTION (2.5" (6.5 cm) Height from ground) 56"... -
Page 40: Envoy
ENVOY ENVOY Dimensions NOTE: All dimensions are approximate; measure your spa before making critical design or pathway decisions. (Front view) DOOR 6" (15.2 cm) 40" (101.6 cm) ELECTRICAL CONNECTION ELECTRICAL CONNECTION (2.5" (6.5 cm) Height from ground) (2.5" (6.5 cm) Height from ground) 52"... -
Page 41: Vanguard
VANGUARD Aria Dimensions NOTE: All dimensions are approximate; measure your spa before making critical design or pathway decisions. (Front view) DOOR 6" (15.2 cm) ELECTRICAL CONNECTION 37" (94.0 cm) ELECTRICAL CONNECTION (2.5" (6.5 cm) Height from ground) (2.5" (6.5 cm) Height from ground) 49"... -
Page 42: Aria
ARIA Dimensions Aria NOTE: All dimensions are approximate; measure your spa before making critical design or pathway decisions. (Front view) DOOR 6" (15.2 cm) ELECTRICAL CONNECTION 37" (94.0 cm) ELECTRICAL CONNECTION (2.5" (6.5 cm) Height from ground) (2.5" (6.5 cm) Height from ground) 49"... -
Page 43: Sovereign
SOVEREIGN Sovereign Dimensions NOTE: All dimensions are approximate; measure your spa before making critical design or pathway decisions. (Front view) DOOR 6" (15.2 cm) ELECTRICAL CONNECTION 35" (89 cm) (2.5" (6.5 cm) Height from ground) ELECTRICAL CONNECTION 45" (114.5 cm) (2.5"... -
Page 44: Triumph
Triumph TRIUMPH Dimensions NOTE: All dimensions are approximate; measure your spa before making critical design or pathway decisions. (Front view) 6" (15.2 cm) ELECTRICAL CONNECTION (2.5" (6.5 cm) Height from ground) 41" (104 cm) ELECTRICAL CONNECTION (2.5" (6.5 cm) Height from ground) 51"... -
Page 45: Prodigy
PRODIGY Prodigy Dimensions NOTE: All dimensions are approximate; measure your spa before making critical design or pathway decisions. (Front view) 6" (15.2 cm) ELECTRICAL CONNECTION 33" (84 cm) (2.5" (6.5 cm) Height from ground) 43" (109 cm) MAIN DRAIN 66" (168 cm) SECONDARY DRAIN (Bottom view) 21"... -
Page 46: Jetsetter Lx & Jetsetter
JTNE JETSETTER LX & JETSETTER Dimensions NOTE: All dimensions are approximate; measure your spa before making critical design or pathway decisions. (Front view) DOOR 6" (15.2 cm) ELECTRICAL CONNECTION 36" (91.4 cm) (2.5" (6.5 cm) Height from ground) ELECTRICAL CONNECTION 48"... -
Page 47: Service Information
If the spa is not heating, the red and green lights are blinking, but ervIce nformatIon the pump and light are operating, then the pressure switch may be open. Opening of the pressure switch is normally a result of one or a GENERAL INFORMATION combination of these problems: A clogged filter cartridge... -
Page 48: Acts Invalidating Warranty
• If the pump is shutting down due to excessive heat, make sure the WELLNESS does not recommend using the spa if the water equipment compartment has adequate ventilation. The air gap at the temperature is above or below the spa’s control panel temperature bottom must not be blocked. - Page 49 GENERAL OPERATION TROUBLESHOOTING GUIDE Problem Probable causes Solutions Entire spa is inoperative • Power failure • Check power source • RCD tripped • Reset RCD; call for service if it will not reset • Heater high-limit thermostat tripped • Disconnect power for at least thirty seconds to reset heater high limit. If it will not reset, check for clogged filters.
-
Page 50: Door Panel Removal
DOOR PANEL REMOVAL Use the following instruction to remove the front door panel below the docking station. When replacing the door, reverse the order making sure the Logo is seated in the top right corner of the spa as illustrated in Step 1. -
Page 51: Spa Specifications
SPA SPECIFICATIONS Spa Model Footprint Height Effective Heater Water Filled Dead Electrical Dimension Filter (Watts) Capacity Weight Weight* Weight* Requirements Area 230 volt, 20 amp GRANDEE 2.54 m 97 cm 30 m²** 1,700 liters 425 kg 2,685 kg kg/m² 1,500 Single phase RCD (Model GGNE) 2.31 m... - Page 52 This manual contains installation, operating, maintenance and service information for the following 2022 HOT SPRING spa models: MODELS EFFECTIVE DATE GRANDEE (MODEL GGNE) 11/21 ENVOY (MODEL KKNE) 11/21 VANGUARD (MODEL VVNE) 11/21 ARIA (MODEL ARNE) 11/21 SOVEREIGN (M ODEL IINE) 11/21 TRIUMPH (MODEL TRHNE) 11/21...