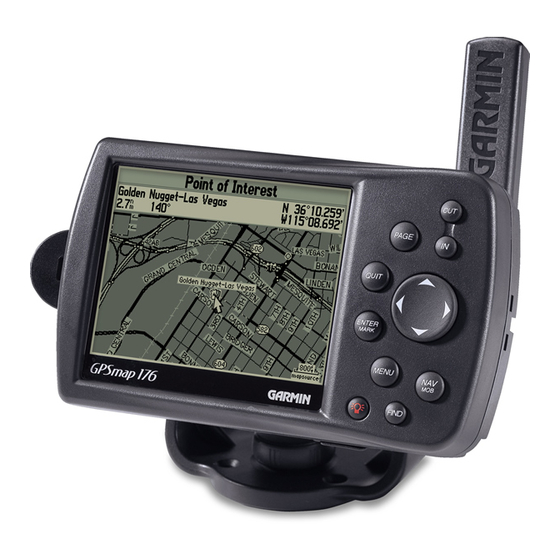
Garmin GPSMAP 176 Owner's Manual And Reference Manual
Chartplotting receiver
Hide thumbs
Also See for GPSMAP 176:
- Owner's manual (104 pages) ,
- Owner's manual and reference manual (86 pages) ,
- Quick start manual (16 pages)
Table of Contents
Advertisement
Quick Links
Advertisement
Table of Contents

Related Manuals for Garmin GPSMAP 176


Summary of Contents for Garmin GPSMAP 176
- Page 1 GPSMAP 176C/176 chartplotting receiver owner’s manual reference guide...
- Page 2 Information in this document is subject to change without notice. GARMIN reserves the right to change or improve its products and to make changes in the content without obligation to notify any person or organization of such changes or improvements.
-
Page 3: Introduction
Be sure you take the time to read the Quick Start Guide fi rst to get acquainted with the basic and Support features of the GPSMAP 176. After you have read the Quick Start Guide, you may read through this Owner’ s Manual in order to understand the operating features of the GPSMAP 176 in detail. This manual is broken down into three sections for your convenience. -
Page 4: Fcc Compliance Statement
FCC Compliance Introduction The GPSMAP 176 complies with Part 15 of the FCC interference limits for Class B digital devices FOR HOME OR OFFICE USE. These limits are designed to provide more reasonable protection against harmful interference in a residential installation, and are more stringent than “outdoor” requirements. -
Page 5: Software License Agreement
CAREFULLY. Software License Agreement GARMIN grants you a limited license to use the software embedded in this device (the “Software) in binary executable form in the normal operation of the product. Title, ownership rights and intellectual property rights in and to the Software remain in GARMIN. -
Page 6: Warnings And Cautions
Warnings and Cautions become unsafe. CAUTION: Use the GPSMAP 176 at your own risk. To reduce the risk of unsafe operation, carefully review and understand all aspects of this Owner’ s Manual—and thoroughly practice operation using the simulator mode prior to actual use. When in actual use, carefully compare indications from the GPSMAP 176 to all available navigation sources, including the information from other NAVAIDs, visual sightings, charts, etc. -
Page 7: Warranty And Serial Number
This GARMIN product is warranted to be free from defects in materials or workmanship for one year from the date of purchase. Within this period, GARMIN will at its sole option, repair or replace any components that fail in normal use. Such repairs or replacement will be made at no charge to... -
Page 8: Features And Capabilities
Introduction that can give you the navigation information you need: Precision Performance • The GPSMAP 176 features a 3.8” diagonal, high-contrast, 320 x 240 FSTN display with Features and Capabilities backlighting • The GPSMAP 176C features a 3.8” diagonal, 16 color, 320 x 240 TFT display with backlighting •... -
Page 9: Table Of Contents
Introduction Introduction ......i -viii Waypoint Lists ......23 Table of Contents User Waypoints List . -
Page 10: How To" Index
TO DO THIS: SEE PAGE(S): Introduction Access the Main Menu ..........39 Change the Displayed Time (zone) . -
Page 11: Reference
Each time the unit receives satellite signals, the Almanac is updated. This is how the GPSMAP 176 knows which satellites to search for. If you do not use the unit for several months, or move the unit several hundred miles between uses, the Almanac can become “cold,” which means the orbital data is no longer valid. -
Page 12: Initialization Options
Initialization Options Reference If the GPSMAP 176 is unable to determine its location, an options menu will be displayed. Depending on the situation, select the appropriate option to help the unit acquire satellites. Start Simulator— This option will turn the GPS receiver Off. Select this option if you are indoors Initializing the GPS Receiver and can not receive satellite signals, or if you wish to practice using the unit in simulator mode. -
Page 13: Map Page
The GPSMAP 176 will always power up in the position mode, with the last known location cen- tered on the map display. When the ARROW KEYPAD is pressed, the GPSMAP 176 will enter cursor Land mode. - Page 14 As you move the cursor, the distance and bearing from your present position to the cursor will be Reference displayed in the data window, along with the cursor’ s position coordinates. When you zoom in cursor mode, the cursor will stay centered on the screen. When the cursor is stationary, a fi xed coordinate position will appear in the position fi...
-
Page 15: Selecting Map Scales
The scale value represents the distance from one end of the scale bar to the other. Using BlueChart/MapSource Data The GPSMAP 176’ s system has a built-in worldwide database to 20 mi, with more detailed coverage available through the use of the optional BlueChart or MapSource data. The GPSMAP 176 will display cartography as long as there is chart information available for the range you’ve selected. -
Page 16: Map Page Options
fi eld. Map Page Options Many features of the GPSMAP 176 are menu driven. Each of the main pages has an options menu, allowing you to custom tailor the corresponding page to your preferences and/or select special features that specifi... - Page 17 • Full Screen Map/Show Data Fields— toggles between a Map Page without or with data fi elds on Reference the map display. To maximize the map/show data fi elds: 1. Highlight the ‘Full Screen Map’ option and press ENTER. The Map Page will now be maximized with Map Page Options no data fi...
- Page 18 • Setup Page Layout— allows you to choose the size of text and number of data fi elds. Reference To setup the page layout: 1. Highlight the ‘Setup Page Layout’ option and press ENTER. 2. Select the desired option, None, Small (1 Column), Small (2 Columns), or Large (1 Column), and press Map Page Options ENTER.
- Page 19 • POINTER – Arrow points to your destination Reference • SPEED – Speed over ground • TIME OF DAY – Current time • TIME TO DEST – Time to fi nal waypoint Map Page Options • TIME TO NEXT – Time to next waypoint •...
- Page 20 General Tab Reference Detail— Most, More, Normal, Less, Least: controls how much map detail you will see. This setting only applies to any map feature set to ‘Auto’. Those features which have a specifi ed scale or turned ‘Off’ are unaffected by this setting. Map Page Setup Options Orientation—...
- Page 21 Marine Tab— Marine Services, Spot Soundings, Tide Stations, Navaids, Light Sectors Reference Text— Off, Small, Medium, and Large: controls the screen size of the name. Zoom— Auto, Off, 20 ft.-800 mi.: sets the maximum scale at which the feature appears on the screen. Some types of data will only be displayed at certain zoom scales.
- Page 22 City Tab— Large City, Medium City, Small City, Small Town Reference Text— Off, Small, Medium, and Large: controls the screen size of the name. Zoom— Auto, Off, 20 ft.-800 mi.: sets the maximum scale at which the cities appear on the screen. Some types of data will only be displayed at certain zoom scales.
-
Page 23: Compass Page
Whenever a ‘Go To’, ‘Navigate Track’ (TracBack) or ‘Navigate Route’ have been activated, the GPSMAP 176’ s Compass Page will guide you to your destination with digital readouts and a graphic compass display, which includes a bearing pointer. Use this page (instead of the Highway Page) when travelling at slower speeds, when making frequent directional changes, or where straight-line navigation is not possible due to obstructions or terrain. -
Page 24: Highway Page
Reference stationary or at very low speeds. Once you start moving, the pointer will be correct. The GPSMAP 176’ s Compass Page features a menu page that provides access to layout and data fi eld Compass Page/Highway Page options. The data window, located at the top of the page, provides a user-selectable layout of vari- ous types of useful data. - Page 25 The data window, located at the top of the page, pro- vides The GPSMAP 176’ s Highway Page options allows you to defi ne the data fi elds and select which waypoints and track are displayed on screen. The data window, located along the right side of the page, provides a user-selectable layout of various types of useful data.
-
Page 26: Numbers Page
‘On’. Active Route Page Whenever you have activated a route in the GPSMAP 176, the Active Route page will show each waypoint of the active route, along with various, user-selectable types of data. For additional details on the Active Route Page, see page 37. -
Page 27: Creating And Using Waypoints
Marking Your Present Position The GARMIN GPSMAP 176’ s ENTER key lets you quickly capture your present position to create a new waypoint. You must have a valid position (2D or 3D) fi x to mark your present position. This can be determined by looking at the GPS tab on the Main Menu. -
Page 28: Creating Waypoints Graphically
When you move the cursor over a map item, you will see a highlighted description of that item. The GPSMAP 176 will use the map item text shown on the cartography as the default name and symbol for the new waypoint. -
Page 29: Additional Options For Creating Waypoints
Additional Options for Creating Waypoints Reference Waypoints may also be created by manually entering position coordinates through the ‘Points’ tab of the Main Menu. This method can be useful for creating a waypoint at a specifi c latitude/longitude position from a chart. Creating Waypoints To create a new waypoint by entering location coordinates: 1. -
Page 30: Waypoint Menu Options
4. Highlight the distance and/or bearing fi elds below ‘From Current Location’ and press ENTER. Use the Reference ARROW KEYPAD to enter the projected distance and/or bearing from your current position for the new waypoint and press ENTER. 5. Make any other desired changes to the new waypoint data (name, symbol, etc), then highlight ‘OK’ Creating Waypoints and press ENTER. - Page 31 To access the Waypoint Review Page: Reference 1. Use the ARROW KEYPAD to highlight the desired waypoint on the Map Page. 2. Press ENTER to display the Waypoint Review Page. If the waypoint is located on a map feature, or MapSource or BlueChart feature, the Waypoint Review Page will include additional information tabs Reviewing/Editing Waypoints about the other features at that location.
- Page 32 To change the distance/bearing from your current location or another location: Reference 1. To select a different location, highlight the fi eld next to ‘From’, select a location and press ENTER. 2. Highlight the distance and/or bearing fi eld and use the ARROW KEYPAD to edit the data. Press ENTER when fi...
-
Page 33: Waypoint Lists
Waypoint Lists Reference The GPSMAP 176’ s Main Menu Page features two submenus of the ‘Points’ tab, ‘User’ and ‘Proxim- ity’, that let you manage a large number of waypoints quickly and effi ciently. The submenu tabs also provide a continuously updated proximity waypoint alarm function that can be used to defi ne an alarm Waypoint Lists circle around submerged hazards, shallow waters, etc. -
Page 34: Proximity Waypoints List
Once a waypoint is deleted from the list, it cannot be recovered from the unit. It is Reference advisable to backup important waypoints to a computer using the optional PC cable and interface software or write them down by hand. Waypoint Lists To delete an individual waypoint from the ‘User’... - Page 35 To add a proximity waypoint: Reference 1. Use the ARROW KEYPAD to highlight an empty space on the Proximity List and press ENTER. The ‘Find’ screen appears. Highlight ‘Waypoints’ and press ENTER. 2. Use the ARROW KEYPAD to highlight the desired waypoint from the ‘By Name’ or ‘Nearest’ tab Waypoint Lists lists.
-
Page 36: Going To A Destination
Going to a Destination Reference Using the NAV key, the GPSMAP 176 provides four ways to navigate to a destination: Go To Point, Navigate Route, Navigate Track (TracBack) and MOB (Man OverBoard) navigation. Once you are actively navigating, you will see a straight line that always runs from your current location to the desti- Going to a Destination nation on the Map page. -
Page 37: Tracback Navigation
To activate an existing waypoint or map item as a ‘Go To’ from the map display: Reference 1. Use the ARROW KEYPAD to highlight the waypoint or map item on screen and press NAV. 2. You will see ‘Go To <waypoint name>’, then press ENTER. Going to a Destination/ To activate a new map point (non-map item) as a ‘Go To’... - Page 38 (TracBack) and press ENTER. Once a TracBack has been activated, the GPSMAP 176 will take the track currently stored in memory and divide it into segments called ‘legs’. Up to 50 temporary ‘turns’ will be created to mark the most signifi...
-
Page 39: Mob: Man Overboard
For more information on setting up the Track options and saved tracks, see pages 447-48. The MOB function allows you to quickly activate a navigation The GPSMAP 176’ s Man OverBoard function (MOB) lets you simultaneously mark and set a course back to a location. -
Page 40: Creating A Route
Creating a Route Reference The last way to navigate to a destination is to create a user-defi ned route. The GARMIN GPSMAP 176 lets you create and store up to 50 reversible routes (numbered 1-50), with up to 50 waypoints each. -
Page 41: Following A Route
To create a route using text: Reference 1. Press the MENU key twice to display the Main Menu page. Use the ARROW KEYPAD to highlight the ‘Route’ tab. 2. Press the MENU key to display the Route Options page. Select the ‘New Route’ option and press Creating a Route/ ENTER. -
Page 42: Route List Page
Route List Page Route List Page The GPSMAP 176 Route List page (‘Route’ tab of the Main Menu) displays all the routes currently stored in memory, along with a descriptive name for each route. By pressing the MENU button on the Route List page, the following menu options appear: ‘New Route’... -
Page 43: Route Review Page
Route Review Page Reference Once you have created a route, the Route Review Page allows you to edit a selected route. To get to the Route Review Page: 1. Press MENU twice and highlight the ‘Route’ tab. Route Review Page 2. - Page 44 To edit a route on the map: Reference 1. From the Route Review page, press MENU, highlight ‘Use Map’ and press ENTER. To review a route point: Route Review Page 1. Highlight the point and press ENTER. The Review Page appears. 2.
- Page 45 The GPSMAP 176’ s route edit mode also lets you insert a new route waypoint in any route leg using Reference the map cursor. To insert a new point between two existing route waypoints: 1. Use the ARROW KEYPAD to select the leg in which you want to insert the new waypoint (the route Editing Routes line will highlight and change to a dotted line when the leg is selected) and press ENTER.
- Page 46 Reverse Route— Reverses the order of the route making the last point the fi rst. Reference To reverse the route: 1. From either the Route Review or Active Route Pages, press MENU. 2. Highlight ‘Reverse Route’ and press ENTER. Editing Routes Plan Route—...
-
Page 47: Active Route Page
Active Route Page Reference Whenever you have activated a route in the GPSMAP 176, the Active Route Page shows each point (waypoint or map item) of the active route, with the point name, Distance, Course, and choice of ETA, Fuel to point, Leg Distance, Leg Fuel, Leg Time, Sunrise and Sunset at point location, or Time To point Active Route Page for each point from your present position. -
Page 48: Find
Find Reference The FIND key allows you to search the unit for user waypoints, map items and any optional BlueChart or MapSource information loaded on a data card. By pressing the FIND key, the unit will search for items from your current location or from another location on the map. When you press Find Key FIND, a list of available items to search from will appear. -
Page 49: Main Menu Page
“tab” format. The Main Menu page is available from any page in the GPSMAP 176’ s system, and is accessed through the MENU key. To access the Main Menu page: 1. -
Page 50: Gps Tab
As soon as the GPSMAP 176 has collected the necessary data from the best satellites in view to calculate a fi x, the status fi eld will indicate a 2D or 3D status. The unit will then update the position, 45°... - Page 51 WAAS satellites will be numbered 33 or higher when viewing the sky view on your GPSMAP 176. Initial reception of the WAAS signal may take up to 15-20 minutes each day, then 1-2 minutes afterwards. When WAAS differential correction From the Main Menu ‘Systm’...
- Page 52 ‘3D Differential’ will appear when you are receiving DGPS corrections in 3D mode and a ‘D’ will show on the strength bar of satellites being cor- When the GPSMAP 176 is using a differential correction signal rected.
- Page 53 DGPS signal being received. If no optional DGPS receiver is used with the GPSMAP 176, the ‘DGPS Rcvr’ fi eld will display ‘Off. The SNR will depend upon the mounting of your DGPS receiver and the distance from the DGPS transmitting station.
-
Page 54: Tide Tab
Tide Tab— shows a graphical chart which displays tide station information in a 24 hour span starting Reference at midnight station time. You can choose from different dates and over 3000 tide stations around the USA coastline, Alaska, Hawaii, Western Canada and several of the Caribbean Islands. The top of the page displays the tide station being referenced, below that the date. - Page 55 To view the chart for a tide station nearest to your current location: Reference 1. From the ‘Tide’ tab, press FIND, select ‘Tide Stations’ and press ENTER. 2. Press MENU and select ‘Nearest to Vessel’. Select the desired station from the list and press ENTER. 3.
-
Page 56: Trip Tab
Trip Tab— displays Trip Odometer, Moving Average Speed, Total Average Speed, Maximum Speed, Reference Stopped Time, Moving Time, Total Time, and Odometer. To reset the trip data: 1. Press MENU, then select ‘Reset Trip’, ‘Reset Max Speed’, ‘Reset Odometer’ or ‘Reset All’ and press Main Menu: Trip/ ENTER. -
Page 57: Hunt Tab
Hunt Tab— displays good and best times and a condition prediction for hunting. You can select a data Reference and location of your choice. To enter another date: 1. Highlight the Date fi eld and press ENTER. Main Menu: 2. Enter a new date then press ENTER to accept. Hunt/Points/Route/Track Tabs To choose another location: 1. - Page 58 • Interval— Defi nes the frequency at which the track is recorded. Three interval settings are Reference available: Distance: Records track based on a user-defi ned distance between points. Time: Records track based on a user-defi ned time interval. Main Menu: Track Tab Resolution: Records track based upon a user-defi...
-
Page 59: Time Tab
Time Tab— displays the current time and date, allows you to adjust the 12 or 24 hour time format, Reference enter a time zone and adjust for daylight savings to show correct local time. The following menu options are available: •... -
Page 60: Location Tab
• Defaults— restores settings on Systm page to default values. Main Menu: Location Tab • All Unit Defaults— restores all settings to Garmin’ s original setup values for the entire unit. Location (Loctn) Tab— defi nes settings for Location Format, Map Datum, Heading, and Magnetic Variation. - Page 61 • Map Datum— allows you to manually select the datum reference used to determine a given posi- Reference tion. The default setting is ‘WGS 84’. The unit will automatically choose the best datum depending upon your chosen position format. Datums are used to describe geographic positions for surveying, mapping, and navigation and are not actual maps built in the unit.
-
Page 62: Units Tab
Communication (Comm) Tab— lets you control the input/output format used when connecting your GPSMAP 176 to external NMEA devices, a DGPS beacon receiver, a personal computer, another GARMIN GPSMAP 176, etc. Note: If a DGPS receiver is used, WAAS capability will automatically be turned to ‘Off’. - Page 63 To have the unit automatically scan for a frequency: 1. With the unit set to ‘Garmin DGPS’ or ‘RTCM In/NMEA Out’, use the ARROW KEYPAD to highlight the “Beacon” fi eld and press ENTER.
- Page 64 To manually enter a frequency and bit rate: Reference 1. With the unit set to ‘Garmin DGPS’ or ‘RTCM In/NMEA Out’, use the ARROW KEYPAD to highlight the “Beacon” fi eld and press ENTER. 2. Highlight ‘User’ and press ENTER.
- Page 65 NMEA Interface Reference If you are going to interface the GPSMAP 176 with another piece of equipment (such as a radar or autopilot), the unit needs to be set to output NMEA data. The NMEA data can be customized to shorted the update time from the unit.
-
Page 66: Alarm Tab
Alarm Tab— allows you to defi ne the alarm setting for Anchor Drag, Arrival, Off Course, Clock, Reference Shallow Water, Deep Water, DGPS and Accuracy. • Anchor Drag— sets an alarm to sound when you’ve exceeded a specifi ed drift distance. Enter a value in the distance fi... -
Page 67: Appendices
MapSource). Water Immersion The GPSMAP 176 is waterproof to IEC Standard 529 IPX7. It can withstand immersion in 1 meter of water for 30 minutes. Prolonged submersion can cause damage to the unit. After submersion, be certain to remove the batteries and data card and dry the compartments before reuse. -
Page 68: Appendix B: Wiring And Interfacing
Connecting the Power/Data Appendix B The power/data cable connects the GPSMAP 176 to an 8-35 volt DC system and provides interface capabilities for connecting external devices. The color code in the diagram below indicates the appro- priate harness connections. Replacement fuse is a AGC/3AG - 2.0 Amp fuse. -
Page 69: Appendix C: Time Offsets
The chart below gives an approximate UTC (Universal Time Coordinate) time offset for the various Appendix C longitudinal zones. Check with local charts for more detailed information. If you are in daylight savings time, add one hour to the offset. Time Offsets Longitudinal Zone Offset... -
Page 70: Appendix D: Map Datums
Chua Astro Chua Astro- Paraguay Appendix D Corrego Alegr Corrego Alegre- Brazil Djakarta Djakarta (Batavia)- Sumatra Island (Indonesia) Dos 1968 Dos 1968- Gizo Island (New Georgia Islands) Dutch Dutch Map Datums Easter Isld 67 Easter Island 1967 European 1950 European 1950- Austria, Belgium, Denmark, Finland, France, Germany, Gibraltar, Greece, Italy, Luxembourg, Netherlands, Norway, Portugal, Spain, Sweden, Switzerland European 1979 European 1979- Austria, Finland, Netherlands, Norway, Spain, Sweden, Switzerland... - Page 71 Minna Minna- Nigeria Appendix D NAD27 Alaska North American 1927- Alaska NAD27 Bahamas North American 1927- Bahamas NAD27 Canada North American 1927- Canada and Newfoundland NAD27 Canal Zone North American 1927- Canal Zone Map Datums NAD27 Caribbn North American 1927- Caribbean (Barbados, Caicos Islands, Cuba, Dominican Repuplic, Grand Cayman, Jamaica, Leeward and Turks Islands) NAD27 Central North American 1927- Central America (Belize, Costa Rica, El Salvador, Guatemala,...
-
Page 72: Appendix E: Glossary Of Terms
Avg Speed — The average of all second-by-second speed readings since last reset. Appendix E Bearing (BRG) — The compass direction from your current location to a destination. Course — The desired course between the active ‘from’ and ‘to’ waypoints. Glossary of Terms Distance (Dist) —... - Page 73 Moving Trip Timer — Total time the unit has been moving. Appendix E Odometer — A running tally of distance traveled, based upon the distance between second-by-second position readings. Off Course — The distance you are off a desired course in either direction, left or right. Also referred to Glossary of Terms as ‘cross-track error’...
-
Page 74: Appendix F: Messages
Cant Unlock Maps — No applicable unlock code for one or more maps was found. All MapSource map are not accessible. Database Error — Internal problem with the unit. Contact your dealer or GARMIN Customer Service to have the unit repaired. - Page 75 Route Waypoint Memory Full — No additional route waypoints can be saved. Appendix F Shallow Water — The water is shallower than the amount set in the Shallow Water Alarm. Track Already Exists — A saved track with the same name already exists. Messages Track Log Full —...
-
Page 76: Appendix G: Loran Td Setup
Setup TD fi eld, the active waypoint information will refl ect those changes. Since the GPSMAP 176 does not rely on the LORAN signal for navigation, it can reference a different GRI chain and/or secondary stations and still navigate to the location stored in memory. - Page 77 You must know your GRI chain number, secondary stations to create a LORAN TD position. For more information please read our LORAN TD Position Format Handbook, available at the GARMIN web site, at www.garmin.com/support/userManual.html. LORAN TD Setup page...
-
Page 78: Appendix H: Accessories
128MB sizes. Download street-level map detail, points of interest, business addresses and phone numbers, marine data, topographical information and more from MapSource CD-ROMs to a data card, either directly through your GPSMAP 176 using the PC Interface Cable, or with the USB Data Card Programmer. - Page 79 Non-Skid Friction Mount— Portable vehicle mount, no installation required. Non-Skid Friction Mount Carrying Case— Protects the GPSMAP 176 when not in use; with storage for data cards. Vehicle Power Adapter— Allows the GPSMAP 176 to operate from the vehicle’ s power system through the cigarette lighter adapter.
-
Page 80: Appendix I: Specifi Cations
AGC/3AG - 2.0 Amp 1 Alkaline batteries lose a signifi cant amount of their capacity as the temperature decreases. Use lithium batteries when operating the GPSMAP 176 in below freezing condi- tions. Extensive use of screen backlighting will signifi cantly reduce battery life. Different battery brands will vary in useful life. -
Page 81: Appendix J: Index
Appendix J Appendix I Index Color Mode ......10 Communication Settings ....52 Accessories . - Page 82 Options ......6-13 Restore GARMIN Setup ....50 Scales/Zooming .
- Page 83 Appendix J Index Deleting ..... . . 32, 36 Sunrise/Sunset ......46 Editing .
- Page 84 Notes...
- Page 86 For the latest free software updates throughout the life of your GARMIN products, visit the GARMIN web site at www.garmin.com. © Copyright 2001-2002 GARMIN Ltd. or its subsidiaries GARMIN International, Inc. 1200 East 151 Street, Olathe, Kansas 66062, U.S.A. GARMIN (Europe) Ltd.