
Related Manuals for Canon SELPHY ES40


Summary of Contents for Canon SELPHY ES40
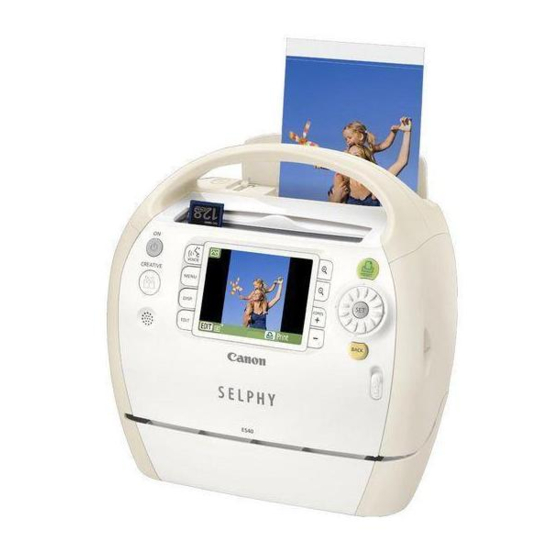
- Page 1 Printer User Guide ENGLISH Make sure you read this guide before using the printer. Store this guide safely so that you can use it in the future. ...
- Page 2 Make Printing Fun with SELPHY! SELPHY speaks! Learn how to create lasting memories with your friendly, but powerful, compact printer. Make more things possible with SELPHY. Creative Print ...You can make many kinds of decorated prints. Frames (p. 40) Speech Bubbles (p.
-
Page 3: Package Contents
□ SELPHY Printer Unit □ Beginner’s Guide PHOTO PRINTER Solution Disk Cartridges (Sold Separately) Before using the printer, be sure to purchase a cartridge (Easy Photo Pack) separately. No. of Paper Size Possible Prints Postcard size (100 x 148mm) (4 x 6 in.) -
Page 4: Table Of Contents
Table of Contents Package Contents Cartridges (Sold Separately) Read This First For Your Safety Getting Started Turning On SELPHY Setting the Display Language Changing Voice Guidance Settings Compatible Memory Cards and Memory Card Slots Choosing and Printing Images Storing the Printed Photos Cleaning Up After Printing Printing Recipes Learning More About SELPHY... -
Page 5: Read This First
This product’s warranty is only effective in the country of sale. If a problem arises while the printer is in use abroad, please return it to the country of sale before proceeding with a warranty claim to a Canon Customer Support Help Desk. -
Page 6: For Your Safety
Do not attempt to disassemble or alter any part of the equipment in a way that is not expressly described in this guide. To avoid the risk of injury, do not touch the interior of the printer if it has been dropped or otherwise damaged. -
Page 7: Getting Started
Do not use if the power cord or plug has been damaged. Do not allow metallic pins to touch or allow dust to collect on the power plug. Do not use the power cord for any other equipment except this printer. This could result in electrical shock or fire. -
Page 8: Setting Up Selphy
Please use only genuine Canon Easy Photo Pack cartridges for SELPHY ES series printers. Cartridges for the CP series cannot be used. Do not remove the colored protective paper that is installed in the cartridge. Do not touch or pull on the ink sheet. Do not touch the cartridge with wet or sweaty hands. You ... -
Page 9: Turning On Selphy
Choose a language. Press the udl r buttons (the the w wheel), or turn the w wheel to choose a language, then press the o button to change the language. (MENU) (pp. 70, 72). button. area on button and choosing [Printer... -
Page 10: Changing Voice Guidance Settings
Changing Voice Guidance Settings You can turn the voice guidance on or off, and set the volume (5 levels) and language (7 languages). Display language settings must be made separately. Compatible Memory Cards and Memory Card Slots Display the [Voice Guidance Settings] screen. -
Page 11: Images That Can Be Printed
If you insert the memory card into a card slot without using an adapter, you may not be able to remove the memory card from the printer. Use a memory card formatted in the device used for taking the images. A memory card formatted ... -
Page 12: Choosing And Printing Images
Choosing and Printing Images You can choose an image and specify the number of copies for printing. In this section, an SD memory card will be used as an example, but you can print from other memory cards using the same steps. The voice guidance will announce when printing has finished. - Page 13 Do not eject the cartridge, open the cartridge cover, or close the print output receptacle cover right after turning on the power or while printing. It may result in equipment damage. When the total number of copies for printing is set to 0 and you press the p button, the currently ...
-
Page 14: Storing The Printed Photos
If you wish to mount prints in an album, choose an album with photo covers made of nylon, polypropylene or cellophane. Color may change over time or depending on storage conditions. Canon assumes no liability for color changes. Cleaning Up After Printing After you finish printing, follow the steps below to clean up and store SELPHY. -
Page 15: Printing Recipes
Voice guidance is available for all the SELPHY features used in these recipes beginners can print easily. For more detailed information, refer to the full instructions for each printer function. Printing Recipes Use the following recipes scrapbooks and more! Let’s get started! - Page 16 Creating a Greeting Card Make an impression with gold and silver frames! Send a unique greeting card. Ingredients Easy Photo Pack (p. 3) Marker pen (For writing addresses or messages.) Decorations [Frames] in [Creative Print] SELPHY Photo Print ...
-
Page 17: Creating A Photo Diary
Creating a Photo Diary Capture life's little moments in a handmade photo diary. Ingredients Easy Photo Pack (p. 3) Colored paper Marker pen Decorations Decorations [Multi Layout] in [Creative Print] Instructions Use the [Multi Layout] feature in [Creative Print] ... - Page 18 Creating a Photo Calendar Turn your birthday and a photo into a calendar. Create a calendar together as a family. Ingredients Easy Photo Pack (p. 3) Decorations The [Calendar] setting in [Creative Print] Instructions Use the [Calendar] feature in [Creative Print] ...
- Page 19 Creating a Scrapbook Use your creativity to turn a fond memory into a scrapbook. Ingredients Easy Photo Pack (p. 3) Mounting board, colored paper Scissors, glue, pens Decorations Combining different size photos can be visually effective. Instructions Decide on a theme for your page (e.g.
-
Page 21: Learning More About Selphy
Conventions Used in This Guide This printer will be referred to as “SELPHY” or “printer”. The various types of memory cards that can be used in this printer are collectively referred to as “memory cards”. The button functions are represented by icons shown on or around the buttons. For a detailed ... -
Page 22: The Names Of Selphy's Components
The Names of SELPHY’s Components Sliding Slot Cover (pp. 10, 12) Card Slots (pp. 10, 12) Speaker Paper-Handling Slot Carrying Handle AC IN (Power Input) Terminal (p. 8) Print Output Receptacle (p. 13) Cartridge Compartment Cartridge Cover Lever (p. 8) Print Output Receptacle Cover (p. - Page 23 Icons Used in This Guide Name Power Button CREATIVE Button Voice Guidance Button Menu Button (MENU) Display Button (DISPLAY) Edit Button (EDIT) Screen (LCD Monitor) Enlarge Button Reduce Button Increase Copies Button Decrease Copies Button Up Button Down Button Left Button Right Button Easy Scroll Wheel Set Button...
-
Page 24: Information Displayed On The Screen
Time and date Displays available operations. The paper status icon will not display directly after the printer is turned on or after the cartridge has been replaced. The icon will be restored after one or more images have been printed. -
Page 25: Demo Mode
Changing the Information Displayed on the Screen You can change the information that is displayed on the screen. However, if SELPHY’s power is turned off or the memory card is removed, the setting will return to [Tool Tips]. No information If the [Auto Power Down] function is set to [Off] and no user operations are performed for 20 sec., SELPHY will enter demo mode and some sample images will be displayed on the screen. -
Page 26: Changing The Way Images Are Displayed
Changing the Way Images Are Displayed In SELPHY's image display screen, you can choose from several image views, including single image view and 9 image view. This section will explain how to switch between each image view. Single Image View Press the 0 button or the b button... -
Page 27: Searching Images
Searching Images Using the Jump Function to Search Images You can jump to an image using a specified search key. Search Key Jump 10 Images Jump 50 Images Jump 100 Images Jump Selected Images Jump Selected Date You can also display the jump screen by pressing the u button while in single image view Displaying Images in Filtered Playback Display the edit menu. - Page 28 Search Images Using Auto Play You can play all the images on your memory card in order of their file number (images will display for approx. 3 seconds each), and search for images to print. Only one image per page will be printed. [Page Layout] settings made in “Printing a Variety of ...
-
Page 29: Printing A Variety Of Images
Printing a Variety of Images This section will explain how to use various print settings to get more enjoyment out of using SELPHY. Refer to the Cartridge/Feature Compatibility Table functions can be performed when each cartridge is installed. (p. 76) to learn which printing... -
Page 30: Printing All Images
Printing All Images Number of sheets required You can print all images on a memory card at once. Display the setting screen. Press the m Press the ud buttons, or turn the w wheel to choose [Print All Images], then press the o button. -
Page 31: Printing A Variety Of Images
Printing a Variety of Images You can set various printing features, such as imprinting the shooting date or adjusting the color of an image. You do not need to repeat the settings for each image because once the settings are made, they are applied for all images. - Page 32 Printing with the Date (Date) Since the date printed will be the date the image was recorded by the digital camera, it cannot be changed on SELPHY. You can change the style of the printed date in [Date Format] ...
- Page 33 Printing with a Colored Border (Border Color) If [Borders] (p. 32) is set to [ Settings] screen. When [Page Layout] is set to [ selected color. Choosing a Layout and Printing (Page Layout) 1-up Prints one image using the full sheet (Default setting) 2-up Prints two images on one sheet...
- Page 34 Correcting Red Eyes and Printing (Correct Red-Eye) Correct images with red-eye. Off (Default setting) / If SELPHY's power is turned off or the memory card is removed, the setting will return to [ Off]. Portions other than the eyes may be mistakenly corrected. Set [Correct Red-Eye] to [ when printing images with red-eye.
- Page 35 Changing the Tones and Printing (My Colors) You can adjust the colors in your images, or make your images sepia-toned or black and white. (Default setting) Emphasizes the contrast and color Vivid saturation for a vivid impression Tones down the contrast and color Neutral saturation for neutral hues Sepia...
-
Page 36: Trimming Images
Trimming Images You can print part of an image by using the trimming feature. Choose an image. Press the l r buttons, or turn the w wheel to choose an image. Display the trimming setting screen. Press the m button. - Page 37 Step 2 are performed and the image cannot be trimmed. Make the setting. Once you have pressed the o button, the trimming frame is set and the printer restores the image display screen. To trim other images before printing at the same ...
-
Page 38: Printing Using Layouts
Printing using Layouts For more instructions about creating a layout, refer to “Choosing a Layout and Printing (Page Layout)” 33). Settings made in “Choosing a Layout and Printing (Page Layout)” if SELPHY’s power is turned off or the memory card is removed from the slot. However, [Page Layout] settings made in the edit menu will clear if the power is turned off or the memory card is removed. -
Page 39: Printing With A Colored Border
Printing with a Colored Border If [Borders] (p. 32) settings are set to [ menu. For complete information about [Border Colors], refer to "Printing with a Colored Border (Border Color)" (p. 33) Settings made in “Printing with a Colored Border (Border Color)” ... -
Page 40: Printing With Frames
Printing with Frames Make your images more dynamic by printing with frames (16 different designs) When using the gold or silver cartridges, you can chose from 9 different gold or silver designs 81). When a black and white cartridge is installed, ... - Page 41 image placement, etc.) will be made depending on the paper size of the new cartridge. However, if settings incompatible with the new cartridge have been selected, the printer will restore the [Creative Print] screen. You can add frames to SELPHY using the supplied software ...
-
Page 42: Printing With Clip Art
Printing with Clip Art You can decorate your images with up to 30 stamps. Choose from 10 different designs and print 81). When using the gold or silver cartridges, you can decorate your images with up to 30 stamps. Choose from 4 different gold or silver designs 81). - Page 43 However, if settings incompatible with the new cartridge have been selected, the printer will restore the [Creative Print] screen. In Step 4, pressing the b ...
-
Page 44: Printing Calendars
Printing Calendars You can turn your photo into a calendar (12 different designs, 10 designs when using a card size cartridge). When a black and white, gold, or silver cartridge is installed, calendars cannot be printed. Display the calendar screen. Press the c button. - Page 45 image placement, etc.) will be made depending on the paper size of the new cartridge. However, if settings incompatible with the new cartridge have been selected, the printer will restore the [Creative Print] screen. Choose whether or not to add holidays.
-
Page 46: Printing Using Multi Layouts
Printing using Multi Layouts Make your photos tell a story by turning them into a photo diary (6 different layout designs). When a black and white, gold, or silver cartridge is installed, multi layouts cannot be printed. As an example, this section will explain how to ... - Page 47 When a cartridge is replaced mid-way through printing, automatic adjustments (trimming frames, image placement, etc.) will be made depending on the paper size of the new cartridge. However, if settings incompatible with the new cartridge have been selected, the printer will restore the [Creative Print] screen. Choose an image.
-
Page 48: Printing With Speech Bubbles
Printing with Speech Bubbles You can make your images more fun by printing with speech bubbles (6 different types). When a black and white, gold, or silver cartridge is installed, speech bubbles cannot be printed. Display the speech bubble screen. Press the c button. - Page 49 However, if settings incompatible with the new cartridge have been selected, the printer will restore the [Creative Print] screen. Choose where to place the speech bubble.
-
Page 50: Printing With Image Effects
Printing with Image Effects Image Effect [Faded Edges] [Soft Edges] [Soft Focus] [Star Lights] [Modern Bright] [Pinhole Camera] [Nostalgic] [Smooth Skin] You can add flair to your photos by printing with image effects (8 different types). When a gold or silver cartridge is installed, ... - Page 51 When a cartridge is replaced mid-way through printing, automatic adjustments (the printed area of the image, etc.) will be made depending on the paper size of the new cartridge. However, if settings incompatible with the new cartridge have been selected, the printer will restore the [Creative Print] screen. Choose an image.
-
Page 52: Id Photos (P
Printing an ID Photo Images taken with a Canon Compact Digital Camera with the recording pixels set to L (Large) can be printed as ID photos. When a gold or silver cartridge is installed, ID photos cannot be printed. - Page 53 If an image taken with a non-Canon brand digital camera has roughly the same recording pixels as an L (large) image taken with a Canon digital camera, it can also be printed as an ID photo. However, depending on the camera, the message [Incompatible image] may appear in Step 2, and the image cannot be printed as an ID photo.
-
Page 55: Using Selphy With Your Computer
Using SELPHY Photo Print, you can view all images at once in a list, and add text to images before printing them. Following the audio guidance will allow inexperienced computer users to print easily. Using SELPHY ES40 Contents Utility you can download new frames and clip art (contents data) to SELPHY. -
Page 56: Software
You can use gold and silver cartridges when printing with a Windows computer. Print calendars You can add calendars to your prints. SELPHY ES40 Contents Utility Download Frames and Stamps to SELPHY You can add frames and stamps (contents data) to SELPHY. SELPHY Photo Print... -
Page 57: System Requirements
System Requirements Windows Vista (including Service Pack 1, Service Pack 2) Windows XP Service Pack 2, Service Pack 3 Configuration The above OS should be pre-installed on computers with built-in USB ports. Pentium 1.3 GHz or higher Windows Vista: 1 GB or more Windows XP: 512 MB or more Interface Free Hard Disk... -
Page 58: Install And Start The Software
Windows Vista and Mac OS X 10.5 are used for these explanations. Items to Prepare A Computer Supplied CD-ROM (COMPACT PHOTO PRINTER Solution Disk) USB Cable shorter than 2.5m (8.2 ft) (Commercially available). SELPHY terminal requires a Type B ... - Page 59 If the screen in Step 5 does not appear, choose from the [Start] menu r [All Programs] r [Canon Utilities] r [SELPHY Photo Print] r [SELPHY Photo Print]. Macintosh If the screen in Step 5 does not appear, follow the procedure below to register your ...
-
Page 60: Printing From Your Computer
Printing from Your Computer Use SELPHY Photo Print to print images from the computer. The [Simple print] feature will be explained in this guide. Using this feature you can view all your images at once and choose which ones you want to print. If your computer is equipped with speakers, set the volume so that the audio guidance for necessary operations can be heard. - Page 61 Press the - or + buttons to set the number of prints. Turning off the Voice Guidance. The voice guidance may not play properly on some computers. If the voice guidance is difficult to hear, follow these steps to turn off the voice guidance before using the software. In order for the software audio guidance to be effective, the SELPHY voice guidance limited to sound effects only.
-
Page 62: Downloading Frames And Stamps
Using SELPHY ES40 Contents Utility, you can download frames and stamps (contents data) to a memory card. Insert the memory card into the printer to add new frames and stamps to SELPHY. You can add (update) up to 5 frames and stamps at a time from those saved in SELPHY ES40 ... - Page 63 Appears on frames compatible with gold and silver cartridges. Appears on frames compatible with gold and silver cartridges. You cannot download contents data to SELPHY directly from your computer. After you have downloaded contents data to a memory card, the next time you use [SELPHY ...
- Page 64 (MENU) Press the ud buttons or turn the w wheel to choose [Printer Setup], then press the o button. Choose [Transfer Content]. Press the ud buttons or turn the w wheel to choose [Transfer Content], then press the o button.
-
Page 65: Printing Images From Your Digital Camera Or Mobile Phone
Printing Images from your Digital Camera or Mobile Phone This section will explain how to connect SELPHY to a digital camera, how to print images with settings specified on the digital camera, and how to print wirelessly from a mobile phone. -
Page 66: Printing From Your Digital Camera
Printing from Your Digital Camera Choose and print images directly from a digital camera that supports the PictBridge standard. A Canon brand compact digital camera will be used as an example to explain the print method. If operations are different for the digital camera you use, refer to the user guide for your digital camera. -
Page 67: Printing Images Using Digital Camera Specified
The date and file number are the DPOF settings made with the digital camera (these settings cannot be changed with SELPHY). If, on a Canon brand digital camera, the [Print Type] is set to [Standard], the settings made in "Printing a Variety of Images"... -
Page 68: Printing From Your Mobile Phone
When a gold or silver cartridge is installed, you cannot print from a mobile phone. Choose Canon ES40-X (X stands for one digit) when choosing a target device name on your mobile phone. You cannot establish a wireless connection between a computer and SELPHY. -
Page 69: Useful Information When Using Selphy
Useful Information when Using SELPHY This section will explain how to personalize SELPHY, how to fix any printing problems, and gives useful information to know when using SELPHY. -
Page 70: Personalizing Selphy
The [Printer Setup] screen will display. Press the m (MENU) Press the ud buttons, or turn the w wheel to choose [Printer Setup], then press the button. Change a setting. Please refer to each item settings and how to change settings. - Page 71 This setting will be applicable when there is more than one Bluetooth compatible device. You can set a passkey to prevent incorrect use of the printer from Bluetooth compatible devices. If a passkey has been set, you must input the 4 digit passkey in your mobile phone before printing.
-
Page 72: Change The Display Language
The display language 9), [Date Format] reset. You can download frames and stamps (contents data) using the supplied software (SELPHY ES40 Contents Utility). For more information, refer to “Downloading Frames and Stamps (Contents Data)” Unless a memory card containing content data is inserted into SELPHY, [Transfer Content] will not be displayed in the [Printer Setup] screen. -
Page 73: Troubleshooting
Troubleshooting If you think there is a problem with SELPHY, first check the following. If the items below do not solve your problem, contact a Canon Customer Support Help Desk as listed on the included customer support list. Power will not turn on ... - Page 74 Confirm SELPHY is connected directly to a port on the computer with the USB cable. • Problems Exclusive to Windows: Check if the printer is set to offline. If it is, right-click the printer icon and cancel the offline setting.
- Page 75 When paper is sticking out of the paper handling slot However, if a gentle tug is not sufficient to remove the paper, do not attempt to forcibly pull it out. Turn the printer off and on repeatedly until the paper is ejected. •...
-
Page 76: Error Messages
“Troubleshooting” 73). If these items do not solve your problem, contact a Canon Customer Support Help Desk as listed on the included customer support list. If a problem occurs while SELPHY is connected to a digital camera, the digital camera may also display an error message. -
Page 77: Handling Precautions
Handling Precautions Do not apply excessive force to the printer. Force or impact on the printer may result in paper jams or equipment damage. Be careful not to spray the equipment with insecticides or volatile substances. In addition, do not ... -
Page 78: Specifications
Specifications All data is measured according to standard Canon testing procedures. We reserve the right to change specifications without notice. Printing Method Dye-sublimation thermal transfer (with overcoating) Print Resolution 300 x 600 dpi (300 x 300 dpi : When a PC is connected, Bluetooth print, 2-up and higher... -
Page 79: Index
Cleaner Unit... 3, 7, 77 Clip Art Designs ... 81 Download New Clip Art ... 62 Printing ... 42 COMPACT PHOTO PRINTER Solution Disk... 3, 58 Computer Download Contents ... 62 Install and Start the Software ... 58 Print ... 60 System Requirements ... - Page 80 Button ... 9, 23 Cord ... 3, 8 Print All Images... 30 Print Effect ... → Image Effect Printable Images... 11 Printer Setup... 70 Auto Power Down ... 71 Auto Rotate ... 71 Bluetooth ... 71 Default ... 72 Language ... 72 Transfer Content...
-
Page 81: Frames And Clip Art
More fun, more style Frames and Clip Art SELPHY features a variety of frames and clip art stamps. Decorate your favorite images and enhance your life with beautiful photos. Frames Clip Art Frames and Clip Art stamps with support gold or silver printing. The above are design samples. -
Page 82: Trademark Acknowledgments
Reprinting, transmitting, or storing in a retrieval system any part of this guide without the permission of Canon is prohibited. Canon reserves the right to change the contents of this guide at any time without prior notice. Illustrations and screenshots in this guide may differ slightly from the actual equipment.