Table of Contents
Advertisement
Advertisement
Table of Contents

Related Manuals for True TUI-15-R-SS-D


Summary of Contents for True TUI-15-R-SS-D
- Page 1 T R U E R E S I D E N T I A L ® 1 5 I N C H T R U E I C E M A C H I N E ® I N S T A L L G U I D E A N D U S E R ' S M A N U A L P R E S E R V E T H E M O M E N T ®...
- Page 2 THANK YOU FOR YOUR PURCHA SE Page 2 of 64 T RUE RE S ID E N TI A L 12/07/2021 TEC_TM_155 REV. A ®...
- Page 3 P R E S E R V E T H E M O M E N T ® L U X U R Y R E F R I G E R A T I O N W I T H C O M M E R C I A L D N A 15”...
-
Page 4: Table Of Contents
ANTI - SWE AT FOAM END PANEL S WATER LINE, DR AIN LINE, AND P OWER C ORD LO CATIONS SAFE T Y INFORM ATION & OWNERSHIP PL AN V IE W S FE ATURE S OF THE TRUE ICE MACHINE ® CUSTOM PANEL SPECIFICATIONS OWNERSHIP CUSTOM PANEL INSTAL L ATION REFRIGER ANT S AFE T Y &... - Page 5 C O N T E N T S C ABINE T SE T UP SERVICING , REPL ACING COMP ONENT S & AD JUS TMENT S ICE S C O OP SERV ICING & REPL ACING C OMP ONENTS 9 0 ˚ D O ORSTOP INSTAL L ATION (OPTIONAL AC CES S ORY ) RE V ERSING D O OR D O OR ADJUSTMENT...
-
Page 6: Instal L Ation Check List
I N S T A L L A T I O N C H E C K L I S T To ensure no part of the installation process has been overlooked, complete the checklist below. … Has an authorized True dealer or licensed installer inspected stainless steel surfaces for imperfection? (Cosmetic defects are covered by a limited 30-day warranty) …... -
Page 7: Inch True Ice ® Machine Model S
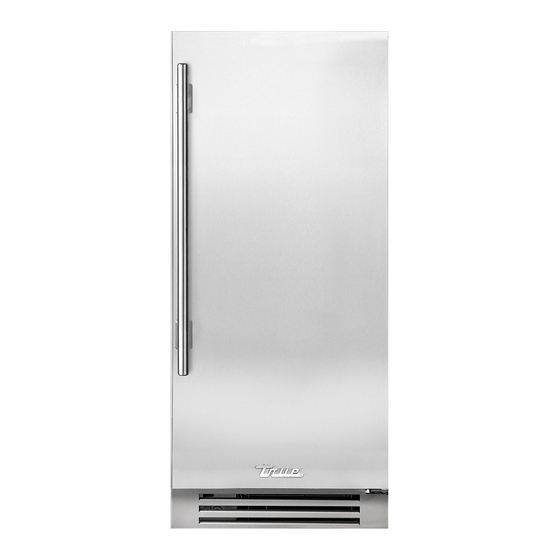
1 5 I N C H T R U E I C E M A C H I N E M O D E L S ® 15” STAINLESS STEEL 15” OVERLAY PANEL T UI -15 - R- S S - D T UI -15 - R- OP- D T UI -15 - L- S S - D 15”... - Page 8 N O T E S Page 8 of 64 T RUE RE S ID E N TI A L 12/07/2021 TEC_TM_155 REV. A ®...
-
Page 9: Safe T Y Inform Ation & Ownership
S A F E T Y I N F O R M A T I O N & O W N E R S H I P F E A T U R E S O F T H E T R U E I C E M A C H I N E ®... -
Page 10: Fe At Ure S Of The True Ice M Achine
S A F E T Y I N F O R M A T I O N & O W N E R S H I P FE AT URE S OF THE TRUE ICE M ACHINE • Produces up to 85 lb (38.5 kg) of ultra-clear gourmet ice cubes per day. -
Page 11: Ownership
All recommend a trained refrigeration mechanic and safety precautions must be followed. electrician install your True equipment. The cost of a Dispose of properly in accordance with professional installation is money well spent. local and federal regulations. Follow all Before you start to install your TRUE unit, carefully safety precautions. - Page 12 S A F E T Y I N F O R M A T I O N & O W N E R S H I P ON THE REAR PANEL INSIDE THE COMPRESSOR COMPARTMENT BENEATH THE EVAPORATOR COVER’S TOP PANEL Page 12 of 64 T RUE RE S ID E N TI A L 12/07/2021...
-
Page 13: Proper Disp Osal Of The C Abine T
S A F E T Y I N F O R M A T I O N & O W N E R S H I P • DO NOT BA SIC SAFE T Y & WARNING use electrical appliances inside the food PREC AU TIONS storage compartments of the units unless the appliances are of the type recommended by the... -
Page 14: Cabine T Lo Cation & Specifications
• The cabinet should always be plugged into its own individual dedicated electrical circuit. The use of adapter plugs and extension cords is prohibited. OU TD OOR USE All True undercounter ice machines are rated for CONTAC T US outdoor use. For any questions about installation, please contact •... -
Page 15: Prior To Ins Tall Ation
P R I O R T O I N S T A L L A T I O N R O U G H O P E N I N G A N T I - S W E A T F O A M E N D P A N E L S W A T E R L I N E , D R A I N L I N E , A N D P O W E R C O R D L O C A T I O N S P L A N V I E W S C U S T O M P A N E L S P E C I F I C A T I O N S... -
Page 16: Rough Opening
80 psig (5.5 bar) ROUG H OPENING ANTI-SWE AT FOA M END PANEL S When installing two or more True units side-by-side, be sure to leave at least a 5/8” (15.88 mm) gap between the cabinets, or install foam pads between the cabinets and on any side with 0”... - Page 17 P R I O R T O I N S T A L L A T I O N S TAINLE SS & FINISHED SOLID UNIT S CU S T OM F INI SH ( D SK ) S TA INL E S S S T EEL D O O R T U I -15 - R - S S - D T U I -15 - R / L - O P - D - D S K-10 3 - H 0 8 T U I -15 - L - S S - D...
- Page 18 P R I O R T O I N S T A L L A T I O N SOLID OVERL AY UNIT S S O L ID PA NEL - R E A DY D O O R (OP) T U I -15 - R - O P - D T U I -15 - L - O P - D N O T E : U n i t s h o w n w i t h o v e r l a y p a n e l p r o v i d e d b y o t h e r s .
-
Page 19: Custom Panel Specifications
P R I O R T O I N S T A L L A T I O N CUS TOM PANEL SPECIFIC ATIONS 1 4 - 5 / 8 ” Overlay units can be fitted with custom panels to ( 3 7 1 . -
Page 20: Custom Panel Instal L Ation
P R I O R T O I N S T A L L A T I O N CUS TOM PANEL INS TALL ATION 4. Place the door front face down on the overlay panel. Then, align the bottom door bracket’s Your new ice machine comes with articulating, or soft- bottom edge with the overlay panel’s bottom edge. - Page 21 P R I O R T O I N S T A L L A T I O N Screw cap NSF Cover FIG. 2. Remove the NSF cover screw caps. FIG. 1. Slide the door off the hinge bolts through the keyhole slots. Align along this edge FIG.
-
Page 22: El Ectrical Instal L Ation & S Afe T Y
A 115V AC, 60 Hz, 15 amp connecting it to a power source. circuit breaker and electrical supply are required. TRUE will not warranty any refrigerator/ • If the outlet is a standard 2-prong outlet, it is your freezer that has been connected to an personal responsibility and obligation to have it adapter plug. -
Page 23: Dr Ain C Onnection
A D R A IN. T HE SE C ONNEC T ION S A R E T HE R E SP ON SIBIL I T IE S O F T HE IN S TA L L ER . TRUE C o u n t e r t o p WI LL NOT WARRANT LEAKS O R DAMAG E CAUSED BY IMPROPER INSTALLATION . - Page 24 1/2” I.D. Hose 48” (1,219.2 mm) 100’ (30.84 m) (provided by TRUE) Hose larger than 1/2" I.D. may require an external pump. Vertical rise higher that 84” will require external pump. 1 / 2 ” I . D . H o s e 3 / 8 ”...
-
Page 25: Water Supply
• While push fittings are acceptable, they are prone to leaks when installed incorrectly and/or not according to the manufacturer’s specifications. • TRUE recommends coiling extra length of supply hose behind the machine to allow proper servicing of the unit. See fig. 1. - Page 26 N O T E S Page 26 of 64 T RUE RE S ID E N TI A L 12/07/2021 TEC_TM_155 REV. A ®...
-
Page 27: Ins Tall Ation
I N S T A L L A T I O N U N C R A T I N G L E V E L I N G L E G S L E V E L I N G K I C K P L A T E I N S T A L L A T I O N W A T E R F I L T E R I N S T A L L A T I O N P R E S E R V E T H E M O M E N T... -
Page 28: Uncr Ating
I N S T A L L A T I O N UNCR ATING R EQUIR ED T O O L S • Cutting Tool • Hammer • Crowbar • Phillips Screwdriver • Floor Protector P R O CEDUR E The following procedure is recommended for uncrating the unit: FIG. -
Page 29: Le Veling Legs
I N S T A L L A T I O N LE VELING LEGS KICKPL ATE INS TALL ATION The kickplate is shipped unattached to the unit to allow P R O CEDUR E easy access for levelling. The kickplate attaches to the With access to the bottom of the cabinet, turn the unit with magnets at the bottom of the unit. -
Page 30: Water Filter Instal L Ation
I N S T A L L A T I O N WATER FILTER INS TALL ATION The built-in water filter removes any unpleasant taste/odor, as well as inhibiting scale. The filter life expectancy is 12 months for low-scale water and 6 months for high-scale water. -
Page 31: C Abine T Se T Up
C A B I N E T S E T U P I C E S C O O P 9 0˚D O O R S T O P I N S T A L L A T I O N ( O P T I O N A L A C C E S S O R Y ) P R E S E R V E T H E M O M E N T ®... -
Page 32: Ice Sco Op
C A B I N E T S E T U P 90 ° D OORS TOP INS TALL ATION ICE SCO OP (OP TIONAL ACCE SSORY ) For easy storage, position the ice scoop on the door’s The doorstop restricts the door from opening past interior. -
Page 33: C Abine T Oper Ation
C A B I N E T O P E R A T I O N B E F O R E O P E R A T I N G B R E A K E R R E S E T P O W E R S E Q U E N C E I C E M A K I N G S E Q U E N C E E L E C T R O N I C C O N T R O L O P E R A T I O N... -
Page 34: Before Oper Ating
C A B I N E T O P E R A T I O N BEFORE OPER ATING P OWER SEQUENCE To ensure ice quality, please clean and sanitize this • Press the power button once to begin ice machine prior to first use. -
Page 35: Ice Mak Ing Sequence
C A B I N E T O P E R A T I O N ICE H A R V E S T ICE M AKING SEQUENCE When harvesting ice– Your TRUE Ice machine will produce one batch of ® • The display will read ice (24 cubes) approximately every 20 minutes. -
Page 36: Elec Tronic Control Oper Ation
C A B I N E T O P E R A T I O N ELEC TRONIC CONTROL OPER ATION E L E C T R O N I C C O N T R O L L E G E N D A. - Page 37 C A B I N E T O P E R A T I O N E L E C T R O N I C D I S P L A Y C O D E S Display Definition Detailed Description In Menu Mode: view the number days elapsed since the Clean cycle reminder...
- Page 38 C A B I N E T O P E R A T I O N M AINTENANCE REMINDERS DR AIN TIME AL ARM Your ice machine will remind you to clean, when to If the drain does not clear within 5 minutes of perform the automatic clean, when to clean condenser running, the display will show to signal a clogged /...
- Page 39 (not provided • Press LIGHT repeatedly to cycle through the 14 by TRUE). preset designer light colors LIGHT To adjust for water quality, press both LIGHT • Press and hold for 5 seconds to toggle the CLEAN.
- Page 40 C A B I N E T O P E R A T I O N COMM ANDS AND KE Y COMBINATIONS See the table below for commands and their corresponding key combinations (continued on next page). Display Command Key Combination Detailed Description Code Press and hold...
- Page 41 C A B I N E T O P E R A T I O N Display Command Key Combination Detailed Description Code Resets the condenser cleaning and water filter Press both LIGHT Reset replacement reminders. Both are reset when CLEAN maintenance pressed.
- Page 42 N O T E S Page 42 of 64 T RUE RE S ID E N TI A L 12/07/2021 TEC_TM_155 REV. A ®...
-
Page 43: M Aintenance , C Are , & Cle Aning
M A I N T E N A N C E , C A R E & C L E A N I N G G E N E R A L M A I N T E N A N C E W A T E R F I L T E R R E P L A C E M E N T C O N D E N S E R C O I L C L E A N I N G S T A I N L E S S S T E E L E Q U I P M E N T C A R E A N D C L E A N I N G... -
Page 44: Gener Al Maintenance
D E S C A L ING & S A NI T I Z ING True recommends performing the following maintenance procedures a minimum of once every six Descale and sanitize every 6 months. See "Descaling &... -
Page 45: Water Filter Repl Acement
M A I N T E N A N C E , C A R E & C L E A N I N G WATER FILTER REPL ACEMENT https://store. To order a replacement water filter, go to trueresidential.com/collections/maintenance-1 844-849-6226 or contact our parts department at or TrueResidentialParts@TrueMfg.com. -
Page 46: Condenser Coil Cle Aning
M A I N T E N A N C E , C A R E & C L E A N I N G CONDENSER COIL CLE ANING 5. If the view is not clear, gently blow compressed air or CO through the coil until it is clean. -
Page 47: Stainl Es S Steel Equipment Care And Cl E Aning
M A I N T E N A N C E , C A R E & C L E A N I N G S TAINLE SS S TEEL EQUIPMENT C ARE S TA INL E S S S T EEL CL E A NING A ND AND CLE ANING R E S T O R AT ION Do not use stainless steel cleaners or similar solvents... - Page 48 M A I N T E N A N C E , C A R E & C L E A N I N G 8 TIP S TO HELP PRE VENT RUS T ON S TAINLE SS S TEEL •...
-
Page 49: Des Caling & S Anitizing 4
C AU T ION: D O NO T C OMBINE D E S C A L ER A ND Add cleaning S A NI T I Z ER . chemicals 8. After adding the descaler, press the TRUE logo. D E S C A L ING The automatic cycle will continue. CLEAN 1. - Page 50 4. With the remaining solution, sanitize the interior DO NOT surfaces of the machine and the bin. 13. After adding the sanitizer solution, press the TRUE RINSE THE SANITIZED AREAS. logo. The automatic cycle will continue. 5. Reinstall the components.
-
Page 51: Interior C Omp Onents
M A I N T E N A N C E , C A R E & C L E A N I N G INTERIOR COMP ONENT S See the following for the removal and correct installation of the interior components. SPRAY BAR ICE GUIDE PUMP CLEAN-OUT CAP... - Page 52 M A I N T E N A N C E , C A R E & C L E A N I N G ICE GUID E The ice guide sits over the spray nozzles and directs falling ice into the bin. REMOVAL Lift the front of the guide and pull the guide forward.
- Page 53 M A I N T E N A N C E , C A R E & C L E A N I N G SP R AY B A R P UMP CL E A N - OU T C A P REMOVAL REMOVAL Carefully pull the spray bar from the water supply hose.
-
Page 54: Winterizing 5
M A I N T E N A N C E , C A R E & C L E A N I N G R E S TA R T ING WINTERIZING C AU T ION: D O NO T A L L O W T HE ICE M A CHINE Use the following instructions to restart your ice T O BE E X P O SED T O T EMP ER AT UR E S BEL OW machine after winterization:... -
Page 55: Servicing , Repl Acing Comp Onent S & Ad Jus Tment S
S E R V I C I N G , R E P L A C I N G C O M P O N E N T S & A D J U S T M E N T S S E R V I C I N G , R E P L A C I N G C O M P O N E N T S &... -
Page 56: Servicing & Repl Acing Comp Onent S
S E R V I C I N G , R E P L A C I N G C O M P O N E N T S & A D J U S T M E N T S P R O CEDUR E SERVICING &... - Page 57 S E R V I C I N G , R E P L A C I N G C O M P O N E N T S & A D J U S T M E N T S Screw cap Screw cap NSF Cover...
- Page 58 S E R V I C I N G , R E P L A C I N G C O M P O N E N T S & A D J U S T M E N T S FIG.
-
Page 59: D O Or Adjustment
Door skin bracket screw holes are slotted to assist with For any questions about installation, please contact door adjustment. See figs. 1–3 your TRUE dealer or TRUE Residential Technical Service. Please have your model and serial number 1. If applicable, remove the NSF cover screw caps. -
Page 60: Warr Ant Y
WARRANTY CLAIMS TRUE warrants to the original purchaser of every new True Ice™ machine, the cabinet and all parts thereof, to All claims for labor or parts must be made directly be free from defects in material and workmanship under through TRUE. - Page 61 Manufacturing Co., Inc. and are not transferred. ALTERATION OR NEGLECT OUTSIDE U.S. / CANADA TRUE is not responsible for the repair or replacement of any parts that TRUE determines have been subjected, This warranty does not apply to, and TRUE is not...
- Page 62 N O T E S Page 62 of 64 T RUE RE S ID E N TI A L 12/07/2021 TEC_TM_155 REV. A ®...
- Page 63 N O T E S 15” T RUE I CE M AC HINE IN STA L L GUID E TEC_TM_155 REV. A 12/07/2021 ® Page 63 of 64...
- Page 64 CONTACT US t r u e - r e s i d e n t i a l . c o m 6 3 6 . 2 4 0 . 2 4 0 0 t o l l f r e e 8 8 8 . 6 1 6 . 8 7 8 3 P R E S E R V E T H E M O M E N T ®...