Table of Contents
Advertisement
Available languages
Available languages
Quick Links
Advertisement
Chapters
Table of Contents

Related Manuals for Moulinex Turbo Cuisine Maxi


Summary of Contents for Moulinex Turbo Cuisine Maxi
- Page 1 Turbo Cuisine Maxi CE777 www.moulinex.com...
- Page 3 Bang!
- Page 5 الحلول األسباب المحتملة المشكلة دليل استكشاف األخطاء وإصالحها انزع حشية منع التسرب ون ظ ّفها وثب ت ّ ها في .حشية منع التسرب غير مثبتة بشكل صحيح .الموضع الصحيح الحلول األسباب المحتملة المشكلة انزع حشية منع التسرب ون ظ ّفها وثب ت ّ ها في اضغط...
- Page 6 تحذير: احذر من البخار الساخن المتصاعد من الجهاز. أبق ِ وجهك ويديك بعيدً ا عن عند اكتمال مرحلة التسخين األولي، سيتح و ّ ل الجهاز تلقائ ي ً ا إلى مرحلة الطهي. وستعرض الشاشة العد .)45 مخرج البخار (الشكل التوضيحي التنازلي...
- Page 7 برنامج ال ع َ ص ِ يدَ ة بالتبادل وسيضيئ مؤشر و سيبدأ الجهاز في مرحلة التسخين األولي. وستعرض الشاشة »«التسخين األولي .ضع المكونات في وعاء الطهي وأغلق الغطاء وأقفله بإحكام عند اكتمال مرحلة التسخين األولي، سيتح و ّ ل الجهاز تلقائ ي ً ا إلى مرحلة الطهي. وستعرض الشاشة العد أ...
- Page 8 أ د ِ ر مقبض لوحة التحكم إلى اليمين للوصول إلى برنامج البخار في نهاية العد التنازلي، سيصدر الجهاز صوت صافرة وستعرض الشاشة . ستعرض الشاشة وقت الطهي .االفت ر اضي بعد بضع ثوانٍ ، سيتحول الجهاز تلقائ ي ً ا إلى مرحلة المحافظة على السخونة. ستعرض الشاشة وسيضيئ...
- Page 9 التنازلي وسيضيئ مؤشر ي ُ رجى الرجوع إلى األشكال التوضيحية الموجودة في دليل البدء السريع الطهي قيد التقدم )36 (بد ء ً ا من الشكل التوضيحي 52 إلى الشكل التوضيحي في أثناء عملية الطهي، يزداد الضغط في الجهاز، ما يدفع صمام التعويم ألعلى. وسيضيئ مؤشر تحت برنامج...
- Page 10 3د. ن ظ ّ ف هيكل الجهاز جدول ب ر امج الطهي .امسح هيكل الجهاز بقطعة قماش مبللة حالة الغطاء .)41 ال تغمر الجهاز في الماء (الشكل التوضيحي .امسح لوح التسخين بقطعة قماش جافة تعليمات االستخدام 1. ضع المكونات في وعاء الطهي .أخ...
- Page 11 3ب. ن ظ ّ ف حشية منع التسرب كيفية االستخدام ودليل التنظيف انزع حشية منع التسرب من الغطاء ون ظ ّفها بإسفنجة ناعمة وماء ساخن وصابون (الشكالن ال تتردد في الرجوع إلى األشكال التوضيحية ال م ُ شار إليها على أنها (الشكل التوضيحي س) من جزء دليل .)8التوضيحيان...
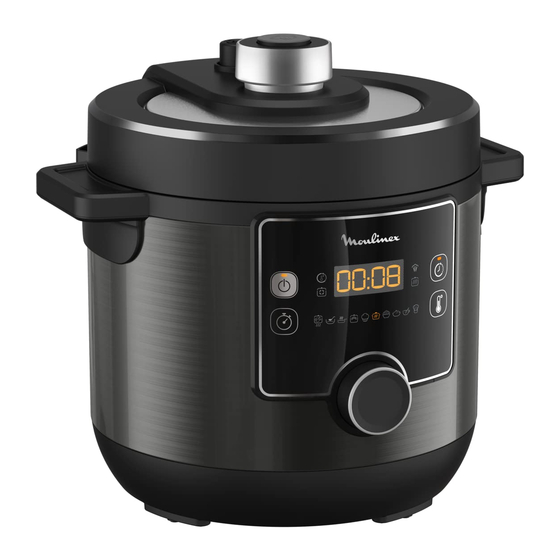
- Page 12 التعرف على لوحة التحكم كل أج ز اء المنتج صمام التعويم صمام تحديد الضغط مؤش ر ات م ر احل الطهي التسخين األولي تحت الضغط زر تحرير الضغط المحافظة على الطبخ قيد التقدم السخونة مقبض الغطاء الوظائف زر بدء التشغيل بدء/إيقاف...
- Page 13 ال تستخدم أوعية طهي أخرى في الجهاز بد ال ً من وعاء الطهي المرفق. استبدل وعاء كن حذ ر ً ا أيض ً ا بشأن مخاطر اإلصابة بحروق بسبب البخار الذي يخرج من الجهاز عند .الطهي بقطعة غيار أصلية مصممة لالستخدام مع هذا المنتج .فتح...
- Page 14 4. كيف تستخدم الجهاز بشكل آمن - قبل الطهي؟ .أو المعكرونة يمكن أن يؤدي إلى خروج رغوة أو ز َ ب َ د من الصما م َ ي ْ ن و انسدادهما لذا، تو خ َّ الحذر عند طهي هذه األنواع من الطعام وقم بتنظيف الصما م َ ي ْ ن تما م ً ا بعد .قبل...
- Page 15 2. من األشخاص الذين يمكنهم استخدام هذا الجهاز بشكل آمن؟ ً توصي مولينكس بالسالمة أو ال هذا الجهاز غير مخصص لالستخدام من ق ِ ب َ ل األشخاص (بما في ذلك األطفال) من أولويتنا األولى هي الحفاظ على سالمتك. لذا، فإننا نقوم بتصميم منتجاتنا وتصنيعها وفق معايير أمان ذوي...
- Page 16 المحتويات شك ر ً ا لك الختيارك مولينكس 2 ----------------------------------------------------------------------------------------------- دليل البدء السريع باألشكال التوضيحية 27 --------------------------------------------------------------------------------------------------------ً توصي مولينكس بالسالمة أو ال !مرح ب ً ا بك في عالم الطهي السريع واللذيذ 21 ---------------------------------------------------------------------------------------------------------------------كل أج ز اء المنتج مع ق ِ در الضغط الكهربائي :،...
-
Page 17: Table Of Contents
THANKS FOR CHOOSING MOULINEX Quick Start Guide in Images ----------------------------------------------------------------------------------2 Welcome to the world of fast & delicious cooking! Moulinex Recommends Safety First ------------------------------------------------------------------------32 All Parts of Your Product -----------------------------------------------------------------------------------------40 With Turbo Cuisine, we took up the challenge of reinventing Getting Familiar with the Control Panel ------------------------------------------------------------------41 the pot: Easier. -
Page 18: Moulinex Recommends Safety First
MOULINEX RECOMMENDS SAFETY FIRST by clients in hotels, motels and other residential type Safety is our number one priority. We design and manufacture environments; our product with high safety and technology standards. However, bed and breakfast type environments. - Page 19 3. How to use safely – general usage? • Do not use the appliance empty, without its cooking pot or without ingredients inside the cooking pot. This • Do not use appliance for other than the intended purpose. could cause serious damage to the appliance. •...
- Page 20 4. How to use safely – before cooking? • Do not remove the cooking pot while the appliance is working. • Before using your appliance, check that the float valve • In browning mode, be careful of risks of burns caused and the pressure limit valve are clean.
- Page 21 8. What to do in case of damage? Environment protection first! • Do not operate any appliance with a damaged power appliance contains valuable materials which • Your cord or plug or after the appliance malfunctions or has can be recovered or recycled. Leave it at a local civic waste collection point.
-
Page 22: All Parts Of Your Product
GETTING FAMILIAR WITH THE CONTROL PANEL ALL PARTS OF YOUR PRODUCT Pressure limit Float valve Cooking phase indicators valve Pressure Pre- Under release button heating pressure Cooking in Keeping progress Lid knob warm Functions Functions Delayed start Start/Stop Steam trivet button Temperature Sealing... -
Page 23: How To Use & Clean Guide
• Do not use a scourer or abrasive sponge to clean the cooking HOW TO USE & CLEAN GUIDE pot as it could damage the non-stick coating in the cooking pot (Fig.40). Feel free to refer to the figures indicated as (Fig.x) from Quick Start Guide part. - Page 24 3c. Clean the valves INSTRUCTIONS FOR USE 1. Place ingredients in the cooking pot • To clean the pressure limit valve, remove the pressure limit valve from the pipe on top of the lid (Fig.10). Clean it with a • Remove the cooking pot from the housing. soft sponge and soapy hot water (Fig.11).
- Page 25 COOKING PROGRAMS TABLE Please refer to the figures from Quick Start Guide (from Fig.25 to Fig.36) Lid status Stew program • Place the ingredients in the cooking pot and completely close and lock the lid. • Turn the control panel knob to the right to reach Stew program .
- Page 26 • Optional: Press and set the desired time by turning the Soup program control panel knob to the right (to increase time) or to the left • Place the ingredients in the cooking pot and completely close (to decrease time). and lock the lid.
- Page 27 • Optional: Press and set the desired temperature by turning control panel knob to the right (to increase time) or to the left the control panel knob to the right (to increase temperature) or (to decrease time). to the left (to decrease temperature). •...
- Page 28 • Press to start the cooking program. indicator turns on to notify that the lid cannot be opened without releasing the pressure first. • The appliance starts the pre-heating phase. The screen • At the end of the count down, the appliance beeps and the displays alternatively &...
- Page 29 automatically to cooking phase. The screen displays the count Adjustable Chef mode down and the cooking in progress light indicator turns on. • Place the ingredients in the cooking pot and close the lid or not • At the end of the count down, the appliance beeps and the depending on your recipe.
- Page 30 9. Unplug the appliance • First select a program following the steps described above in part 6. • After usage, unplug the appliance and let it cool down for at • Before starting the selected program, press . The screen least 2 hours before cleaning.
-
Page 31: Technical Troubleshooting Guide
TECHNICAL TROUBLESHOOTING GUIDE Problem Possible reasons Solutions Carefully rotate/press the pressure The pressure limit valve is limit valve to make it fall into place. Problem Possible reasons Solutions Be careful of the hot steam. Position in an incorrect position. Intense release of yourself safely and wear oven mitts. - Page 32 Problem Possible reasons Solutions MERCI D'AVOIR CHOISI MOULINEX Try again by following precisely the Solid/liquid ingredients quantities of Bienvenue dans le monde de la cuisine rapide et ratio is incorrect. the recipe. Food is uncooked délicieuse ! No electricity from the Check your home electric circuit.
- Page 33 Guide de démarrage rapide en images -------------------------------------------------------------------2 La sécurité est notre priorité numéro un. Nous concevons et Moulinex recommande la sécurité avant tout ---------------------------------------------------------63 fabriquons nos produits selon des normes de technologie et de Toutes les pièces de votre produit ---------------------------------------------------------------------------72 sécurité...
- Page 34 les cuisines destinées au personnel des magasins, • Cet appareil ne doit pas être utilisé par les enfants. bureaux et autres environnements de travail ; Gardez l'appareil et son câble d'alimentation hors de les fermes ; portée des enfants. les clients des hôtels, motels et autres lieux à caractère •...
- Page 35 • Sachez que certains types d'aliments, tels que les • Utilisez une cuillère en plastique ou en bois pour éviter compotes de pomme, les canneberges, la rhubarbe, d'endommager le revêtement antiadhésif de la cuve l'orge perlé, les flocons d'avoine ou d’autres céréales, les de cuisson.
- Page 36 • Assurez-vous que le fond de la cuve de cuisson et la • Ne retirez pas la cuve de cuisson lorsque l'appareil plaque chauffante sont toujours propres. Assurez- fonctionne. vous que la partie centrale de la plaque chauffante est • En mode brunissage, faites attention aux risques de mobile.
- Page 37 • N'immergez pas l'appareil dans l'eau. • L'utilisation d'accessoires non recommandés par le • Pour le nettoyage de votre appareil, reportez-vous au fabricant de l'appareil peut provoquer des blessures. mode d'emploi. Vous pouvez laver la cuve de cuisson et • N'utilisez pas d'autres cuves de cuisson dans l'appareil le couvercle à...
- Page 38 FAMILIARISATION AVEC LE PANNEAU DE COMMANDE TOUTES LES PIÈCES DE VOTRE PRODUIT Limiteur de Soupape à Indicateurs de phases de cuisson pression flotteur Pré- Sous Bouton de chauffage pression décompression Maintien Cuisson en cours au chaud Poignée du couvercle Fonctions Fonctions Bouton Marche/Arrêt...
- Page 39 • N'immergez pas l'appareil dans l'eau (fig. 41). GUIDE D'UTILISATION ET DE NETTOYAGE • Si vous immergez accidentellement votre appareil dans N'hésitez pas à consulter les figures indiquées (fig. x) dans la l'eau ou si vous renversez de l'eau directement sur la plaque partie Guide de démarrage rapide.
- Page 40 3c. Nettoyer les soupapes • Placez les ingrédients dans la cuve de cuisson. • Pour nettoyer le limiteur de pression, enlevez-le de l'orifice • Veuillez noter que le niveau d'aliments et de liquides ne doit situé sur le dessus du couvercle (fig. 10). Nettoyez-le avec une jamais dépasser le repère de niveau maximal indiqué...
- Page 41 TABLEAU DES PROGRAMMES DE CUISSON Veuillez vous reporter aux figures du Guide de démarrage rapide (fig. 25 à 36) État du couvercle Programme Mijoté • Placez les ingrédients dans la cuve de cuisson, fermez complète- ment le couvercle et verrouillez-le. • Tournez le bouton du panneau de commande vers la droite pour accéder au programme « Mijoté »...
- Page 42 • Option : Appuyez sur et réglez la durée souhaitée en tour- Programme Soupe nant le bouton du panneau de commande vers la droite (pour • Placez les ingrédients dans la cuve de cuisson, fermez complète- augmenter la durée) ou vers la gauche (pour diminuer la durée). ment le couvercle et verrouillez-le.
- Page 43 nant le bouton du panneau de commande vers la droite (pour • Option : Appuyez sur et réglez la durée souhaitée en tour- augmenter la durée) ou vers la gauche (pour diminuer la durée). nant le bouton du panneau de commande vers la droite (pour augmenter la durée) ou vers la gauche (pour diminuer la durée).
- Page 44 augmenter la durée) ou vers la gauche (pour diminuer la durée). • L’appareil lance la phase de préchauffage. L’écran affiche al- ternativement , puis le voyant de préchauffage • Option : Appuyez sur et réglez la température souhaitée en s’allume. tournant le bouton du panneau de commande vers la droite •...
- Page 45 augmenter la durée) ou vers la gauche (pour diminuer la durée). • L’appareil lance la phase de préchauffage. L’écran affiche alterna- tivement , puis le voyant de préchauffage s’allume. • Option : Appuyez sur et réglez la température souhaitée en • Lorsque la phase de préchauffage est terminée, l’appareil passe tournant le bouton du panneau de commande vers la droite automatiquement en phase de cuisson.
- Page 46 Libération naturelle de la pression : À la fin de la cuisson ou • Lorsque la phase de préchauffage est terminée, l'appareil passe automatiquement en phase de cuisson. L'écran affiche le après l'arrêt du programme, l'appareil se refroidit tout seul et la pression se libère naturellement.
- Page 47 • Pour garantir la durabilité de la cuve de cuisson au fil du temps, GUIDE DE DÉPANNAGE TECHNIQUE ne coupez pas d'aliments à l'intérieur. Problème Raisons possibles Solutions • Utilisez les accessoires fournis. N'utilisez pas d'ustensile métal- lique, car cela pourrait endommager le revêtement antiadhésif Appuyez de manière continue sur le bouton Ouverture de décompression pour libérer la pression se...
- Page 48 Problème Raisons possibles Solutions Problème Raisons possibles Solutions Avec précaution, tournez le Le joint d'étanchéité n'est Enlevez le joint d'étanchéité, limiteur de pression / appuyez pas correctement mis en nettoyez-le et remettez-le dessus pour le mettre en correctement en place. place.
- Page 49 OBRIGADO POR ESCOLHER A MOULINEX Guia de início rápido em imagens --------------------------------------------------------------------------2 Bem-vindo ao mundo da cozinha rápida e deliciosa! A Moulinex recomenda a segurança em primeiro lugar -------------------------------------------96 Descrição do seu produto --------------------------------------------------------------------------------------104 Com a Turbo Cuisine, aceitámos o desafio de reinventar a Familiarizar-se com o painel de controlo -----------------------------------------------------------------105 panela: Mais fácil.
-
Page 50: A Moulinex Recomenda A Segurança Em Primeiro Lugar
A MOULINEX RECOMENDA A SEGURANÇA EM PRIMEIRO LUGAR lojas, escritórios e outros espaços profissionais; A segurança é a nossa principal prioridade. Concebemos e quintas; fabricamos o nosso produto com elevados padrões de segurança utilização por clientes de hotéis, motéis e outros... - Page 51 • As crianças não devem brincar com o aparelho. • Tenha em atenção que determinadas receitas que incluem • As crianças devem ser supervisionadas para garantir leite podem formar espuma, transbordar e entupir as que não brincam com o aparelho. válvulas.
- Page 52 • Não utilize um pano ou qualquer outro objeto entre a • Durante a cozedura e a libertação de vapor no final da cozedura, o aparelho liberta calor e vapor. Mantenha tampa e o corpo do aparelho de forma a deixar a tampa o rosto e as mãos afastados do aparelho para evitar mal fechada.
- Page 53 7. Como utilizar em segurança – limpeza? • Utilize apenas peças sobresselentes disponibilizadas • Limpe a parte inferior da cuba e a placa de aquecimento por um Serviço de Assistência Técnica autorizado. após cada utilização. • A utilização de acessórios não recomendados pelo •...
-
Page 54: Descrição Do Seu Produto
FAMILIARIZAR-SE COM O PAINEL DE CONTROLO DESCRIÇÃO DO SEU PRODUTO Válvula Válvula Indicadores da fase de cozedura limitadora flutuante Botão de Pré- pressão libertação de aquecimento Manter Cozedura quente em curso Botão da tampa Funções Funções Botão de Iniciar/parar início diferido Trivet a vapor Tampa Botão de... -
Page 55: Guia De Utilização E Limpeza
• Se mergulhar inadvertidamente o aparelho em água ou GUIA DE UTILIZAÇÃO E LIMPEZA derramar água diretamente sobre a placa de aquecimento, leve o aparelho a um Serviço de Assistência Técnica autorizado Consulte as figuras indicadas como (Fig. x) na parte do Guia para reparação. - Page 56 de que a conduta do tubo está limpa antes de voltar a ligar • Tenha em atenção que o nível de alimentos e líquidos nunca a válvula limitadora de pressão ao tubo na parte superior da deve exceder a marca de nível máximo na cuba (Fig. 19). tampa (Fig.
- Page 57 TABELA DE PROGRAMAS DE COZEDURA Consulte as figuras do Guia de início rápido (da Fig. 25 à Fig. 36). Programa estufar Estado da tampa • Coloque os ingredientes na cuba e feche completamente e bloqueie a tampa. • Rode o botão do painel de controlo para a direita para aceder ao programa de estufar .
- Page 58 bloqueie a tampa. tempo) ou para a esquerda (para diminuir o tempo). • Rode o botão do painel de controlo para a direita para aceder • Opcional: prima e ajuste a temperatura pretendida rodando ao programa de sopa . O ecrã apresenta o tempo de cozedu- o botão do painel de controlo para a direita (para aumentar a ra predefinido.
- Page 59 • Prima para iniciar o programa de cozedura. • Prima para iniciar o programa de cozedura. • O aparelho inicia a fase de pré-aquecimento. O ecrã apre- • O aparelho inicia a fase de pré-aquecimento. O ecrã apre- senta alternadamente e o indicador luminoso de senta alternadamente e o indicador luminoso de...
- Page 60 quer altura. muda automaticamente para a fase de cozedura. O ecrã apresen- ta a contagem decrescente e o indicador luminoso de cozedura Programa iogurte e fermentação em curso acende-se. O programa de iogurte e fermentação pode ser utilizado para • No final da contagem decrescente, o aparelho emite um aviso preparar iogurte ou levedar pão/massa para bolos.
- Page 61 Programa de reaquecimento Modo Chef ajustável • Coloque os ingredientes na cuba e feche completamente e • Coloque os ingredientes na cuba e feche a tampa ou não, de- bloqueie a tampa. pendendo da receita. • Rode o botão do painel de controlo para a direita para aceder •...
- Page 62 7. Utilize a função de início diferido AVISO: tenha cuidado com o vapor quente que sai da cuba. O início diferido pode ser útil para programar o aparelho para 9. Desligue o aparelho da tomada começar a cozinhar mais tarde. •...
-
Page 63: Guia Técnico De Resolução De Problemas
GUIA TÉCNICO DE RESOLUÇÃO DE PROBLEMAS Problema Possíveis razões Soluções Rode/pressione cuidadosamente Problema Possíveis razões Soluções a válvula limitadora de pressão A válvula limitadora de para que caia no devido lugar. Prima continuamente o botão de pressão está numa posição Libertação intensa Tenha cuidado com o vapor quente. - Page 64 Problema Possíveis razões Soluções O anel vedante não está Retire o anel vedante, limpe-o e volte a instalá-lo na posição correta. corretamente colocado. Retire o anel vedante, limpe-o e volte O anel vedante está sujo. Fuga de vapor da a instalá-lo na posição correta. tampa.
- Page 65 3203000378/01...