
Related Manuals for Acer Aspire One D255 Series


Summary of Contents for Acer Aspire One D255 Series
- Page 1 Aspire One D255 Series Service Guide Service guide files and updates are available on the ACER/CSD web; for more information, please refer to http://csd.acer.com.tw PRINTED IN TAIWAN...
-
Page 2: Revision History
Revision History Please refer to the table below for the updates made to this service guide. Date Chapter Updates... - Page 3 Copyright Copyright © 2010 by Acer Incorporated. All rights reserved. No part of this publication may be reproduced, transmitted, transcribed, stored in a retrieval system, or translated into any language or computer language, in any form or by any means, electronic, mechanical, magnetic, optical, chemical, manual or otherwise, without the prior written permission of Acer Incorporated.
-
Page 4: Conventions
Conventions The following conventions are used in this manual: SCREEN MESSAGES NOTE WARNING CAUTION IMPORTANT NOTE: This symbol where placed in the Service Guide designates a component that should be recycled according to the local regulations. Denotes actual messages that appear on screen. - Page 5 DIFFERENT part number code to those given in the FRU list of this printed Service Guide. You MUST use the list provided by your regional Acer office to order FRU parts for repair and service of customer machines.
-
Page 7: Table Of Contents
System Specifications Features ............1 System Block Diagram . - Page 8 Table of Contents Removing the Button Board ........65 Removing the LED Board .
- Page 9 Wireless Function Failure .........134 3G Function Failure .
- Page 10 Table of Contents...
-
Page 11: System Specifications
System Specifications Features Below is a brief summary of the computer’s many features: Operating system • Genuine Windows® 7 Home Basic 32-bit (China only) • Genuine Windows® 7 Starter 32-bit • Genuine Windows® XP Home (Service Pack 3) CPU and chipset •... -
Page 12: Color Options
640 x 480 resolution online video calls Wireless and networking • WLAN: • Acer InviLink™ Nplify™ 802.11b/g/n Wi-Fi CERTIFIED™ • Acer InviLink™ 802.11b/g Wi-Fi CERTIFIED™ (available only in Russia, Pakistan, Ukraine) • Supporting Acer SignalUp™ wireless technology • WPAN: • Bluetooth® 3.0+HS (for Windows® 7 only) •... -
Page 13: Dimensions And Weight
48 W 4400 mAh 6-cell Li-ion battery pack Battery life: 8 hours Input and control • Keyboard • 84-/85-/88-key Acer FineTip keyboard, 93% of full-size keyboard, with international language support • Touchpad • Multi-gesture touchpad, supporting two-finger scroll, pinch, rotate, flip... - Page 14 • Windows Live™ Essentials - Wave 3.2 (Mail, Photo Gallery, Live™ Messenger, Movie Maker, Writer) • Web links and utilities • Acer Accessory Store1 (Belgium, France, Germany, Italy, Netherlands, Spain, Sweden, UK only) • Acer Assist • Acer Identity Card •...
-
Page 15: System Block Diagram
System Block Diagram DDR2 CRT Conn LCD Conn. Thermal Sensor EMC1402 MINI Card x1 MINI Card x1 WLAN Power ON/OFF DC/DC Interface 3VALW/5VALW DC IN 0.89VP/1.5VP 0.9VSP/2.5VSP BATT IN CHARGER 1.8V/VCCP CPU_CORE Chapter 1 Memory BUS(DDRII) Pineview FCBGA 559 1.8V DDRII 667 LVDS 22x22mm X2 mode... -
Page 16: Ddr3
DDR3 CRT Conn LCD Conn. Thermal Sensor EMC1402 PCI-Express MINI Card x1 10/100 Ethernet WLAN AR8152 Transfermer RJ45 Power ON/OFF DC/DC Interface 3VALW/5VALW DC IN 1.5VP/VCCP BATT IN 0.89VP/1.8VP CHARGER 0.75VS CPU_CORE Memory BUS(DDRIII) Pineview FCBGA 559 LVDS 22x22mm X2 mode GEN1 Tigerpoint PCBGA360... -
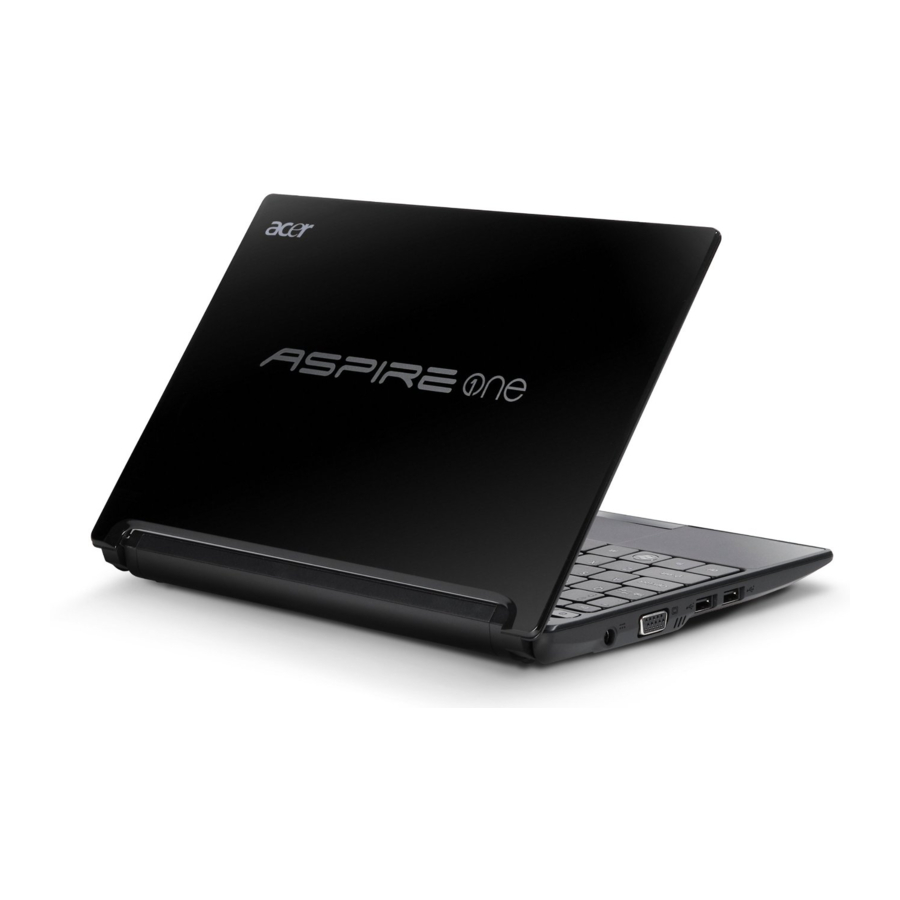
Page 17: Your Notebook Tour
Keyboard Touchpad Status indicators Click buttons (left, and right) Palmrest Acer Crystal Eye webcam NOTE: The front panel indicators are visible even when the computer cover is closed. Chapter 1 Icon Internal microphone for sound recording. Also called Liquid-Crystal Display (LCD), displays computer output (configuration may vary by model). -
Page 18: Closed Front View
Closed Front View Component Power indicator Battery indicator HDD indicator Communication indicator Rear View Component Battery bay NOTE: Your computer may be equipped with a different battery to the one in the picture. Left View Component DC-in jack External display (VGA) port USB 2.0 port Icon... -
Page 19: Right View
Right View Component 2-in-1 card reader Microphone-in jack Headphone/ speaker/line-out jack USB 2.0 port Kensington lock slot Ethernet (RJ-45) port Chapter 1 Icon Accepts Secure Digital (SD), MultiMediaCard (MMC). Note: Push to remove/install the card. Only one card can operate at any given time. Accepts input from external microphones. -
Page 20: Bottom View
Bottom View Component Ventilation slots and/or cooling fan Battery release latch 3G SIM card slot Battery bay Battery lock Speaker Icon Enables the computer to stay cool, even after prolonged use. Note: Do not cover or obstruct the opening of the fan. Releases the battery for removal. -
Page 21: Touchpad Basics
Touchpad Basics The following items show you how to use the Touchpad: • Move your finger across the TouchPad (1) to move the cursor. • Press the left (2) and right (3) buttons located beneath the TouchPad to perform selection and execution functions. -
Page 22: Using The Keyboard
Using the Keyboard The Acer Aspire D255 has a close-to-full-sized keyboard and an embedded numeric keypad, separate cursor, lock, function and special keys. Lock Keys and Embedded Numeric Keypad The keyboard has three lock keys which you can toggle on and off. -
Page 23: Windows Keys
Windows Keys The keyboard has two keys that perform Windows-specific functions. Windows key Pressed alone, this key has the same effect as clicking on the Windows Start button; it launches the Start menu. It can also be used with other keys to provide a variety of functions: <... -
Page 24: Hot Keys
Hot Keys The computer employs hotkeys or key combinations to access most of the computer's controls like screen brightness and volume output. To activate hotkeys, press and hold the <Fn> key before pressing the other key in the hotkey combination. Hotkey Icon <Fn>... -
Page 25: Using The Communication Key
Using the communication key Here you can enable and disable the various wireless connectivity devices on your computer. Press <Fn> + <F3> to bring up the Launch Manager window panel. A red toggle indicates the device is off. Click On to enable wireless/3G/Bluetooth connection. Click Off to disable connection. -
Page 26: Hardware Specifications And Configurations
512 KB 45 nm 512 KB 45 nm 2*512 For N45x N47x OS mode Fan Speed (RPM) 4700 5200 5500 5200 5200 5500 Core Package Acer P/N Voltage Micro- 0.9V- KC.ANB0 FCBGA8 1.100V 1.450 Micro- 0.8V- KC.ANB0 FCBGA8 1.175V 1.455 Micro- 0.8V-... - Page 27 CPU Temperature • Throttling 50%: On=95°C ; OFF=80°C • OS shut down at100°C ; H/W shut down at 90°C CPU Temperature • Throttling 50%: On=95°C ; OFF=80°C • OS shut down at100°C ; H/W shut down at 90°C System Memory (DDR2) Item Memory controller Memory size...
- Page 28 InsydeH20 V1.00 for DDR2 SKU; V3.00 for DDR3 SKU Flash 2 MB Support ISIPP Support Acer UI Support multi-boot Suspend to RAM (S3)/Disk (S4) Various hot-keys for system control Support SMBUS 2.0, PCI2.3 ACPI 3.0 compliance with Intel Speed Step Support C1, C2, C3,...
- Page 29 LAN Interface Item LAN Chipset Support LAN protocol LAN connector type LAN connector location Features Wireless Module 802.11b/g/Draft-N Item Manufacturer Model Supported Standards Battery Item Vendor & model name Battery Type Pack capacity Number of battery cell Package configuration Chapter 1 Specification AR8152L RJ45...
- Page 30 Hard Disk Drive Interface Item Vendor & Model Western Digital Name WD1600BEVT- 22A23T0, Hitachi HTS545016B9A300, Toshiba MK1665GSX, Seagate ST9160314AS Capacity (GB) 1600GB Bytes per sector Data heads 1, 2, 1, 2 Drive Format Disks Spindle speed (RPM) Performance Specifications Buffer size Interface Fast data transfer rate...
- Page 31 LCD 10.1” Item Vendor/model name Screen Diagonal (mm) Display Area (mm) Display resolution (pixels) Pixel Pitch Display Mode Typical White Luminance (cd/m (also called Brightness) Contrast Ratio Response Time (Optical Rise Time/ Fall Time) msec Typical Power Consumption (watt) Weight Physical Size (mm) Electrical Interface Support Color...
- Page 32 Dimensions (L x W x H mm) Sensor type Pixel resolution Pixel size Image size 16 bits Specification New Acer flat keyboard 84-US/85-UK keys Plug USB keyboard to the USB port directly: Yes • 2.0+/- 3mm full stroke keys • Phantom key auto detect •...
- Page 33 3G Module Item Manufacturer Model Card Type Throughput Supported Services USB Port Item USB compliance level UHCI Number of USB port(s) Location Audio Subsystem Item Audio Controller Audio onboard or optional Mono or Stereo Resolution Compatibility Sampling rate Internal microphone Internal speaker/quantity HDMI Port - Not available on this model Item...
- Page 34 I/O Ports Item I/O support System Board Major Chips Item Core logic USB 2.0 Bluetooth Wireless Audio codec Card reader AC Adapter Item Input rating Maximum input AC current Inrush current Efficiency Card Reader Item Chipset Package Feature Supports Maximum size (please specify max supporting size for each card) Specification...
- Page 35 System LED Indicator Item Lock System state HDD access state Wireless state Power button backlight Blue color solid on: System on Blue color off: System off, sleep and hibernation state Power Specification Legacy ACPI Mode Mode Mech. Off (G3) Soft Off (G2/S5) Working (G0/S0) S3 Sleeping State S4 Sleeping State...
- Page 36 Chapter 1...
-
Page 37: System Utilities
System Utilities BIOS Setup Utility The BIOS Setup Utility is a hardware configuration program built into your computer’s BIOS (Basic Input/ Output System). Your computer is already properly configured and optimized, and you do not need to run this utility. However, if you encounter configuration problems, you may need to run Setup. -
Page 38: Information
Information The Information screen displays a summary of your computer hardware information. Information Main C P U Ty p e C P U Ty p e C P U S p e e d C P U S p e e d H D D M o d e l N a m e : H D D M o d e l N a m e : H D D S e r i a l N u m b e r :... -
Page 39: Main
Main The Main screen allows the user to set the system time and date as well as enable and disable boot option and recovery. Information Main S y s t e m Ti m e : S y s t e m Ti m e : S y s t e m D a t e : S y s t e m D a t e : To t a l M e m o r y :... -
Page 40: Security
Security The Security screen contains parameters that help safeguard and protect your computer from unauthorized use. Information Main Security S u p e r v i s o r P a s s w o r d I s : S u p e r v i s o r P a s s w o r d I s : U s e r P a s s w o r d I s : U s e r P a s s w o r d I s :... -
Page 41: Setting A Password
Setting a Password Follow these steps as you set the user or the supervisor password: Use the ↑ and ↓ keys to highlight the Set Supervisor Password parameter and press the Enter key. The Set Supervisor Password box appears: C o n f i r m N e w P a s s w o r d Type a password in the “Enter New Password”... -
Page 42: Changing A Password
Changing a Password Use the ↑ and ↓ keys to highlight the Set Supervisor Password parameter and press the Enter key. The Set Password box appears. E n t e r C u r r e n t P a s s w o r d C o n f i r m N e w P a s s w o r d Type the current password in the Enter Current Password field and press Enter. -
Page 43: Boot
Boot This menu allows the user to decide the order of boot devices to load the operating system. Bootable devices include USB storage drives including FDD, HDD, ODD, USB key drives and the onboard HDD. Information Main Security B o o t p r i o r i t y o r d e r : B o o t p r i o r i t y o r d e r : 1 . -
Page 44: Exit
Exit The Exit screen allows you to save or discard any changes you made and quit the BIOS Utility. Information Main Security E x i t S a v i n g C h a n g e s E x i t S a v i n g C h a n g e s E x i t D i s c a r d i n g C h a n g e s E x i t D i s c a r d i n g C h a n g e s L o a d S e t u p D e f a u l t s... -
Page 45: Bios Flash Utility
BIOS Flash Utility The BIOS flash memory update is required for the following conditions: • New versions of system programs • New features or options • Restore a BIOS when it becomes corrupted. Use the flash utility to update the system BIOS flash ROM. NOTE: If you do not have a crisis recovery diskette at hand, then you should create a Crisis Recovery Diskette before you use the flash utility. -
Page 46: Dos Flash Utility
DOS Flash Utility Perform the following steps to use the DOS Flash Utility: Press F2 during boot to enter the Setup Menu. Select Boot Menu to modify the boot priority order, for example, if using USB HDD to Update BIOS, move USB HDD to position 1. - Page 47 In flash BIOS, the message Please do not remove AC Power Source displays. NOTE: If the AC power is not connected, the following message displays. Plug in the AC power to continue. Flash is complete when the message Flash programming complete displays. Chapter 2...
-
Page 48: Winflash Utility
WinFlash Utility Perform the following steps to use the WinFlash Utility: Double click the WinFlash executable. Click OK to begin the update. A progress screen displays. When the process is complete, close all programs and applications and reboot the system. Chapter 2... -
Page 49: Remove Hdd/Bios Password Utilities
Remove HDD/BIOS Password Utilities This section provides you with details about removing HDD/BIOS password methods: Removing HDD Password: If you key in the wrong HDD password three times, an error is generated. To reset the HDD password, perform the following steps: After the error is displayed, select the Enter Unlock Password option on the screen. - Page 50 Removing BIOS Passwords: To clear the User or Supervisor passwords, open the lower door and use a metal instrument to short the CMOS jumper as shown below. Cleaning BIOS Passwords To clean the User or Supervisor passwords, perform the following steps: From a DOS prompt, execute clnpwd.exe Press 1 or 2 to clean the desired password shown on the screen.
-
Page 51: Miscellaneous Utilities
Miscellaneous Utilities Using Boot Sequence Selector Boot Sequence Selector allows the boot order to be changes without accessing the BIOS. To use Boot Sequence Selector, perform the following steps: Enter into DOS. Execute BS.exe to display the usage screen. Select the desired boot sequence by entering the corresponding sequence, for example, enter BS2 to change the boot sequence to HDD|CD ROM|LAN|Floppy. - Page 52 Manufacturer (Type1, Offset04h): Acer Product Name (Type1, Offset05h): Aspire one xxxxx Serial Number (Type1, Offset07h): 01234567890123456789 UUID String (Type1, Offset08h): xxxxxxxx-xxxx-xxxx-xxxx-xxxxxxxxxxxx Asset Tag (Type3, Offset04h): Acer Asstag Example 2: Write Product Name to EEPROM Input: dmitools /wp Acer Example 3: Write Serial Number to EEPROM...
- Page 53 Execute MAC.BAT to write MAC information to eeprom. Chapter 2...
-
Page 54: Creating A Usb Flash Crisis Disk
Creating a USB Flash Crisis Disk Plug in the USB flash disk. Select the Fast Format option and click Start. Then click Next. Click Format and then Exit to complete the operation. Copy the KAV60.fd to the USB flash disk root directory. NOTE: Do not place any other *.fd files to the USB flash disk root directory. -
Page 55: Machine Disassembly And Replacement
Machine Disassembly and Replacement IMPORTANT:The outside housing and color may vary from the mass produced model. This chapter contains step-by-step procedures on how to disassemble the notebook computer for maintenance and troubleshooting. Disassembly Requirements To disassemble the computer, you need the following tools: •... -
Page 56: General Information
General Information Pre-disassembly Instructions Before proceeding with the disassembly procedure, make sure that you do the following: 1. Turn off the power to the system and all peripherals. 2. Unplug the AC adapter and all power and signal cables from the system. 3. -
Page 57: External Module Disassembly Process
External Module Disassembly Process IMPORTANT:The outside housing and color may vary from the mass produced model. External Modules Disassembly Flowchart The flowchart below gives you a graphic representation on the entire disassembly sequence and instructs you on the components that need to be removed during servicing. For example, if you want to remove the main board, you must first remove the keyboard, then disassemble the inside assembly frame in that order. -
Page 58: Removing The Battery Pack
Removing the Battery Pack 1. Turn computer over. Pull the battery lock latch in the direction shown. 2. Pull and hold the battery release latch into the open position (1), then lift out the battery pack from the main unit (2). -
Page 59: Removing The Sd Dummy Card
Removing the SD Dummy Card 1. See “Removing the Battery Pack” on page 48. 2. Push the SD dummy card inwards to eject it. 3. Pull the card out from the slot. Chapter 3... -
Page 60: Removing The 3G Card
Removing the 3G Card 1. See “Removing the Battery Pack” on page 48. 2. Push the 3G card into the slot to eject it. 3. Pull the card out from the slot. Chapter 3... -
Page 61: Removing The Keyboard
Removing the Keyboard 1. See “Removing the Battery Pack” on page 48. 2. Push down on the four (4) latches holding the top center of the keyboard. 3. Pull up the top center of the keyboard. 4. Turn the keyboard over. Chapter 3... - Page 62 5. Unlock the FPC. 6. Remove the FPC and the keyboard. Chapter 3...
-
Page 63: Removing The Lower Door
Removing the Lower Door 1. See “Removing the Keyboard” on page 51. 2. Remove the four (4) screws from the upper cover as shown. Step Lower Door M2*7 3. Using a screwdriver or other straight tool, push through the hole in the upper cover to release the lower door. Chapter 3 Size Quantity... -
Page 64: Removing The Dimm Module
4. Turn the computer over and remove the lower cover door. Removing the DIMM Module 1. See “Removing the Lower Door” on page 53. 2. Push out the release latches on both sides of the DIMM socket to release the DIMM module. 3. -
Page 65: Removing The Hdd Module
Removing the HDD Module 1. See “Removing the Lower Door” on page 53. 2. Remove the one (1) screw from the chassis. Step HDD Module M2*3 3. Grasp the pull-tab and pull the HDD module away from the connector. 4. Remove the HDD module. Chapter 3 Size Quantity... - Page 66 5. Remove the four (4) screws, two on each side, securing the HDD to the carrier. Step Size Quantity Screw Type HDD Carrier M3*3 Ni 6. Remove the HDD from the carrier. Chapter 3...
-
Page 67: Removing The 3G Module
Removing the 3G Module 1. See “Removing the Lower Door” on page 53. 2. Disconnect the antenna cables from the 3G module. NOTE: Cable placement is YELLOW to the MAIN terminal (closest to the edge of the computer) and BLUE to the AUX terminal (closest to the HDD). -
Page 68: Removing The Wlan Module
4. Remove the 3G module from the 3G socket. NOTE: When removing the 3G Module, the WLAN antenna cables may be removed to simplify the procedure. Removing the WLAN Module 1. See “Removing the Lower Door” on page 53. 2. Disconnect the antenna cables from the WLAN module. NOTE: Cable placement is Black to the MAIN terminal (closest to the HDD) and White to the AUX terminal (closest to the edge of the computer). - Page 69 3. Move the antenna cables away and remove the one (1) screw. Step Size Quantity Screw Type WLAN Module M2*3 4. Remove the WLAN module from the WLAN socket. NOTE: When removing the WLAN module, the 3G antenna cables may be removed to simplify the procedure. Chapter 3...
-
Page 70: Main Unit Disassembly Process
Main Unit Disassembly Process Main Unit Disassembly Flowchart Screw List Step Upper Cover Lower Cover Button Board LED Board Speakers Mainboard Thermal Module LCD Module Screw Quantity M2*7 M2*5 M2*3 (t=0.04) M2*3 M2*3 M2*3 M2*3 M2*4 Ni Part No. 86.SDE02.005 86.SDE02.004 86.SDE02.001 86.SDE02.002... -
Page 71: Removing The Upper Cover
Removing the Upper Cover 1. See “Main Unit Disassembly Flowchart” on page 60. 2. Unlock and remove the touchpad FFC. 3. Unlock and remove the LED FFC. Chapter 3... - Page 72 4. Remove the four (4) remaining screws from the upper cover. Step Upper Cover M2*7 5. Remove the seven (7) screws from the chassis. Step Lower Cover M2*5 Size Quantity Size Quantity Screw Type Screw Type Chapter 3...
- Page 73 6. Starting at the top left corner, pull up on the upper cover to unhook the latches which secure the top cover to the chassis. 7. Continue by inserting a flat, plastic tool to unhook the remaining latches as shown. To prevent damage to the internal components, do not push the tool in too far.
- Page 74 8. Use a plastic tool to unlock the two latches (red callouts) located above the HDD cover. 9. Remove the upper cover. Chapter 3...
-
Page 75: Removing The Button Board
Removing the Button Board 1. See “Removing the Upper Cover” on page 61. 2. Locate the button board on the upper cover. 3. Release the touchpad FFC locking latch and disconnect the touchpad FFC from the cover. 4. Pull the button board FFC off the adhesive. Chapter 3... - Page 76 5. Remove the two (2) screws securing the button board to the upper cover. Step Size Quantity Screw Type Button Board M2*3 (t=0.04) 6. Remove the button board from the upper cover. Chapter 3...
-
Page 77: Removing The Led Board
Removing the LED Board 1. See “Removing the Upper Cover” on page 61. 2. Remove the one (1) screw from the chassis. Step LED Board M2*3 3. Remove the LED board from the chassis. Chapter 3 Size Quantity Screw Type... -
Page 78: Removing The Bluetooth Module
Removing the Bluetooth Module 1. See “Removing the Upper Cover” on page 61. 2. Remove the adhesive tape securing the Bluetooth cable to the chassis. 3. Disconnect the Bluetooth cable from the mainboard connector. 4. Lift the Bluetooth module off the adhesive. Chapter 3... -
Page 79: Removing The Rtc Battery
5. Disconnect the cable from the Bluetooth module. Removing the RTC Battery 1. See “Removing the Upper Cover” on page 61. 2. The RTC battery is soldered in place. Break the solder and remove the RTC battery. NOTE: The battery has been highlighted with a yellow oval as shown in the above image. Please detach the battery and follow local regulations for disposal. -
Page 80: Removing The Speaker Module
Removing the Speaker Module 1. See “Removing the Upper Cover” on page 61. 2. Remove the adhesive tape securing the speaker cable. 3. Disconnect the speaker cable from the mainboard connector. 4. Remove the speaker cable from the cable guides. Chapter 3... - Page 81 5. Remove the four (4) screws from the chassis. Step Size Quantity Screw Type Speakers M2*3 6. Remove the speakers from the chassis. Chapter 3...
-
Page 82: Removing The Mainboard
Removing the Mainboard NOTE: Ensure speaker cable is clear before removal of mainboard. 1. See “Removing the LED Board” on page 67. 2. Pull the LVDS grounding wire from the 3G card casing. 3. Disconnect the LVDS cable from the connector. 4. - Page 83 5. Disconnect the DC-In cable from the connector. 6. Pull the microphone grounding wire from the LAN casing. 7. Disconnect the microphone cable from the connector. Chapter 3...
- Page 84 8. Remove the adhesive tape securing the speaker cable. 9. Disconnect the speaker cable from the mainboard connector. 10. Remove the two (2) screws from the chassis. Step Size Quantity Screw Type Mainboard M2*3 Chapter 3...
- Page 85 11. With one hand, pull up on the bridge of the mainboard (1) and with the other, hold the bottom of chassis and press up and out (2). 12. Remove the mainboard from the chassis. Chapter 3...
-
Page 86: Removing The Thermal Module
Removing the Thermal Module 1. See “Removing the Mainboard” on page 72. 2. Disconnect the fan cable from the connector. 3. Remove the three (3) screws in order from 1 to 3. Step Thermal Module M2*3 4. Remove the thermal module from the mainboard. Size Quantity Screw Type... - Page 87 Circuit boards >10 cm² have been highlighted with a yellow rectangle as shown in the NOTE: previous image. Please detach the Circuit board and follow local regulations for disposal. Chapter 3...
-
Page 88: Removing The Lcd Module
Removing the LCD Module 1. See “Removing the Mainboard” on page 72. 2. Remove the DC-In cable and jack housing from the chassis. 3. Remove the left antenna cables from the cable guides on the bottom cover. 4. Lift up the chassis and pull the left antenna cables through to the front. Chapter 3... - Page 89 5. Remove the left antenna cables from the retention guides. 6. Pull the right antenna cables through the chassis and remove the cables from the retention guides. 7. Remove the two (2) hinge screws from the chassis. Step Size Quantity Screw Type LCD Module M2*4 Ni...
- Page 90 8. Remove the LCD module from the chassis. Chapter 3...
-
Page 91: Lcd Module Disassembly Process
LCD Module Disassembly Process LCD Module Disassembly Flowchart Screw List Step Screw LCD Bezel M2*4 Ni LCD Panel M2*3(t=0.04) LCD Panel M2*3(t=0.04) Brackets Chapter 3 Quantity Part No. 86.SDE02.003 86.SDE02.001 86.SDE02.001... -
Page 92: Removing The Lcd Bezel
Removing the LCD Bezel 1. See “Removing the LCD Module” on page 78. 2. Remove the two (2) screw caps and two (2) screws from the module. Step LCD Bezel M2*4 Ni 3. Starting from the bottom-center of the bezel, pry the bezel upwards and away from the panel. Move along the edge until the bezel is completely removed. -
Page 93: Removing The Camera Module
Removing the Camera Module 1. See “Removing the LCD Bezel” on page 82. 2. Disconnect the camera cable from the connector. 3. Pull the camera away from the adhesive strip and lift it out of the LCD module. Chapter 3... -
Page 94: Removing The Lcd Panel
Removing the LCD Panel CAUTION: The LCD module displayed here may be different from model purchased. 1. See “Removing the Camera Module” on page 83. 2. Remove the four (4) securing screws from the LCD Panel. Step LCD Panel M2*3(t=0.04) 3. - Page 95 4. Lift the LCD Panel out of the module. 5. Turn the LCD panel over and place it face down on a clean surface. 6. Remove the adhesive tape securing the camera cable to the panel Chapter 3...
- Page 96 7. Remove the camera cable from the back of the LCD panel. 8. Peel up the transparent adhesive protector securing the LVDS cable to the LCD Panel. 9. Disconnect the LVDS cable from the panel connector and lift the panel away. Chapter 3...
-
Page 97: Removing The Microphone Module
Removing the Microphone Module 1. See “Removing the LCD Panel” on page 84. 2. Lift up the adhesive tape and foil tab covering the microphone cable. 3. Remove the adhesive tape covering the microphone and lift it clear of the LCD module. Chapter 3... -
Page 98: Removing The Lcd Brackets
Removing the LCD Brackets 1. See “Removing the LCD Panel” on page 84. 2. Remove the four (4) screws from the LCD brackets. Step LCD Panel M2*3 (t=0.04) Brackets 3. Lift the brackets away from the upper cover. Size Quantity Screw Type Chapter 3... -
Page 99: Removing The 3G And Wlan Antennas
Removing the 3G and WLAN Antennas 1. See “Removing the LCD Brackets” on page 88. 2. Lift the adhesive foam padding off the adhesive foil. 3. Lift the adhesive foam padding off the left 3G antenna. 4. Lift the left antenna foil off the LCD cover. Chapter 3... - Page 100 5. Remove the left 3G antenna. 6. Remove the cable from the retention guides 7. Pry the left WLAN antenna off the LCD module cover and remove. 8. Repeat steps 2 - 7 for the right 3G and WLAN antennas. Chapter 3...
-
Page 101: Lcd Module Reassembly Procedure
LCD Module Reassembly Procedure Replacing the 3G and WLAN Antennas 1. Place the left WLAN antenna onto the LCD module cover and apply pressure to adhere it to the LCD cover. 2. Place the left 3G antenna onto the LCD cover as shown. 3. - Page 102 4. Replace the adhesive foam padding onto the left 3G adhesive foil and apply pressure to fix the adhesive. 5. Place the left antenna cables into the retention guides and replace the adhesive foil tabs to secure the cables. 6. Replace the adhesive foam on the top of the left 3G antenna and apply pressure to fix the adhesive. 7.
-
Page 103: Replacing The Lcd Brackets
Replacing the LCD Brackets 1. Place the brackets onto the upper cover. 2. Replace the four (4) screws to secure the LCD brackets. Step LCD Panel M2*3 (t=0.04) Brackets Chapter 3 Size Quantity Screw Type... -
Page 104: Replacing Microphone Module
Replacing Microphone Module 1. Adhere the microphone to the LCD cover. 2. Place the microphone cable along the bottom of the LCD cover and replace the foil tabs over the microphone cable. 3. Lay the camera cable across the LCD cover as shown. Chapter 3... -
Page 105: Replacing The Lvds Cable
4. Replace the adhesive tape and foil tabs to secure the cable. Replacing the LVDS Cable 1. Replace the LCD cable connector. 2. Adhere the transparent connector protector. Chapter 3... - Page 106 3. Place the LCD panel onto the LCD cover and replace the adhesive foil tabs to secure the LVDS cable. 4. Replace the four (4) screws to secure the LCD Panel. Step Size Quantity Screw Type LCD Panel M2*3 (t=0.04) Chapter 3...
-
Page 107: Replacing The Ccd Module
Replacing the CCD Module 1. Adhere the CCD to the LCD module cover. 2. Connect the CCD cable to the CCD module connector. Replacing the LCD Bezel 1. Locate the bezel hinges first and press down until there are no gaps between the bezel and the LCD module cover hinge wells. - Page 108 2. Press down around the entire perimeter of the bezel until there are no gaps between the bezel and the LCD module. 3. Secure the two (2) screws and screw covers to secure the LCD bezel. Step Size Quantity Screw Type LCD Bezel M2*4 Ni Chapter 3...
-
Page 109: Main Module Reassembly Procedure
Main Module Reassembly Procedure Replacing the LCD Module 1. Place the LCD module onto the main unit lower cover. 2. Secure the two (2) screws to the chassis. Step LCD Module M2*4 Ni Chapter 3 Size Quantity Screw Type... - Page 110 3. Place the right antenna cables under the retention guides and pull the antenna cables through the chassis as shown. 4. Place the left antenna cables into the retention guides as shown. 5. Lift up the chassis and pull the left antenna cables through to the back. Chapter 3...
- Page 111 6. Place the left antenna cables into the cable guides on the bottom cover. 7. Replace the DC-In power jack. Chapter 3...
-
Page 112: Replacing The Thermal Module
Replacing the Thermal Module IMPORTANT:Apply a suitable thermal grease and ensure all heat pads are in place before replacing the thermal module. The following thermal grease types are approved for use: • Silmore GP50 • Honeywell PCM45F-SP • ShinEtsu 7762 The following thermal pads are approved for use: •... -
Page 113: Replacing The Mainboard
5. Connect the thermal module cable to the mainboard connector. Replacing the Mainboard 1. Place the mainboard into the chassis as shown. 2. While lifting up at the mainboard bridge (1) , apply gentle pressure to the connector end to fit the mainboard into the chassis (2). - Page 114 3. Replace the two (2) screws to secure the mainboard. Step Size Quantity Screw Type Mainboard M2*3 4. Connect the speaker cable to the conector. 5. Replace the adhesive tape to secure the speaker cable. Chapter 3...
- Page 115 6. Connect the microphone cable to the mainboard connector. 7. Adhere the microphone grounding wire to the LAN casing. 8. Connect the DC-In power cable. Chapter 3...
- Page 116 9. Adhere the LVDS cable to the adhesive strip on the mainboard. 10. Connect the LVDS cable to the main board connector. 11. Adhere the LVDS grounding wire to the 3G card casing. Chapter 3...
-
Page 117: Replacing The Speakers
Replacing the Speakers 1. Place the two speaker housings onto the chassis. 2. Secure the four (4) screws and place the cables into the retention guides. Step Size Quantity Screw Type Speakers M2*3 Chapter 3... -
Page 118: Replacing The Rtc Battery
Replacing the RTC Battery 1. Place the RTC battery onto the mainboard plus (+) side down and solder the connections to secure it in place. Replacing the Bluetooth Module 1. Connect the Bluetooth cable to the Bluetooth module 2. Adhere the the Bluetooth module to the chassis. Chapter 3... -
Page 119: Replacing The Led Board
3. Connect the Bluetooth cable to the mainboard connector. Replacing the LED Board 1. Place the LED board onto the chassis. 2. Secure the LED board to the chassis using one (1) screw. Step Size Quantity Screw Type LED Board M2*3 Chapter 3... -
Page 120: Replacing The Button Board
Replacing the Button Board 1. Place the button board onto the upper cover. 2. Secure the button board to the upper cover using two (2) screws. Step Size Quantity Screw Type Button Board M2*3 (t=0.04) Chapter 3... - Page 121 3. Adhere the button board FFC to the upper cover. 4. Connect and lock the touchpad FFC to the connector. Chapter 3...
-
Page 122: Replacing The Upper Cover
Replacing the Upper Cover 1. Place the upper cover onto the chassis ensuring the hinge covers are seated properly. Press down around the upper cover edges to secure the latches. 2. Press down on the center of the upper cover to secure the center latches. Chapter 3... - Page 123 3. Secure the upper cover to the chassis using seven (7) screws. Step Lower Cover M2*5 4. Secure the upper cover to the chassis using four (4) screws. Step Upper Cover M2*7 Chapter 3 Size Quantity Size Quantity Screw Type Screw Type...
- Page 124 5. Connect and lock the LED FFC to the connector. 6. Connect and lock the touchpad FFC to the connector. Chapter 3...
-
Page 125: Replacing The Wlan Module
Replacing the WLAN Module 1. Push the WLAN module into the connector. 2. Secure the WLAN module to the chassis using one (1) screw. Step Size Quantity Screw Type WLAN Module M2*3 3. Secure the two (2) antennas to the connectors. NOTE: Cable placement is Black to the MAIN terminal (closest to the HDD) and White to the AUX terminal (closest to the edge of the computer). -
Page 126: Replacing The 3G Module
Replacing the 3G Module 1. Push the 3G module into the connector. 2. Secure the 3G module to the chassis using one (1) screw. Step Size Quantity Screw Type 3G Module M2*3 3. Secure the two (2) antennas to the connectors. NOTE: Cable placement is YELLOW to the MAIN terminal (closest to the edge of the computer) and BLUE to the AUX terminal (closest to the HDD). -
Page 127: Replacing The Hdd Module
Replacing the HDD Module 1. Place the HDD into the carrier. 2. Secure the four (4) screws, two (2) on each side, to secure the HDD carrier. Step Size Quantity Screw Type HDD Module M3*3 Ni 3. Place the HDD module into the HDD bay. Chapter 3... - Page 128 4. Push the HDD module forward to engage the connector. 5. Secure the HDD module to the chassis using one (1) screw. Step Size Quantity Screw Type HDD Module M2*3 Chapter 3...
-
Page 129: Replacing The Dimm Module
Replacing the DIMM Module 1. Push the DIMM module into the connector. 2. Press down to lock the DIMM module into place. Replacing the Lower Cover 1. Place the back edge of the lower cover door against the chassis (1) and then lower the front edge into place (2). -
Page 130: Replacing The Keyboard
2. Secure the lower cover to the chassis using four (4) screws. Step Size Quantity Screw Type Lower Door M2*7 Replacing the Keyboard 1. Connect the keyboard FPC and lock the connector. Chapter 3... -
Page 131: Replacing The 3G Card
2. Turn the keyboard over ensuring the latches are inserted into the connectors at the bottom of the keyboard bay. 3. Apply gentle pressure to secure the keyboard latches. Replacing the 3G Card 1. Push the 3G card into the slot until it clicks into place. Chapter 3... -
Page 132: Replacing The Sd Dummy Card
Replacing the SD Dummy Card 1. Insert the SD dummy card into the slot. 2. Push the card in until it clicks into place and is flush with the casing Replacing the Battery 1. Pull the battery release latch into the open position then (1) insert the battery pack and push into place (2). Chapter 3... - Page 133 2. Push the battery lock latch in the direction shown to secure the battery. Chapter 3...
- Page 134 Chapter 3...
-
Page 135: Troubleshooting
Common Problems Use the following procedure as a guide for computer problems. NOTE: The diagnostic tests are intended to test only Acer products. Non-Acer products, prototype cards, or modified options can give false errors and invalid system responses. Obtain the failing symptoms in as much detail as possible. -
Page 136: Power On Issue
Power On Issue If the system doesn’t power on, perform the following actions one at a time to correct the problem. Do not replace a non-defective FRUs: Computer Shutsdown Intermittently If the system powers off at intervals, perform the following actions one at a time to correct the problem. Check the power cable is properly connected to the computer and the electrical outlet. -
Page 137: No Display Issue
No Display Issue If the Display doesn’t work, perform the following actions one at a time to correct the problem. Do not replace a non-defective FRUs: Replace LCD panel/cable No POST or Video If the POST or video doesn’t display, perform the following actions one at a time to correct the problem. Make sure that the internal display is selected. -
Page 138: Random Loss Of Bios Settings
Abnormal Video Display If video displays abnormally, perform the following actions one at a time to correct the problem. Reboot the computer. If permanent vertical/horizontal lines or dark spots display in the same location, the LCD is faulty and should be replaced. See “Disassembly Process” on page 46. If extensive pixel damage is present (different colored spots in the same locations on the screen), the LCD is faulty and should be replaced. -
Page 139: Lcd Failure
LCD Failure If the LCD fails, perform the following actions one at a time to correct the problem. Do not replace a non- defective FRUs: Built-In Keyboard Failure If the built-in Keyboard fails, perform the following actions one at a time to correct the problem. Do not replace a non-defective FRUs: Chapter 4 Start... -
Page 140: Touch Pad Failure
Touch Pad Failure If the TouchPad doesn’t work, perform the following actions one at a time to correct the problem. Do not replace a non-defective FRUs: Internal Speaker Failure If the internal Speakers fail, perform the following actions one at a time to correct the problem. Do not replace a non-defective FRUs: Start Re-assemble... -
Page 141: Sound Problems
Sound Problems If sound problems are experienced, perform the following actions one at a time to correct the problem. Reboot the computer. Navigate to Start Control Panel the Device Manager to determine that: • The device is properly installed. • There are no red Xs or yellow exclamation marks. -
Page 142: Internal Microphone Failure
Internal Microphone Failure If the internal Microphone fails, perform the following actions one at a time to correct the problem. Do not replace a non-defective FRUs: Microphone Problems If internal or external Microphones do no operate correctly, perform the following actions one at a time to correct the problem. -
Page 143: Hdd Not Operating Correctly
HDD Not Operating Correctly If the HDD does not operate correctly, perform the following actions one at a time to correct the problem. Disconnect all external devices. Run a complete virus scan using up-to-date software to ensure the computer is virus free. Run the Windows 7 Startup Repair Utility: insert the Windows 7 Operating System DVD in the ODD and restart the computer. -
Page 144: Usb Failure
USB Failure If the USB fails, perform the following actions one at a time to correct the problem. Do not replace a non- defective FRU: Wireless Function Failure If the WLAN fails, perform the following actions one at a time to correct the problem. Do not replace a non- defective FRUs: Start Check USB... -
Page 145: 3G Function Failure
3G Function Failure If the 3G module fails, perform the following actions one at a time to correct the problem. Do not replace a non- defective FRU: Chapter 4 Start Re-assemble Check 3G the antenna to antenna to 3G card Swap The Check antenna... -
Page 146: Cosmetic Failure
Cosmetic Failure If an external component fails, perform the following actions one at a time to correct the problem. Do not replace a non-defective FRU: Start LCD cover? LCD bezel? Upper? Lower? Function Test Swap LCD cover Swap LCD bezel Swap Upper Swap Lower Chapter 4... -
Page 147: Thermal Unit Failure
Thermal Unit Failure If the Thermal Unit fails, perform the following actions one at a time to correct the problem. Do not replace a non-defective FRUs: External Mouse Failure If an external Mouse fails, perform the following actions one at a time to correct the problem. Try an alternative mouse. -
Page 148: Other Failures
13. If the Issue is still not resolved, see “Online Support Information” on page 259. Other Failures If the CRT Switch, Dock, LAN Port, external MIC or Speakers, PCI Express Card, 5-in-1 Card Reader or Volume Wheel fail, perform the following general steps to correct the problem. Do not replace a non-defective FRUs: Check Drive whether is OK. -
Page 149: Intermittent Problems
Issue” on page 126.): Power-off the computer. Visually check them for damage. If any problems are found, replace the FRU. Remove or disconnect all of the following devices: • Non-Acer devices • Printer, mouse, and other external devices • Battery pack •... -
Page 150: Post Codes
Post Codes These tables describe the POST codes and descriptions during the POST. Sec: NO_EVICTION_MODE_DEBUG EQU 1 (CommonPlatform\sec\Ia32\SecCore.inc) Code 0xC2 MTRR setup 0xC3 Enable cache 0xC4 Establish cache tags 0xC5 Enter NEM, Place the BSP in No Fill mode, set CR0.CD = 1, CR0.NW = 0. 0xCF Cache Init Finished Memory:... -
Page 151: Bds & Specific Action
Code 0x27 Enable DRAM Channel I/O Buffers 0x28 Enable all clocks on populated rows 0x29 Perform JEDEC memory initialization for all memory rows 0x30 Perform steps required after memory init 0x31 Program DRAM throttling and throttling event registers 0x32 Setup DRAM control register for normal operation and enable 0x33 Enable RCOMP 0x34... -
Page 152: Each Peim Entry Point Used In 80_Port
Each PEIM entry point used in 80_PORT Code 0x00 0x01 PEI_EVENT_LOG 0xA1 PEI_OEM_SERVICE 0xA2 PEI_SIO_INIT 0xA3 PEI_MONO_STATUS_CODE 0xA4 PEI_CPU_IO_PCI_CFG 0x06 PEI_CPU_IO 0x07 PEI_PCI_CFG 0xA5 PEI_CPU_PEIM 0xA6 PEI_PLATFORM_STAGE1 0xA7 PEI_VARIABLE 0xA8 PEI_SB_INIT 0x0C PEI_CAPSULE 0xAA PEI_PLATFORM_STAGE2 0xAC PEI_SB_SMBUS_ARP_DISABLED 0x0F PEI_HOST_TO_SYSTEM 0x40 PEI_MEMORY_INIT 0x41 PEI_S3_RESUME... - Page 153 Code 0xC4 SECURITY_STUB 0xC5 DXE_CPU_IO 0xC6 CF9_RESET 0xC7 PC_RTC 0xC8 STATUS_CODE 0xC9 VARIABLE EMU_VARIABLE 0xD9 DXE_CHIPSET_INIT 0x45 DXE_ALERT_FORMAT 0xD6 PCI_HOST_BRIDGE 0xD7 PCI_EXPRESS 0xD5 DXE_SB_INIT 0xDA IDE_CONTROLLER 0xDB SATA_CONTROLLER 0xDD SB_SM_BUS 0xE7 ISA_ACPI_DRIVER 0xE8 ISA_BUS 0xE9 ISA_SERIAL 0xED BUS_PCI_UNDI 0xEC PCI_BUS 0xF6 BOOT_PRIORITY 0xF7...
- Page 154 Code 0x72 MONITER_KEY 0x73 LEGACY_BIOS 0x75 LEGACY_BIOS_PLATFORM 0x76 PCI_PLATFORM 0x6C ISA_FLOOPY 0x6D PS2_MOUSE 0x6E USB_BOT 0x6F USB_CBI0 0x74 USB_MOUSE 0xFA SETUP_UTILITY 0x90 FW_BLOCK_SERVICE 0x78 SMM_USB_LEGACY 0x86 GRAPHICS_CONSOLE 0x87 TERMINAL 0x8A DATA_HUB_STD_ERR 0x7C 0x7D PARTITION 0x7E ENGLISH 0x7F FRENCH 0x9E HII_DATABASE 0x9F OEM_SETUP_BROWSER 0x8C...
-
Page 155: Each Smmdriver Entry Point Used In 80_Port
Each SmmDriver entry point used in 80_PORT Code 0xD4 SMM_ACCESS 0xDE SMM_CONTROL 0xCC SMM_BASE 0xD2 SMM_RUNTIME 0xDF SB_SMM_DISPATCH 0xD0 SMM_THUNK 0xCA SMM_ACPI_SW_CHILD 0xFE SMM_PLATFORM 0xD8 SMM_GMCH_MBI 0x90 SMM_FW_BLOCK_SERVICE 0x91 SMM_VARIABLE 0x92 SMM_IHISI 0x93 SMM_INT15_MICROCODE 0x94 SMM_PNP 0x95 SMM_INIT_PPM 0xD3 SMM_OEM_SERVICE Chapter 4 Description... - Page 156 Chapter 4...
-
Page 157: Jumper And Connector Locations
Jumper and Connector Locations Mainboard Top View JRJ45 JP26 JUSB3 JMIC 1 JHP 1 JP20 JBT 1 JPI 1 JKB 1 JPI 8 JUSB2 JUSB1 JLVDS 1 JCRT 1 PJP 1 Chapter 5 ITEM DESCRIPTION RJ45 CONNECTOR MICROPHONE CONNECTOR USB CONNECTOR AUDIO JACK (MIC) AUDIO JACK (HEAD PHONE) SPEAKER CONNECTOR... -
Page 158: Mainboard Bottom View (Ddr3 Model)
Mainboard Bottom View (DDR3 Model) JDIMI JMINI 1 JMINI 2 JPI2 JHDD1 PJP2 ITEM DESCRIPTION DDR2 CONNECTOR MINI CARD CONNECTOR MINI CARD CONNECTOR FAN CONNECTOR HDD CONNECTOR BATTERY CONNECTOR Chapter 5... -
Page 159: Clearing Password Check And Bios Recovery
Clearing Password Check and BIOS Recovery This section provide you the standard operating procedures of clearing password and BIOS recovery for the computer. There is one Hardware Open Gap on the mainboard for clearing password check, and one Hotkey for enabling BIOS Recovery. Clearing Password Check Hardware Open Gap Description is as follows: Item... -
Page 160: Bios Recovery Boot Block/Hotkey
BIOS Recovery by Crisis Disk BIOS Recovery Boot Block: BIOS Recovery Boot Block is a special block of BIOS. It is used to boot up the system with minimum BIOS initialization. Users can enable this feature to restore the BIOS firmware to a successful one once the previous BIOS flashing process failed. -
Page 161: Fru (Field Replaceable Unit) List
Guide. For ACER AUTHORIZED SERVICE PROVIDERS, your Acer office may have a DIFFERENT part number code from those given in the FRU list of this printed Service Guide. You MUST use the local FRU list provided by your regional Acer office to order FRU parts for repair and service of customer machines. -
Page 162: Exploded Diagrams
Exploded Diagrams Main Assembly Description UPPER CASE MAINBOARD THERMAL MODULE W/FAN DC-IN CABLE Acer P/N Description 60.SDE02.001 LED BOARD MB.SE102.001 LOWER CASE 60.SDE02.006 LOGIC DOOR 50.SDE02.003 Acer P/N 55.SDU02.001 60.SDE02.002 60.SDE02.003 Chapter 6... -
Page 163: Logic Lower Assembly
Logic Lower Assembly Description SPEAKER R+L Chapter 6 Acer P/N 23.SDE02.002 LOWER CASE Description Acer P/N 60.SDE02.002... -
Page 164: Logic Upper Assembly
Logic Upper Assembly Description BUTTON BOARD Acer P/N 55.SDE02.001 UPPER CASE Description Acer P/N 60.SDE02.001 Chapter 6... -
Page 165: Lcd Assembly
LCD Assembly Description LCD BEZEL ANTENNA 3G AUX ANTENNA WLAN LCD CABLE FOR W/ CAMERA 1.3M Chapter 6 Acer P/N 60.SDE02.005 LCD BRACKET R&L 50.SDU02.002 LCD COVER IMR- BLACK W/3G 50.SDE02.005 ANTENNA WLAN MAIN 50.SDU02.003 ANTENNA 3G MAIN 57.SDE02.001 Description Acer P/N 33.SDE02.002... -
Page 166: Aspire D255 Fru List
Aspire D255 FRU List Category ADAPTER BATTERY BOARD Description ADAPTER DELTA 30W 19V 1.7X5.5X11 BLACK ADP-30JH BA LF ADAPTER LITE-ON 30W 19V 1.7X5.5X11 BLACK PA-1300-04AC LF ADAPTER HIPRO 30W 19V 1.7X5.5X11 BLACK HP-A0301R3 B1LF LF ADAPTER DELTA 40W 19V 1.7X5.5X11 BLACK ADP-40 TH AA, LV5 WALL-MOUNTED, OBL LF ADAPTER LEADER 40W 19V 1.7X5.5X11 BLACK IU40-11190-011S, WALL-MOUNTED, LV5+OBL LF... - Page 167 Category CABLE CASE/COVER/BRACKET ASSEMBLY Chapter 6 Description BLUE TOOTH CABLE-8PIN BLUE TOOTH CABLE-6PIN BLUE TOOTH CABLE DC IN CABLE AC CLIP US AC CLIP EU AC CLIP AUSTRALIA AC CLIP UK AC CLIP ARGETINA AC CLIP CHINA AC CLIP BRAZIL AC CLIP S-AFRICA AC CLIP KOREA AC CLIP AF...
- Page 168 Category Description LOWER CASE LOGIC DOOR HDD HOUSING 60.SDE02.002 60.SDE02.003 33.SDE02.001 Chapter 6...
- Page 169 W:C60F DISK IMBALANCE CRITERIA = 0.014G- HDD WD 2.5" 5400RPM 320GB WD3200BEVT- 22A23T0,ML320S,WD SATA 8MB LF F/ W:01.01A01 Keyboard ACER NT0T_A10B NT0T Internal 10 Standard 84KS Black US International Texture Keyboard ACER NT0T_A10B NT0T Internal 10 Standard 84KS Black Greek Texture...
- Page 170 Category Description Keyboard ACER NT0T_A10B NT0T Internal 10 Standard 84KS Black US International w/ Hebrew Texture Keyboard ACER NT0T_A10B NT0T Internal 10 Standard 84KS Black Thailand Texture Keyboard ACER NT0T_A10B NT0T Internal 10 Standard 84KS Black Korean Texture Keyboard ACER NT0T_A10B NT0T Internal 10...
- Page 171 Category Chapter 6 Description ASSY LED MODULE 10.1" WSVGA Glare w/ ANTENNA, CCD, 3G-BLACK LCD COVER IMR-BLACK W/3G LCD BEZEL ANTENNA 3G MAIN ANTENNA 3G AUX ANTENNA WLAN MAIN ANTENNA WLAN AUX LCD CABLE FOR W/3G 6M.SDU02.001 60.SDE02.004 60.SDE02.005 50.SDU02.001 50.SDU02.002 50.SDE02.004 50.SDE02.005...
- Page 172 Category Description LCD BRACKET R&L CAMERA 1.3M LED LCD AUO 10.1" WSVGA Glare B101AW06 V1 LF 200nit 8ms 500:1 LED LCD CMO 10.1" WSVGA GLARE N101L6- L0D LF 200NIT 10MS 500:1 ASSY LED MODULE 10.1" WSVGA Glare w/ ANTENNA, CCD, 3G-WHITE LCD COVER IMR-WHITE W/3G LCD BEZEL ANTENNA 3G MAIN...
- Page 173 Category Chapter 6 Description ANTENNA WLAN AUX LCD CABLE FOR W/3G LCD BRACKET R&L CAMERA 1.3M LED LCD AUO 10.1" WSVGA Glare B101AW06 V1 LF 200nit 8ms 500:1 LED LCD CMO 10.1" WSVGA GLARE N101L6- L0D LF 200NIT 10MS 500:1 ASSY LED MODULE 10.1"...
- Page 174 Category Description ANTENNA 3G AUX ANTENNA WLAN MAIN ANTENNA WLAN AUX LCD CABLE FOR W/3G LCD BRACKET R&L CAMERA 1.3M LED LCD AUO 10.1" WSVGA Glare B101AW06 V1 LF 200nit 8ms 500:1 LED LCD CMO 10.1" WSVGA GLARE N101L6- L0D LF 200NIT 10MS 500:1 ASSY LED MODULE 10.1"...
- Page 175 Category Chapter 6 Description LCD BEZEL ANTENNA 3G MAIN ANTENNA 3G AUX ANTENNA WLAN MAIN ANTENNA WLAN AUX LCD CABLE FOR W/3G LCD BRACKET R&L CAMERA 1.3M LED LCD AUO 10.1" WSVGA Glare B101AW06 V1 LF 200nit 8ms 500:1 LED LCD CMO 10.1" WSVGA GLARE N101L6- L0D LF 200NIT 10MS 500:1 60.SDE02.005 50.SDU02.001...
- Page 176 Category Description ASSY LED MODULE 10.1" WSVGA Glare w/ ANTENNA, CCD, 3G-BLUE LCD COVER IMR-BLUE W/3G LCD BEZEL ANTENNA 3G MAIN ANTENNA 3G AUX ANTENNA WLAN MAIN ANTENNA WLAN AUX LCD CABLE FOR W/3G 6M.SDW02.001 60.SDF02.002 60.SDE02.005 50.SDU02.001 50.SDU02.002 50.SDE02.004 50.SDE02.005 50.SDU02.003 Chapter 6...
- Page 177 Category Chapter 6 Description LCD BRACKET R&L CAMERA 1.3M LED LCD AUO 10.1" WSVGA Glare B101AW06 V1 LF 200nit 8ms 500:1 LED LCD CMO 10.1" WSVGA GLARE N101L6- L0D LF 200NIT 10MS 500:1 ASSY LED MODULE 10.1" WSVGA None Glare w/ ANTENNA, CCD, 3G-BLACK LCD COVER IMR-BLACK W/3G LCD BEZEL...
- Page 178 Category Description ANTENNA WLAN AUX LCD CABLE FOR W/3G LCD BRACKET R&L CAMERA 1.3M LED LCD AUO 10.1" WSVGA NONE GLARE B101AW06 V0 LF 200NIT 16MS 400:1 ASSY LED MODULE 10.1" WSVGA None Glare w/ ANTENNA, CCD, 3G-WHITE LCD COVER IMR-WHITE W/3G LCD BEZEL 50.SDE02.005 50.SDU02.003...
- Page 179 Category Chapter 6 Description ANTENNA 3G MAIN ANTENNA 3G AUX ANTENNA WLAN MAIN ANTENNA WLAN AUX LCD CABLE FOR W/3G LCD BRACKET R&L CAMERA 1.3M LED LCD AUO 10.1" WSVGA NONE GLARE B101AW06 V0 LF 200NIT 16MS 400:1 ASSY LED MODULE 10.1" WSVGA None Glare w/ ANTENNA, CCD, 3G-RED 50.SDU02.001 50.SDU02.002...
- Page 180 Category Description LCD COVER IMR-RED W/3G LCD BEZEL ANTENNA 3G MAIN ANTENNA 3G AUX ANTENNA WLAN MAIN ANTENNA WLAN AUX LCD CABLE FOR W/3G LCD BRACKET R&L CAMERA 1.3M 60.SDQ02.002 60.SDE02.005 50.SDU02.001 50.SDU02.002 50.SDE02.004 50.SDE02.005 50.SDU02.003 33.SDE02.002 57.SDE02.001 Chapter 6...
- Page 181 Category Chapter 6 Description LED LCD AUO 10.1" WSVGA NONE GLARE B101AW06 V0 LF 200NIT 16MS 400:1 ASSY LED MODULE 10.1" WSVGA None Glare w/ ANTENNA, CCD, 3G-BROWN LCD COVER IMR-BROWN W/3G LCD BEZEL ANTENNA 3G MAIN ANTENNA 3G AUX ANTENNA WLAN MAIN ANTENNA WLAN AUX LK.10105.006...
- Page 182 Category Description LCD CABLE FOR W/3G LCD BRACKET R&L CAMERA 1.3M LED LCD AUO 10.1" WSVGA NONE GLARE B101AW06 V0 LF 200NIT 16MS 400:1 ASSY LED MODULE 10.1" WSVGA None Glare w/ ANTENNA, CCD, 3G-BLUE LCD COVER IMR-BLUE W/3G LCD BEZEL ANTENNA 3G MAIN ANTENNA 3G AUX 50.SDU02.003...
- Page 183 Category MAINBOARD Chapter 6 Description ANTENNA WLAN MAIN ANTENNA WLAN AUX LCD CABLE FOR W/3G LCD BRACKET R&L CAMERA 1.3M LED LCD AUO 10.1" WSVGA NONE GLARE B101AW06 V0 LF 200NIT 16MS 400:1 MAINBOARD AOD255 INTEL NM10 LF N450 W/ MAINBOARD AOD255 INTEL NM10 LF N550 W/ MAINBOARD AOD255 INTEL NM10 LF N450 W/O MAINBOARD AOD255 INTEL NM10 LF N550 W/O...
- Page 184 Category MEMORY HEATSINK MICROPHONE MISCELLANEOUS Description MEMORY SAMSUNG SO-DIMM DDRII 667 1GB M470T2864QZ3-CE6 LF 64*16 0.065UM MEMORY SAMSUNG SO-DIMM DDRII 800 1GB M470T2864EH3-CF7 LF 64*16 0.055UM MEMORY KINGSTON SO-DIMM DDRII 800 1GB ACR128X64D2S800C6 LF 128*8 0.065UM MEMORY SAMSUNG SO-DIMM DDRII 800 2GB M470T5663EH3-CF7 LF 128*8 0.055UM MEMORY KINGSTON SO-DIMM DDRII 800 2GB ACR256X64D2S800C6 LF 128*8 0.065UM...
- Page 185 Category Chapter 6 Description LCD GASKET-L FOR W/3G LCD GASKET-R FOR W/3G 2 IN1 CARD READER MYLAR FOR W/3G 47.SDU02.001 47.SDU02.002 47.SDU02.003...
-
Page 186: Screw List
Screw SCREW SCREW SCREW SCREW SCREW SCREW AcerPN Acer Description 86.SDE02.001 SCREW 2D 3L K 4.5D ZK NL CR3 0.4T 86.SDE02.002 SCREW 2D 3L K 4.5D ZK NL 86.SDE02.003 SCREW 2D 4.0L K 4.0D NI NL 0.3T 86.SDE02.004 SCREW 2D 5L K 4.6D ZK NL CR3 86.SDE02.005... -
Page 187: Model Definition And Configuration
13DQws AOD255- GCTWN 2BQbb AOD255- GCTWN 2BQbb AOD255- CHINA Hong Kong 2BQbb Appendix A Acer Part No Description S2.SDH0D.002 AOD255-13DQbb SNW7ST32SSWW1 MC Android UMACbb_3 1*1G/160/BT/ 6L2.2/5R/CBSDS_GN_1.3C_GEb_ES62 S2.SDP0D.001 AOD255-13DQcc SNW7ST32SSWW1 MC Android UMACcc_3 1*1G/160/BT/ 3L2.2/5R/CBSDS_GN_1.3C_GEc_ES62 S2.SDW0D.001 AOD255-13DQGbb SNW7ST32SSWW1 MC Android UMAGCbb_3 1*1G/160/BT/ 3L2.2/5R/... - Page 188 Austria 2BQkk AOD255- EMEA Baltic 2BQkk AOD255- EMEA Baltic 2BQkk AOD255- EMEA Baltic 2BQkk AOD255- EMEA Baltic 2BQkk Country Acer Part No LU.SDF0B.003 LU.SDF0B.004 LU.SDF0B.005 LU.SDF0B.006 S2.SDF0B.001 LU.SDN0B.001 LU.SDN0B.004 LU.SDN0B.002 LU.SDN0B.003 S2.SDN0B.001 LU.SDE0B.003 LU.SDE0B.053 LU.SDE0B.055 LU.SDE0B.016 LU.SDE0B.017 LU.SDE0B.045 LU.SDE0B.058 Description AOD255-2BQbb AOXPHSRUS1 MC Android UMACbb_2 1*1G/160/3L2.2/5R/...
- Page 189 2BQkk AOD255- EMEA Finland 2BQkk AOD255- EMEA France 2BQkk AOD255- EMEA France 2BQkk AOD255- GCTWN 2BQkk Chapter 3 Country Acer Part No LU.SDE0B.069 LU.SDE0B.078 LU.SDE0B.007 LU.SDE0B.023 LU.SDE0B.034 LU.SDE0B.035 LU.SDE0B.061 LU.SDE0B.077 LU.SDE0B.046 LU.SDE0B.068 LU.SDE0B.071 LU.SDE0B.074 LU.SDE0B.008 LU.SDE0B.031 LU.SDE0B.030 LU.SDE0B.041 LU.SDE0B.001 Description AOD255-2BQkk AOXPHSRBC3 MC Android UMACkk_2 1*1G/160/3L2.2/2R/...
- Page 190 2BQkk AOD255- EMEA Luxembourg 2BQkk AOD255- EMEA Luxembourg 2BQkk AOD255- EMEA Middle East 2BQkk AOD255- EMEA Middle East 2BQkk Country Acer Part No LU.SDE0B.081 LU.SDE0B.083 LU.SDE0B.013 LU.SDE0B.026 LU.SDE0B.012 LU.SDE0B.062 LU.SDE0B.019 LU.SDE0B.059 LU.SDE0B.002 LU.SDE0B.028 LU.SDE0B.065 LU.SDE0B.022 LU.SDE0B.064 LU.SDE0B.009 LU.SDE0B.011 LU.SDE0B.006 LU.SDE0B.024...
- Page 191 AOD255- EMEA Russia 2BQkk AOD255- EMEA Russia 2BQkk AOD255- EMEA Russia 2BQkk AOD255- EMEA Russia 2BQkk Chapter 3 Country Acer Part No LU.SDE0B.038 LU.SDE0B.043 LU.SDE0B.056 LU.SDE0B.063 LU.SDE0B.039 LU.SDE0B.057 LU.SDE0B.048 LU.SDE0B.066 LU.SDE0B.075 LU.SDE0B.051 LU.SDE0B.060 LU.SDE0B.015 LU.SDE0B.032 LU.SDE0B.037 LU.SDE0B.044 LU.SDE0B.052 LU.SDE0B.070 Description AOD255-2BQkk EM AOXPHSTME3 MC Android UMACkk_2 1*1G/160/3L2.2/2R/...
- Page 192 Switzerland 2BQkk AOD255- EMEA Switzerland 2BQkk AOD255- EMEA Switzerland 2BQkk AOD255- EMEA Turkey 2BQkk AOD255- EMEA Turkey 2BQkk Country Acer Part No LU.SDE0B.082 LU.SDE0B.018 LU.SDE0B.020 LU.SDE0B.033 LU.SDE0B.036 LU.SDE0B.040 LU.SDE0B.047 LU.SDE0B.050 LU.SDE0B.014 LU.SDE0B.025 LU.SDE0B.010 LU.SDE0B.076 LU.SDE0B.027 LU.SDE0B.049 LU.SDE0B.067 LU.SDE0B.021 LU.SDE0B.054 Description AOD255-2BQkk AOXPHSTRU1 MC Android UMACkk_2 1*1G/160/6L2.2/2R/...
- Page 193 2BQws AOD255- CHINA Hong Kong 2BQws AOD255- EMEA Russia 2BQws AOD255- CHINA China 2Cbb AOD255- Thailand 2Cbb Chapter 3 Country Acer Part No LU.SDE0B.042 LU.SDE0B.073 LU.SDE0B.029 LU.SDE0B.072 LU.SDE0B.004 LU.SDE0B.005 LU.SDE0B.079 LU.SDE0B.080 LU.SDQ0B.004 LU.SDQ0B.001 LU.SDQ0B.003 LU.SDG0B.001 LU.SDG0B.004 LU.SDG0B.002 LU.SDG0B.003 LU.SDF0C.001 LU.SDF0C.002...
- Page 194 Spain 2Ckk AOD255- Thailand 2Ckk AOD255- Thailand 2Ckk AOD255- CHINA China 2Crr AOD255- Thailand 2Crr AOD255- Thailand 2Crr Country Acer Part No LU.SDF0C.003 LU.SDN0C.001 LU.SDN0C.004 LU.SDN0C.002 LU.SDN0C.003 LU.SDE0C.004 LU.SDE0C.005 LU.SDE0C.006 LU.SDE0C.007 LU.SDE0C.001 LU.SDE0C.009 LU.SDE0C.008 LU.SDE0C.002 LU.SDE0C.003 LU.SDQ0C.001 LU.SDQ0C.002 LU.SDQ0C.003 Description AOD255-2Cbb LINPUS MSTH1 UMACbb_2 1*1G/320/3L2.2/2R/...
- Page 195 2Dkk AOD255- 2Dkk AOD255- Canada 2DQbb AOD255- Canada 2DQbb AOD255- CHINA Hong Kong 2DQbb AOD255- Malaysia 2DQbb Chapter 3 Country Acer Part No LU.SDG0C.001 LU.SDG0C.002 LU.SDG0C.003 LU.SDG0C.004 LU.SDG0C.005 S2.SDF0D.001 S2.SDF0D.002 S2.SDH0D.001 LU.SDN0D.002 S2.SDE0D.001 S2.SDE0D.002 S2.SDE0D.003 S2.SDJ0D.001 LU.SDF0D.004 LU.SDF0D.008 LU.SDF0D.001 LU.SDF0D.010...
- Page 196 Canada 2DQcc AOD255- CHINA Hong Kong 2DQcc AOD255- Malaysia 2DQcc AOD255- EMEA Middle East 2DQcc AOD255- Philippines 2DQcc Country Acer Part No LU.SDF0D.011 LU.SDF0D.012 LU.SDF0D.006 LU.SDF0D.007 LU.SDF0D.002 LU.SDF0D.003 LU.SDF0D.005 LU.SDF0D.009 S2.SDF0D.003 S2.SDF0D.004 LU.SDN0D.005 LU.SDN0D.001 LU.SDN0D.007 LU.SDN0D.008 LU.SDN0D.004 Description AOD255-2DQbb EM SNW7ST32EMSSMY1 MC Android UMACbb_2 1*1G/160/BT/3L2.2/2R/...
- Page 197 Australia/ 2DQkk New Zealand AOD255- Australia/ 2DQkk New Zealand AOD255- Australia/ 2DQkk New Zealand AOD255- EMEA Austria 2DQkk Chapter 3 Country Acer Part No LU.SDN0D.003 LU.SDN0D.006 S2.SDN0D.001 S2.SE10D.001 S2.SE00D.001 LU.SDZ0D.001 S2.SDZ0D.001 S2.SDY0D.001 S2.SDX0D.001 LU.SDE0D.017 LU.SDE0D.018 LU.SDE0D.002 LU.SDE0D.003 LU.SDE0D.008 LU.SDE0D.067 Description AOD255-2DQcc SNW7ST32SSUS1 MC Android UMACcc_2 1*1G/250/6L2.2/2R/...
- Page 198 Cyprus 2DQkk AOD255- EMEA Czech 2DQkk AOD255- EMEA Czech 2DQkk AOD255- EMEA Denmark 2DQkk AOD255- EMEA Denmark 2DQkk Country Acer Part No LU.SDE0D.076 LU.SDE0D.043 LU.SDE0D.044 LU.SDE0D.058 LU.SDE0D.068 LU.SDE0D.086 LU.SDE0D.040 LU.SDE0D.075 LU.SDE0D.090 LU.SDE0D.092 LU.SDE0D.096 LU.SDE0D.041 LU.SDE0D.064 LU.SDE0D.042 LU.SDE0D.099 LU.SDE0D.048 LU.SDE0D.059 Description AOD255-2DQkk SNW7ST32STAT1 MC Android UMACkk_2 1*1G/250/6L2.2/2R/...
- Page 199 AOD255- EMEA Holland 2DQkk AOD255- CHINA Hong Kong 2DQkk AOD255- EMEA Hungary 2DQkk AOD255- EMEA Italy 2DQkk Chapter 3 Country Acer Part No LU.SDE0D.060 LU.SDE0D.077 LU.SDE0D.061 LU.SDE0D.078 LU.SDE0D.062 LU.SDE0D.081 LU.SDE0D.004 LU.SDE0D.046 LU.SDE0D.057 LU.SDE0D.063 LU.SDE0D.071 LU.SDE0D.073 LU.SDE0D.056 LU.SDE0D.079 LU.SDE0D.001 LU.SDE0D.049 LU.SDE0D.066...
- Page 200 AOD255- EMEA Middle East 2DQkk AOD255- EMEA Middle East 2DQkk AOD255- EMEA Middle East 2DQkk AOD255- EMEA Middle East 2DQkk Country Acer Part No LU.SDE0D.069 LU.SDE0D.072 LU.SDE0D.083 LU.SDE0D.088 LU.SDE0D.089 LU.SDE0D.065 LU.SDE0D.084 LU.SDE0D.098 LU.SDE0D.021 LU.SDE0D.023 LU.SDE0D.025 LU.SDE0D.027 LU.SDE0D.028 LU.SDE0D.030 LU.SDE0D.032 Description AOD255-2DQkk SNW7ST32SSIT1 MC Android UMACkk_2 1*1G/250/6L2.2/2R/...
- Page 201 AOD255- EMEA Russia 2DQkk AOD255- EMEA Russia 2DQkk AOD255- EMEA Russia 2DQkk AOD255- EMEA South Africa 2DQkk Chapter 3 Country Acer Part No LU.SDE0D.035 LU.SDE0D.038 LU.SDE0D.050 LU.SDE0D.082 LU.SDE0D.094 LU.SDE0D.095 LU.SDE0D.070 LU.SDE0D.074 LU.SDE0D.055 LU.SDE0D.085 LU.SDE0D.009 LU.SDE0D.010 LU.SDE0D.012 LU.SDE0D.014 LU.SDE0D.015 LU.SDE0D.022 Description...
- Page 202 2DQkk AOD255- EMEA Sweden 2DQkk AOD255- EMEA Sweden 2DQkk AOD255- EMEA Switzerland 2DQkk AOD255- EMEA Switzerland 2DQkk Country Acer Part No LU.SDE0D.024 LU.SDE0D.026 LU.SDE0D.029 LU.SDE0D.031 LU.SDE0D.033 LU.SDE0D.034 LU.SDE0D.036 LU.SDE0D.037 LU.SDE0D.039 LU.SDE0D.051 LU.SDE0D.087 LU.SDE0D.047 LU.SDE0D.052 LU.SDE0D.053 LU.SDE0D.080 Description AOD255-2DQkk EM SNW7ST32EMSTZA5 MC Android UMACkk_2 1*1G/250/6L2.2/2R/...
- Page 203 2DQkk AOD255- 2DQkk AOD255- 2DQkk AOD255- Canada 2DQrr AOD255- EMEA France 2DQrr AOD255- EMEA France 2DQrr Chapter 3 Country Acer Part No LU.SDE0D.019 LU.SDE0D.020 LU.SDE0D.045 LU.SDE0D.054 LU.SDE0D.011 LU.SDE0D.013 LU.SDE0D.016 LU.SDE0D.005 LU.SDE0D.006 LU.SDE0D.007 LU.SDE0D.091 LU.SDE0D.093 LU.SDE0D.097 S2.SDE0D.004 LU.SDQ0D.003 LU.SDQ0D.008 LU.SDQ0D.009 Description...
- Page 204 GCTWN 2DQws AOD255- EMEA Germany 2DQws AOD255- CHINA Hong Kong 2DQws AOD255- Malaysia 2DQws AOD255- EMEA Middle East 2DQws Country Acer Part No LU.SDQ0D.007 LU.SDQ0D.010 LU.SDQ0D.002 LU.SDQ0D.001 LU.SDQ0D.006 LU.SDQ0D.011 LU.SDQ0D.012 LU.SDQ0D.004 LU.SDQ0D.005 S2.SDQ0D.001 LU.SDG0D.006 LU.SDG0D.007 LU.SDG0D.002 LU.SDG0D.001 LU.SDG0D.005 LU.SDG0D.008 Description AOD255-2DQrr SNW7ST32SSTW1 MC Android UMACrr_2 1*1G/160/BT/6L2.2/...
- Page 205 AOD255- CHINA Hong Kong N55DQbb AOD255- CHINA Hong Kong N55DQbb AOD255- CHINA Hong Kong N55DQbb AOD255- Indonesia N55DQbb Chapter 3 Country Acer Part No LU.SDG0D.009 LU.SDG0D.003 LU.SDG0D.004 S2.SDG0D.002 S2.SDG0D.001 S2.SDK0D.001 LU.SDH0C.001 LU.SDP0C.001 LU.SDJ0C.001 LU.SDR0C.001 LU.SDK0C.001 LU.SDH0D.001 LU.SDH0D.006 LU.SDH0D.018 LU.SDH0D.013 Description...
- Page 206 N55DQbb AOD255- CHINA Hong Kong N55DQcc AOD255- CHINA Hong Kong N55DQcc AOD255- CHINA Hong Kong N55DQcc AOD255- Indonesia N55DQcc Country Acer Part No LU.SDH0D.014 LU.SDH0D.016 LU.SDH0D.007 LU.SDH0D.008 LU.SDH0D.009 LU.SDH0D.010 LU.SDH0D.011 LU.SDH0D.012 LU.SDH0D.017 LU.SDH0D.015 LU.SDP0D.001 LU.SDP0D.004 LU.SDP0D.018 LU.SDP0D.015 Description AOD255-N55DQbb EM SNW7ST32EMSSMY1 MC Android UMACbb_3 1*1G/250/BT/6L2.2/5R/...
- Page 207 AOD255- N55DQcc AOD255- EMEA Switzerland N55DQGkk AOD255- EMEA Albania/ N55DQkk Macedonia AOD255- EMEA Albania/ N55DQkk Macedonia Chapter 3 Country Acer Part No LU.SDP0D.017 LU.SDP0D.005 LU.SDP0D.006 LU.SDP0D.007 LU.SDP0D.008 LU.SDP0D.009 LU.SDP0D.010 LU.SDP0D.011 LU.SDP0D.012 LU.SDP0D.013 LU.SDP0D.014 LU.SDP0D.016 LU.SDU0D.001 LU.SDJ0D.080 LU.SDJ0D.081 Description AOD255-N55DQcc EM SNW7ST32EMSSPH1 MC Android UMACcc_3 1*1G/250/BT/6L2.2/2R/...
- Page 208 Czech N55DQkk AOD255- EMEA Denmark N55DQkk AOD255- EMEA Denmark N55DQkk AOD255- EMEA Denmark N55DQkk AOD255- EMEA Denmark N55DQkk Country Acer Part No LU.SDJ0D.041 LU.SDJ0D.046 LU.SDJ0D.017 LU.SDJ0D.018 LU.SDJ0D.030 LU.SDJ0D.042 LU.SDJ0D.057 LU.SDJ0D.014 LU.SDJ0D.058 LU.SDJ0D.088 LU.SDJ0D.015 LU.SDJ0D.038 LU.SDJ0D.016 LU.SDJ0D.022 LU.SDJ0D.033 LU.SDJ0D.037 LU.SDJ0D.047 Description AOD255-N55DQkk SNW7ST32SSAT1 MC Android UMACkk_3 1*1G/250/6L2.2/...
- Page 209 AOD255- CHINA Hong Kong N55DQkk AOD255- CHINA Hong Kong N55DQkk AOD255- EMEA Hungary N55DQkk AOD255- Indonesia N55DQkk Chapter 3 Country Acer Part No LU.SDJ0D.034 LU.SDJ0D.048 LU.SDJ0D.035 LU.SDJ0D.052 LU.SDJ0D.020 LU.SDJ0D.032 LU.SDJ0D.036 LU.SDJ0D.050 LU.SDJ0D.064 LU.SDJ0D.031 LU.SDJ0D.049 LU.SDJ0D.001 LU.SDJ0D.003 LU.SDJ0D.090 LU.SDJ0D.023 LU.SDJ0D.013 Description AOD255-N55DQkk SNW7ST32SSFI2 MC Android UMACkk_3 1*1G/250/6L2.2/...
- Page 210 AOD255- EMEA Middle East N55DQkk AOD255- EMEA Middle East N55DQkk AOD255- EMEA Middle East N55DQkk AOD255- EMEA Middle East N55DQkk Country Acer Part No LU.SDJ0D.040 LU.SDJ0D.043 LU.SDJ0D.044 LU.SDJ0D.054 LU.SDJ0D.061 LU.SDJ0D.062 LU.SDJ0D.039 LU.SDJ0D.055 LU.SDJ0D.012 LU.SDJ0D.066 LU.SDJ0D.068 LU.SDJ0D.070 LU.SDJ0D.071 LU.SDJ0D.072 LU.SDJ0D.074 Description AOD255-N55DQkk SNW7ST32SSIT1 MC Android UMACkk_3 1*1G/250/6L2.2/...
- Page 211 N55DQkk AOD255- Singapore N55DQkk AOD255- Singapore N55DQkk AOD255- Singapore N55DQkk AOD255- Singapore N55DQkk AOD255- Singapore N55DQkk Chapter 3 Country Acer Part No LU.SDJ0D.076 LU.SDJ0D.082 LU.SDJ0D.084 LU.SDJ0D.024 LU.SDJ0D.053 LU.SDJ0D.087 LU.SDJ0D.045 LU.SDJ0D.059 LU.SDJ0D.029 LU.SDJ0D.056 LU.SDJ0D.004 LU.SDJ0D.005 LU.SDJ0D.006 LU.SDJ0D.007 LU.SDJ0D.008 Description AOD255-N55DQkk EM SNW7ST32EMSSME4 MC Android UMACkk_3 1*1G/250/6L2.2/2R/...
- Page 212 AOD255- EMEA South Africa N55DQkk AOD255- EMEA South Africa N55DQkk AOD255- EMEA South Africa N55DQkk AOD255- EMEA Spain N55DQkk Country Acer Part No LU.SDJ0D.009 LU.SDJ0D.010 LU.SDJ0D.011 LU.SDJ0D.067 LU.SDJ0D.069 LU.SDJ0D.073 LU.SDJ0D.075 LU.SDJ0D.077 LU.SDJ0D.078 LU.SDJ0D.079 LU.SDJ0D.083 LU.SDJ0D.085 LU.SDJ0D.086 LU.SDJ0D.025 Description AOD255-N55DQkk SNW7ST32SSSG1 MC Android UMACkk_3 1*1G/160/3L2.2/...
- Page 213 AOD255- CHINA Hong Kong N55DQrr AOD255- CHINA Hong Kong N55DQrr AOD255- CHINA Hong Kong N55DQrr AOD255- Indonesia N55DQrr Chapter 3 Country Acer Part No LU.SDJ0D.060 LU.SDJ0D.021 LU.SDJ0D.026 LU.SDJ0D.027 LU.SDJ0D.051 LU.SDJ0D.063 LU.SDJ0D.065 LU.SDJ0D.019 LU.SDJ0D.028 LU.SDJ0D.089 LU.SDR0D.018 LU.SDR0D.001 LU.SDR0D.004 LU.SDR0D.020 LU.SDR0D.016 Description AOD255-N55DQkk SNW7ST32SSES1 MC Android UMACkk_3 1*1G/250/6L2.2/...
- Page 214 AOD255- Singapore N55DQrr AOD255- Singapore N55DQrr AOD255- N55DQrr AOD255- CHINA Hong Kong N55DQws AOD255- CHINA Hong Kong N55DQws Country Acer Part No LU.SDR0D.015 LU.SDR0D.017 LU.SDR0D.005 LU.SDR0D.006 LU.SDR0D.007 LU.SDR0D.008 LU.SDR0D.009 LU.SDR0D.010 LU.SDR0D.011 LU.SDR0D.012 LU.SDR0D.013 LU.SDR0D.014 LU.SDR0D.019 LU.SDK0D.001 LU.SDK0D.004 Description AOD255-N55DQrr EM SNW7ST32EMSSMY1 MC Android UMACrr_3 1*1G/250/BT/6L2.2/5R/...
- Page 215 AOD255- Singapore N55DQws AOD255- Singapore N55DQws AOD255- Singapore N55DQws AOD255- Singapore N55DQws AOD255- Singapore N55DQws Chapter 3 Country Acer Part No LU.SDK0D.018 LU.SDK0D.012 LU.SDK0D.013 LU.SDK0D.017 LU.SDK0D.005 LU.SDK0D.006 LU.SDK0D.007 LU.SDK0D.008 LU.SDK0D.009 LU.SDK0D.010 LU.SDK0D.011 LU.SDK0D.014 LU.SDK0D.015 LU.SDK0D.016 Description AOD255-N55DQws SNW7ST32SSHK2 MC Android UMACws_3 1*1G/250/BT/ 6L2.2/2R/...
- Page 216 AOD255- GCTWN 2BQcc AOD255- GCTWN 2BQcc AOD255- Hong Kong 2BQcc AOD255- Russia 2BQcc AOD255- 2BQcc AOD255- Australia/ 2BQkk Zealand Acer Part No BOM Name S2.SDH0D.002 AOD255_UMACbb_3 S2.SDP0D.001 AOD255_UMACcc_3 S2.SDW0D.001 AOD255_UMAGCbb_3 S2.SDV0D.001 AOD255_UMAGCcc_3 S2.SDU0D.001 AOD255_UMAGCkk_3 S2.SDT0D.001 AOD255_UMAGCrr_3 S2.SDS0D.001 AOD255_UMAGCws_3 S2.SDS0D.002 AOD255_UMAGCws_3 S2.SDR0D.001...
- Page 217 Finland 2BQkk AOD255- France 2BQkk AOD255- France 2BQkk AOD255- GCTWN 2BQkk AOD255- GCTWN 2BQkk AOD255- GCTWN 2BQkk Chapter 3 Acer Part No BOM Name LU.SDE0B.053 AOD255_UMACkk_2 LU.SDE0B.055 AOD255_UMACkk_2 LU.SDE0B.016 AOD255_UMACkk_2 LU.SDE0B.017 AOD255_UMACkk_2 LU.SDE0B.045 AOD255_UMACkk_2 LU.SDE0B.058 AOD255_UMACkk_2 LU.SDE0B.069 AOD255_UMACkk_2 LU.SDE0B.078 AOD255_UMACkk_2 LU.SDE0B.007...
- Page 218 AOD255- Norway 2BQkk AOD255- Norway 2BQkk AOD255- Poland 2BQkk AOD255- Poland 2BQkk AOD255- Poland 2BQkk AOD255- Portugal 2BQkk Acer Part No BOM Name LU.SDE0B.013 AOD255_UMACkk_2 LU.SDE0B.026 AOD255_UMACkk_2 LU.SDE0B.012 AOD255_UMACkk_2 LU.SDE0B.062 AOD255_UMACkk_2 LU.SDE0B.019 AOD255_UMACkk_2 LU.SDE0B.059 AOD255_UMACkk_2 LU.SDE0B.002 AOD255_UMACkk_2 LU.SDE0B.028 AOD255_UMACkk_2 LU.SDE0B.065 AOD255_UMACkk_2 LU.SDE0B.022...
- Page 219 AOD255- Switzerland 2BQkk AOD255- Switzerland 2BQkk AOD255- Switzerland 2BQkk AOD255- Turkey 2BQkk AOD255- Turkey 2BQkk AOD255- 2BQkk Chapter 3 Acer Part No BOM Name LU.SDE0B.060 AOD255_UMACkk_2 LU.SDE0B.015 AOD255_UMACkk_2 LU.SDE0B.032 AOD255_UMACkk_2 LU.SDE0B.037 AOD255_UMACkk_2 LU.SDE0B.044 AOD255_UMACkk_2 LU.SDE0B.052 AOD255_UMACkk_2 LU.SDE0B.070 AOD255_UMACkk_2 LU.SDE0B.082 AOD255_UMACkk_2 LU.SDE0B.018...
- Page 220 AOD255- Thailand 2Ccc AOD255- ACLA- 2Ckk Spanish AOD255- ACLA- 2Ckk Spanish AOD255- ACLA- 2Ckk Spanish AOD255- Chile 2Ckk Acer Part No BOM Name LU.SDE0B.073 AOD255_UMACkk_2 LU.SDE0B.029 AOD255_UMACkk_2 LU.SDE0B.072 AOD255_UMACkk_2 LU.SDE0B.004 AOD255_UMACkk_2 LU.SDE0B.005 AOD255_UMACkk_2 LU.SDE0B.079 AOD255_UMACkk_2 LU.SDE0B.080 AOD255_UMACkk_2 LU.SDQ0B.004 AOD255_UMACrr_2 LU.SDQ0B.001 AOD255_UMACrr_2 LU.SDQ0B.003...
- Page 221 AOD255- 2Dkk AOD255- 2Dkk AOD255- Canada 2DQbb AOD255- Canada 2DQbb AOD255- Hong Kong 2DQbb AOD255- Malaysia 2DQbb Chapter 3 Acer Part No BOM Name LU.SDE0C.001 AOD255_UMACkk_2 LU.SDE0C.009 AOD255_UMACkk_2 LU.SDE0C.008 AOD255_UMACkk_2 LU.SDE0C.002 AOD255_UMACkk_2 LU.SDE0C.003 AOD255_UMACkk_2 LU.SDQ0C.001 AOD255_UMACrr_2 LU.SDQ0C.002 AOD255_UMACrr_2 LU.SDQ0C.003 AOD255_UMACrr_2 LU.SDG0C.001...
- Page 222 2DQcc AOD255- 2DQGbb AOD255- 2DQGcc AOD255- Switzerland 2DQGkk AOD255- 2DQGkk AOD255- 2DQGrr AOD255- 2DQGws AOD255- Albania/ 2DQkk Macedonia Acer Part No BOM Name LU.SDF0D.011 AOD255_UMACbb_2 LU.SDF0D.012 AOD255_UMACbb_2 LU.SDF0D.006 AOD255_UMACbb_2 LU.SDF0D.007 AOD255_UMACbb_2 LU.SDF0D.002 AOD255_UMACbb_2 LU.SDF0D.003 AOD255_UMACbb_2 LU.SDF0D.005 AOD255_UMACbb_2 LU.SDF0D.009 AOD255_UMACbb_2 S2.SDF0D.003 AOD255_UMACbb_2 S2.SDF0D.004...
- Page 223 Cyprus 2DQkk AOD255- Czech 2DQkk AOD255- Czech 2DQkk AOD255- Denmark 2DQkk AOD255- Denmark 2DQkk AOD255- Denmark 2DQkk Chapter 3 Acer Part No BOM Name LU.SDE0D.018 AOD255_UMACkk_2 LU.SDE0D.002 AOD255_UMACkk_2 LU.SDE0D.003 AOD255_UMACkk_2 LU.SDE0D.008 AOD255_UMACkk_2 LU.SDE0D.067 AOD255_UMACkk_2 LU.SDE0D.076 AOD255_UMACkk_2 LU.SDE0D.043 AOD255_UMACkk_2 LU.SDE0D.044 AOD255_UMACkk_2 LU.SDE0D.058...
- Page 224 AOD255- Italy 2DQkk AOD255- Italy 2DQkk AOD255- Luxembourg 2DQkk AOD255- Luxembourg 2DQkk AOD255- Malaysia 2DQkk AOD255- Middle East 2DQkk Acer Part No BOM Name LU.SDE0D.077 AOD255_UMACkk_2 LU.SDE0D.061 AOD255_UMACkk_2 LU.SDE0D.078 AOD255_UMACkk_2 LU.SDE0D.062 AOD255_UMACkk_2 LU.SDE0D.081 AOD255_UMACkk_2 LU.SDE0D.004 AOD255_UMACkk_2 LU.SDE0D.046 AOD255_UMACkk_2 LU.SDE0D.057 AOD255_UMACkk_2 LU.SDE0D.063...
- Page 225 AOD255- Russia 2DQkk AOD255- South Africa 2DQkk AOD255- South Africa 2DQkk AOD255- South Africa 2DQkk AOD255- South Africa 2DQkk Chapter 3 Acer Part No BOM Name LU.SDE0D.023 AOD255_UMACkk_2 LU.SDE0D.025 AOD255_UMACkk_2 LU.SDE0D.027 AOD255_UMACkk_2 LU.SDE0D.028 AOD255_UMACkk_2 LU.SDE0D.030 AOD255_UMACkk_2 LU.SDE0D.032 AOD255_UMACkk_2 LU.SDE0D.035 AOD255_UMACkk_2 LU.SDE0D.038...
- Page 226 AOD255- Ukraine 2DQkk AOD255- Ukraine 2DQkk AOD255- 2DQkk AOD255- 2DQkk AOD255- 2DQkk AOD255- 2DQkk AOD255- 2DQkk AOD255- 2DQkk Acer Part No BOM Name LU.SDE0D.031 AOD255_UMACkk_2 LU.SDE0D.033 AOD255_UMACkk_2 LU.SDE0D.034 AOD255_UMACkk_2 LU.SDE0D.036 AOD255_UMACkk_2 LU.SDE0D.037 AOD255_UMACkk_2 LU.SDE0D.039 AOD255_UMACkk_2 LU.SDE0D.051 AOD255_UMACkk_2 LU.SDE0D.087 AOD255_UMACkk_2 LU.SDE0D.047 AOD255_UMACkk_2 LU.SDE0D.052...
- Page 227 AOD255- Middle East 2DQws AOD255- Middle East 2DQws AOD255- Philippines 2DQws AOD255- Philippines 2DQws AOD255- 2DQws AOD255- 2Dws Chapter 3 Acer Part No BOM Name S2.SDE0D.004 AOD255_UMACkk_2 LU.SDQ0D.003 AOD255_UMACrr_2 LU.SDQ0D.008 AOD255_UMACrr_2 LU.SDQ0D.009 AOD255_UMACrr_2 LU.SDQ0D.007 AOD255_UMACrr_2 LU.SDQ0D.010 AOD255_UMACrr_2 LU.SDQ0D.002 AOD255_UMACrr_2 LU.SDQ0D.001 AOD255_UMACrr_2 LU.SDQ0D.006...
- Page 228 AOD255- N55DQbb AOD255- Hong Kong N55DQcc AOD255- Hong Kong N55DQcc AOD255- Hong Kong N55DQcc AOD255- Indonesia N55DQcc AOD255- Philippines N55DQcc Acer Part No BOM Name S2.SDK0D.001 AOD255_UMACws_3 LU.SDH0C.001 AOD255_UMACbb_3 LU.SDP0C.001 AOD255_UMACcc_3 LU.SDJ0C.001 AOD255_UMACkk_3 LU.SDR0C.001 AOD255_UMACrr_3 LU.SDK0C.001 AOD255_UMACws_3 LU.SDH0D.001 AOD255_UMACbb_3 LU.SDH0D.006 AOD255_UMACbb_3 LU.SDH0D.018...
- Page 229 Baltic N55DQkk AOD255- Baltic N55DQkk AOD255- Belgium N55DQkk AOD255- Belgium N55DQkk AOD255- Canada N55DQkk AOD255- Cyprus N55DQkk Chapter 3 Acer Part No BOM Name LU.SDP0D.005 AOD255_UMACcc_3 LU.SDP0D.006 AOD255_UMACcc_3 LU.SDP0D.007 AOD255_UMACcc_3 LU.SDP0D.008 AOD255_UMACcc_3 LU.SDP0D.009 AOD255_UMACcc_3 LU.SDP0D.010 AOD255_UMACcc_3 LU.SDP0D.011 AOD255_UMACcc_3 LU.SDP0D.012 AOD255_UMACcc_3 LU.SDP0D.013...
- Page 230 AOD255- Hong Kong N55DQkk AOD255- Hungary N55DQkk AOD255- Indonesia N55DQkk AOD255- Italy N55DQkk AOD255- Italy N55DQkk AOD255- Italy N55DQkk Acer Part No BOM Name LU.SDJ0D.038 AOD255_UMACkk_3 LU.SDJ0D.016 AOD255_UMACkk_3 LU.SDJ0D.022 AOD255_UMACkk_3 LU.SDJ0D.033 AOD255_UMACkk_3 LU.SDJ0D.037 AOD255_UMACkk_3 LU.SDJ0D.047 AOD255_UMACkk_3 LU.SDJ0D.034 AOD255_UMACkk_3 LU.SDJ0D.048 AOD255_UMACkk_3 LU.SDJ0D.035...
- Page 231 Poland N55DQkk AOD255- Portugal N55DQkk AOD255- Portugal N55DQkk AOD255- Singapore N55DQkk AOD255- Singapore N55DQkk AOD255- Singapore N55DQkk Chapter 3 Acer Part No BOM Name LU.SDJ0D.054 AOD255_UMACkk_3 LU.SDJ0D.061 AOD255_UMACkk_3 LU.SDJ0D.062 AOD255_UMACkk_3 LU.SDJ0D.039 AOD255_UMACkk_3 LU.SDJ0D.055 AOD255_UMACkk_3 LU.SDJ0D.012 AOD255_UMACkk_3 LU.SDJ0D.066 AOD255_UMACkk_3 LU.SDJ0D.068 AOD255_UMACkk_3 LU.SDJ0D.070...
- Page 232 Sweden N55DQkk AOD255- Switzerland N55DQkk AOD255- Switzerland N55DQkk AOD255- Turkey N55DQkk AOD255- Turkey N55DQkk AOD255- N55DQkk AOD255- N55DQkk Acer Part No BOM Name LU.SDJ0D.007 AOD255_UMACkk_3 LU.SDJ0D.008 AOD255_UMACkk_3 LU.SDJ0D.009 AOD255_UMACkk_3 LU.SDJ0D.010 AOD255_UMACkk_3 LU.SDJ0D.011 AOD255_UMACkk_3 LU.SDJ0D.067 AOD255_UMACkk_3 LU.SDJ0D.069 AOD255_UMACkk_3 LU.SDJ0D.073 AOD255_UMACkk_3 LU.SDJ0D.075 AOD255_UMACkk_3 LU.SDJ0D.077...
- Page 233 N55DQws AOD255- Hong Kong N55DQws AOD255- Hong Kong N55DQws AOD255- Indonesia N55DQws AOD255- Malaysia N55DQws AOD255- Philippines N55DQws Chapter 3 Acer Part No BOM Name LU.SDJ0D.089 AOD255_UMACkk_3 LU.SDR0D.018 AOD255_UMACrr_3 LU.SDR0D.001 AOD255_UMACrr_3 LU.SDR0D.004 AOD255_UMACrr_3 LU.SDR0D.020 AOD255_UMACrr_3 LU.SDR0D.016 AOD255_UMACrr_3 LU.SDR0D.015 AOD255_UMACrr_3 LU.SDR0D.017 AOD255_UMACrr_3 LU.SDR0D.005...
- Page 234 13DQGrr AOD255- 13DQGws AOD255- 13DQGws AOD255- 13DQrr AOD255- 13DQws AOD255- GCTWN 2BQbb AOD255- GCTWN 2BQbb AOD255- Hong Kong 2BQbb Acer Part No BOM Name LU.SDK0D.005 AOD255_UMACws_3 LU.SDK0D.006 AOD255_UMACws_3 LU.SDK0D.007 AOD255_UMACws_3 LU.SDK0D.008 AOD255_UMACws_3 LU.SDK0D.009 AOD255_UMACws_3 LU.SDK0D.010 AOD255_UMACws_3 LU.SDK0D.011 AOD255_UMACws_3 LU.SDK0D.014 AOD255_UMACws_3 LU.SDK0D.015...
- Page 235 Baltic 2BQkk AOD255- Belgium 2BQkk AOD255- Belgium 2BQkk AOD255- Cyprus 2BQkk AOD255- Cyprus 2BQkk AOD255- Czech 2BQkk Chapter 3 Acer Part No Memory 1 LU.SDF0B.003 SO1GBII6 LU.SDF0B.004 SO1GBII6 LU.SDF0B.005 SO1GBII6 LU.SDF0B.006 SO1GBII6 S2.SDF0B.001 SO1GBII6 LU.SDN0B.001 SO1GBII6 LU.SDN0B.004 SO1GBII6 LU.SDN0B.002 SO1GBII6 LU.SDN0B.003...
- Page 236 AOD255- Hungary 2BQkk AOD255- Hungary 2BQkk AOD255- Italy 2BQkk AOD255- Italy 2BQkk AOD255- Luxembourg 2BQkk AOD255- Luxembourg 2BQkk Acer Part No Memory 1 LU.SDE0B.077 SO1GBII6 LU.SDE0B.046 SO1GBII6 LU.SDE0B.068 SO1GBII6 LU.SDE0B.071 SO1GBII6 LU.SDE0B.074 SO1GBII6 LU.SDE0B.008 SO1GBII6 LU.SDE0B.031 SO1GBII6 LU.SDE0B.030 SO1GBII6 LU.SDE0B.041 SO1GBII6 LU.SDE0B.001...
- Page 237 South Africa 2BQkk AOD255- South Africa 2BQkk AOD255- South Africa 2BQkk AOD255- South Africa 2BQkk AOD255- South Africa 2BQkk Chapter 3 Acer Part No Memory 1 LU.SDE0B.006 SO1GBII6 LU.SDE0B.024 SO1GBII6 LU.SDE0B.038 SO1GBII6 LU.SDE0B.043 SO1GBII6 LU.SDE0B.056 SO1GBII6 LU.SDE0B.063 SO1GBII6 LU.SDE0B.039 SO1GBII6 LU.SDE0B.057...
- Page 238 GCTWN 2BQrr AOD255- Hong Kong 2BQrr AOD255- Russia 2BQrr AOD255- GCTWN 2BQws AOD255- GCTWN 2BQws AOD255- Hong Kong 2BQws Acer Part No Memory 1 LU.SDE0B.047 SO1GBII6 LU.SDE0B.050 SO1GBII6 LU.SDE0B.014 SO1GBII6 LU.SDE0B.025 SO1GBII6 LU.SDE0B.010 SO1GBII6 LU.SDE0B.076 SO1GBII6 LU.SDE0B.027 SO1GBII6 LU.SDE0B.049 SO1GBII6 LU.SDE0B.067...
- Page 239 AOD255- China 2Cws AOD255- Thailand 2Cws AOD255- Thailand 2Cws AOD255- Vietnam 2Cws AOD255- Vietnam 2Cws AOD255- 2Dbb Chapter 3 Acer Part No Memory 1 LU.SDG0B.003 SO1GBII6 LU.SDF0C.001 SO1GBII6 LU.SDF0C.002 SO1GBII6 LU.SDF0C.003 SO1GBII6 LU.SDN0C.001 SO1GBII6 LU.SDN0C.004 SO1GBII6 LU.SDN0C.002 SO1GBII6 LU.SDN0C.003 SO1GBII6 LU.SDE0C.004...
- Page 240 2DQbb AOD255- 2DQbb AOD255- 2DQbb AOD255- Canada 2DQcc AOD255- Hong Kong 2DQcc AOD255- Malaysia 2DQcc AOD255- Middle East 2DQcc Acer Part No Memory 1 S2.SDF0D.002 SO1GBII6 S2.SDH0D.001 SO1GBIII10 LU.SDN0D.002 SO1GBII6 S2.SDE0D.001 SO1GBII6 S2.SDE0D.002 SO1GBII6 S2.SDE0D.003 SO1GBII6 S2.SDJ0D.001 SO1GBIII10 LU.SDF0D.004 SO1GBII6 LU.SDF0D.008...
- Page 241 Baltic 2DQkk AOD255- Baltic 2DQkk AOD255- Baltic 2DQkk AOD255- Baltic 2DQkk AOD255- Baltic 2DQkk AOD255- Belgium 2DQkk Chapter 3 Acer Part No Memory 1 LU.SDN0D.004 SO1GBII6 LU.SDN0D.003 SO1GBII6 LU.SDN0D.006 SO1GBII6 S2.SDN0D.001 SO1GBII6 S2.SE10D.001 SO1GBII6 S2.SE00D.001 SO1GBII6 LU.SDZ0D.001 SO1GBII6 S2.SDZ0D.001 SO1GBII6 S2.SDY0D.001...
- Page 242 AOD255- Germany 2DQkk AOD255- Germany 2DQkk AOD255- Greece 2DQkk AOD255- Holland 2DQkk AOD255- Holland 2DQkk AOD255- Hong Kong 2DQkk Acer Part No Memory 1 LU.SDE0D.075 SO1GBII6 LU.SDE0D.090 SO1GBII6 LU.SDE0D.092 SO1GBII6 LU.SDE0D.096 SO1GBII6 LU.SDE0D.041 SO1GBII6 LU.SDE0D.064 SO1GBII6 LU.SDE0D.042 SO1GBII6 LU.SDE0D.099 SO1GBII6 LU.SDE0D.048...
- Page 243 Norway 2DQkk AOD255- Norway 2DQkk AOD255- Philippines 2DQkk AOD255- Philippines 2DQkk AOD255- Poland 2DQkk AOD255- Poland 2DQkk Chapter 3 Acer Part No Memory 1 LU.SDE0D.049 SO1GBII6 LU.SDE0D.066 SO1GBII6 LU.SDE0D.069 SO1GBII6 LU.SDE0D.072 SO1GBII6 LU.SDE0D.083 SO1GBII6 LU.SDE0D.088 SO1GBII6 LU.SDE0D.089 SO1GBII6 LU.SDE0D.065 SO1GBII6 LU.SDE0D.084...
- Page 244 AOD255- Sweden 2DQkk AOD255- Sweden 2DQkk AOD255- Switzerland 2DQkk AOD255- Switzerland 2DQkk AOD255- Turkey 2DQkk AOD255- Turkey 2DQkk Acer Part No Memory 1 LU.SDE0D.055 SO1GBII6 LU.SDE0D.085 SO1GBII6 LU.SDE0D.009 SO1GBII6 LU.SDE0D.010 SO1GBII6 LU.SDE0D.012 SO1GBII6 LU.SDE0D.014 SO1GBII6 LU.SDE0D.015 SO1GBII6 LU.SDE0D.022 SO1GBII6 LU.SDE0D.024 SO1GBII6 LU.SDE0D.026...
- Page 245 2DQrr AOD255- Malaysia 2DQrr AOD255- Middle East 2DQrr AOD255- Middle East 2DQrr AOD255- 2DQrr AOD255- 2DQrr AOD255- 2DQrr Chapter 3 Acer Part No Memory 1 LU.SDE0D.045 SO1GBII6 LU.SDE0D.054 SO1GBII6 LU.SDE0D.011 SO1GBII6 LU.SDE0D.013 SO1GBII6 LU.SDE0D.016 SO1GBII6 LU.SDE0D.005 SO1GBII6 LU.SDE0D.006 SO1GBII6 LU.SDE0D.007 SO1GBII6 LU.SDE0D.091...
- Page 246 AOD255- Hong Kong N55DQbb AOD255- Indonesia N55DQbb AOD255- Malaysia N55DQbb AOD255- Philippines N55DQbb AOD255- Singapore N55DQbb AOD255- Singapore N55DQbb Acer Part No Memory 1 LU.SDG0D.006 SO1GBII6 LU.SDG0D.007 SO1GBII6 LU.SDG0D.002 SO1GBII6 LU.SDG0D.001 SO1GBII6 LU.SDG0D.005 SO1GBII6 LU.SDG0D.008 SO1GBII6 LU.SDG0D.009 SO1GBII6 LU.SDG0D.003 SO1GBII6 LU.SDG0D.004...
- Page 247 N55DQcc AOD255- Singapore N55DQcc AOD255- N55DQcc AOD255- Switzerland N55DQGkk AOD255- Albania/ N55DQkk Macedonia AOD255- Albania/ N55DQkk Macedonia Chapter 3 Acer Part No Memory 1 LU.SDH0D.009 SO1GBIII10 LU.SDH0D.010 SO1GBIII10 LU.SDH0D.011 SO1GBIII10 LU.SDH0D.012 SO1GBIII10 LU.SDH0D.017 SO1GBIII10 LU.SDH0D.015 SO1GBIII10 LU.SDP0D.001 SO1GBIII10 LU.SDP0D.004 SO1GBIII10 LU.SDP0D.018...
- Page 248 AOD255- France N55DQkk AOD255- France N55DQkk AOD255- Germany N55DQkk AOD255- Germany N55DQkk AOD255- Germany N55DQkk AOD255- Germany N55DQkk Acer Part No Memory 1 LU.SDJ0D.041 SO1GBIII10 LU.SDJ0D.046 SO1GBIII10 LU.SDJ0D.017 SO1GBIII10 LU.SDJ0D.018 SO1GBIII10 LU.SDJ0D.030 SO1GBIII10 LU.SDJ0D.042 SO1GBIII10 LU.SDJ0D.057 SO1GBIII10 LU.SDJ0D.014 SO1GBIII10 LU.SDJ0D.058 SO1GBIII10 LU.SDJ0D.088...
- Page 249 Middle East N55DQkk AOD255- Middle East N55DQkk AOD255- Middle East N55DQkk AOD255- Middle East N55DQkk AOD255- Middle East N55DQkk Chapter 3 Acer Part No Memory 1 LU.SDJ0D.064 SO1GBIII10 LU.SDJ0D.031 SO1GBIII10 LU.SDJ0D.049 SO1GBIII10 LU.SDJ0D.001 SO1GBIII10 LU.SDJ0D.003 SO1GBIII10 LU.SDJ0D.090 SO1GBIII10 LU.SDJ0D.023 SO1GBIII10 LU.SDJ0D.013...
- Page 250 N55DQkk AOD255- South Africa N55DQkk AOD255- South Africa N55DQkk AOD255- South Africa N55DQkk AOD255- South Africa N55DQkk AOD255- South Africa N55DQkk Acer Part No Memory 1 LU.SDJ0D.084 SO1GBIII10 LU.SDJ0D.024 SO1GBIII10 LU.SDJ0D.053 SO1GBIII10 LU.SDJ0D.087 SO1GBIII10 LU.SDJ0D.045 SO1GBIII10 LU.SDJ0D.059 SO1GBIII10 LU.SDJ0D.029 SO1GBIII10 LU.SDJ0D.056...
- Page 251 Singapore N55DQrr AOD255- Singapore N55DQrr AOD255- Singapore N55DQrr AOD255- Singapore N55DQrr AOD255- Singapore N55DQrr AOD255- Singapore N55DQrr Chapter 3 Acer Part No Memory 1 LU.SDJ0D.086 SO1GBIII10 LU.SDJ0D.025 SO1GBIII10 LU.SDJ0D.060 SO1GBIII10 LU.SDJ0D.021 SO1GBIII10 LU.SDJ0D.026 SO1GBIII10 LU.SDJ0D.027 SO1GBIII10 LU.SDJ0D.051 SO1GBIII10 LU.SDJ0D.063 SO1GBIII10 LU.SDJ0D.065...
- Page 252 N55DQws AOD255- Singapore N55DQws AOD255- Singapore N55DQws AOD255- Singapore N55DQws AOD255- Singapore N55DQws Model AOD255-13DQbb AOD255-13DQcc AOD255-13DQGbb AOD255-13DQGcc Acer Part No Memory 1 LU.SDR0D.011 SO1GBIII10 LU.SDR0D.012 SO1GBIII10 LU.SDR0D.013 SO1GBIII10 LU.SDR0D.014 SO1GBIII10 LU.SDR0D.019 SO1GBIII10 LU.SDK0D.001 SO1GBIII10 LU.SDK0D.004 SO1GBIII10 LU.SDK0D.018 SO1GBIII10 LU.SDK0D.012 SO1GBIII10 LU.SDK0D.013...
- Page 253 AOD255-2BQkk Denmark AOD255-2BQkk Denmark AOD255-2BQkk Denmark AOD255-2BQkk Denmark AOD255-2BQkk Finland AOD255-2BQkk Finland AOD255-2BQkk France AOD255-2BQkk France Chapter 3 Country Acer Part No S2.SDU0D.001 S2.SDT0D.001 S2.SDS0D.001 S2.SDS0D.002 S2.SDR0D.001 S2.SDK0D.002 LU.SDF0B.001 LU.SDF0B.007 LU.SDF0B.002 LU.SDF0B.003 LU.SDF0B.004 LU.SDF0B.005 LU.SDF0B.006 S2.SDF0B.001 LU.SDN0B.001 LU.SDN0B.004 LU.SDN0B.002 LU.SDN0B.003 S2.SDN0B.001...
- Page 254 AOD255-2BQkk South Africa AOD255-2BQkk South Africa AOD255-2BQkk South Africa AOD255-2BQkk South Africa AOD255-2BQkk South Africa AOD255-2BQkk South Africa AOD255-2BQkk South Africa Country Acer Part No LU.SDE0B.001 LU.SDE0B.081 LU.SDE0B.083 LU.SDE0B.013 LU.SDE0B.026 LU.SDE0B.012 LU.SDE0B.062 LU.SDE0B.019 LU.SDE0B.059 LU.SDE0B.002 LU.SDE0B.028 LU.SDE0B.065 LU.SDE0B.022 LU.SDE0B.064 LU.SDE0B.009 LU.SDE0B.011...
- Page 255 Chile AOD255-2Ckk China AOD255-2Ckk Slovenia/ Croatia AOD255-2Ckk Spain AOD255-2Ckk Thailand AOD255-2Ckk Thailand AOD255-2Crr China AOD255-2Crr Thailand Chapter 3 Country Acer Part No LU.SDE0B.014 LU.SDE0B.025 LU.SDE0B.010 LU.SDE0B.076 LU.SDE0B.027 LU.SDE0B.049 LU.SDE0B.067 LU.SDE0B.021 LU.SDE0B.054 LU.SDE0B.042 LU.SDE0B.073 LU.SDE0B.029 LU.SDE0B.072 LU.SDE0B.004 LU.SDE0B.005 LU.SDE0B.079 LU.SDE0B.080 LU.SDQ0B.004 LU.SDQ0B.001...
- Page 256 Hong Kong AOD255-2DQcc Malaysia AOD255-2DQcc Middle East AOD255-2DQcc Philippines AOD255-2DQcc AOD255-2DQcc AOD255-2DQcc AOD255-2DQGbb AOD255-2DQGcc AOD255-2DQGkk Switzerland AOD255-2DQGkk AOD255-2DQGrr AOD255-2DQGws Country Acer Part No LU.SDQ0C.003 LU.SDG0C.001 LU.SDG0C.002 LU.SDG0C.003 LU.SDG0C.004 LU.SDG0C.005 S2.SDF0D.001 S2.SDF0D.002 S2.SDH0D.001 LU.SDN0D.002 S2.SDE0D.001 S2.SDE0D.002 S2.SDE0D.003 S2.SDJ0D.001 LU.SDF0D.004 LU.SDF0D.008 LU.SDF0D.001 LU.SDF0D.010...
- Page 257 AOD255-2DQkk Germany AOD255-2DQkk Germany AOD255-2DQkk Germany AOD255-2DQkk Greece AOD255-2DQkk Holland AOD255-2DQkk Holland AOD255-2DQkk Hong Kong AOD255-2DQkk Hungary Chapter 3 Country Acer Part No LU.SDE0D.017 LU.SDE0D.018 LU.SDE0D.002 LU.SDE0D.003 LU.SDE0D.008 LU.SDE0D.067 LU.SDE0D.076 LU.SDE0D.043 LU.SDE0D.044 LU.SDE0D.058 LU.SDE0D.068 LU.SDE0D.086 LU.SDE0D.040 LU.SDE0D.075 LU.SDE0D.090 LU.SDE0D.092 LU.SDE0D.096 LU.SDE0D.041...
- Page 258 South Africa AOD255-2DQkk South Africa AOD255-2DQkk South Africa AOD255-2DQkk South Africa AOD255-2DQkk South Africa AOD255-2DQkk South Africa AOD255-2DQkk Spain AOD255-2DQkk Spain Country Acer Part No LU.SDE0D.066 LU.SDE0D.069 LU.SDE0D.072 LU.SDE0D.083 LU.SDE0D.088 LU.SDE0D.089 LU.SDE0D.065 LU.SDE0D.084 LU.SDE0D.098 LU.SDE0D.021 LU.SDE0D.023 LU.SDE0D.025 LU.SDE0D.027 LU.SDE0D.028 LU.SDE0D.030 LU.SDE0D.032...
- Page 259 AOD255-2DQws Hong Kong AOD255-2DQws Malaysia AOD255-2DQws Middle East AOD255-2DQws Middle East AOD255-2DQws Philippines AOD255-2DQws Philippines AOD255-2DQws AOD255-2Dws AOD255-2Dws Chapter 3 Country Acer Part No LU.SDE0D.047 LU.SDE0D.052 LU.SDE0D.053 LU.SDE0D.080 LU.SDE0D.019 LU.SDE0D.020 LU.SDE0D.045 LU.SDE0D.054 LU.SDE0D.011 LU.SDE0D.013 LU.SDE0D.016 LU.SDE0D.005 LU.SDE0D.006 LU.SDE0D.007 LU.SDE0D.091 LU.SDE0D.093 LU.SDE0D.097...
- Page 260 Singapore AOD255-N55DQcc AOD255-N55DQGkk Switzerland AOD255-N55DQkk Albania/ Macedonia AOD255-N55DQkk Albania/ Macedonia AOD255-N55DQkk Austria AOD255-N55DQkk Austria AOD255-N55DQkk Baltic AOD255-N55DQkk Baltic Country Acer Part No LU.SDH0C.001 LU.SDP0C.001 LU.SDJ0C.001 LU.SDR0C.001 LU.SDK0C.001 LU.SDH0D.001 LU.SDH0D.006 LU.SDH0D.018 LU.SDH0D.013 LU.SDH0D.014 LU.SDH0D.016 LU.SDH0D.007 LU.SDH0D.008 LU.SDH0D.009 LU.SDH0D.010 LU.SDH0D.011 LU.SDH0D.012 LU.SDH0D.017 LU.SDH0D.015...
- Page 261 AOD255-N55DQkk Luxembourg AOD255-N55DQkk Malaysia AOD255-N55DQkk Middle East AOD255-N55DQkk Middle East AOD255-N55DQkk Middle East AOD255-N55DQkk Middle East AOD255-N55DQkk Middle East Chapter 3 Country Acer Part No LU.SDJ0D.030 LU.SDJ0D.042 LU.SDJ0D.057 LU.SDJ0D.014 LU.SDJ0D.058 LU.SDJ0D.088 LU.SDJ0D.015 LU.SDJ0D.038 LU.SDJ0D.016 LU.SDJ0D.022 LU.SDJ0D.033 LU.SDJ0D.037 LU.SDJ0D.047 LU.SDJ0D.034 LU.SDJ0D.048 LU.SDJ0D.035...
- Page 262 AOD255-N55DQkk Switzerland AOD255-N55DQkk Switzerland AOD255-N55DQkk Turkey AOD255-N55DQkk Turkey AOD255-N55DQkk AOD255-N55DQkk AOD255-N55DQkk AOD255-N55DQrr Canada AOD255-N55DQrr Hong Kong AOD255-N55DQrr Hong Kong Country Acer Part No LU.SDJ0D.074 LU.SDJ0D.076 LU.SDJ0D.082 LU.SDJ0D.084 LU.SDJ0D.024 LU.SDJ0D.053 LU.SDJ0D.087 LU.SDJ0D.045 LU.SDJ0D.059 LU.SDJ0D.029 LU.SDJ0D.056 LU.SDJ0D.004 LU.SDJ0D.005 LU.SDJ0D.006 LU.SDJ0D.007 LU.SDJ0D.008 LU.SDJ0D.009 LU.SDJ0D.010...
- Page 263 AOD255-N55DQws Singapore AOD255-N55DQws Singapore AOD255-N55DQws Singapore AOD255-N55DQws Singapore AOD255-N55DQws Singapore AOD255-N55DQws Singapore AOD255-N55DQws Singapore AOD255-N55DQws Singapore Chapter 3 Country Acer Part No LU.SDR0D.020 LU.SDR0D.016 LU.SDR0D.015 LU.SDR0D.017 LU.SDR0D.005 LU.SDR0D.006 LU.SDR0D.007 LU.SDR0D.008 LU.SDR0D.009 LU.SDR0D.010 LU.SDR0D.011 LU.SDR0D.012 LU.SDR0D.013 LU.SDR0D.014 LU.SDR0D.019 LU.SDK0D.001 LU.SDK0D.004 LU.SDK0D.018 LU.SDK0D.012...
- Page 264 Chapter 3...
-
Page 265: Test Compatible Components
Test Compatible Components Microsoft Windows ® Vendor Type EM770W-Rev1 Ericsson F3307-900MHz Adapter DELTA Leader Audio Codec Realtek ALC272X Battery SANYO 3CELL2.2 SANYO 3CELL2.2 SANYO 6CELL2.2 SANYO 6CELL2.2 Bluetooth Foxconn BT 2.0 Foxconn BT 3.0 Foxconn BT 3.0 Foxconn BT 3.0 Camera Chicony 1.3M... - Page 266 Vendor Type INTEL ATMN455B INTEL ATMN475B INTEL ATMN550B HGST N160GB5.4KS HGST N250GB5.4KS HGST N320GB5.4KS SAMSUNG N160GB5.4KS SAMSUNG N250GB5.4KS SEAGATE N160GB5.4KS SEAGATE N160GB5.4KS SEAGATE N250GB5.4KS SEAGATE N250GB5.4KS TOSHIBA N160GB5.4KS TOSHIBA N250GB5.4KS N160GB5.4KS N250GB5.4KS Description CPU Intel Atom N455 1.66G 512K DDR2/DDR3 CPU Intel Atom N475 1.83G 512K DDR2/DDR3 CPU Intel Atom N550 BGA 1.5G 1M...
- Page 267 Appendix B Description HDD WD 2.5" 5400rpm 320GB WD3200BEVT-22A23T0,ML320S,WD SATA 8MB LF F/W:01.01A01 Keyboard ACER NT0T_A10B NT0T Internal 10 Standard Black Y2010 Acer Legend Texture Atheros AR8152L LED LCD AUO 10.1" WSVGA None Glare B101AW06 V0 LF 200nit 16ms 400:1 LED LCD CMI 10.1"...
- Page 268 Vendor Type WiFi Antenna PIFA Wireless LAN Foxconn 3rd WiFi 1x1 BGN Foxconn 3rd WiFi 1x1 BGN Liteon 3rd WiFi 1x1 BGN Liteon 3rd WiFi 1x1 BGN 3rd WiFi 1x1 BGN Description PIFA Foxconn Wirelss LAN Atheros HB95 1x1 BGN (HM) T77H121.01 Foxconn Wirelss LAN Broadcom 4313 1x1 BGN (HM) T77H194.00 Liteon Wireless LAN Atheros HB95 1x1...
-
Page 269: Online Support Information
This section describes online technical support services available to help you repair your Acer Systems. If you are a distributor, dealer, ASP or TPM, please refer your technical queries to your local Acer branch office. Acer Branch Offices and Regional Business Units may access our website. However some information sources will require a user i.d. - Page 270 Appendix C...
-
Page 271: Index
Antennas Removing Battery Pack Removing 27–35 BIOS Utility Advanced Boot Exit Navigating Save and Exit Security System Security Board Layout Top View brightness hotkeys Camera Module Removing Common Problems DIMM Modules Removing Display display hotkeys EasyTouch Failure Euro External Module Disassembly Flowchart Features FLASH Utility... - Page 272 Replacing Main Module Reassembly Procedure Main Unit Disassembly Flowchart Mainboard Removing Replacing Media Board Replacing Memory Check Model Definition Modem Cable Removing No Display Issue ODD Failure Online Support Information Panel Bottom left Power On Failure Primary HDD Removing RJ-11 Jack Removing SD Dummy Card Removing...