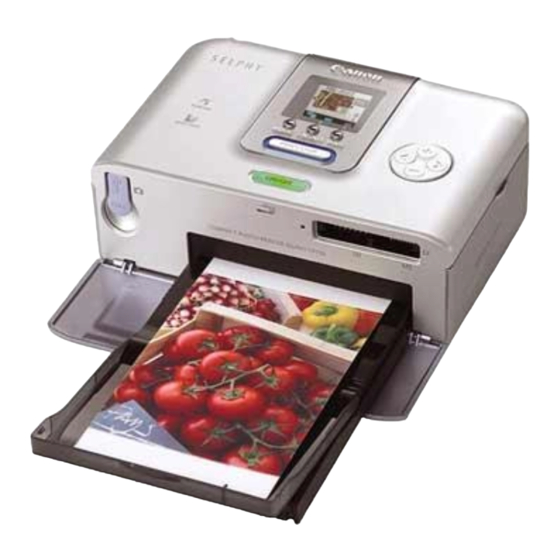
Canon Selphy CP510 User Manual
Compact photo printer
Hide thumbs
Also See for Selphy CP510:
- Printer software manual (33 pages) ,
- User manual (82 pages) ,
- Software manual (60 pages)
Table of Contents
Advertisement
CDI-M193-010
xx05xxxx
©
2005 CANON INC.
PRINTED IN JAPAN
IMPRIMÉ AU JAPON
CP710
CP510
NOTICE! When a computer is connected to the printer, be sure to install the software and the
printer driver bundled on the supplied CD-ROM (Canon CP Printer Solution Disk).
If you are using another version of software, actual screen contents and procedures may differ
slightly from those indicated in this guide.
¡ATENCIÓN! Cuando se conecte un ordenador a la impresora, asegúrese de instalar el software
y el controlador de la impresora incluidos con el CD-ROM suministrado (disco CP Printer Solution
Disk de Canon).
Si está utilizando otra versión de software, el contenido real de la pantalla y los procedimientos
podrán ser un poco diferentes de los indicados en esta guía.
ATTENTION ! Quand un ordinateur est connecté à l'imprimante, veillez à installer le logiciel et le
pilote d'imprimante inclus sur le CD-ROM fourni (Canon CP Printer Solution Disk).
Si vous utilisez une autre version de logiciel, le contenu réel de l'écran et les procédures peuvent
être légèrement différents de ceux indiqués dans ce guide.
User Guide
ENGLISH
Guía del usuario
ESPAÑOL
Guide d'utilisation
FRANÇAIS
Advertisement
Table of Contents

Related Manuals for Canon Selphy CP510


Summary of Contents for Canon Selphy CP510
- Page 1 NOTICE! When a computer is connected to the printer, be sure to install the software and the printer driver bundled on the supplied CD-ROM (Canon CP Printer Solution Disk). If you are using another version of software, actual screen contents and procedures may differ slightly from those indicated in this guide.
-
Page 2: Table Of Contents
Contents Quick Start ............. . 2 Before You Begin . - Page 3 Specifications ....... . . 64 Printing with Non-Canon Digital Cameras ..66...
-
Page 4: Quick Start
: Included with the printer About illustrations used in this guide This guide uses illustrations mainly for the CP710. Unless otherwise mentioned, operations are also the same when using the CP510. Loading the Ink Cassette in the Printer (p. 27) Open the ink cassette compartment cover. - Page 5 Loading the paper into the Paper Cassette (p. 28) Open the paper cassette’s top and middle covers. Middle cover Place the middle cover back to its original position, and leave the top cover open. Loading the Paper Cassette into the Printer (p. 29) Open the paper cassette compartment cover.
- Page 6 Quick Start (Continued) Connecting the Printer to a Power Source (p. 30) Insert the power cord into the compact power adapter and plug the other end into a power outlet. To power outlet Connecting the Camera to the Printer (p. 31) Pull out the retractable USB cable, and connect to the camera’s DIGITAL terminal.
- Page 7 For more details, refer to your Camera User Guide or Direct Print User Guide included with your camera. When using non-Canon Digital Cameras, refer to the camera’s user guide for the camera you are using.
-
Page 8: Before You Begin
Before You Begin Thank you for your purchase of the Canon Compact Photo Printer SELPHY CP710/ CP510. This guide explains the printer’s general flow of operations, from camera print settings to printing and computer connection operations to printing. Before using your printer for the first time, please read through the "Safety Precautions" (p. 11). - Page 9 This product is designed to achieve excellent performance when used with genuine Canon accessories. Canon shall not be liable for any damage to this product and/or accidents such as fire, etc., caused by the malfunction of non-genuine Canon accessories (e.g., a leakage and/or explosion of a battery pack).
-
Page 10: About Using The Software
In consideration of the right to use the SOFTWARE, you agree to abide by the terms and conditions of this Agreement. 1. LICENSE: Canon grants you the personal, non-exclusive right to use the SOFTWARE only on a single computer. You may physically transfer the SOFTWARE from one computer to another provided that the SOFTWARE is used on only one computer at a time. - Page 11 SOFTWARE is subject to the laws of the United States, and Canada, and other applicable copyright and trademark laws, and nothing in this Agreement constitutes a waiver of the rights of Canon, its affiliated corporations and third party licensors under such laws. You only own the CD-ROM media in which the Software is stored.
-
Page 12: About This Guide
While every effort has been made to ensure that the information contained in this guide is accurate and complete, no liability can be accepted for any errors or omissions. Canon reserves the right to change the specifications of the hardware and software described herein at any time without prior notice. -
Page 13: Safety Precautions
Continued use of the equipment may result in fire or electric shock. Immediately turn the printer power off and remove the printer battery or unplug the power cord from the power outlet. Please consult your camera distributor or the closest Canon Customer Support Help Desk. - Page 14 Power Do not exceed the cable and power outlet ratings when operating this product. Do not operate this product outside of the specified voltage rating. Check that the voltage of the outlet is compatible with the devices before plugging them in. If the power cord becomes damaged (if internal wiring is exposed, etc.), immediately unplug it from the power outlet.
- Page 15 CAUTIONS Devices Do not block the air vents on the printer. Do not rest heavy objects on the devices. Do not reach into internal parts of the devices except as specified in the operating instructions. Such conditions could lead to injury, fire, electric shock or other damage. Unplug the devices when you are not using them.
-
Page 16: Proper Usage And Handling
Proper Usage and Handling Usage Location Leave about 15 cm (6 in.) of clearance at the front and back of the devices and 10 cm (4 in.) of clearance on both sides. Be sure to leave clearance around the paper-handling slot (at the rear) so that paper has sufficient room to jut out from the slot during printing. - Page 17 • If the air vents on the back of the printer are blocked or if ventilation is inadequate. Ink Cassettes Please use only the ink cassettes specified for use by Canon. Do not open the ink cassette cover while printing is in progress, and do not pull the ink cassette out.
- Page 18 • Locations that reach temperatures above 40 °C (104 °F) • Humid or dusty locations • Locations exposed to direct sunlight. Color change may occur over time in accordance with conditions of storage. Canon assumes no liability for color changes.
- Page 19 It can be charged at any charge state. It takes approximately 150 minutes to bring a fully discharged battery pack to a full charge state (based on standard Canon testing criteria). ° ° • Charge it within a temperature range of 5 to 40 C (41 to 104 •...
-
Page 20: Package Contents
• User Guide (This Guide) • Warranty Card • Canon Customer Support Leaflet For information about how to use the cleaner stick, refer to "Cleaning the Printer" (p. 57). This cover prevents dust from entering the printer. When the printer is not in use, always attach it as shown in the figure. -
Page 21: Separately Sold Products
* It may be necessary to update the printer firmware in order to use Bluetooth. Please check the following website for information on the newest firmware and how to use and print with the Bluetooth unit. http://web.canon.jp/Imaging/information-e.html L size Credit card size Wide size (100 x 200 mm (4 x 8 in.)) -
Page 22: Components Guide
Components Guide Compact Photo Printer SELPHY CP710 Front View Power Button Turns the printer’s power on power button also lights to indicate the printer status. Green: Ready to print Blinking green: Printing in progress Orange: Charging the battery pack (sold separately) -
Page 23: Front View
Compact Photo Printer SELPHY CP510 Front View Power Button Turns the printer’s power on off. The power button also lights to indicate the printer status. Green: Ready to print Blinking green: Printing in progress Orange: Charging the battery pack (sold separately) -
Page 24: This Printer Allows You To Do The Following
This Printer Allows You to Do the Following Immediately print images taken on your camera Select and print images from a memory card (CP710 only) Print from a computer Connect via the built-in retractable USB cable. Insert the memory card into the appropriate memory card slot. - Page 25 You can make various size prints L size paper cassette (sold separately) Credit card size paper cassette (sold separately) Postcard size paper cassette Wide size paper cassette (sold separately) You can alter images with a computer and lay them out in various ways •...
-
Page 26: Printing Procedure And Reference Guides
Printing Procedure and Reference Guides Installing the Software and the Printer Driver User Guide (This Guide) p. 41 When an Error Occurs and Troubleshooting Preparing User Guide (This Guide) p. 26 Printing from memory card (CP710 only) Before you connect the printer to a computer, you must install the printer driver from the CP Printer Solution Disk. - Page 27 Printer Software Guide (PDF Format) Printing User Guide (This Guide) p. 31 Camera User Guide Direct Print User Guide When using non-Canon digital cameras, refer to the user guide that came with your camera. User Guide (This Guide) p. 36, 37, 38...
-
Page 28: Let's Prepare
Let’s Prepare Preparing Your Ink Cassette/Paper Sets and Paper Cassette Prepare the paper and ink/paper cassettes to match the size of the paper you are printing. There are several types of paper and paper/ink cassettes. If the set is not correct, you will not be able to print. Please check the sets and the names of their components in the table below. -
Page 29: Loading The Ink Cassette
CP710: Viewing the LCD monitor display (p. 35) CP510: Viewing the display window on the top of the printer (p. 21) Do not reuse empty ink cassettes. Attempting to reuse an empty ink cassette may result in malfunction or damage to the printer. -
Page 30: Loading The Paper Into The Paper Cassette
Loading the Paper into the Paper Cassette Do not insert more than 18 sheets in the paper cassette. Do not insert more than 12 sheets of wide size paper (100 x 200 mm (4 x 8 in.)) in the paper cassette. Proper Handling of Paper Cassettes Proper Handling of Paper Please use specified paper types only. -
Page 31: Loading The Paper Cassette
Place the middle cover back to its original position. After pulling the middle cover down, slide it in the direction of the arrow until it clicks back into place. Do not close the top cover. Printed or fed paper is coated even when nothing is printed on the paper. Therefore, never reuse the printed or fed paper for printing. -
Page 32: Placing The Printer
Placing the Printer Usage Location "Usage Location" (p. 14) Refer to the figure below when placing the printer. Numbers in the figure correspond to the steps in the procedure below. 15 cm (6 in.) at the front and back of the device and 10 cm (4 in.) on both sides or more of open space Compact power... -
Page 33: Connecting To A Camera For Printing
For more details, refer to your Camera User Guide or Direct Print User Guide. In other cases, please refer to the "Printing with Non-Canon Digital Cameras" (p. 66). Make sure that the memory card is not inserted into the printer and that the printer is not connected to the computer. -
Page 34: Disconnect The Camera
Display the images to be printed and press the SET or SELECT button. If your camera has a immediately after you press the Select [Print] and press the SET or SELECT button. Printing starts. During printing, the printer’s power button blinks green. The camera returns to the playback screen once printing is successfully completed. -
Page 35: Compatible Memory Cards
Printing from Memory Card (CP710 only) Insert the memory card into the printer so that you can print images stored on the memory card. Make sure that the camera or computer is not connected to the printer. Clearer printing results can be obtained when printing from a memory card by optimizing the information stored in the camera when the photo was taken. -
Page 36: Inserting Memory Cards
Inserting Memory Cards Do not load two or more memory cards at the same time. Press the printer’s power button. The power button lights green once the printer powers up. After a while, the startup screen is displayed on the LCD monitor. Push the memory card all the way into the card slots. -
Page 37: About Lcd Monitor And Operation Buttons
About LCD Monitor and Operation Buttons LCD Monitor Displays images on the memory card, and details that have been set using the buttons. PRINT/STOP Button Starts printing. Printing is canceled when this button is pressed during printing. MODE Button Selects the print operation mode. -
Page 38: Printing Selected Images (Select)
Printing Selected Images (SELECT) Select a specific image in the LCD monitor and print that image. The required number of specific images can be printed together. Buttons available for this function Turn the printer on, and insert the memory card into the card slot (p. -
Page 39: Printing All Images (All)
Check the setting on the LCD monitor. Make sure that the paper cassette contains the required number of sheets of paper. Press the PRINT/STOP button. Printing starts. During printing, the printer’s power button blinks green. Printing All Images (ALL) Print a single copy of all the images on the memory card at a time. Buttons available for this function Turn the printer on, and insert the memory card into the card slot (p. -
Page 40: Printing By Specified Camera Settings (Dpof)
Printing by specified camera settings (DPOF) You can make prints according to the DPOF (Digital Printer Order Format) setting specified on the camera. Buttons available for this function The date setting complies with the DPOF information. The date cannot be set with the DATE button. -
Page 41: Specifying The Layout
Specifying the Layout Specify the print layout. You can select from bordered/borderless, 8 stickers or index (INDEX). Bordered Borderless If you set the print operation mode to ALL and layout to INDEX, you can print a list of all the images on the memory card. -
Page 42: Printing The Date
Printing the Date Select whether or not to print the date that you took the photograph. When you print the date, specify the format of the date. Select the required operation mode, and press the DATE button to select the date format. The date is not printed. -
Page 43: System Requirements
- Easy-PhotoPrint: 65 MB or more - PhotoStitch: 40 MB or more - PhotoRecord: 100 MB or more • Canon SELPHY CP710/CP510 Printer Driver: 4 MB or more (the amount of free space required for installation) Display 1,024 x 768 pixels/High Color (16 bit) or better Macintosh Mac OS X (v10.2 - v10.3) -
Page 44: Installing The Software And The Printer Driver
Installing the Software and the Printer Driver The CP Printer Solution Disk contains software that your computer will require for printing. Install the software and the printer driver according to the following steps. The instructions in this section are intended for Windows XP and Mac OS X (v10.3). If you are using another version of OS, actual screen contents and procedures may differ slightly from those indicated here. - Page 45 Select [Easy Installation] as the setup type and click [Next]. Select [Custom Installation] to select programs for individual installation. Follow the screen messages to proceed. When a dialog box appears instructing that the installation is complete, click [Finish]. Restart your computer when a dialog box appears instructing you to do so. Next, install the printer driver to your computer.
- Page 46 When the screen below appears, connect the printer to the computer with a commercially available USB cable and turn the printer’s power on. Refer to "Connecting the Printer to Your Computer" (p. 48) on how to connect. Follow the screen messages to proceed. When a dialog box appears instructing that the installation is complete, click [Finish].
-
Page 47: Macintosh
Quit any programs that are running. Place the CP Printer Solution Disk in the CD-ROM drive, and double-click the [Canon CP Printer Installer] icon in the CD-ROM. The installer panel appears. Click the Application Software [Install] button. Select [Easy Installation] and then click [Next]. - Page 48 Click the CP Printer Driver [Install] button. Click the printer you are using. Click [Agree] if you consent to all the conditions of the software license agreement. The installer starts. Select [Easy Install] and then click the [Install] button. Follow the screen messages to proceed. Restart your computer when a dialog box appears instructing you to do so.
- Page 49 Double-click the [Printer Setup Utility] or [Print Center] icon in [Applications] [Utilities] folder. The Printer List window appears. Click the [Add] button. Select [USB], select the printer name, and then click the [Add] button. Close the window by clicking in the upper left-hand corner.
-
Page 50: Connecting The Printer To Your Computer
Connecting the Printer to Your Computer Notes about connection Before connecting the printer to a computer, make sure that the memory card is not inserted into the printer and that the printer is not connected to the camera. The printer may not function properly. When using the USB cable, be sure to connect the printer directly to your computer. - Page 51 Connect one end of a commercially available USB cable to the USB port on the printer, and the other end to a USB port on your computer. There is no need to turn off the printer or your computer. When connecting the printer to your computer, make sure the connectors on the ends of the USB cable match the ports on the printer and your computer.
-
Page 52: Software Manuals
The ImageBrowser Software User Guide describes in detail the functions and operations of the ImageBrowser software for the Macintosh. This guide can be downloaded from the following web site if it is required. http://web.canon.jp/Imaging/information-e.html p. 42, Macintosh p. 45) [CP Printer Guide]. -
Page 53: Uninstalling The Software
The instructions in this section are intended for uninstallation of Easy-PhotoPrint. Click the [Start] button and select [All Programs] or [Programs] [Canon Utilities] PhotoPrint Uninstall]. Follow the screen messages to proceed. You can use the same procedure to uninstall PhotoStitch. -
Page 54: Uninstalling The Printer Driver
Be sure to follow the procedures described in this section to uninstall the printer. Windows Click the [Start] and select [All Programs] or [Programs] SELPHY CP XXX] Select the printer you will uninstall and click [Next]. Follow the screen messages to proceed. [Uninstall]. [Canon... -
Page 55: Macintosh
Macintosh Place the CP Printer Solution Disk in the CD-ROM drive, and double-click the [Canon CP Printer Installer] icon. The installer panel appears. Click the CP Printer Driver [Install] button. Click the printer you wish to uninstall. Click [Agree] if you consent to all the conditions of the software license agreement. - Page 56 Select the printer you uninstalled, and then click the [Delete] button. Close the window by clicking in the upper left-hand corner.
-
Page 57: Attaching And Charging The Battery Pack
Proper Usage and Handling of the Battery Pack The battery pack NB-CP1L (sold separately) cannot be used. Do not use the battery pack in products other than those recommended by Canon. Attaching and Charging the Battery Pack Use the printer for charging the battery pack. -
Page 58: Battery Status
Attach the power cord to the Compact Power Adapter CA- CP200 and plug it into a power outlet. Connect the compact power adapter cable to the printer. The power button lights orange while charging and turns off once the battery pack is fully charged. -
Page 59: Cleaning The Printer
Appendix Cleaning the Printer Cleaning Inside the Printer If faint stripes appear in the printed image, a probable cause is that dust has accumulated inside the printer. Remove any dust using the cleaner stick included with your printer. Remove the ink cassette. Insert the cleaner stick in the direction of the arrow and with the arrow on the... -
Page 60: Troubleshooting
If the printer does not seem to be working properly, run through the checks below to see if you can identify and correct the problem. If you are not able to solve the problem, please call your dealer or contact a Canon Customer Support help desk for assistance. The printer has no power. - Page 61 Printing stopped midway. The printer is not correctly connected to the camera. The printer’s power button lights red without the camera’s LCD monitor displaying any error message. There is a malfunction in the printer. Print quality is not good. You are not using the correct paper type.
- Page 62 Frequent paper jams. The paper cassette is overloaded. The print output receptacle is too full. Paper is creased or curled. Faint stripes appear in the print. Dust has accumulated inside the printer. “?” instead of the image is displayed on the LCD monitor. (CP710 only) “?”...
-
Page 63: Error Messages
Paper Jam Turn the power off and turn it on again. If the printer fails to eject the paper, contact a Canon Customer Support help desk for assistance. Paper has been changed No Display Paper was changed after the print menu was displayed. Change back to the original paper size or change the print settings. - Page 64 You can also use the printer’s compact power adapter. Communication error Turn the printer and camera power off and turn it on again. If the error message does not clear, contact a Canon Customer Support help desk for assistance. Cannot print!
- Page 65 Printing from Memory Card (CP710 only) LCD monitor Cause/Solution The memory card is not loaded in the card slot. The memory card is not properly loaded in the card slot. Insert the memory card all the way into the card slot (p. 34). The memory card does not contain any images.
-
Page 66: Specifications
Specifications Compact Photo Printer SELPHY CP710/CP510 All data is based on standard Canon testing criteria. Details are subject to change without notice. Print Method Dye-sublimation thermal transfer (with overcoating) Resolution 300 x 300 dpi Gradation 256 gradations/color Dedicated ink cassette (Y/M/C/overcoating) - Page 67 Weight Approx. 230 g (8.1 oz.) *Test Conditions: Normal temperature (23°C/73°F), Canon images, continuous print The above data may vary according to the printing environment and the image to be printed. At low temperatures, the battery pack performance may diminish and the low battery icon may appear very rapidly.
-
Page 68: Printing With Non-Canon Digital Cameras
Printing with Non-Canon Digital Cameras Since the CP710/CP510 printers support the direct print PictBridge connect PictBridge compliant non-Canon digital cameras to easily print high image quality photos. *PictBridge: PictBridge is an industry standard for direct printing that allows you to print images without using a computer by directly connecting a digital camera or digital camcorder (hereafter “camera”) to a printer, regardless of their brands and models. - Page 69 Memo...