Canon SELPHY CP720 Printing Manual
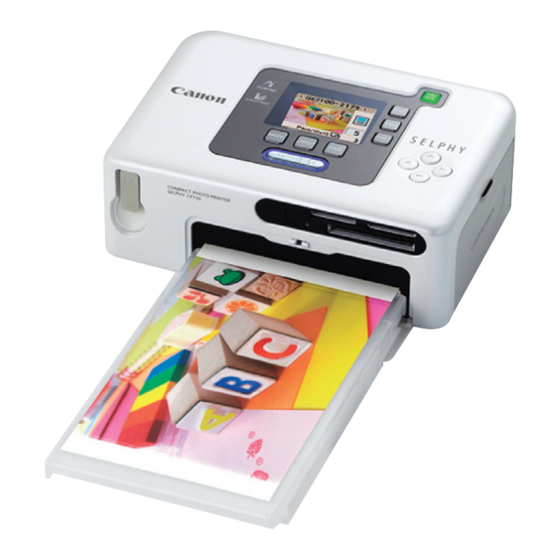
Compact photo printer
Hide thumbs
Also See for SELPHY CP720:
- User manual (52 pages) ,
- Software manual (60 pages) ,
- Printing manual (28 pages)
Table of Contents
Advertisement
Printing Guide
Basic to Advanced
Printing
Thank you for purchasing a SELPHY Compact
Photo Printer. You can start to print immediately
with the items in your package. There are three
easy steps: Unpack the contents, prepare them
and print.
ENGLISH
1
2
3
Print
Enjoy a Multitude of
Functions
Installing the PDF
Manual
Boundless
Possibilities
p. 2
p. 3
p. 5
p. 8
p. 11
p. 13
p. 16
Advertisement
Table of Contents

Related Manuals for Canon SELPHY CP720


Summary of Contents for Canon SELPHY CP720
- Page 1 Printing Guide Basic to Advanced Printing Thank you for purchasing a SELPHY Compact Photo Printer. You can start to print immediately with the items in your package. There are three easy steps: Unpack the contents, prepare them and print. ENGLISH Unpack p.
- Page 2 Easy Install option. This product is designed to achieve excellent performance when used with genuine Canon accessories. Canon shall not be liable for any damage to this product and/or accidents such as fire, etc., caused by the malfunction of non- genuine Canon accessories (e.g., a leakage and/or explosion of a battery pack).
- Page 3 Next, place the paper in the cassette with the shiny side upward. Try not to touch the shiny side of the paper. Install the paper cassette into the printer. Open the paper cassette slot cover. Insert the starter ink cassette into the printer until it clicks firmly into place and close the cover.
- Page 4 The matching paper size is written where shown on paper cassettes and ink cassettes. Do not connect the printer to the computer until after you have installed the printer driver. Can I Use Standard Printer Paper and...
- Page 5 Print In this step you will insert a memory card with images into the printer, and print. Press the power button until the start-up image (shown right) displays on the LCD monitor. Insert the memory card into the appropriate card slot.
- Page 6 When it shows day/year] format. Press The printer will start. The paper will pass in and out four times. Do not pull on or force the paper during this process. After confirming that the image has printed, remove the memory card.
- Page 7 (Print/Share) button, please check its user manual. 1. Pull the cable out of the printer and attach it to the camera's DIGITAL terminal. If the connector on the cable does not fit your camera's terminal, use the USB cable supplied with your camera.
-
Page 8: Mode Button
Enjoy a Multitude of Functions This section introduces the numerous functions that make printing fun. MODE Button This button sets the printing mode. Single Prints one copy of the displayed image. Select Prints the specified number of copies of the selected images. -
Page 9: Lcd Monitor
Power Button DISP. (Display) Button Press this button to display the image at a larger size. Press it again to restore it to its original size. DATE Button This button sets the date imprint that can be added to images. No Date Year/Month/Day Month/Day/Year... - Page 10 This button starts the trimming mode, which lets you enlarge a portion of an image for printing. How to Select the Trimming Area 1. Press the TRIM. button, followed by the DISP. button. 2. Press the print area size, and the to rotate the print area frame 90 degrees.
- Page 11 Manual The Printer User Guide (PDF manual) explains information such as details about the printer, troubleshooting suggestions and instructions for connecting the printer to a computer. Use the following procedures to install the Printer User Guide on your computer. Windows Place the supplied CD-ROM into the CD-ROM drive.
- Page 12 Select [Printer User Guide] and click [Next]. Follow the onscreen instructions. Remove the CD-ROM when the installation is complete. • The Printer User Guide is also installed by selecting the [Easy Installation] option. • The Adobe Reader or Adobe Acrobat Reader program is required to view the Printer User Guide.
- Page 13 Boundless Possibilities Supplied Items Depending on the region, L size items may be supplied with the printer. Postcard Size Paper Cassette Postcard Size Paper Package (5 sheets) Ink Cassette for Postcard Size Separately Sold Items* *Some items are not sold in some regions.
- Page 14 Present Your Memories Attractively in Photo Frames or Albums or create Postcards with Postcard Size Sheets Required Items: (Add Options Create Unique Stickers with 8-Label Sheets Required Items: The CP730 can print without a cable connection if you have a mobile phone that supports the IrDA (infrared data transmission) protocol.
- Page 15 Carry Your Favorite Photos Everywhere with Card Size Sheets Required Items: Use the Wide Size Sheets for the Grand Appeal of Panorama Shots Required Items: Use the CP730's Separately Sold Battery Pack to Print Postcards on Location 1. Open the battery cover. 3.
-
Page 16: Troubleshooting
Troubleshooting Solutions for when you cannot print as expected, or think the printer is not operating properly. Power will not turn on… Cannot print… I have extra paper but the ink ran out… Cannot set the mode, print layout, date imprint and print number as expected…... - Page 17 Printer power button is blinking red… Images will not appear even with a memory card inserted… Experiencing numerous paper jams… List of Error Symbols Cannot display image No images on memory card Cannot read image No paper Paper jam No ink Try turning the power off and on.
-
Page 18: Safety Precautions
• While every effort has been made to ensure that the information contained in this guide is accurate and complete, no liability can be accepted for any errors or omissions. Canon reserves the right to change the specifications of the hardware and software described herein at any time without prior notice. -
Page 19: Fcc Notice
If such changes or modifications should be made, you could be required to stop operation of the equipment. Canon U.S.A., Inc. One Canon Plaza, Lake Success, NY 11042, U.S.A. Tel No. (516) 328-5600 Canadian Radio Interference Regulations This Class B digital apparatus complies with Canadian ICES-003. - Page 20 CDI-E262-010 xx06xxxx © 2006 CANON INC. PRINTED IN JAPAN...