Table of Contents
Advertisement
Quick Links
Advertisement
Table of Contents

Related Manuals for Naish TORQUE 2


Summary of Contents for Naish TORQUE 2
- Page 1 TORQUE 2 KITE CONTROL SYSTEM USER MANUAL...
-
Page 2: Table Of Contents
CONTROL SYSTEM OVERVIEW To waive any and all claims that you have or may have in the future against Naish International, a division of Nalu Kai Incorporated, or any of its agents, resulting from use of this product and any of its Torque 2 ATB 55 &Torque 2 ATB 50 Control System ............ -
Page 3: Warning & Safety Precautions
Make sure to always have a 100 m semi-circle area downwind and on both sides of your flying • position that is clear of people, animals, and other obstructions. The release system is not designed for cold condition and will be impaired when used in icy • conditions, e.g. for snow kiting. WARNING & SAFETY PRECAUTIONS naish.com... -
Page 4: Control System Overview
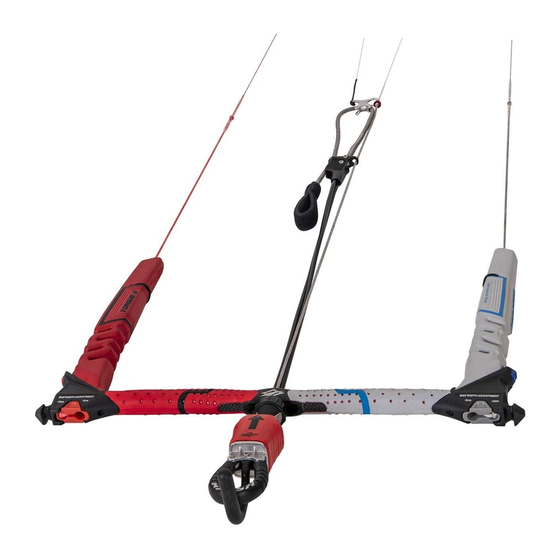
CONTROL SYSTEM OVERVIEW CONTROL SYSTEM OVERVIEW TORQUE 2 ATB 55 & TORQUE 2 ATB 50 CONTROL SYSTEM TORQUE 2 5-LINE ATB CONTROL SYSTEM A) Control System Bar A) Control System Bar B) Floaters B) Floaters C) Bar Ends C) Bar Ends... -
Page 5: Loop Options
CONTROL SYSTEM OVERVIEW CONTROL SYSTEM OVERVIEW LOOP OPTIONS LOOP OPTIONS (CONTINUED) Slider Loop Micro Loop Freestyle Loop Medium Loop For advanced riders only. May become unhooked unintentionally while riding. CONTROL SYSTEM OVERVIEW naish.com... -
Page 6: Line Connections
(rear) line connection points. Be sure to always incorrect connection between front and steering use authentic Naish flying lines and bridles when (rear) line connection points. Be sure to always using Naish kites and control systems. -
Page 7: Attaching Foolproof Connectors
2m Pull the lines tight to secure the steering lines. extensions. connection. WARNING: The loop end of the extension line is opposite the foolproof connector end of the extension line. LINE CONNECTIONS naish.com... -
Page 8: Torque 2 Control System
TORQUE 2 CONTROL SYSYEM TORQUE 2 CONTROL SYSTEM ADJUSTING TORQUE 2 BAR STEERING (REAR) FLYING LINES ADJUSTING TORQUE BAR STEERING (REAR) FLYING LINES ( CONTINUED) Repositioning the knots found inside the bar/line adjuster changes the length of the steering (rear) flying lines. -
Page 9: Operating The Chicken Finger
OPERATING THE CHICKEN FINGER OPERATING THE SNAPLOCK QUICK RELEASE The chicken finger is designed to hold the Torque 2 loop in position in the harness hook. To release yourself from the kite in an emergency situation, you must activate the SnapLock Quick Release. -
Page 10: Operating The Torque 2 Atb And 5-Line Trim Cleat
TORQUE 2 CONTROL SYSTEM KITE LEASH OPERATING THE TORQUE 2 ATB AND 5-LINE TRIM CLEAT ATTACHING THE KITE LEASH All Naish Control Systems are delivered with a kite leash. When activating the SnapLock Quick Release (page 15) in an emergency situation, the kite leash will To depower the kite: keep the rider attached to the kite while the kite depowers. -
Page 11: Operating The Kite Leash Quick Release
There are 3 O-rings used on the quick release mechanism. These must be in good working order for • the system to function properly. See the Naish website on instructional video to replace the O-ring. WARNING: If the release mechanism does not operate smoothly, additional cleaning with a toothbrush and soapy water may be required to remove any built-up deposits on the mechanism. -
Page 12: Warranty Policy
If a product is deemed to be defective by Naish, the warranty covers the repair or replacement of the defective product only. Naish will not be responsible for any costs, losses or damages incurred as a result of loss of use of this product. - Page 13 Naish.com © 2021 Naish International, a division of Nalu Kai Incorporated PO Box 703 Haiku, Hi 96708...