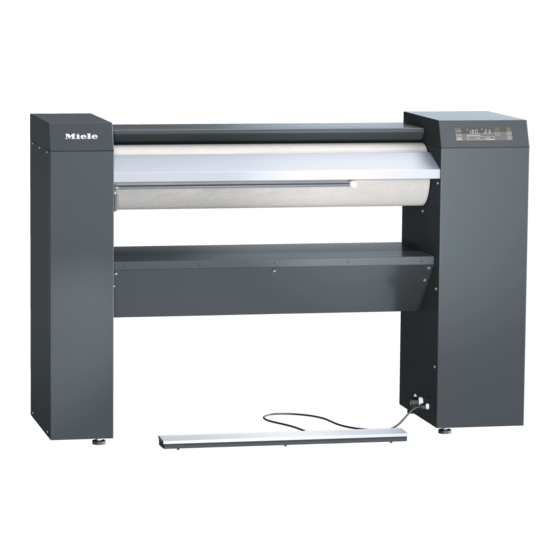
Miele PRI 210 Operating Instructions Manual
Commercial rotary iron
Hide thumbs
Also See for PRI 210:
- Operating instructions manual (188 pages) ,
- Operating instructions manual (40 pages) ,
- Operating instructions manual (40 pages)

Related Manuals for Miele PRI 210


Summary of Contents for Miele PRI 210
- Page 1 Operating Instructions Commercial Rotary Iron PRI 210 PRI 214 PRI 217 To prevent accidents and machine damage, en-US, CA read these instructions before installation or use. M.-Nr. 11 942 090...
-
Page 2: Table Of Contents
Contents Caring for the environment .................... IMPORTANT SAFETY INSTRUCTIONS ................Appropriate use ......................... Technical and electrical safety ..................Use of the appliance ......................Using accessories ......................Notes on the use of this machine ..................Appliance overview ......................Touch display ........................Display symbols ........................ - Page 3 Using the cleaning cloth....................30 Starting the waxing program ..................31 Using the waxing cloth and ironing wax ............... 31 Padding instructions......................33 Removing the ironing cloth ................... 33 Fitting the ironing cloth (only for steel-wool roller covering) ......... 33 Miele Technical Service ..................... 34...
-
Page 4: Caring For The Environment
Consult with local authorities, dealers or Miele in order to dispose of and recycle electrical and electronic appliances. Miele assumes no responsibility for deleting any personal data left on the appliance being disposed. -
Page 5: Important Safety Instructions
If other persons are being shown how to operate the rotary iron, they must be given and/or informed of these important safety instructions. Miele cannot be held liable for injury or damage caused by non-compliance with these instructions. Keep these operating instructions in a safe place and pass them on to any future user. -
Page 6: Use Of The Appliance
Country-specific safety regulations, standards, and safety requirements must be taken into consideration. Using accessories Only approved genuine Miele accessories should be used with the rotary iron. Using parts or accessories from other manufacturers will void the warranty, and Miele cannot ac- cept liability. -
Page 7: Notes On The Use Of This Machine
IMPORTANT SAFETY INSTRUCTIONS Coin-operated rotary irons must be anchored to the floor by the supporting feet to pre- vent the risk of the machine tipping. Notes on the use of this machine At the laundry infeed table, only allow trained individuals to operate the iron. ... -
Page 8: Appliance Overview
Appliance overview Control panel (touch display) “FlexControl” footswitch Laundry infeed table Laundry pickers Finger guard Height-adjustable screw feet Roller Toe kick (optional) Heater plate with cover Lint filter box Laundry outfeed table Option PRI 210 PRI 214 PRI 217 Laundry rod feature available Flexible laundry feed feature available Leaf-spring padding... -
Page 9: Touch Display
Appliance overview Touch display The buttons on the touch display can be selected by pressing lightly. The button that is currently selected will then be highlighted with a bar underneath. ... - Page 10 Appliance overview Display in the roller speed selection mode button button Switches the iron on and off. Increases the roller speed button button Pauses the ironing process. Decreases the roller speed button button Begins the ironing process once the set...
-
Page 11: Display Symbols
The current temperature of the heater Display of ironing temperature in °F or plate is higher than the setpoint tempera- °C . This can be altered by Miele Tech- ture. The temperature of the heater plate nical Service. is lowered. -
Page 12: Finger Guard
Risk of injury due to lack of finger guard function. A malfunctioning finger guard function can lead to serious injury. Shut down the rotary iron immediately. Contact Miele Technical Service immediately. Ensure that the rotary iron is not operated by another person and advise others of the potential hazard. -
Page 13: Swing Out Bar
Appliance overview While the rotary iron is in operation, do not use the finger guard intentionally to interrupt the ironing process. Always interrupt the ironing process by pressing the button. Swing out bar (for PRI 214 as an optional accessory) Ironed laundry can be placed over the hinged laundry rod to avoid wrinkling. Flexible laundry feed for outfeed laundry removal (for PRI 217 as an optional accessory) The flexible laundry feed mechanism enables the ironed laundry to be fed through to the... -
Page 14: Before Using For The First Time
Before using for the first time Cleaning and waxing before starting up for the first time It is essential to clean and wax the heater plate before it is used for the first time (see “Cleaning the heater plate” and “Waxing the heater plate” in “Cleaning and care”). Clean the heater plate by passing the cleaning cloth offset through the rotary iron across ... -
Page 15: Use
Preparing the laundry Residual moisture For an excellent finish and optimum ironing performance, the laundry that is to be ironed should have the following levels of residual mois- ture, depending on the type of ironing being carried out: PRI 214/217: 15–25% residual moisture PRI 210: 15% residual moisture The ideal residual moisture level depends on the composition of the fabric. -
Page 16: Ironing
Danger of burning on the hot edge of the heater plate. When the rotary iron has heated up, there is a danger of burns on the edge of the heater plate. Warning labels on the outer casing of the heater plate indicate the danger of burns. Avoiding touching the edges of the heater plate. -
Page 17: Changing The Value Of A Temperature Selection Button
(For example, temperature selection button) The selected temperature selection button will be highlighted with a bar underneath and the heater plate heated / cooled to the appropri- ate temperature. Changing the Press the temperature selection button you want to change the ... -
Page 18: Setting The Iron Speed
Setting the iron Press the . button to access the roller speed selection mode. speed The button will then be highlighted with a bar underneath. Now press one of the three spin speed selection buttons. (For example, button) The selected spin speed selection button will be highlighted with a bar underneath and the iron speed will be adopted as the button value. -
Page 19: Removal Of Ironed Laundry
Press the button to switch the rotary iron back on. Standby mode is deactivated by default. Standby mode can be acti- vated at service level by Miele Technical Service. The time at which the rotary iron will switch to standby mode can be adjusted to a value between 1 and 30 minutes of non-use. -
Page 20: Stopping Ironing
The roller automatically begins to rotate again. The ironing process continues. Alternatively, the footswitch can be adjusted by Miele Technical Ser- vice in such a way that the heater plate exits Pause mode and the roller begins to rotate when the footswitch is activated (domestic setting). - Page 21 If the ironing process is paused during the follow-up time, you must purchase more ironing time to restart the iron. Miele Technical Service can change the duration of the follow-up time to a value between 0–5 minutes. At the end of the follow-up time, the heater plate disengages and the roller comes to a standstill.
-
Page 22: Notes For Installer
Notes for installer The rotary iron should be installed by a Miele trained installer. Storage of the The following conditions must be observed for transport and storage: machine Temperature: minimum of 77 °F (25 °C) to maximum of 131 °F (55 °C) Humidity: minimum of 5 % to maximum of 75 %, non-condensing Maximum storage period: 2 years... -
Page 23: Installation
Notes for installer Installation The machine is transported to the installation site while still in the packaging. Do not remove the packaging until right before installa- tion. The machine may be transported or lifted from the wooden frame only with the lateral mounting flaps mounted. First lift the machine at the installation site by the wooden frame. -
Page 24: Duct For Venting Steam
Notes for installer - If the appliance is hard wired, a multiple-pole separator must be in- stalled. Separators with a contact gap of more than ⅛" (3 mm) are valid as separators. All components have to bear CSA or UL ap- proval. -
Page 25: Substitute Duct Lengths
Notes for installer Substitute duct Molded part Substitute duct length lengths PRI 214 PRI 217 90° bend r = 2 d 10" (0.25 m) 45° bend r = 2 d 5 ⅞" (0.15 m) 90° bend r = d 13 ¾" (0.35 m) 45° bend r = d 10"... -
Page 26: Maximum Permissible Total Duct Length
Notes for installer Maximum permis- Adequate room ventilation must be ensured during operation. sible total duct length Minimum inside duct diam- Maximum permissible total duct eter (sheet metal ducting) length Exhaust air PRI 214 PRI 217 2 ¾" (70 mm) 16' 4 ⅞" (5 m) 3 ⅛"... -
Page 27: Notes
Notes Changing the temperature unit Miele Service can switch the temperature display from °C to °F. Saving and loading favorites The following steps describe how to save and load the most frequently used combinations of ironing temperature and roller speed on the button. -
Page 28: Fault Messages
Control system fault If the fault message appears again, repeat the process or switch the iron off before switch- ing it back on again. If the fault persists, contact Miele Technical Service. In the event of a malfunction, contact Miele Technical Service. -
Page 29: Cleaning And Care
Regular heater plate maintenance is essential for protecting the roller drive and the pad- ding. Refer to the instructions in the Miele Ironing Handbook. Always wax the heater plate after cleaning. Failure to exercise due care and attention can result in a significant reduc- tion in the service life of the machine. -
Page 30: Using The Cleaning Cloth
Cleaning and care Using the cleaning cloth Use the cleaning cloth for cleaning the heater plate. Since the cleaning cloth is smaller than the heater plate, you cannot clean the entire heater plate width by feeding the cloth through once. You need to feed the cloth through the iron several times, and move it from side to side. -
Page 31: Starting The Waxing Program
Cleaning and care It is essential to wax the heater plate after cleaning. You can switch directly to the waxing program by pressing the temperature selection but- ton on the right or exit the cleaning program by pressing and holding the button for at least 3 seconds. - Page 32 Cleaning and care Fold up the waxing cloth. Start the waxing program (see “Starting the waxing program” in “Waxing the heater plate”). Feed the waxing cloth into the rotary iron with the rubber-coated side facing the roller. Feed the waxing cloth into the rotary iron multiple times from the left or right side at the ...
-
Page 33: Padding Instructions
The padding needs to be changed if there is a visible gap on the lower edge of the heater plate and roller (laundry outfeed). The stainless wool padding on the roller may only be replaced by Miele Technical Ser- vice! The diameter of a new or re-upholstered roller must not be less than the dimensions in- dicated below (including the ironing cloth). -
Page 34: Miele Technical Service
Cleaning and care Miele Technical Service In the event of a malfunction, contact Miele Technical Service. The Miele Technical Service department requires the model and serial number (SN) of the rotary iron. You will find these on the data plate on the inside of the right-hand side column. - Page 35 Technical Service & Support Phone: 800-991-9380 Miele Professional proservice@mieleusa.com Technical Service Phone: 1-888-325-3957 serviceprofessional@miele.ca Manufacturer: Miele & Cie. KG Carl-Miele-Straße 29, 33332 Gütersloh, Germany Alteration rights reserved / Publication date: 36.21 M.-Nr. 11 942 090 / 00...