Table of Contents
Advertisement
TOTO U.S.A., Inc.
Warranty Registration and Inquiry
For product warranty registration, TOTO U.S.A. Inc. recommends On-Line Warranty Registration. Please visit
our web site http://www.totousa.com. If you have questions regarding warranty policy or coverage, please
contact TOTO U.S.A. Inc.,
Customer Service Department, 1155 Southern Road, Morrow, GA 30260 (888) 295 - 8134 or (678) 466 - 1300
when calling from outside of U.S.A.
TOTO ASIA OCEANIA
PTE. LTD.
TOTO ASIA OCEANIA
PTE. LTD.
TOTO ASIA OCEANIA
PTE. LTD.
TOTO LTD.
TOTO INDIA INDUSTRIES
PVT. LTD
TOTO VIETNAM Co., Ltd.
•
You are advised to record the following information to allow quick service.
Date of purchase :
Date : year month day
1155 Southern Road Morrow, GA 30260
Phone : (770) 282 8686
10, Eunos Road 8, #12-07, Singapore Post Centre. Singapore 408600.
Phone : +65-6744-6955 Fax : +65-6841-0819 http://asia.toto.com/
Middle East Branch LOB19-1701-1702, Jebel Ali Free Zone, P.O. box 261804, Dubai U.A.E.
Phone : +971-4-886-5983 Fax : +971-4-886-5986 http://asia.toto.com/
Manila Representative Office. Unit 1010, 10th Floor Rufino Building, Ayala Avenue cor.V.A.
Rufina Street, Makati City,1226 Philippines.
Phone : +63-2-887-6643 Fax : +63-2-887-4084 http://asia.toto.com/
Bangkok Representative Office G & 7th FL., Q.House Ploenjit Building, 598 Ploenchit Road,
Lumpini, Pathumwan, Bangkok 10330 Thailand
Phone: +66-2-650-9925 Fax : +66-2-650-9923
http://www.totobkk.com/
101, Kamla Executive Park, Opp. Vazir Glass Works,
Off. Andheri Kurla Road, Andheri (East), Mumbai 400 059, India.
Phone : +91-22-4022-3717 / 3718 Fax : +91-22-4022-3719 http://asia.toto.com/
R. 810, Daeha Business Centre, 360 Kim Ma St., Ba Dình Dist., Ha Noi City
Phone : +84-4-37714354 Fax : +84-4-37714355 http://toto.com.vn/
Name of shop :
Tel : (
)
2013. 8.6
D08781
Advertisement
Table of Contents

Related Manuals for Toto Neorest 550H


Summary of Contents for Toto Neorest 550H
- Page 1 Phone : (770) 282 8686 Warranty Registration and Inquiry For product warranty registration, TOTO U.S.A. Inc. recommends On-Line Warranty Registration. Please visit our web site http://www.totousa.com. If you have questions regarding warranty policy or coverage, please contact TOTO U.S.A. Inc., Customer Service Department, 1155 Southern Road, Morrow, GA 30260 (888) 295 - 8134 or (678) 466 - 1300 when calling from outside of U.S.A.
- Page 2 (MS982CUMG) TCF9786WA ■ ■ Thank you for your recent purchase of the TOTO NEOREST. Please read the enclosed information to ensure the safe use of your product. ■ ■ Be sure to read this Instruction Manual before using your product and keep it in a...
- Page 3 What functions available on your product? The model name and part number are indicated on the bottom side of the toilet lid. Product model number Top unit Bowl unit = Combination model number * SN○○○○ CT○○○○ MS○○○○ TCF○○○○ CW○○○○ * Combination model number is for U.S. only. Model NEOREST SN982MR...
-
Page 4: Table Of Contents
Cleaning Table of Contents Safety Precautions ....4 Support Operational Precautions ..11 Parts Names ......12 Preparation ......14 Sanitary Toilet Basic Operations ..... 16 Automatic Functions The "ewater+" feature keeps the toilet bowl clean at all times. (Cleaning Features) ....20 DEODORIZER, AUTO WAND CLEANING, AUTO BOWL CLEANING, BOWL LIGHT, CLEAN INDICATOR... -
Page 5: Safety Precautions
Safety Precautions These precautions are important for safe usage. Be sure to follow them and use the product correctly. Symbols and Meanings WARNING May result in death or serious injury. CAUTION May result in injury or property damage. The following symbols are used to indicate important safety instructions for the use of the product. Symbol Meaning This symbol indicates a prohibited use of the product. - Page 6 WARNING Do not use the NEOREST if a malfunction occurs. Always unplug the plug from the outlet. Switch the breaker on the distribution board to OFF. (Asia, Oceania, Middle East) Close the water shutoff valve to stop water supply. ● • Possible malfunctions: Water is leaking from a pipe or the top unit.
- Page 7 Safety Precautions (Continued) WARNING Beware of irritation or burn. Improper use of the toilet seat may cause irritation or burn. ● • When sitting for a long time on the toilet seat, switch the toilet seat temperature adjustment to "OFF". When any of the following persons use a heated seat or warm air drying, someone should switch the toilet seat temperature adjustment to "OFF"...
- Page 8 CAUTION Do not use the product if the top unit is unstable. Doing so may cause the top unit to come loose and fall, resulting in injury. ● • If the product is damaged, do not touch the damaged section. Doing so may cause electrical shock or injury.
- Page 9 Safety Precautions (Continued) CAUTION If a water leak should occur, always close the shutoff valve. When the ambient temperature is likely to drop to 0°C or lower, prevent damage to the pipes and hoses due to freezing. Frozen water pipes could cause the top unit and the pipes to break, resulting in a water leak. ●...
- Page 10 DANGER To reduce the risk of electrocution: 1. Do not use while bathing. 2. Do not place or store the product where it can fall or be pulled into a tub or sink. 3. Do not place in or drop into water or other liquid. 4.
- Page 11 Safety Precautions (Continued) Grounding Instructions This product should be grounded. In the event of an electrical short circuit, grounding reduces the risk of electric shock by providing an escape wire for the electrical current. The plug must be plugged into an outlet that is properly installed and grounded. DANGER - Improper use of the grounding plug can result in a risk of electric shock.
-
Page 12: Operational Precautions
Operational Precautions ■ ■ For prevention of malfunctions ■ ■ For prevention of damage ● Do not block the body sensor or the remote control transmitter ● Wipe plastic areas such ■ ■ or receiver. as the top unit and <... -
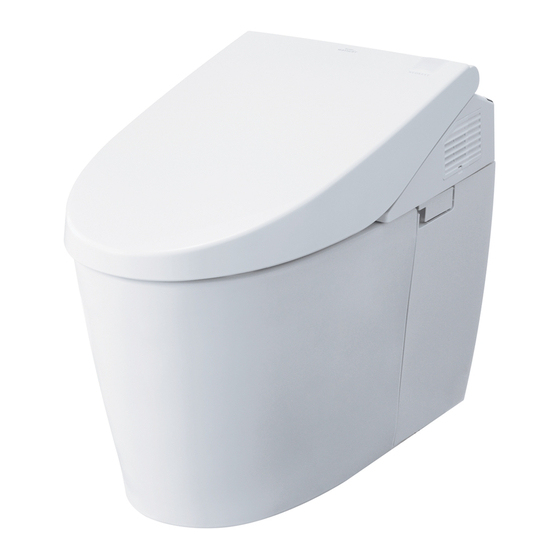
Page 13: Parts Names
Parts Names Control panel Main display POWER ON/OFF POWER LED FRONT ON/OFF REAR ON/OFF ENERGY CLEAN indicator FLUSH SAVER LED * Use in situations such as when the remote controller SEAT LED batteries have discharged. Model name, part no., etc. Body sensor A Toilet lid (Page 11) - Page 14 Right side of top unit Remote control receiver Deodorizer vent Cleaning lift lever (Page 33) Deodorizing filter (Page 36) Left side of top unit Toilet lid and toilet seat underside Water filter drain valve Toilet lid cushion (Page 35) Toilet seat cushions Body sensor B (page 11) Water drain lever...
-
Page 15: Preparation
Preparation Using the Product for the First Time 1.Insert the battery If the remote control is secured (for anti theft) Remove the remote control from the hanger. Remove the screws (2, left and right) from the remote Remote control control fi xture. (View from side)... - Page 16 2.Turn on the power 3.Open the shutoff valve Remove the side-panel. Insert the power plug. Switch the breaker on the distribution board to ON. (Asia, Oceania, Middle East) • The wand extends and then retracts. Fully open the shutoff valve. <For water supply from floor>...
-
Page 17: Basic Operations
Basic Operations Press a button on the remote control; a beep sounds when the top unit receives the signal. [REAR] Cleanses your rear. [SOFT] Cleansing Washes your rear with soft embracing water flow. [FRONT] Serves as a bidet for ladies. [WIDE] Gently washes a wide area. - Page 18 When flushing and opening/closing the toilet seat with the remote control [ FLUSH] Perform a flush. Flushing [ FLUSH] Perform a light flush. Opening Opens and closes the toilet seat. and closing Remote control back side MENU/RETURN button Adjust settings Return to previous menu Display screen Adjust settings, check status, etc.
- Page 19 Basic Operations About the Menu Screen Set up easily with simple steps! This section is an overview of the settings that can be configured with the remote MENU control. 1.MANUAL CLEANING See the corresponding pages 2.ENERGY SAVER for the detailed descriptions. [●ENTER]PUSH SELECT Remote control back side...
- Page 20 Level 1 Level 2 MANUAL CLEANING TIMER SAVER 1.BOWL CLEANING 1.TIMER SAVER ON/OFF 2.WAND CLEANING ON/OFF ENERGY SAVER 1.AUTO ENERGY SAVER 2.TIMER SAVER AUTO FLUSH 1.AUTO FLUSH 2.AUTO FLUSH DELAY AUTO FUNCTION 1.AUTO FLUSH AUTO OPEN/CLOSE 2.AUTO OPEN/CLOSE 1.AUTO OPEN/CLOSE 3.AUTO CLEANING 2.AUTO CLOSE DELAY 4.LIGHT...
-
Page 21: Automatic Functions (Cleaning Features)
Automatic Functions Cleaning Features "ewater+" is used automatically to clean the wand and bowl unit. As you As you sit As you stand up approach Deodorizer stops DEODORIZER Starts the deodorizer ➝It stops after about 2 minutes Cleans the wand Clean the wand automatically ➝■... -
Page 22: Clean Indicator
Support Cleaning ■ ■ CLEAN indicator ■ ■ Bowl light Lights to show that the "clean" Lights to show that auto bowl functions are operating. cleaning and auto wand cleaning are operating. Changing Note settings DEODORIZER ● • ON/OFF (Page 46) If dirt adheres... -
Page 23: Automatic Functions (Convenience Features)
Automatic Functions Convenience Features As you Various automatic As you sit As you stand up approach functions are available, such as a toilet lid that opens and closes automatically. Operation under the initial ● • settings is described below. When using the toilet seat The toilet flushes (After about... - Page 24 As you move away Changing Note settings Auto flush is not available in the following ● • cases. (Flush with the remote control.) ➝ For about 60 seconds after flushing. When a person sits on the toilet seat (or when a male user stands in front of ●...
-
Page 25: Temperature Adjustment
Temperature Adjustment Warm Water / Toilet Seat / Drying You can adjust the temperature levels or turn the settings to "OFF". Remove the remote control from Press [TEMP]. the hanger. If the remote control is locked to prevent theft (Page 14) WATER TEMP SEAT TEMP DRYER TEMP... - Page 26 to select the item to select the <Settings you want to set. temperature level. complete> WATER TEMP WATER TEMP SEAT TEMP SEAT TEMP DRYER TEMP DRYER TEMP WATER TEMP SEAT TEMP DRYER TEMP Warm water OFF* Low High temperature Press until "OFF"...
-
Page 27: Energy Saver Features
Energy Saver Features Type You can save energy by turning the toilet seat heater to a low temperature (or turning the heater "OFF") during periods when the toilet will be used infrequently. It takes about 10 days for the product to determine the periods when it is used relatively less frequently. ●... - Page 28 When energy saver is in operation Toilet seat heater Example: Used infrequently from 9 pm to 6 am Green Set temperature temperature temperature Orange Example: Set from 8 am to 5 pm Set temperature Set temperature Green Example: When timer energy saver and auto energy saver are used together During timer energy ●...
- Page 29 Energy Saver Features How to set Set the timer energy saver at the time you want to start it. MENU 1.MANUAL CLEANING 2.ENERGY SAVER Press [MENU]. SELECT [●ENTER]PUSH AUTO ENERGY MENU 1.MANUAL CLEANING SAVER 2.ENERGY SAVER [●ENTER]PUSH SELECT to select "ENERGY SAVER"...
- Page 30 to select ENERGY SAVER "AUTO ENERGY 1.AUTO ENERGY SAVER 2.TIMER SAVER SAVER". SELECT [●ENTER]PUSH to select ENERGY SAVER "ON" or "OFF" 1.AUTO ENERGY SAVER AUTO ENERGY SAVER ON 2.TIMER SAVER and then press [●ENTER]PUSH SELECT [ ● ENTER]. To return to select ENERGY SAVER "TIMER SAVER"...
-
Page 31: Power Plug
Maintenance Power plug WARNING (Perform monthly) <North, Central, South America only> ■ ● Always disconnect the power plug from the outlet before cleaning, maintenance or inspection.(Page 15) ● Always switch the breaker on ■ the distribution board to OFF. (Asia, Oceania, Middle East only) (Otherwise, it may cause electrical shock Dry cloth Wet cloth... -
Page 32: Top Unit
Cautions with use of detergent ● The NEOREST is an electric appliance. Be careful not to let water seep inside or leave detergent in the ■ gap between the top unit and bowl unit. (May damage plastic parts or cause a malfunction.) ●... -
Page 33: Bowl Unit
Maintenance Bowl unit (Perform daily) • Strongly acidic cleaners or strong alkaline cleaners • Cleaners containing abrasive compounds • Toilet brush • Fluoride-based detergent • Neutral toilet detergent (containing hydrogen fl uoride or ammonium fl uoride) • Wire brush • Abrasive nylon scrubbing brush Unplug the power plug. -
Page 34: Bowl Unit Cleaning
Gap between the Top Unit and Bowl Unit (Perform monthly) You can lift up the top unit with the cleaning lift lever Soft cloth Toilet paper, etc. soaked in water (May cause damage) and clean the gap between it and the bowl unit. Unplug the power plug. - Page 35 Maintenance Between the top unit and the toilet lid (Perform monthly) The toilet lid can be removed Soft cloth Toilet paper, etc. soaked in water (May cause damage) for thorough cleaning. Unplug the power plug. (Page 15) Switch the breaker on the Removing and Reinstalling distribution board to OFF.
-
Page 36: Water Filter Drain Valve
Water Filter Drain Valve (Perform once every 6 months) <If you think the water pressure has weakened> Remove the cover. Cover Remove the water fi lter drain Water filter drain valve valve. Close the shutoff valve. ● • Loosen with (Page 56) Water filter a fl at-head... -
Page 37: Deodorizing Filter
Maintenance Deodorizing fi lter (Perform monthly) <If you notice odors> Unplug the power plug. (Page 15) Switch the breaker on the distribution board to OFF. (Asia, Oceania, Middle East) Remove the deodorizing fi lter. ■ • Hold the knob and pull outward. ■... -
Page 38: Wand
Wand (Perform monthly) <Wand cleaning> If you notice dirt Soft cloth soaked in water Toilet paper, etc. (May cause damage.) Extend the wand. ■ • Operate with the buttons on the back side of the remote control. Press [MENU]. to select "MANUAL CLEANING". Press [●ENTER]. -
Page 39: Wand Cleaning Water Filter
Maintenance Water fi lter (Bowl Unit) (Perform once every 6 months) Remove the side-panel (left). Unplug the power plug. (Page 15) Switch the breaker on the distribution board to OFF. (Asia, Oceania, Middle East) Loosen the nut on the shutoff valve to remove the water fi lter. - Page 40 Tighten the nut on the shutoff valve. Open the shutoff valve. (Page 15) • Check that there are no leaks in the shutoff valve or plumbing connections. Mount the opening/closing tool to its original position and reinstall the side-panel. Insert the power plug. (Page 15) Switch the breaker on the distribution board to ON...
-
Page 41: Changing Settings
Changing Settings Setting List WATER TEMP SEAT TEMP DRYER TEMP Remote control back side Setting Types ● • AUTO FLUSH AUTO FLUSH ● • AUTO FLUSH DELAY ● • AUTO OPEN/CLOSE ● • AUTO CLOSE DELAY AUTO ● • AUTO OPEN DELAY OPEN/CLOSE ●... - Page 42 Setting Ref. Available Settings* Applicable Models Page Set whether or not to clean the bowl ● • ON/OFF unit automatically Page 42 All models Change the amount of time before the ● • 5S/10S/15S toilet flushes automatically Set whether or not to open the toilet lid ●...
- Page 43 Changing Settings AUTO FLUSH MENU 1.MANUAL CLEANING 2.ENERGY SAVER Press [MENU]. SELECT [●ENTER]PUSH Set whether or not to clean the bowl unit automatically MENU AUTO FLUSH 2.ENERGY SAVER 3.AUTO FUNCTION [●ENTER]PUSH SELECT to select "AUTO FUNCTION" and then press [ ● ENTER]. AUTO FUNCTION Select the amount of time 1.AUTO FLUSH...
- Page 44 to select AUTO FLUSH "AUTO FLUSH". 1.AUTO FLUSH 2.AUTO FLUSH DELAY SELECT [●ENTER]PUSH clean cally to select AUTO FLUSH 1.AUTO FLUSH "ON/OFF" and AUTO FLUSH OFF 2.AUTO FLUSH DELAY then press [●ENTER]PUSH SELECT [ ● ENTER]. To return to select AUTO FLUSH 1.AUTO FLUSH "AUTO FLUSH...
- Page 45 Changing Settings AUTO OPEN/CLOSE MENU 1.MANUAL CLEANING 2.ENERGY SAVER Set whether or not to open Press [MENU]. SELECT [●ENTER]PUSH the toilet lid automatically AUTO OPEN/ MENU CLOSE 2.ENERGY SAVER 3.AUTO FUNCTION [●ENTER]PUSH SELECT to select "AUTO FUNCTION" Change the time before and then press the lid/seat closes automatically...
- Page 46 to select AUTO OPEN/CLOSE 1.AUTO OPEN/CLOSE "AUTO OPEN/ 2.AUTO CLOSE DELAY open CLOSE". SELECT [●ENTER]PUSH ally to select AUTO OPEN/CLOSE 1.AUTO OPEN/CLOSE "ON/OFF" and then AUTO OPEN/CLOSE OFF 2.AUTO CLOSE DELAY press [ ● ENTER]. [●ENTER]PUSH SELECT To return to select AUTO OPEN/CLOSE 1.AUTO OPEN/CLOSE "AUTO CLOSE...
- Page 47 Changing Settings AUTO CLEANING MENU 1.MANUAL CLEANING 2.ENERGY SAVER Press [MENU]. SELECT [●ENTER]PUSH Set whether or not to clean the wand automatically AUTO WAND MENU 2.ENERGY SAVER CLEAN 3.AUTO FUNCTION [●ENTER]PUSH SELECT to select "AUTO FUNCTION" and then press [ ● ENTER]. Set whether or not to spray mist in the bowl unit AUTO FUNCTION...
- Page 48 to select AUTO CLEANING "AUTO WAND 1.AUTO WAND CLEAN 2.AUTO BOWL CLEAN CLEAN". SELECT [●ENTER]PUSH clean to select AUTO CLEANING 1.AUTO WAND CLEAN "ON/OFF" and AUTO WAND CLEAN OFF 2.AUTO BOWL CLEAN then press [●ENTER]PUSH SELECT [ ● ENTER]. To return to select AUTO CLEANING 1.AUTO WAND CLEAN...
- Page 49 Changing Settings LIGHT MENU 1.MANUAL CLEANING 2.ENERGY SAVER Press [MENU]. SELECT [●ENTER]PUSH Set whether or not to use the soft light MENU SOFT LIGHT 2.ENERGY SAVER 3.AUTO FUNCTION [●ENTER]PUSH SELECT to select "AUTO FUNCTION" and then press [ ● ENTER]. Set whether or not to use AUTO FUNCTION the light inside the bowl unit...
- Page 50 to select LIGHT "SOFT LIGHT". 1.SOFT LIGHT 2.BOWL LIGHT SELECT [●ENTER]PUSH to select LIGHT 1.SOFT LIGHT "ON/OFF" and SOFT LIGHT OFF 2.BOWL LIGHT then press [●ENTER]PUSH SELECT [ ● ENTER]. To return to select LIGHT 1.SOFT LIGHT "BOWL LIGHT". 2.BOWL LIGHT [●ENTER]PUSH SELECT wl unit...
- Page 51 Changing Settings OTHER SETTING MENU 1.MANUAL CLEANING Set whether or not to run 2.ENERGY SAVER Press [MENU]. the water for the bowl unit SELECT [●ENTER]PUSH and wand automatically at a fixed interval in order to prevent freezing MENU ANTI 3.AUTO FUNCTION 4.OTHER SETTING FREEZING [●ENTER]PUSH...
- Page 52 OTHER SETTING select "ANTI 1.ANTI FREEZING 2.BEEP FREEZING". unit SELECT [●ENTER]PUSH y at to select "ON/OFF". r to <For setting to "ON">When the time is set, the toilet bowl is cleaned in 10 minute intervals to prevent freezing. OTHER SETTING FLUSHES EVERY 10 MIN 1.ANTI FREEZING ANTI FREEZING ON...
-
Page 53: What To Do
What to Do? If there is no water due to a power outage or water failure Use a bucket to flush water. Large bucket If the water level is low after flushing, add more water. Pour strongly, aiming at the center Prevents odors. -
Page 54: Freeze Damage Prevention
Freeze Damage Prevention TCF9786WA only When the ambient temperature is likely to drop to 0°C or lower, take measures to prevent freezing. Attention! ■ ● When the ambient temperature is likely to drop to 0°C or lower, do not use the energy saver feature. (May damage the product.) ■... -
Page 55: Long Periods Of Disuse
What to Do? Long Periods of Disuse If the toilet is in a location you will not visit for a long time , drain the water. (The water in the tank may become contaminated and cause skin inflammation or other problems) ●Before draining the water, check that the top unit is not lifted up and that the cleaning lift lever (Page 33) is retracted to its ■... - Page 56 Resupplying the Water (After draining) Open the shutoff valve to Press [FLUSH] on supply water. the remote control to flush. Check that there are no leaks in the ● • plumbing or the NEOREST. If there is no water in the ●...
-
Page 57: Troubleshooting
Troubleshooting First, try the actions described on pages 56 to 63.If the problem persists, consult CAUTION the installer, seller or the contact listed on the back cover of this manual. If a water leak ● All LEDs on the display of the top unit are fl ickering. ■... - Page 58 Rear and front cleansing, wand Ref. Trouble Please check Page ■ ● Can you operate with the control panel? (Check while sitting on the toilet seat.) ➞Check "Is the remote control working?" ■ ● When the temperature is low, it takes time for the wand to come out after the ■...
- Page 59 Troubleshooting Warm air drying Ref. Trouble Please check Page The dryer ● Is the remote control preset temperature set to a low level? ■ temperature is low ● The feature stops automatically after 10 minutes of continuous use. ■ ● Does the seat switch have difficulty detecting? ■...
- Page 60 Flushing Ref. Trouble Please check Page ● Is the shutoff valve fully open? ■ ● Is the water filter clogged? ■ ➞Clean the filter. ■ ● Is the water supply to the toilet disrupted by other running water fixtures? ■ ➞Cease using other fixtures and then flush the toilet.
- Page 61 Troubleshooting Toilet Seat and Toilet Lid (AUTO OPEN/CLOSE) Ref. Trouble Please check Page ● Is "AUTO OPEN/CLOSE (LID)" set to "OFF"? ➞ Set to "ON". ■ ● When you do not sit on the toilet seat, or when the time spent sitting on the ■...
- Page 62 Toilet Seat and Toilet Lid Ref. Trouble Please check Page ● If it opens automatically ➞ Check "Is the remote control working?" ■ Cannot open or ● If automatic opening does not work either. ■ close with the The toilet seat or toilet lid may not be mounted correctly. ●...
- Page 63 Troubleshooting Sanitary Ref. Trouble Please check Page The soft light or bowl ● Is the setting "OFF"? ■ light does not light up ➞Set to "ON". ■ ● When body sensor A detects someone, the pre-mist is sprayed. ■ The mist sprays out ●...
- Page 64 Others Ref. Trouble Please check Page Water is leaking ● If any nuts in a connection are loose, firmly tighten them with a tool such as a ■ from the plumbing monkey wrench. ➞If the water leak does not stop, close the shutoff valve and seek repair. connections ■...
-
Page 65: Specifications
Weight (Top unit: about 6.3kg, bowl unit: about 32.5kg) *1 Temperature around the warm air outlet measured by TOTO. *2 Based on IEC60335-1 and 60335-2-84, rated power consumption shall be that of ambient temperature of 20°C and water supply temperature of 15°C. - Page 67 Damage or loss resulting from electrical surges or lightning strikes or other acts which are not the fault of TOTO or which the Product is not specified to tolerate, including failure to use the factory equipped cord and plug or use of a loose or faulty electrical outlet or use of a current or socket other than a 120V, 60Hz electrical current from a GFI (ground, fused) socket.
-
Page 68: Warranty
4. This warranty gives you specific legal rights. You may have other rights which vary from country to country. 5. T o obtain warranty repair service under this warranty, you must take the product or deliver it prepaid to a TOTO service facility, together with a letter stating the problem, or contact a TOTO distributor or product service contractor, or directly to TOTO sales office.