
Related Manuals for La Crosse Technology 616-1410B


Summary of Contents for La Crosse Technology 616-1410B
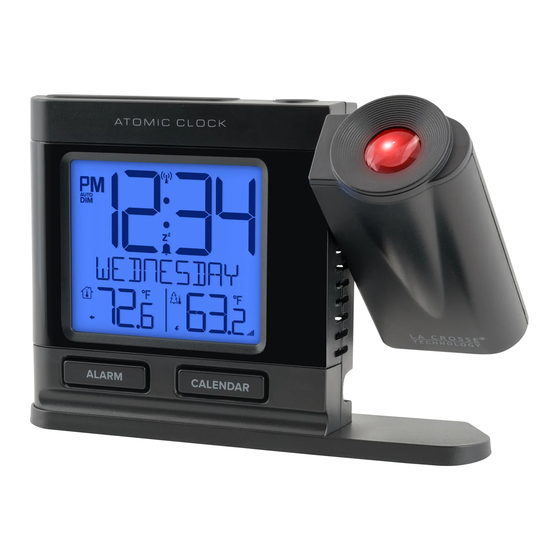
- Page 1 Atomic Projection Clock with Indoor/Outdoor Temperature SET UP GUIDE MODEL: 616-1410B / 616-41667...
-
Page 2: Atomic Time
4. Once the sensor is reading to your clock, place the senor outside in a shaded location. View our sensor mounting video here: bit.ly/th_sensor_mounting TX141-Bv3 616-1410B / 616-41667 Outdoor Sensor Projection Clock Atomic Time • The clock will search for the Atomic Time Signal at power up and at UTC 7:00, 8:00, 9:00, 10:00, and 11:00. -
Page 3: Settings Menu
Settings Menu 1. Hold the button to enter the Settings Menu. 2. Use the buttons to adjust values. 3. Press to confirm values. 4. Press the SNOOZE/LIGHT button at any time to save and exit. Settings Menu Order: • Language (English, Spanish, French, German) •... - Page 4 Backlight • Press the SNOOZE/LIGHT button to adjust the backlight to adjust the backlight intensity. There are 4 levels, plus an off option. Auto Dim Program your display to automatically dim during preselected times. 1. Hold the SNOOZE/LIGHT button to enter the Auto-Dim Settings Menu. 2.
-
Page 5: Custom Display
Custom Display Press the CALENDAR button to change the middle section of your display. Choose between full weekday, abbreviated weekday with date, or alarm time. Projection Image 1. Hold the button to enter the Projection Settings 2. Use the buttons to change projection selection. 3. -
Page 6: Time Alarm
Projection Brightness & Rotation Brightness: Press the button to change the Projection Brightness (High, Low, or Off). Rotation: Use the Rotation Wheel on the back of the projection arm to change the projection orientation 270 degrees. Tilt The Projection Arm: The Projection Arm can tilt forward and backward to adjust the location of the projection image on a wall or ceiling. -
Page 7: Temperature Trend Arrows
Snooze: • When alarm sounds, press the SNOOZE button to silence alarm for 10 minutes. The Snooze Icon will flash. • Press any button except SNOOZE to silence the alarm for 24 hours. • When alarm ends by button press or time out after 2 minutes, GOOD DAY will show briefly then return to normal time display. -
Page 8: Outdoor Temperature
Outdoor Temperature If you are seeing NO or dashes for your outdoor readings, please try the following steps: 1. Hold the button to search for your outdoor sensor. The Reception Indicator will begin to animate. 2. If after 3 minutes the sensor still isn’t connected, bring the sensor inside next to the display and remove power from both the sensor and clock. -
Page 9: Specifications
Stay in Touch Specifications Ask questions, watch setup videos, and Projection Clock (616-1410B / 616-41667) provide feedback on our social media outlets. Temperature Range: 32°F to 99°F (0°C to 37°C) Power Requirements: 5 volt Power cord AC6: GPU280500150WAOO Optional: 3-AAA LR3, IEC, batteries for... - Page 10 Warranty Info FCC Statment This equipment has been tested and found to comply with La Crosse Technology, Ltd. provides a 1-year the limits for a Class B digital device, pursuant to part 15 limited time warranty (from date of purchase) on of the FCC Rules.