GoPro HERO3 Manual
Hide thumbs
Also See for HERO3:
- User manual (132 pages) ,
- Manual (61 pages) ,
- Quick start manual (15 pages)
Table of Contents
Advertisement
Quick Links
V 1 (MB)
August 14
TITLE PAGE
HERO3 White Edition | User Manual + Warranty Info
PROMO PAGE
Join the GoPro party at facebook.com/gopro to see what other GoPro owners are
capturing. Share your footage and be a part of the GoPro excitement/movement!
TABLE OF CONTENTS
[CREATE ToC ONCE CONTENT FINAL]
ACCESSORY PAGES
[CREATE ONCE CONTENT FINAL]
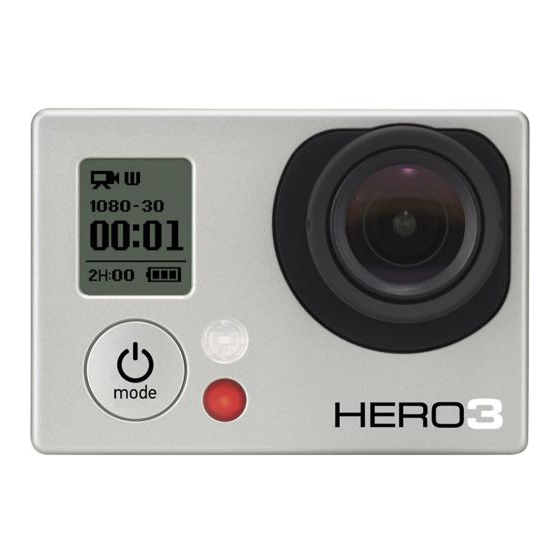
HERO3 FEATURES (order L to R, top to bottom)
1. LED Indicator Lights (Red
2. SHUTTER/SELECT Button [S graphic]
3. LCD Status Screen
4. Wi-Fi Indicator Light (Blue
5. HDMI Port (cable not included)
6. microSD Card Slot (card not included)
7. POWER/MODE Button [mode graphic]
8. HERO Port
9. USB Port (composite A/C cable/3.5mm stereo mic adapter/file
transfer/charge/playback accessory connection)
10. Battery Door
11. Sound Indicator (located on camera bottom)
12. Wi-Fi ON/OFF
CAMERA UPDATES
Process TBD... Keep your camera updated with the latest features. Check
gopro.com/update to download xxxxx.
USING YOUR HERO3: BASICS
GETTING STARTED
Before using the HERO3 for first time:
Red flashes during capture; solid when charging
1
Blue flashes when connected to Wi-Fi
2
)
1
) [W graphic]
2
Advertisement
Table of Contents

Related Manuals for GoPro HERO3


Summary of Contents for GoPro HERO3
- Page 1 TITLE PAGE HERO3 White Edition | User Manual + Warranty Info PROMO PAGE Join the GoPro party at facebook.com/gopro to see what other GoPro owners are capturing. Share your footage and be a part of the GoPro excitement/movement! TABLE OF CONTENTS...
-
Page 2: Camera Default Settings
> See STORAGE/MEMORY CARDS for more information. > See BATTERY LIFE for more information. CAMERA DEFAULT SETTINGS The HERO3 camera has been configured to start with the following default settings: [TABLE] [icon] Startup Mode... - Page 3 Press and release [S]. The red LED Indicator Lights will flash three times and the camera will emit three beeps to indicate recording has stopped. The HERO3 automatically stops recording when memory card is full or battery is out of power. Video is saved before the camera powers OFF.
-
Page 4: Taking Photos
TAKING PHOTOS [photo icon] Verify camera is in Photo mode. If it is not showing, press [mode] repeatedly until it appears. The default photo size is 5MP Wide. The LCD screen will display [mode], FOV, photo resolution size (MP), number of photos stored on the memory card, number of photos that can be taken before the card is full and battery capacity. - Page 5 >See Time Lapse for instructions on how to change the interval setting. ADVANCED MENU SETINGSS ENTERING THE SETTINGS MENU The HERO3 offers many options to customize and change how photos and video are captured using the Settings menu. [settings icon] Verify camera is in Settings menu: 1.
-
Page 6: Capture Settings
8. Press [S]. Note: Certain combinations of Resolution and FPS are not possible. See gopro.com/support for additional information on video resolutions. CHANGING BURST RATE – [burst icon] Burst mode produces a rapid-fire series of 3 photos in 1 second. CHANGING TIME LAPSE MODES [time lapse icon] Several time interval settings are available for Time Lapse mode photos, including 0.5, 1, 2, 5, 10, 30 and 60 seconds. - Page 7 [spot meter icon] Turn on the Spot Meter when filming from within a dark space pointing the camera into a brighter setting, such as filming the outdoors from inside a car. When set to ON, the [spot meter icon] appears in the LCD window. [TABLE] OFF (default) [settings icon] Verify camera is in Settings menu.
- Page 8 PRO TIP: Not sure when a “can’t miss” moment will happen? Set camera to Video Looping. Applications such as road safety and insurance record keeping, where looping can help ensure that the circumstances of an accident or other incident are captured.
-
Page 9: On-Screen Display (Osd)
[TABLE] NTSC default 1080p/30 1080p/24 960p/48 960p/30 720p/60 720p/30 WVGA/120 1080p/25 1080p/24 960p/50 960p/25 720p/50 720p/25 WVGA/120 ONSCREEN DISPLAY (OSD) [OSD icon] To display or hide recording icons and file information on a video or viewing screen during playback, turn [OSD] to ON or OFF. [TABLE] default [settings icon] To turn Onscreen Display ON or OFF, verify camera is in Settings... - Page 10 [settings icon] To change LED Lights display, verify camera is in Settings menu. If it is not showing, press [mode] repeatedly until it appears: 1. Press [S] to enter Settings menu. 2. Use [mode] to cycle through the Settings menu to locate Set Up. 3.
-
Page 11: Setting Date And Time
3. Press [S] to enter Set Up sub-menu. 4. Use [mode] to cycle through the settings menu to locate MANUAL OFF. 5. Press [S] to enter MANUAL OFF sub-menu. 6. Use [mode] to cycle through options. 7. Select highlighted option by pressing [S]. 8. -
Page 12: Storage/Microsd Cards
Check manufacturer guidelines regarding use in acceptable temperature ranges. SYSTEM REQUIREMENTS The HERO3 camera is compatible with Microsoft® XP (Service Pack 2) or later and Mac OS X 10.4.11 or later. Windows requirements: ... -
Page 13: Transferring Files To A Computer
Pro Tip: Want to see your footage and stills on the big screen? Aside from smooth playback on a computer, the HERO3 also plugs directly into a high definition TV (HDTV) via micro-HDMI cable (not included) or XXX. Be sure the HDTV supports a USB I/O interface. -
Page 14: Playback Of Video Files
[sort icon] Quickly find files of the same type using sorting function. From thumbnails screen: Using [mode], cycle through thumbnails until cursor is on [sort icon] Select [sort icon] by pressing [S] Use [mode] to cycle through ALL, Video, Photo, XXX ... -
Page 15: Battery Life
BATTERY LIFE A fully charged HERO3 battery provides approximately two (2) hours of video recording time at 720p-60. If using the HERO3 with LCD BacPac in use, the battery provides approximately XX hours of video recording time at 720p-60. The LCD displays the battery meter in every camera mode. -
Page 16: Important Warning Messages
HERO3 camera. The GoPro 1 amp (1000mAh) charger offers maximum charging performance. REMOVING BATTERY FROM CAMERA The HERO3 battery enclosure area provides a very snug fit in order to maximize battery connection and reliability when camera is used in high vibration activities. To remove battery: 1. -
Page 17: Assembling The Camera
Waterproof Backdoor The waterproof backdoor helps protect the camera to a depth of 197 feet / 60 meters. Use this door when the HERO3 may be used in and around water or other environmental hazards. Pro Tip: When using camera in rain or water, apply RAIN-X or similar anti-beading solution to housing lens to prevent water spots from forming. - Page 18 Water damage due to user error is not covered by the warranty. ATTACHING CAMERA TO MOUNTS Attach the HERO3 to curved or flat surfaces using one of the many GoPro mount accessories. The HERO3 camera, attachment buckle, proper mount and thumb screw are all it takes!
-
Page 19: Fcc Statement
Drying time. For best results, attach the mount a minimum of 24 hours prior to use. For more information on mounts, visit gopro.com/support. FCC STATEMENT [GOPRO to update] WARRANTY [GOPRO to update] CUSTOMER SUPPORT GoPro is dedicated to providing the best possible service. To reach the GoPro Customer Support Team, visit: gopro.com/support.