Table of Contents
Advertisement
Quick Links
Advertisement
Table of Contents

Related Manuals for Bosch HBF113B 0I Series


Summary of Contents for Bosch HBF113B 0I Series
- Page 1 Oven HBF113B.0I, HBF113BR0M [en] Instruction manual...
-
Page 3: Table Of Contents
Before using for the first time....11 www.bosch-home.com and in the online shop www.bosch-eshop.com Initial use ........11 Cleaning the cooking compartment and accessories 11 Operating the appliance . -
Page 4: Intended Use
Intended use 8Intended use (Important safety information R ead these instructions carefully. Only then I n t e n d e d u s e will you be able to operate your appliance G eneral information safely and correctly. Retain the instruction I m p o r t a n t s a f e t y i n f o r m a t i o n manual and installation instructions for future Warning –... -
Page 5: Halogen Lamp
Causes of damage Water in a hot cooking compartment may Risk of scalding! ]Causes of damage ■ create hot steam. Never pour water into the hot cooking compartment. G eneral information C a u s e s o f d a m a g e Warning –... -
Page 6: Installation And Connection
Installation and connection Measures to be noted during transport 5Installation and connection Secure all mobile parts in and on the appliance using an adhesive tape that can be removed without leaving T his appliance is only intended to be fully fitted in a any traces. -
Page 7: Environmental Protection
Environmental protection Open the appliance door as infrequently as possible 7Environmental protection ■ when the appliance is in use. Y our new appliance is particularly energy-efficient. E n v i r o n m e n t a l p r o t e c t i o n Here you can find tips on how to save even more energy when using the appliance, and how to dispose of your appliance properly. -
Page 8: Getting To Know Your Appliance
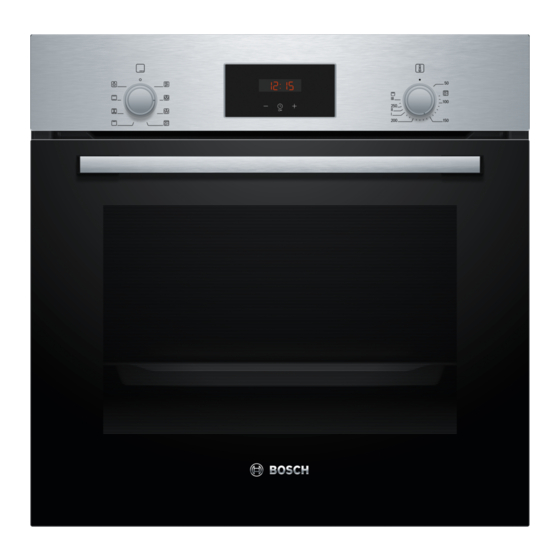
Getting to know your appliance Depending on the appliance model, individual Note: *Getting to know your details and colours may differ. appliance Control panel I n this chapter, we will explain the indicators and You can set your appliance's various functions on the G e t t i n g t o k n o w y o u r a p p l i a n c e controls. -
Page 9: Temperature
Getting to know your appliance Type of heating 3D hot air For baking and roasting on one or more levels. < The fan distributes the heat from the ring heating element in the back panel evenly around the cooking compartment. Hot air gentle An intelligent heating type for the gentle preparation of meat, fish and pastries. -
Page 10: Accessories
Accessories So that the cooking compartment cools down more Always insert accessories between the two guide rods quickly after operation, the cooling fan continues to run for the shelf position. for a certain period afterwards. Accessories can be pulled out approximately halfway without tipping. -
Page 11: Before Using For The First Time
Before using for the first time KBefore using for the first Universal pan, non-stick For moist cakes, baked items, frozen food and large roasts. time Allows baked items and roasts to be removed more easily from the universal pan. B efore you can use your new appliance, you must Baking tray, non-stick B e f o r e u s i n g f o r t h e f i r s t t i m e make some settings. -
Page 12: Operating The Appliance
Operating the appliance Rapid heating 1Operating the appliance With Rapid heating, you can shorten the heat-up time. Y ou have already learnt about the controls and how Then, for best results, use: O p e r a t i n g t h e a p p l i a n c e they work. -
Page 13: Time-Setting Options
Time-setting options Use the button to set the cooking time. OTime-setting options Y our appliance has different time-setting options. T i m e - s e t t i n g o p t i o n s Time-setting option Use Cooking time Once the set cooking time has elapsed, the appliance will automatically stop heating. -
Page 14: Setting The Timer
Time-setting options Example in the picture: The time is 10.30 a.m., a The maximum time that can be set is 23 hours and 59 cooking time of 45 minutes has been set and you want minutes. Up to 10 minutes, the timer duration can be the food to be ready at 12.30 p.m. -
Page 15: Childproof Lock
Childproof lock AChildproof lock DCleaning Y our appliance is equipped with a childproof lock so W ith good care and cleaning, your appliance will retain C h i l d p r o o f l o c k C l e a n i n g that children cannot switch it on accidentally or change its appearance and remain fully functioning for a long any settings. -
Page 16: Keeping The Appliance Clean
Cleaning Notes Door panels Hot soapy water: Slight differences in colour on the front of the ■ Clean with a dish cloth and then dry with a soft appliance are caused by the use of different cloth. materials, such as glass, plastic and metal. Do not use a glass scraper or a stainless steel Shadows on the door panels, which look like ■... -
Page 17: Rails
Rails Warning pRails Incorrect assembly! Never move the frame before the two hooks are fully W ith good care and cleaning, your appliance will retain anchored in the upper holes. The enamel could be R a i l s its appearance and remain fully functional for a long damaged and may break (figure C). -
Page 18: Appliance Door
Appliance door Attaching the door qAppliance door Reattach the oven door in the reverse sequence to removal. W ith good care and cleaning, your appliance will retain A p p l i a n c e d o o r When attaching the oven door, ensure that both its appearance and remain fully functional for a long hinges are inserted straight into the opening... -
Page 19: Trouble Shooting
Trouble shooting 3Trouble shooting Warning – Risk of injury! Scratched glass in the appliance door may develop into a crack. Do not use a glass scraper, sharp or abrasive I f a fault occurs, there is often a simple explanation. cleaning aids or detergents. -
Page 20: Customer Service
Customer service 4Customer service Warning – Risk of electric shock! When replacing the cooking compartment bulb, the bulb socket contacts are live. Before replacing the bulb, O ur after-sales service is there for you if your appliance unplug the appliance from the mains or switch off the C u s t o m e r s e r v i c e needs to be repaired. -
Page 21: Tested For You In Our Cooking Studio
Tested for you in our cooking studio Baking on one level JTested for you in our When baking on one level, use the following shelf cooking studio positions: Position 2 – tall baked items and tins/dishes on the ■ wire rack H ere, you can find a selection of dishes and the ideal Position 3 –... - Page 22 Tested for you in our cooking studio Some frozen products may be unevenly pre-baked. Baking tins Uneven browning may remain even after baking. For optimal cooking results, we recommend using dark- coloured metal baking tins. Bread and rolls Tinplate baking tins, ceramic dishes and glass dishes Caution! extend baking time and mean that the baked item will not brown evenly.
- Page 23 Tested for you in our cooking studio Small baked items Dish Accessories/cookware Shelf posi- Heating Temperature Cooking tion function in °C time in mins Muffins Muffin tray 170-190 20-40 Muffins, 2 levels Muffin trays 160-170 30-40 < Small yeast cakes Universal pan 150-170 25-35...
- Page 24 Tested for you in our cooking studio Pizza, quiche and savoury cakes Dish Accessories/cookware Shelf posi- Heating Temperature Cooking tion function in °C time in Pizza, fresh Universal pan 190-210 20-30 Pizza, fresh, 2 levels Universal pan + baking tray 160-180 35-45 <...
-
Page 25: Bakes And Gratins
Tested for you in our cooking studio The baked item looks good, but is not Use a lower temperature and bake slightly longer; if necessary, add slightly less liquid. For baked items with a cooked properly in the middle. moist topping, bake the base first. Sprinkle it with almonds or breadcrumbs and then place the topping on top. The baked item cannot be turned out Allow the baked item to cool down for 5 to 10 minutes after baking. - Page 26 Tested for you in our cooking studio Do not add salt to the meat until it has been grilled. Salt Poultry will turn out particularly crispy and brown if you draws water from the meat. baste it towards the end of the roasting time with butter, salted water or orange juice.
- Page 27 Tested for you in our cooking studio Dish Accessories/cookware Shelf position Heating Temperature in Cooking time function °C in mins Goose legs, 350 g each Wire rack 220-240 40-50 Small turkey, 2.5 kg Wire rack 180-200 80-100 Turkey breast, boned, 1 kg Cookware, covered 240-260 80-100...
-
Page 28: Vegetables And Side Dishes
Tested for you in our cooking studio Vegetables and side dishes Adhere to the specifications in the table. Here, you can find information for preparing grilled vegetables, potatoes and frozen potato products. Dish Accessories/cookware Shelf posi- Heating Tempera- Cooking tion function ture in °C time in mins... -
Page 29: Prove Dough
Tested for you in our cooking studio dependent on the type, moisture, ripeness and more flavour it will retain.For this reason, the table thickness of the food. The longer you leave the food to specifies setting ranges. be dried, the better it will be preserved. The more thinly If you wish to dry food that is not listed in the table, you you slice the food, the more quickly it will dry and the should use the settings listed in the table for similar... - Page 30 Tested for you in our cooking studio...
- Page 31 Tested for you in our cooking studio...
- Page 32 Robert Bosch Hausgeräte GmbH Carl-Wery-Straße 34 81739 München, GERMANY www.bosch-home.com *9001341219* 9001341219 030897(A)