Table of Contents
Advertisement
Available languages
Available languages
Quick Links
BARBECUE À GRANULES DE BOIS
FOR OUTDOOR AND HOUSEHOLD USE ONLY. NOT FOR COMMERCIAL USE.
POUR UN USAGE DOMESTIQUE ET À L'EXTÉRIEUR SEULEMENT. NON DESTINÉ À UN USAGE COMMERCIAL.
WOODLAND PELLET GRILL
IMPORTANT: READ CAREFULLY, RETAIN FOR FUTURE REFERENCE.
MANUAL MUST BE READ BEFORE OPERATING!
IMPORTANT : LISEZ ATTENTIVEMENT CE DOCUMENT ET
CONSERVEZ-LE POUR RÉFÉRENCE ULTÉRIEURE. VOUS
DEVEZ LIRE CE MANUEL AVANT D'UTILISER LE BARBECUE.
ASSEMBLY AND OPERATION
ASSEMBLAGE ET UTILISATION
MODEL / MODÈLE : VC1080PG1
PART / PIÈCE : 10512
300522
TM/MC
Advertisement
Chapters
Table of Contents

Related Manuals for Vermont Castings WOODLAND VC1080PG1


Summary of Contents for Vermont Castings WOODLAND VC1080PG1
- Page 1 MODEL / MODÈLE : VC1080PG1 PART / PIÈCE : 10512 300522 TM/MC WOODLAND PELLET GRILL BARBECUE À GRANULES DE BOIS IMPORTANT: READ CAREFULLY, RETAIN FOR FUTURE REFERENCE. MANUAL MUST BE READ BEFORE OPERATING! IMPORTANT : LISEZ ATTENTIVEMENT CE DOCUMENT ET CONSERVEZ-LE POUR RÉFÉRENCE ULTÉRIEURE.
- Page 2 Vermont Castings continues the promise of unwavering quality and purposeful design. Vermont Castings barbecues do more than just grill. They let you create enduring connections around food and flame. CONTACT US: 1-844-586-4660...
-
Page 4: Safety Information
SAFETY INFORMATION MAJOR CAUSES OF APPLIANCE FIRES ARE A RESULT OF POOR MAINTENANCE AND A FAILURE TO MAINTAIN REQUIRED CLEARANCE TO COMBUSTIBLE MATERIALS. IT IS OF UTMOST IMPORTANCE THAT THIS PRODUCT BE USED ONLY IN ACCORDANCE WITH THE FOLLOWING INSTRUCTIONS. DANGERS AND WARNINGS Please read and understand this entire manual before attempting to assemble, operate or install the product. - Page 5 In accordance with the procedures and specifications listed in the UL Subject 2728A-2019 “pellet fuel cooking appliances” and ULC/ORD-C2728-13 and Canadian CSA C22.2 #3 “for electrical features of fuel burning equipment.” Vermont Castings pellet cooking appliances have been independently tested and listed by CSA (an accredited testing laboratory) to UL, ULC and CSA standards.
-
Page 6: Table Of Contents
GETTING STARTED Make sure you know and understand the basics of safe use and installation. SAFETY INFORMATION PARTS & SPECS TAKING CARE OF ASSEMBLY PREPARATION ASSEMBLY INSTRUCTIONS YOUR BARBECUE GRILLING LIKE A PRO Maintenance and performance go hand-in-hand. If you take responsibility Every barbecue is different. -
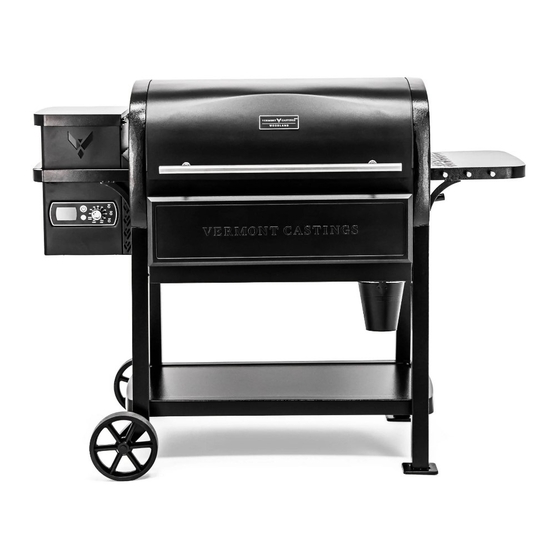
Page 7: Parts & Specs
PARTS & SPECS PART# DESCRIPTION Porcelain-Coated Steel Upper Cooking Rack (x1) Porcelain-Coated Cast-Iron Cooking Grids (x3) Flame Broiler Control Lever (x1) Flame Broiler Slider (x1) Flame Broiler Main Plate (x1) Burn Grate (x1) Main Barrel / Hopper Assembly (x1) Side Shelf (x1) Meat Probe (x2) Front Shelf (x1) Lid Handle Washer (x2) -
Page 8: Assembly Preparation
ASSEMBLY PREPARATION MAJOR CAUSES OF APPLIANCE FIRES ARE A RESULT OF POOR MAINTENANCE AND A FAILURE TO MAINTAIN REQUIRED CLEARANCE TO COMBUSTIBLE MATERIALS. IT IS OF UTMOST IMPORTANCE THAT THIS PRODUCT BE USED ONLY IN ACCORDANCE WITH THE FOLLOWING INSTRUCTIONS. Parts are located throughout the shipping carton, including below the grill. - Page 9 INSTALLING SIDE SKIRT TO THE CART PARTS REQUIRED: Side Skirt (#17) Screw (#D) INSTALLATION: • From below, secure the side skirt to each leg using four screws. Ensure the flatter surface of the side skirt is facing outwards. • Install the other side skirt to the other two support legs of the unit using another four screws.
- Page 10 MOUNTING WHEELS TO THE LEGS PARTS REQUIRED: Wheel (#23) Wheel Axle Pin (#E) Wheel Washer (#F) Wheel Cotter Pin (#G) INSTALLATION: • Attach the wheel to the leg by inserting the wheel axle pin through the wheel, then the leg hole, wheel washer, and finally secure using wheel cotter pin. Note illustration for order.
- Page 11 INSTALLING THE FRONT SHELF PARTS REQUIRED: Front Shelf (#10) Screw (#H) Nut (#I) INSTALLATION: • From below, insert the front shelf screw (from the inside) into the front shelf bracket and front shelf and lock with nut. • Repeat installation for the other side of the front shelf. INSTALLING THE LID HANDLE PARTS REQUIRED: Lid Handle Washer (#11)
- Page 12 INSTALLING THE COOKING COMPONENTS PARTS REQUIRED: Flame Broiler Main Plate (#5) Flame Broiler Slider (#4) Flame Broiler Control Lever (#3) INSTALLATION: • Insert the flame broiler main plate into the grill barrel. Rest the flame broiler main plate on the built-in ledge (on the inside right) of the main grill that directs grease towards the grease bucket.
- Page 13 PLACING THE GREASE BUCKET PARTS REQUIRED: Grease Bucket (#24) INSTALLATION: • Place the grease bucket on the spout hook on the bottom of the main barrel. Ensure it is level to avoid grease spills. • The unit is now completely assembled. CONNECTING TO A POWER SOURCE STANDARD OUTLET FAST-BLOW FUSE,...
-
Page 14: Grill Environment
Extreme cold weather conditions may affect maximal temperature output. All Vermont Castings units should keep a minimum clearance of 457 mm (17.9 inches) from combustible constructions, and this clearance must be maintained while the grill is operational. To effectively assist your grill in achieving proper temperature output, maintain heat retention, and heat recovery time when the lid is open, it is recommended to shelter your unit from the wind. -
Page 15: Grill Temperature Ranges
FUEL, PROPER AIRFLOW, AND THE COOKING COMPONENTS ARE CLEAN. The unique design of the Vermont Castings airflow system allows the majority of fly ash to be directed toward the bottom of the barrel, while directing the fan-forced convection heat to circulate around the main grill barrel. -
Page 16: Understanding The Digital Control Centre
The plug-in connection port on the front of the Digital Control Centre is for a Meat Probe. When the meat probe is connected, the temperature is displayed on the LED Screen. When not in use, disconnect the meat probe from the connection port. Compatible with Vermont Castings branded meat probes only. -
Page 17: Understanding The Probes
UNDERSTANDING THE PROBES GRILL PROBE The grill probe measures the internal temperature of the grill. Using these temperature values (ACT temperature), the controller adjusts its feeding rate to maintain the Set temperature/desired temperature. To adjust the SETPOINT temperature of the grill, rotate the temperature control dial to the preset temperatures such as Smoke, 200°F, 225°F, 250°F, 300°F, 350°F, 400°F, 450°F, 525°F and High. -
Page 18: Automatic Start-Up Procedure
AUTOMATIC START-UP PROCEDURE Plug the power cord into a grounded power source. Open the main barrel lid. Check the burn grate to ensure there is no obstruction for proper ignition. Open the hopper lid. Ensure there are no foreign objects in the hopper or auger feed system. Fill the hopper with dry, all natural barbecue hardwood pellets. -
Page 19: Cooking Guidelines
COOKING GUIDELINES Smoking and grilling styles of cooking can give you different results based on time and temperature. For best results, keep a record of what you cooked, at what temperature, how long you cooked for, and the results. Adjust to your taste for the next time. Practice makes perfect. The culinary art of hot smoking refers to longer cooking times, but results in more natural wood flavor (and a sought-after smoke ring) on your meats. - Page 20 RARE MEDIUM WELL DONE BEEF SIZE HEAT 54°C / 130°F 60°C / 140°F 65°C / 150°F Steak (New York, Porter- 1.9 cm / ¾" High Sear 8–10 minutes house, Rib-eye, Sirloin, 2.5 cm / 1" Sear 10–12 minutes T-bone, or Tenderloin) 3.8 cm / 1½"...
-
Page 21: Tips & Techniques
TIPS & TECHNIQUES Follow these helpful tips and techniques, passed on from Vermont Castings owners, our staff, and customers just like you, to become more familiar with your grill: FOOD SAFETY • Keep everything in the kitchen and cooking area clean. Use different platters and utensils for the cooked meat than the ones you used to prepare or transport the raw meat out to the grill. -
Page 22: Care & Maintenance
REQUIRED CLEARANCE TO COMBUSTIBLE MATERIALS. IT IS OF UTMOST IMPORTANCE THAT THIS PRODUCT BE USED ONLY IN ACCORDANCE WITH THE FOLLOWING INSTRUCTIONS. Any Vermont Castings unit will give you many years of flavorful service with minimum cleaning. Follow these cleaning and maintenance tips to service your grill: HOPPER ASSEMBLY •... -
Page 23: Troubleshooting
TROUBLESHOOTING Proper cleaning, maintenance and the use of clean, dry, quality fuel will prevent common operational problems. When your Vermont Castings grill is operating poorly, or on a less frequent basis, the following troubleshooting tips may be helpful. For FAQ, please visit www.vermontcastingsbbq.com . - Page 24 Grill produces excess or Grease build-up Follow care and maintenance instructions. discolored smoke Wood pellet quality Remove moist wood pellets from hopper. Follow care and maintenance instructions to clean out. Replace with dry wood pellets. Burn grate is blocked Clear burn grate of moist, wood pellets. Follow hopper priming procedure. Insufficient air intake for fan Check fan.
-
Page 25: Electrical Diagram
ELECTRICAL DIAGRAM The Digital Control Centre system is an intricate and valuable piece of technology. For protection from power surges and electrical shorts, consult the wire diagram below to ensure your power source is sufficient for the operation of the unit. HOPPER ACCESS PANEL Locate and remove the eight screws on side of hopper to access electrical components. -
Page 26: Replacement Parts
REPLACEMENT PARTS ORDERING REPLACEMENT PARTS 1-LH To order replacement parts, please contact Customer Service or 2-LH visit our online store at: www.vermontcastingsbbq.com PART# DESCRIPTION 3-LH 4-LH 1-LH Hopper Lid 8-LH 14-LH 2-LH Hopper Safety Screen 5-LH 16-LH 9-LH 25-LH 3-LH Hopper Housing 6-LH 4-LH... -
Page 27: Warranty
CONDITIONS All wood pellet grills by Vermont Castings, manufactured by Dansons, carry a limited warranty from the date of sale by the original owner. The warranty coverage begins on the original date of purchase and proof of date of purchase, or copy of original bill of sale, is required to validate the warranty. - Page 28 BIENVENUE AU VERMONT CASTINGS Fondé en 1975, Vermont Castings a toujours défendu un engagement sans compromis pour un travail de qualité et un design éloquent. Nos poêles à bois et produits de foyer fournissent plus que de la chaleur - ils créent une chaleur qui unit.
-
Page 30: Consignes De Sécurité
CONSIGNES DE SÉCURITÉ LES PRINCIPALES CAUSES D’INCENDIE DE L’ A PPAREIL SONT LE RÉSULTAT D’UN MAUVAIS ENTRETIEN ET D’UN MANQUE DE DÉGAGEMENT REQUIS POUR LES MATÉRIAUX COMBUSTIBLES. IL EST DE LA PLUS HAUTE IMPORTANCE QUE CET ARTICLE NE SOIT UTILISÉ QUE CONFORMÉMENT AUX INSTRUCTIONS SUIVANTES. DANGERS ET AVERTISSEMENTS Veuillez lire attentivement et bien comprendre le présent guide avant d’assembler, d’utiliser ou d’installer cet article. - Page 31 », dans l’ULC/ORD-C2728-13 et dans le CSA CANADIEN C22.2 #3 « pour les caractéristiques électriques des appareils à combustible ». Les appareils de cuisson à granules Vermont Castings ont été testés indépendamment et répertoriés par le CSA (un laboratoire d’essai reconnu) selon les normes UL, ULC et CSA.
- Page 32 COMMENCER Assurez-vous de connaître et de comprendre les principes de base d’une utilisation et d’une installation sûres. CONSIGNES DE SÉCURITÉ PIÈCES ET SPÉCIFICATIONS PRENDRE SOIN DE PRÉPARATION EN VUE DE L’ASSEMBLAGE VOTRE BARBECUE INSTRUCTIONS D’ASSEMBLAGE GRILLER COMME UN PRO Maintenance et performance fonctionnent ensemble.
-
Page 33: Pièces Et Spécifications
PIÈCES ET SPÉCIFICATIONS DÉSIGNATION Grille de cuisson supérieure en acier émaillé (x1) Grilles de cuisson en fonte émaillée (x3) Levier de commande pour le brûleur à flamme (x1) Glissière du brûleur à flamme (x1) Planche principale du brûleur à flamme (x1) Grille de combustion (x1) Assemblage de la trémie/baril principal (x1) Tablette latérale (x1) -
Page 34: Préparation En Vue De L'assemblage
PRÉPARATION EN VUE DE L’ASSEMBLAGE LES PRINCIPALES CAUSES D’INCENDIE DE L’APPAREIL SONT LE RÉSULTAT D’UN MAUVAIS ENTRETIEN ET D’UN MANQUE DE DÉGAGEMENT REQUIS POUR LES MATÉRIAUX COMBUSTIBLES. IL EST DE LA PLUS HAUTE IMPORTANCE QUE CET ARTICLE NE SOIT UTILISÉ QUE CONFORMÉMENT AUX INSTRUCTIONS SUIVANTES. Les pièces se trouvent partout dans le carton d’expédition, y compris sous le gril. - Page 35 INSTALLATION DE LA JUPE LATÉRALE AU CHARIOT PIÈCES REQUISES : jupe latérale (n vis (n INSTALLATION : • À partir du dessous, fixez la jupe latérale à chaque patte à l’aide de quatre vis. Veillez à ce que la surface plus lisse de la jupe latérale soit tournée vers l’extérieur.
- Page 36 ASSEMBLAGE DES ROUES SUR LES PATTES PIÈCES REQUISES : roue (n° 23) goupille de l’essieu de roue (n° E) rondelle de roue (n° F) goupille fendue de roue (n° G) INSTALLATION : • Fixez la roue à la patte en insérant la goupille de l’essieu de roue dans la roue, puis dans le trou de la patte et la rondelle de roue, puis fixez-la à...
- Page 37 INSTALLATION DE LA TABLETTE AVANT PIÈCES REQUISES : tablette avant (n° 10) vis (n° H) écrou (n° I) INSTALLATION : • À partir du dessous, insérez la vis de la tablette avant (de l’intérieur) dans le support de tablette avant et la tablette avant, puis bloquez avec l’écrou. •...
- Page 38 INSTALLATION DES COMPOSANTS DE CUISSON PIÈCES REQUISES : planche principale du brûleur à flamme (n° 5) glissière du brûleur à flamme (n° 4) levier de commande pour le brûleur à flamme (n° 3) INSTALLATION : • Insérez la planche principale du brûleur à flamme dans le baril du barbecue. Posez la planche principale du brûleur sur le rebord intégré...
- Page 39 MISE EN PLACE DU SEAU À GRAISSE PIÈCES REQUISES : seau à graisse (n° 24) INSTALLATION : • Placez le seau à graisse sur le crochet au bas du baril principal. Assurez-vous qu’il est de niveau pour éviter les déversements de graisse. •...
-
Page 40: Environnement Du Barbecue
Le froid extrême peut affecter la température maximale atteinte par le barbecue. Tous les appareils Vermont Castings doivent conserver un espace minimum de 457 mm (17,9 po) de toute structure inflammable, et cet espace doit être maintenu lorsque le barbecue est en fonction. -
Page 41: Plages De Température Du Barbecue
DE COMBUSTIBLE SEC, UN BON DÉBIT D’AIR ET QUE LES COMPOSANTS DE CUISSON SONT PROPRES. La conception unique du système de circulation d’air de Vermont Castings permet à la majorité des cendres volantes d’être dirigées vers le bas du baril, tout en dirigeant la chaleur de convection forcée par un ventilateur pour circuler autour du baril principal du barbecue. -
Page 42: Comprendre Le Centre De Contrôle Numérique
COMPRENDRE LE CENTRE DE CONTRÔLE NUMÉRIQUE Cette commande de type PID (proportionnelle, intégrale et dérivée) est très semblable aux commandes de votre four de cuisine. Les principaux avantages sont la possibilité de compenser automatiquement les différentes conditions ambiantes et les différents types de carburant utilisés. IMPORTANT : LA TEMPÉRATURE INTERNE DE TOUT BARBECUE VARIE GRANDEMENT EN FONCTION DE SON EMPLACEMENT. -
Page 43: Comprendre Les Thermomètres
à viande. Lorsque ce dernier est connecté, la température affichée est sur l’écran à DEL. Lorsque vous ne l’utilisez pas, débranchez-le du port de connexion. Compatible avec les thermomètres à viande de marque Vermont Castings seulement. COMPRENDRE LES THERMOMÈTRES THERMOMÈTRE POUR LE BARBECUE Le thermomètre mesure la température interne du barbecue. -
Page 44: Première Utilisation : Combustion Initiale
PREMIÈRE UTILISATION : COMBUSTION INITIALE Avant de cuisiner sur le barbecue pour la première fois, il est important d’effectuer un brûlage complet des grilles de cuisson. Mettez le barbecue en marche et faites-le fonctionner à une température supérieure à 180 °C/350 °F, le couvercle ouvert, pendant 30 à 40 minutes pour faire brûler les grilles de cuisson et ainsi brûler tout corps étranger. -
Page 45: Directives De Cuisson
DIRECTIVES DE CUISSON Les styles de cuisson de fumage et grillage peuvent donner des résultats différents en fonction du temps et de la température. Pour de meilleurs résultats, prenez en note ce que vous avez cuisiné, la température et le temps de cuisson ainsi que les résultats obtenus. Ajuster la cuisson à votre goût pour la prochaine fois. - Page 46 À POINT MEDIUM BIEN CUIT BŒUF TAILLE CHALEUR 54 °C / 130 °F 60 °C / 140 °F 65 °C / 150 °F Bifteck (f aux-filet, aloyau, 1,9 cm/¾ po Élevée Saisir de 8 à 10 minutes entrecôte, surlonge ou filet 2,5 cm/1 po Saisir de 10 à...
-
Page 47: Conseils Et Techniques
CONSEILS ET TECHNIQUES Suivez ces conseils et techniques utiles, qui ont été transmis par des propriétaires d’appareils Vermont Castings, notre personnel et des clients comme vous, afin de mieux connaître votre barbecue : SALUBRITÉ ALIMENTAIRE • Maintenez la cuisine et la surface de cuisson propres. Utilisez des plats et des ustensiles différents de ceux que vous avez utilisés pour préparer ou transporter la viande crue sur le barbecue. -
Page 48: Entretien Et Maintenance
IMPORTANCE QUE CET ARTICLE NE SOIT UTILISÉ QUE CONFORMÉMENT AUX INSTRUCTIONS SUIVANTES. Tout appareil Vermont Castings vous donnera de nombreuses années de service pour des plats savoureux avec un minimum de nettoyage. Suivez ces conseils de maintenance et de nettoyage pour l’entretien de votre barbecue : ASSEMBLAGE DE LA TRÉMIE... -
Page 49: Dépannage
Un nettoyage et un entretien approprié ainsi que l’utilisation d’un combustible propre, sec et de qualité permettront d’éviter les problèmes opérationnels courants. Lorsque votre appareil Vermont Castings fonctionne mal ou moins fréquemment, les conseils de dépannage suivants peuvent vous être utiles. Pour la foire aux questions, veuillez consulter le site www.vermontcastingsbbq.com. Vous pouvez également communiquer avec un marchand autorisé... - Page 50 Le barbecue produit un Accumulation de graisse Suivez les instructions d’entretien et de maintenance. excès de fumée ou une Qualité des granules de bois Retirez de granules de bois humide de la trémie. Suivez les instructions d’entretien fumée décolorée et de maintenance pour nettoyer. Remplacer avec des granules de bois sèches. La grille de combustion est Retirez les granules de bois humides de la grille de combustion.
-
Page 51: Schéma Électrique
SCHÉMA ÉLECTRIQUE Le système du centre de contrôle numérique est une technologie complexe et précieuse. Pour la protection contre les surtensions et les courts-circuits électriques, consultez le schéma électrique ci-dessous pour vous assurer que votre source d’alimentation est suffisante pour le fonctionnement de l’appareil. PANNEAU D’ACCÈS DE LA TRÉMIE Localisez et enlevez les huit vis sur le côté... -
Page 52: Pièces De Rechange
PIÈCES DE REMPLACEMENT COMMANDE DE PIÈCES DE RECHANGE 1-LH Pour commander des pièces de rechange, veuillez communiquer 2-LH avec votre marchand autorisé ou visitez notre magasin en ligne à l’adresse : www.vermontcastingsbbq.com N° DÉSIGNATION 3-LH 4-LH 8-LH 14-LH 1-LH Couvercle de la trémie 5-LH 16-LH 9-LH... -
Page 53: Garantie
CONDITIONS Tous les barbecues à granules de bois Vermont Castings, fabriqués par Dansons, sont couverts par une garantie limitée à partir de la date de vente par le propriétaire original. La couverture de la garantie débute à la date d’achat originale; une preuve de la date d’achat ou une copie de l’acte de vente original est requise pour valider la garantie. - Page 54 TM/MC IMPORTANT DO NOT RETURN PRODUCT TO STORE For all questions, comments, or inquiries, please contact Dansons directly. Our Customer Service department is available Monday through Sunday, 4 a.m. - 8 p.m. PST (EN/FR/ES). TOLL FREE: 1.844.586.4660 WARNING: This product can expose you to chemicals including wood dust, which is known to the IMPORTANT state of California to cause cancer.