Table of Contents
Advertisement
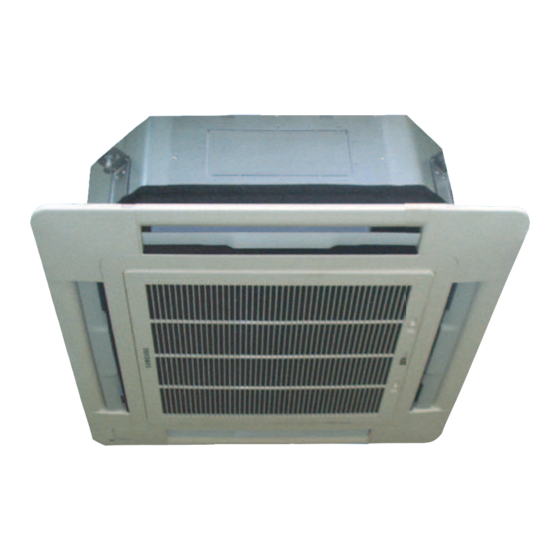
AIR CONDITIONER
CH070EAV1/CH090/105/140EAV
UH070EAV1
Refer to the service manual in the GSPN(see the rear cover) for the more information.
SYSTEM AIR CONDITIONER
Basic : CH140EAV/UH140GAV
Model : CH070EAV1/CH090/105/140EAV
Model Code : CH070EAV1/CH090/105/140EAV
UH090/105/140EAV
UH070EAV1/UH090/105/140EAV
UH070EAV1/UH090/105/140EAV
CONTENTS
1. Precautions
2. Product Specifi cations
3. Disassembly and Reassembly
4. Troubleshooting
5. Exploded Views and Parts List
6. PCB Diagram and Parts List
7. Wiring Diagram
8. Schematic Diagram
9. Reference Sheet
Advertisement
Table of Contents

Related Manuals for Samsung CH070EAV1


Summary of Contents for Samsung CH070EAV1
- Page 1 SYSTEM AIR CONDITIONER Basic : CH140EAV/UH140GAV Model : CH070EAV1/CH090/105/140EAV UH070EAV1/UH090/105/140EAV Model Code : CH070EAV1/CH090/105/140EAV UH070EAV1/UH090/105/140EAV AIR CONDITIONER CONTENTS 1. Precautions 2. Product Specifi cations 3. Disassembly and Reassembly 4. Troubleshooting 5. Exploded Views and Parts List CH070EAV1/CH090/105/140EAV 6. PCB Diagram and Parts List 7.
-
Page 2: Table Of Contents
Contents 11. Precautions ............................1-1 Installing the air conditioner ......................1-2 Power supply and circuit breaker ....................1-3 During operation ..........................1-4 Disposing of the unit ........................1-5 Others ..............................12. Product Specifications ....................... 2-1 The Feature of Product ........................ - Page 3 >3mm. Do not extend an electric cord to the air conditioner. The air conditioner must be plugged in after you complete the installation. No Tapping and No Extension Cords Samsung Electronics...
-
Page 4: During Operation
�oung children or infirm persons should be always supervised when they use the air conditioner. Max current is measured according to IEC standard for safety. Current is measured according to ISO standard for energy efficiency. Samsung Electronics... -
Page 5: Product Specifications
It can give the benefit to the installers and aries the reliability of the air conditioner. Long Ambient Operation(In Low Temperature) It can arise the reliability and the capacity of the air conditioner, especially operated in low temperature. Eco-friendly Product(Lead-Free, RoHS, WEEE) Samsung Electronics... -
Page 6: Product Specifications
2-2 Product Specifications Model CH070EAV1 UH070EAV1 CH090EAV UH090EAV Indoor Unit Outdoor Unit Indoor unit Outdoor unit Item Type Cassette-type Cassette-type Cooling(MIN/STD/MAX) 2.1/7.1/8.4 3.2/9.0/10.0 Heating(MIN/STD/MAX) 2.0/8.0/11.6 3.0/10.0/13.9 Dehumidifying ℓ/h Cooling 21.9/19.4/18.3 22.8/17.6/13.5 m³/min Air Volume (H/M/L) Heating 22.3/21.7/19.1 24.1/20.3/16.2 Cooling Noise... - Page 7 Refrigerant Control Unit Freezer Oil Capacity 1,100 Refrigerant to Change(R410A) 2,800(40g/m) Protection Device(OLP) Cooling Test Condition INDOOR UNIT : DB27˚C WB19˚C OUTDOOR UNIT : DB35˚C WB24˚C Heating Test Condition INDOOR UNIT : DB20˚C WB15˚C OUTDOOR UNIT : DB7˚C WB6˚C Samsung Electronics...
- Page 8 Refrigerant Control Unit Freezer Oil Capacity 1,100 Refrigerant to Change(R410A) 2,800(40g/m) Protection Device(OLP) Cooling Test Condition INDOOR UNIT : DB27˚C WB19˚C OUTDOOR UNIT : DB35˚C WB24˚C Heating Test Condition INDOOR UNIT : DB20˚C WB15˚C OUTDOOR UNIT : DB7˚C WB6˚C Samsung Electronics...
-
Page 9: The Comparative Specifications Of Product
Item UH140EAV UH140GAV Outdoor Unit Design Indoor Unit Indoor Unit 29.0kg 29.0kg Net Weight Outdoor Unit 94.0kg 98.0kg Indoor Unit 840x298x840(mm) 840x298x840(mm) Outer Dimension (WidthxHeightxDepth) Outdoor Unit 1,128x932x375(mm) 930x1,135x370(mm) Indoor Unit 50dB↓ 45dB↓ Noise Outdoor Unit 66dB↓ 60dB↓ Samsung Electronics... -
Page 10: Accessory And Option Specifications
Insulation Pipe Joint In 1/4 DB72-00143E Insulation Pipe Joint In 1/2 DB72-00143G Insulation Pipe joint out 1/4 DB62-03439J Indoor Unit Cable-tie DB65-10088C Flexible hose DB94-01065A Pad stopper DB69-00165A Safety net DB63-01480A M4x12 tapped Screw 6002-000231 Installation manual DB98-26918A Samsung Electronics... - Page 11 Accessories(cont.) Item Descriptions Code-No. Q'TY Remark Drain Plug DB67-00477A Cap Drain DB63-10355C Outdoor Unti Rubber bracket Wire DB73-00218A Nut Flare DB60-30010B Samsung Electronics...
- Page 12 Accessories(cont.) Wireless Remote Controller Accessories Item Descriptions Code-No. Q'TY Remark DB93-00251G Wireless remote controller ( ARH-401 ) Battery DB47-90024A Remote control holder DB61-00204A STS 2S-2x10 tapped screw 6002-000581 User's manual DB98-05156A Installation manual DB98-05184A Samsung Electronics...
- Page 13 Accessories(cont.) Wireless Remote Controller Accessories Item Descriptions Code-No. Q'TY Remark DB93-04858C Wireless remote controller (MR-BH01) Battery DB47-90024A Remote control holder DB61-03147A STS 2S-2x10 tapped screw 6002-000581 User's manual DB98-27999A Installation manual DB98-27997A Samsung Electronics...
- Page 14 DB93-03934B Wired remote controller (MWR-WS00) Cable-tie DB65-10088B Cable clamp DB65-10074E M4x16 tapped screw 6002-000474 Indoor unit power drawing cable DB39-00221A Communication cable of the DB39-00933A wired remote controller Wire joint DB39-90020A User's manual DB98-25179A Installation manual DB98-25180A 2-10 Samsung Electronics...
- Page 15 Centralized Controller Accessories Item Descriptions Code-No. Q'TY Remark DB93-03425C Centralized controller (MCM-A202) Cable-tie DB65-10088B Cable clamp DB65-10074E M4x16 tapped screw 6002-000474 User's manual DB98-12721A Installation manual DB98-25773A Samsung Electronics 2-11...
- Page 16 ■ Function Controller Accessories Item Descriptions Code-No. Q'TY Remark DB97-01077A Function controller (MCM-A100) Cable-tie DB65-10088B Cable clamp DB65-10074E M4x16 tapped screw 6002-000474 User's manual DB98-27317A Installation manual DB98-27315A 2-12 Samsung Electronics...
- Page 17 Transmitter Accessories Item Descriptions Code-No. Q'TY Remark DB97-00647P Transmitter (MIM-B04A) Transmitter power cable DB39-00378D Transmitter communication cable DB39-00253D Samsung Electronics 2-13...
- Page 18 DMS(Data Management Server) Accessories Item Descriptions Code-No. Q'TY Remark DB93-03709B (MIM-D00) Cable-tie DB65-01088B Cable clamp DB65-010074D M4x16 tapped screw 6002-000474 DB73-00320A BOTTOM HOOK User's manual DB98-25059A Installation manual DB98-25049A 2-14 Samsung Electronics...
-
Page 19: Disassembly And Reassembly
3. Disassembly and Reassembly ■ Necessary Tools Item Remark +SCREW DRIVER MONKE� SPANNER Samsung Electronics... -
Page 20: Indoor Unit
3-1 Indoor Unit ■ CH070EAV1/CH090/105/140EAV Parts Procedure Remark Front Grille 1) Push the tap on the Front Grille to open it. –Dust-Collecting Filter 2) Disassembly of Front Grille. (1) Open the Front Grille at about 45˚ degrees and draw it forward. - Page 21 5) Pull the corner cover forward carefully by using 2 hands. 6) Loosen 4 bolts of the front panel slowly. 7) Loosen 4 screws of the safety net to disassemble it.(Use +Screw Driver.) Samsung Electronics...
- Page 22 Panel. -Stepping motor connector. -Receiving & display unit connector wire. 10) Hold on 2 hooks on both sides of the indoor unit and disassemble the Front Panel. 11) Take away the disassembled Panel out of the Main Body. Samsung Electronics...
- Page 23 1) Disassemble the Fan Motor Wire Connector, Thermistor Wire Connector, Drain Pump Wire Connector and Float Switch Wire Connector. 2) Loosen 4 screws in the mark (Use +Screw Driver.) 3) Disassemble the Base Control from the Main Body. Samsung Electronics...
- Page 24 * At first, there are 2 bolts per one corner and when reassembly, there should be at least 1 bolt per one corner fastened. * 2 Bolts per one corner recommended. 6) Disassemble the Drain Cushion from the Main Body. 7) Loosen the nut.(Use Monkey Spanner.) Samsung Electronics...
- Page 25 8) Take out the Washer. 9) Lift the Fan to disassemble from the Motor. 10) Loosen the screw and disassemble the Motor Connector to disassemble Motor.(Use +Screw Driver.) 11) Loosen 4 screws in the mark (Use +Screw Driver.) Samsung Electronics...
- Page 26 Drain Pump from the Main Body. (Use +Screw Driver.) Heat Exchanger 1) Loosen 2 screws to disassemble the Cover Pipe beside the Main Body. (Use +Screw Driver.) 2) Loosen 2 screws fixing the Holder Evap to disassemble the Heat Exchanger. (Use +Screw Driver.) Samsung Electronics...
- Page 27 1) Loosen 2 screws to disassemble the (PCB Part) Cover PCB.(Use +Screw Driver.) 2) Loosen the screw fixing the PCB to disassemble it.(Use +Screw Driver.) 3) Disassemble the PCB Wire from the PCB. 4) Disassemble the Button PCB from the PCB. Samsung Electronics...
- Page 28 Side. 2) Draw 2 hooks then lift up the Cover Side. 3) Disassemble the Stepping Motor Wire Connected. 4) Disassemble the Stepping Motor from the Panel Front. 5) Disassemble the link and bracket from the Stepping Motor. 3-10 Samsung Electronics...
-
Page 29: Outdoor Unit
Product Specifications 3-2 Outdoor Unit UH070EAV1 Parts Procedure Remark Common Work 1) Loosen 1 fixing screw of the Cover-Control and detach the Cover Control. 2) Loosen each 7 fixing screws and detach the Cabinet Upper. Samsung Electronics 3-11... - Page 30 Product Specifications Parts Procedure Remark 3) Loosen 1 screw fixed to assemble Control Box with Cabinet-Side RH. 4) Loosen fixing screws and detach the Cabinet-Side RH. 5) Loosen 2 screws fixed on the Guide Condenser. 3-12 Samsung Electronics...
- Page 31 Product Specifications Parts Procedure Remark 6) Loosen fixing screws of the Cabinet Front. Samsung Electronics 3-13...
- Page 32 2) Detach the Fan Propeller. 3) Loosen 4 fixing screws to detach the Motor. 4) Disconnect the wire between ASS'� Control Out and Motor. 5) Loosen 2 fixing bolts and detach the Bracket Motor. 3-14 Samsung Electronics...
- Page 33 2) Loosen fixing screw on both sides. 3) Disassemble the pipes in both inlet and outlet with welding torch. 4) Detach the Heat Exchanger. 5) Loosen 4 bolts fixed to assemble Valve Service with Bracket Valve like the picture on the right side. Samsung Electronics 3-15...
- Page 34 Procedure Remark Compressor 1) Loosen the fixing nut and detach the Compressor Lead Wire. 2) Disassemble the Felt Compressor Sound. 3) Loosen the 3 bolts at the bottom of Compressor like the picture on the right side. 3-16 Samsung Electronics...
- Page 35 Cabi Front Rh. 2) Loosen each 8 fixing screws and detach the Cabi Top Cover. 3) Loosen 2 screws fixed to assemble Control Box with Cabi Back Rh. 4) Loosen fixing screws and detach the Cabi Back Rh. Samsung Electronics 3-17...
- Page 36 Parts Procedure Remark 5) Loosen 2 screws fixed on the Cabi Back Lf. 6) Loosen fixing screws of the Cabi Front Lf. 3-18 Samsung Electronics...
- Page 37 2) Detach the Fan Propeller. 3) Loosen 4 fixing screws to detach the Motor.(Use Monkey Spanner.) 4) Disconnect the wire between Ass’y Control Out and Motor. 5) Loosen 2 fixing bolts and detach the Bracket Motor.(Use Monkey Spanner.) Samsung Electronics 3-19...
- Page 38 3) Pull up the Ass’y Control Out. Heat Exchanger 1) Release the refrigerant at first. 2) Loosen fixing screw on both sides. 3) Disassemble the pipes in both inlet and outlet with welding torch. 4) Detach the Heat Exchanger. 3-20 Samsung Electronics...
- Page 39 1) Loosen the fixing nut and detach the Compressor Lead Wire. (Use Monkey Spanner.) 2) Disassemble the Felt Comp Sound. 3) Loosen the 3 bolts at the bottom of Compressor like the picture on the right side.(Use Monkey Spanner.) Samsung Electronics 3-21...
- Page 40 MEMO 3-22 Samsung Electronics...
-
Page 41: Troubleshooting
Error of setting option switches for optional accessories ◑ ◑ ◑ ◑ ◑ EEPROM option error ● : On, ◑ : Flickering, X: OFF If you turn off the air conditioner when the LED is flickering, the LED is also turned off. Samsung Electronics... - Page 42 Discharge over temperature Outdoor Unit Protetion Control Error [Inverter] Compressor starting error Primary Current Over Trip error [Inverter] IPM Over Current (O.C) [Inverter] Compressor Rotation error [Inverter] Current Sensor error [Inverter] DC LINK Sensor error [Inverter] EEPROM Read/Write Error Samsung Electronics...
- Page 43 Outdoor unit Capacity Setup option error Communication error between Indoor unit and wired remote control Wired remote control error Communication error between Master and Slave wired remote control COM1/COM2 Cross-installed error Error of setting option for wired remote control COM2 Samsung Electronics...
-
Page 44: Outdoor Led Error Display And Check Method
● Power ON reset(1sec) ◎ ○ ○ Capacity miss match ○ ◎ ◎ Test Operation at Cooling Mode ◎ ◎ ◎ Test Operation at Heating Mode ● : LED ON, ○ : LED OFF, ◎ : LED BLINK Samsung Electronics... -
Page 45: Setting Option Setup Method
Push the button to set the display panel to ➡ ➡ Every time you push the button, the display panel reads ➡ ➡ . . . ➡ ➡ ➡ ➡ ➡ ➡ repeatedly. Samsung Electronics... - Page 46 If all lamps of indoor unit are flickering, Plug out, plug in power plug again and press ON/OFF key to retry. If the unit is not working properly or all lamps are continuously flickering after setting the option code, see if the correct option code is set up for its model. Samsung Electronics...
- Page 47 I nput the second digit of option code by pressing the High Temp button. example) 021E311422852A311439421F R esult) I f 2 is displayed, go to the step 4 (whenever pressing the button, 1~9, A,B,C,D,E,F are lit in order.) Samsung Electronics...
- Page 48 021E311422852A311439421F Result) If E displays, go to step 6. Step 6 Method) Input the fifth digit of option code by pressing the On Timer button. example) 021E311422852A311439421F Result) If 3 displays, go to step 7. SEG5 Samsung Electronics...
- Page 49 2~7 steps, press the mode button repeatedly to make the first digit 0. Step 9 Method) Input the eighth digit by pressing the High Temp button. example) 021E311422852A311439421F Result) If 4 displays, go to step 10. Samsung Electronics...
- Page 50 021E311422852A311439421F Result) If 2 displays, go to step 12. Step 12 Method) I nput the 11st digit by pressing the On Timer button. example) 021E311422852A311439421F Result) If 8 displays, go to step 13. 4-10 Samsung Electronics...
- Page 51 Option code will be input.(Check the option code correctly. At the time, if the same error continues to occur, the option code is out of input range. Check the option code again and repeat the step 1~14. Samsung Electronics 4-11...
- Page 52 Low Temp button. example) 021E311422852A311439421F Result) If 3 displays, go to step 17. Step 17 Method) Input the 16th digit by pressing the High Fan button. example) 021E311422852A311439421F Result) If 1 displays, go to step 18. 4-12 Samsung Electronics...
- Page 53 ② If the first number is 3 of the time, it is correct. so go to step 22. • If wanting to see previous screen, press the mode button repeatedly to make the first digit to with digit. Samsung Electronics 4-13...
- Page 54 Low Temp button. example) 021E311422852A311439421F Result) If 4 displays, go to step 23. Step 23 Method) Input the 22th digit by pressing the High Fan button. example) 021E311422852A311439421F Result) If 2 displays, go to step 24. 4-14 Samsung Electronics...
- Page 55 Option code will be input.(Check the option code correctly. At the time, if the same error continues to occur, the option code is out of input range. Check the option code again and repeat the step 1~26. Samsung Electronics 4-15...
- Page 56 Option code will be input.(Check the option code rear side correctly. At the time, if the same error continues to occur, the option code is out of input range. Check the option code again and repeat the step 1~26. 4-16 Samsung Electronics...
- Page 57 ■ OPTION ITEMS MODEL SEG1 SEG2 SEG3 SEG4 SEG5 SEG6 SEG7 SEG8 SEG9 SEG10 SEG11 SEG12 CH090EAV CH105EAV CH140EAV CH070EAV1 Samsung Electronics 4-17...
-
Page 58: Items To Be Checked First
The compressor operates in a reverse cycle to remove Indoor fan and outdoor fan stop operation intermittently exterior ice in a HEAT mode, and indoor fan and outdoor in a HEAT mode. fan do not operate intermittently for within 20% of the total heater operation 4-18 Samsung Electronics... -
Page 59: Fault Diagnosis By Symptom
Wrong setting Check DIP SW in the Set DIP SW correctly wired remote controller. Correct �es Is there any error display on Check each item according to error code list the wired remote controller Check the setting temperature Samsung Electronics 4-19... - Page 60 #1 and #3 Are wire and socket connected correctly? CN05,06,07 TAB terminal(EMI PCB), Check and correct the wiring Error 469 display Error 469 display (Table No.19) (Table No.19) CN20(INVERTER PCB) �es Check the M/C 4-20 Samsung Electronics...
- Page 61 Exchange INVERTER PCB making manual rotation slowly? Is the Pin voltage #7 - #3 of CN40 and Exchange the FAN motor 41 low(0-1V) in normal rotation? �es Exchange INVERTER PCB Samsung Electronics 4-21...
- Page 62 Does the compressor rotate normally? Exchange the compressor �es Are the service valves full opened? Open valve screw to the end. �es Is AC power voltage normal during the Check AC power source compressor in operation? �es Exchange INVERTER PCB 4-22 Samsung Electronics...
- Page 63 4-WA� valve coil error of 4-WA� valve coil. Dose the voltage of AC220V Exchange apply to the connector of 4-WA� the outdoor PCB. valve coil during the operation? �es Go to the next page 4-WA� valve main body error Samsung Electronics 4-23...
- Page 64 �es Check the resistance value Outdoor fan error of outdoor fan. Dose the voltage of DC300V �es apply to the connector of outdoor Check the motor wire. fan during the operation of outdoor unit? Outdoor PCB error 4-24 Samsung Electronics...
- Page 65 Exchange the sensor. (Refer to the R/T TABLE) �es Is the resistance value of sensor connection pull_up 18K? Exchange the PCB. �es Exchange the PCB. Normal operation Exit 400.0 350.0 300.0 250.0 200.0 150.0 100.0 50.0 Samsung Electronics 4-25...
- Page 66 Exchange the sensor. (Refer to the R/T TABLE) �es Is the resistance value of sensor connection pull_up 24K? Exchange the PCB. �es Exchange the PCB. Normal operation Exit 600.0 500.0 400.0 300.0 200.0 100.0 4-26 Samsung Electronics...
- Page 67 Exchange the sensor. (Refer to the R/T TABLE) �es Is the resistance value of sensor connection pull_up 18.2K? Exchange the PCB. �es Exchange the PCB. Normal operation Exit 400.0 350.0 300.0 250.0 200.0 150.0 100.0 50.0 Samsung Electronics 4-27...
- Page 68 2. Troubleshooting procedure Remove the Fan lock. Isn't the Fan locked? �es Is the connector connected correctly? Connect the connector. �es Is the color of Fan wire matched correctly? Exchange the Fan. �es Exchange the PCB. Normal operation Exit 4-28 Samsung Electronics...
- Page 69 2) Are Relay R�21 and R200 on the INVERTER PCB mounted normally? 2. Troubleshooting procedure Are connection of the wire from INVERTER PBA to Check and correct the wire connection EMI PBA normal? �es Exchange INVERTER PCB Samsung Electronics 4-29...
- Page 70 Exchange the compressor compressor terminal and body normal? �es Does the compressor rotate normally? Exchange the compressor �es �es Did AC power voltage interruption happen Check AC power source during the compressor in operation? Exchange INVERTER PCB 4-30 Samsung Electronics...
- Page 71 Terminate the service. occurred again? �es Isn't the power cable and Correct the wrong wiring. communication cable wiring error? �es Is the connection of Correct the connection of communication cable normal? communication cable. �es Exchange the outdoor unit PCB. Samsung Electronics 4-31...
- Page 72 Exchange the compressor. compressor(u↔v, v↔w, w↔u) normal? �es Is the compressor body and Exchange the compressor. interphase resistance insulated? �es Is the connection cable for the Correct the cable connection. compressor and power terminal normal? �es Exchange the PCB. 4-32 Samsung Electronics...
- Page 73 Exchange the compressor. compressor(u↔v, v↔w, w↔u) normal? �es Is the compressor body and Exchange the compressor. interphase resistance insulated? �es Is the connection cable for the Correct the cable connection. compressor and power terminal normal? �es Exchange the PCB. Samsung Electronics 4-33...
- Page 74 Is each contact resistance normal? Exchange M/C (less than 0.1ohm) �es �es Does the error reappear frequently Exchange INVERTER PCB The cause of this error may be power source trouble as like power interruption. Check the power source. 4-34 Samsung Electronics...
- Page 75 4-5-16 The others 1. Capacity miss match – Check again the indoor unit option code. Samsung Electronics 4-35...
-
Page 76: Pcb Inspection Method
FAN operation checking 1) Is the FAN motor running? • Controller trouble inside of the fan motor Press the ON/OFF button. 2) Is the connection of CN73 normal? • connector trouble of CN73 1. FAN Speed[HIGH] 2. FAN mode 4-36 Samsung Electronics... - Page 77 D101 upper side pin of '~' marking pins INVERTER PCB 2) Is DC Link voltage 450-510V? Check IGBT module pins marking voltage near C701 Check BLDC fan 1) See 12-2-3 The Outdoor unit Fan error(Fault Diagnosis) Samsung Electronics 4-37...
-
Page 78: Main Part Inspection Method
BLUE - BLACK 10KΩ ~ 50KΩ pulse ORANGE - BLACK 10KΩ ~ 50KΩ reverse Abnormal 0Ω...Open or Short Outdoor Unit 4way Valve Solenoid Measure resistance with a multimeter Normal At the normal temperature(10˚C~30˚C) 1.6KΩ±15% ∞,0Ω...Open or Short Abnormal 4-38 Samsung Electronics... -
Page 79: Exploded Views And Parts List
5. Exploded Views and Parts List 5-1 Indoor Unit 18-2 18-4 18-3 18-1 Samsung Electronics... - Page 80 BRACKET-FLOAT SWITCH HIPS DB61-02349A CLIP BRUSH N�LON 66 DB90-02693A ASS� CUSHION BASE ASS�,EPS,V0 DB31-00364A MOTOR FAN BLDC DB94-01059A ASS� BRACKET MOTOR ASS� DB39-01259A CONNECT WIRE ASS� DB32-00169A THERMISTOR ASS� DB94-01065A ASS� DRAIN HOSE ASS� DB90-02689A ASS� CABINET-BASE ASS�,SGCC-M Samsung Electronics...
- Page 81 BRACKET-FLOAT SWITCH HIPS DB61-02349A CLIP BRUSH N�LON 66 DB97-05920A ASS� CUSHION BASE ASS�,EPS,V0 DB31-00439A MOTOR FAN BLDC DB90-03188A ASS� BRACKET MOTOR ASS� DB39-01259A CONNECT WIRE ASS� DB32-00169A THERMISTOR ASS� DB94-01065A ASS� DRAIN HOSE ASS� DB90-02689B ASS� CABINET-BASE ASS�,SGCC-M Samsung Electronics...
-
Page 82: Panel
Product Specifications 5-2 Panel Samsung Electronics... - Page 83 DB63-01488A COVER SIDE C HIPS(BLK) DB63-01489A COVER SIDE D HIPS(BLK) DB64-01558A INLA� PCB DB64-01559A BUTTON PCB DB69-01419A CUSHION IN EPS,25 DB69-01420A CUSHION OUT EPS,25 DB61-02704A BRACKET STEPPING MOTOR SGCC-M,T1.0 DB61-02705A PLATE HANGER STS304,T0.5 DB93-04220A ASS'� PCB DISPLA� ASS'� Samsung Electronics...
-
Page 84: Outdoor Unit
5-3 Outdoor Unit ■ UH090/105/140EAV Samsung Electronics... - Page 85 23 DB27-00056A ASS’� REACTOR ASS� DB90-02583A ASS’�-MOTOR BRACKET SUB SGCC-M,T1.2 DB90-02583B ASS’�-MOTOR BRACKET SUB SGCC-M,T1.2 25 DB97-02613A ASS’� BRACKET-VAVLE SGCC-M,T1.6 26 DB61-01910A BRACKET-WIRE SECC-P,1.0T 27 DB64-01231A HANDLE ABS,V0 28 DB93-05954A ASS’� CONNECTOR WIRE-COMP ASS� 29 DB63-00691A GUARD FAN MSWR Samsung Electronics...
- Page 86 Product Specifications ■ UH070EAV1 15-2 15-1 15-3 15-4 15-6 15-8 15-11 15-9 15-5 15-7 15-10 12-1 13-1 Samsung Electronics...
- Page 87 15-9 DB65-00181F TERMINAL BLOCK 15-10 DB95-01180A ASS'�-TERMINAL BLOCK ASS'� 15-11 DB93-06290A ASS'� PCB SUB-DISPLA� ASS'� 15-12 DB61-01097A HOLDER WIRE CLAMP DB27-00043A REACTOR 20A, 50Hz DB32-00175B THERMISTOR COND 103AT,204CTB DB32-00176C THERMISTOR WIRE OUT/DISCHARGE 103AT,204CTB DB90-03652A ASS'� COVER CONTROL ASS'� Samsung Electronics...
-
Page 88: Assy Control Out
Product Specifications 5-4 Assy control out ■ UH090/105/140EAV 5-10 Samsung Electronics... - Page 89 DB93-06331A ASS� CONNECTOR WIRE-COMM UH140EAV,SSEC DB93-06332A ASS� CONNECTOR WIRE-POWER UH140EAV,SSEC DB93-06336A ASS� CONNECTOR WIRE-POWER UH140EAV,SSEC DB93-06324A ASS� CONNECTOR WIRE-DISPLA� UH140EAV,SSEC DB93-06325A ASS� CONNECTOR WIRE-DISPLA� UH140EAV,SSEC ASS� CONNECTOR WIRE-MAIN DB93-06337A INVERTER DB95-01040H ASS�-NOISE ABSORBER UH140EAV,SSEC DB93-01469S ASS� PCB SUB 220nF*2 Samsung Electronics 5-11...
- Page 90 Product Specifications ■ UH070EAV1 5-12 Samsung Electronics...
- Page 91 DB93-03546C ASS'� PCB SUB-EMI UH070EAV DB93-03662A ASS'� PCB DISPLA� AS18BPB,24K/18K(SUB) DB98-17991B ASS'�-INSULATOR MICA SH12BWH,- 6002-000630 SCREW-TAPPING PH,+,-,2S,M3,L8,ZPC(�EL),SWRCH18A,- DB91-00306A ASS'�-SCREW MACHINE WW-INV,M3x16,WSP,PH,+,ZPC DB91-00307A ASS'�-SCREW MACHINE WW-INV,M4x16,WSP,PH,+,ZPC 6002-000555 SCREW-TAPPING PH,+,2S,M4,L25,ZPC(�EL),SWRCH1 6001-001054 SCREW-MACHINE TH,+,-,M4,L10,ZPC(�EL),SM20C,-,- 6009-001001 SCREW-SPECIAL TH,+,-,M4,L8,ZPC(WHT),T.C,-,- 6002-000171 SCREW-TAPPING PH,+,2S,M4,L10,ZPC(�EL),SWRCH1 Samsung Electronics 5-13...
- Page 92 MEMO 5-14 Samsung Electronics...
-
Page 93: Pcb Diagram And Parts List
Power in step motor Display operation check Micon download SUB PCB connector Wire Remote Controller Power Indoor/Outdoor Communication BLDC MOTOR Wired Remote Controller Communication Thermistor Discharge EVA out sensor Indoor Pipe in Temperature Sensor Indoor Room Temperature Sensor Samsung Electronics... - Page 94 #3: TXD_4WA Y Operating #5: L phase #5: 12V, #6: INV_SMPS_RELAY Signal #7: N phase #7: Not used ⑨ CN90(4PIN/WHT): DI SPLAY ⑩ CN91(10PIN/WHT): DISPLAY #1~4: RXD_Operating Signal #1~7: 7-SEGMENT of MAIN PCB #8~10: TXD_KEY INPUT S IGNA L Samsung Electronics...
- Page 95 #6 : FAN FG ④ ⑤ ⑥ CN30(6P/WHT)-EEV CN20(4P/WHT)-DISPLAY CN21(10P/WHT)-DISPLAY #1~4 : RECEIVE SIGNAL FROM THE MAIN #1~7 : 7-SEGMENT SIGNAL #8~10 : RECEIVE KE� OPERATION SIGNALS FROM THE MAIN ⑦ ⑧ CN01(2PIN/BLU)-12V REACTOR1,2(TAB)-REACTOR #1 : 12V #2 : GND Samsung Electronics...
- Page 96 ⑦ N2(TAB/WHT) ⑧ N1(SKYBLU) #1: N phase POWER of L phase POWER of N phase POWER of N phase POWER to M/C MAIN PBA INVERTER PBA INVERTER PBA #2: Not used #3: L phase POWER of MAIN PBA Samsung Electronics...
- Page 97 Product Specifications ■ OUTDOOR EMI PCB(UH070EAV1) Cont. ① ② L(TAB)-POWER N(TAB)-POWER AC(L) AC(N) Samsung Electronics...
- Page 98 #6: FAN FG #7: DATA_DAC, #8: #7: FAN Backlash Sensing ⑤ CN72(2IPN/WHT): IPM ⑦ CN71(3PIN/BLU) TEMP ⑥ CN22(2PIN/WHT) #1: 12V #1: TXD_IPM TEMP #1: L phase IN SIGNAL #2: N phase IN INV_SMPS_RELAY #2: GND #3: Not used Samsung Electronics...
- Page 99 ■ 6-1-5 OUTDOOR DISPLAY PCB � � � �������������� #��� ������������� ������ �� ���� ��� � � ������������� ����� ������ Samsung Electronics...
- Page 100 MEMO Samsung Electronics...
-
Page 101: Pcb Parts List
6-2. PCB Parts List ■ INDOOR MAIN PCB(CH070EAV1/CH090EAV :DB93-04120E) Location No. Code No. Description Specification Q’ty SA/SNA Remark D900 0401-000133 DIODE-SWITCHING RLS4148,75V,150mA,LL-34,TP D901 0401-000133 DIODE-SWITCHING RLS4148,75V,150mA,LL-34,TP D902 0401-000133 DIODE-SWITCHING RLS4148,75V,150mA,LL-34,TP D903 0401-000133 DIODE-SWITCHING RLS4148,75V,150mA,LL-34,TP D904 0401-000133 DIODE-SWITCHING RLS4148,75V,150mA,LL-34,TP D905 0401-000133... - Page 102 Product Specifications ■ INDOOR MAIN PCB(CH070EAV1/CH090EAV :DB93-04120E cont.) Location No. Code No. Description Specification Q’ty SA/SNA Remark IC01 1203-002710 IC-PWM CONTROLLER TN�267P,DIP,8P,9.65X6.35MM,PLASTIC,700V,19W,- 40TO+150C,481MA,-,ST IC03 1203-003334 IC-RESET S-801,SOT-23,5P,2.9x1.6mm,PLASTIC,3.716/ 4.284V,256mW,-,2.5mA,-,TP NTC01 1404-001316 THERMISTOR-NTC 18ohm,1.7A,3100K,14.5mW/C,0uF,13.5,BK R107 2003-000448 R-METAL OXIDE(S) 100Kohm,5%,2W,AA,TP,4x12mm R108 2003-000448 R-METAL OXIDE(S)
- Page 103 Product Specifications ■ INDOOR MAIN PCB(CH070EAV1/CH090EAV :DB93-04120E cont.) Location No. Code No. Description Specification Q’ty SA/SNA Remark R204 2007-000944 R-CHIP 47Kohm,5%,1/4W,TP,3216 R205 2007-000944 R-CHIP 47Kohm,5%,1/4W,TP,3216 R206 2007-000944 R-CHIP 47Kohm,5%,1/4W,TP,3216 R207 2007-000944 R-CHIP 47Kohm,5%,1/4W,TP,3216 R208 2007-000944 R-CHIP 47Kohm,5%,1/4W,TP,3216 R401 2007-001067 R-CHIP 6.8Kohm,1%,1/8W,TP,2012...
- Page 104 Product Specifications ■ INDOOR MAIN PCB(CH070EAV1/CH090EAV :DB93-04120E cont.) Location No. Code No. Description Specification Q’ty SA/SNA Remark BZ61 3002-001129 BUZZER-PIEZO 85DB,-,-,2KHZ,- SW02 3406-001098 SWITCH-ROTAR� 240V AC,25A,6P(10C),L14mm SW05 3407-000121 SWITCH-DIP 24V,300mA,SLIDE,STANDARD SW06 3407-000121 SWITCH-DIP 24V,300mA,SLIDE,STANDARD SW07 3407-000121 SWITCH-DIP 24V,300mA,SLIDE,STANDARD R�70 3501-001154 RELA�-MINIATURE...
- Page 105 IC-CMOS LOGIC 74HC86,OR GATE,SOP,14P,150MIL IC18 1006-001371 IC-LINE TRANSCEIVER ISL3175EIBZ,SOIC,8P,6.2x5.0x1.75,1 IC19 1006-001371 IC-LINE TRANSCEIVER ISL3175EIBZ,SOIC,8P,6.2x5.0x1.75,1 IC51 1103-001175 IC-EEPROM 93LC56,128x16,SOP,8P,5x4mm,2.5/6.0V,-40to+85C 1 IC02 1203-000274 IC-POSI.FIXED REG. 7805,TO-220,3P,-,PLASTIC,4.8/5 IC01 1203-002710 IC-PWM CONTROLLER TN�267P,DIP,8P,9.65X6.35MM,PLASTIC,700V,19W IC03 1203-003334 IC-RESET S-801,SOT-23,5P,2.9x1.6mm,PLASTIC, NTC01 1404-001316 THERMISTOR-NTC 18ohm,1.7A,3100K,14.5mW/C,0uF,13.5,BK Samsung Electronics 6-13...
- Page 106 47Kohm,1%,1/8W,TP,2012 R201 2007-000944 R-CHIP 47Kohm,5%,1/4W,TP,3216 R202 2007-000944 R-CHIP 47Kohm,5%,1/4W,TP,3216 R203 2007-000944 R-CHIP 47Kohm,5%,1/4W,TP,3216 R204 2007-000944 R-CHIP 47Kohm,5%,1/4W,TP,3216 R205 2007-000944 R-CHIP 47Kohm,5%,1/4W,TP,3216 R206 2007-000944 R-CHIP 47Kohm,5%,1/4W,TP,3216 R207 2007-000944 R-CHIP 47Kohm,5%,1/4W,TP,3216 R208 2007-000944 R-CHIP 47Kohm,5%,1/4W,TP,3216 R401 2007-001067 R-CHIP 6.8Kohm,1%,1/8W,TP,2012 6-14 Samsung Electronics...
- Page 107 C601 2401-002300 C-AL 47μF,20%,50V,GP,TP,6.3x11,5mm L101 2702-001123 INDUCTOR-RADIAL 4.7UH,10%,6.5X7.5MM X301 2802-001179 RESONATOR-CERAMIC 4MHZ,0.5%,BK,8X3X5.5MM BZ61 3002-001129 BUZZER-PIEZO 85DB,-,-,2KHZ,- SW02 3406-001098 SWITCH-ROTAR� 240V AC,25A,6P(10C),L14mm SW05 3407-000121 SWITCH-DIP 24V,300mA,SLIDE,STANDARD SW06 3407-000121 SWITCH-DIP 24V,300mA,SLIDE,STANDARD SW07 3407-000121 SWITCH-DIP 24V,300mA,SLIDE,STANDARD R�70 3501-001154 RELA�-MINIATURE 12Vdc,200mW,3000mA,1FormA,10mS,10mS Samsung Electronics 6-15...
- Page 108 SW04 DB34-00009A SWITCH-DIGITAL PT65 103,ROTAR� DIP,-,DC24V DB41-00490A PBA LOGIC BOARD CH140EAMC,-,FR-1,-,T-1.6,-,- Heat sink DB62-03085A HEAT SINK -,A6063,25,15,15,-,-,SSEC Label Bar code DB68-02809A LABEL BAR CODE -,-,-,-,W170,L115,-,-,-,FOR PACKING CASE IC04 DB91-00411A ASS�-MIC Star_PJT New 4way,MB90F823, 80P, ROM 128K bytes 6-16 Samsung Electronics...
- Page 109 CN02 3711-000203 HEADER-BOARD TO CABLE 1WALL,2P/3P,1R,7.92mm,STRAIGHT,SN,WHT CN01 3711-003404 HEADER-BOARD TO CABLE 1WALL,2P,1R,7.92mm,STRAIGHT,SN,BLU FT71 DB27-00032A COIL CHOKE -,-,14mH MIN AT 1KHz(1V),-,-,-,2.5A,Φ19x11x13,- ,20*28*20,-,Φ0.5,480PCS/PACK,-, DB41-00489A PBA LOGIC BOARD CH140EAMC,-,FR-1,-,T-1.6,-,- F701 DB61-00924A HOLDER-FUSE -,FH-51B,-,-,-,-,SSEC DB68-02809A LABEL BAR CODE -,-,-,-,W170,L115,-,-,-,FOR PACKING CASE Samsung Electronics 6-17...
- Page 110 3712-001139 CONNECTOR-TERMINAL TAB,MALE,-,6.35X0.8MM 4715-001093 SURGE ABSORBER 3600V,20%,2000A,-,AXIAL FT00 DB27-00040A COIL CHOKE SSC3120030B,AQV24JAKCV,3.0mH,10%,-,200m OHM FT01 DB27-00040A COIL CHOKE SSC3120030B,AQV24JAKCV,3.0mH,10%,-,200m OHM DB39-00514F CBF LEAD WIRE-EARTH -,KFR-35(25)GW/GPI,-,200,-,-,-,GRN/�EL,-,-,- PCB BOARD DB41-00531A PCB SUB FORTE,CEM-3,2,1.0,1.6T,160*140,-,3,-,- DB93-04908F ASS� CONNECTOR WIRE-POWER UH070EAV1,SSEC,ST730620-3, SIN-21T-1.8S,UL1015#14,140÷5 1 6-18 Samsung Electronics...
- Page 111 WIRE-NO SHEATH CU TCWA,300V,52mm(TAPING),1/0.6mm 3812-001283 WIRE-NO SHEATH CU TCWA,300V,52mm(TAPING),1/0.6mm 3812-001283 WIRE-NO SHEATH CU TCWA,300V,52mm(TAPING),1/0.6mm DIS1 DB07-00054A LED DISPLA� SSD-A3202GS-A13,LED DISPLA�,2 DIGIT DIS2 DB07-00054A LED DISPLA� SSD-A3202GS-A13,LED DISPLA�,2 DIGIT,16 SEGMENT PCB BOARD DB41-00671A PCB SUB-DISPLA� GALAX� 2 PJT,FR-1,1,V1.0,T1.6 Samsung Electronics 6-19...
- Page 112 1Kohm,1%,1/8W,TP,2012 R301 2007-000465 R-CHIP 1Kohm,1%,1/8W,TP,2012 R302 2007-000465 R-CHIP 1Kohm,1%,1/8W,TP,2012 R303 2007-000465 R-CHIP 1Kohm,1%,1/8W,TP,2012 R400 2007-000465 R-CHIP 1Kohm,1%,1/8W,TP,2012 R403 2007-000465 R-CHIP 1Kohm,1%,1/8W,TP,2012 R414 2007-000613 R-CHIP 24Kohm,1%,1/8W,TP,2012 R416 2007-000613 R-CHIP 24Kohm,1%,1/8W,TP,2012 R417 2007-000613 R-CHIP 24Kohm,1%,1/8W,TP,2012 R419 2007-000613 R-CHIP 24Kohm,1%,1/8W,TP,2012 6-20 Samsung Electronics...
- Page 113 100nF,10%,50V,X7R,2012 C404 2203-000206 C-CER,CHIP 100nF,10%,50V,X7R,2012 C405 2203-000206 C-CER,CHIP 100nF,10%,50V,X7R,2012 C406 2203-000206 C-CER,CHIP 100nF,10%,50V,X7R,2012 C407 2203-000206 C-CER,CHIP 100nF,10%,50V,X7R,2012 C408 2203-000206 C-CER,CHIP 100nF,10%,50V,X7R,2012 C409 2203-000206 C-CER,CHIP 100nF,10%,50V,X7R,2012 C500 2203-000206 C-CER,CHIP 100nF,10%,50V,X7R,2012 C502 2203-000206 C-CER,CHIP 100nF,10%,50V,X7R,2012 C503 2203-000206 C-CER,CHIP 100nF,10%,50V,X7R,2012 Samsung Electronics 6-21...
- Page 114 DB61-00924A HOLDER-FUSE -,FH-51B,-,-,-,-,SSEC IC301 DB91-00582A ASS�-MIC GALAX�_2 INVETER OUT MAIN MICOM IC301 DB09-00338A IC MICOM MB90F823,-,80 P,5 V,24 MHz,Flash Memory DB93-06342A ASS� CONNECTOR WIRE-EARTH UH140EAV,SSEC,UL1015,AWG16 R103 DB98-20665A ASS�-RESISTOR KFR-35(25)GW/GPI,1.8k F 1608 R104 DB98-20665A ASS�-RESISTOR KFR-35(25)GW/GPI,1.8k F 1608 6-22 Samsung Electronics...
- Page 115 R-CHIP 1Kohm,5%,1/10W,TP,1608 R472 2007-000078 R-CHIP 1Kohm,5%,1/10W,TP,1608 2007-000080 R-CHIP 2Kohm,5%,1/10W,TP,1608 R315 2007-000084 R-CHIP 4.7Kohm,5%,1/10W,TP,1608 R324 2007-000084 R-CHIP 4.7Kohm,5%,1/10W,TP,1608 R325 2007-000084 R-CHIP 4.7Kohm,5%,1/10W,TP,1608 R327 2007-000084 R-CHIP 4.7Kohm,5%,1/10W,TP,1608 R328 2007-000084 R-CHIP 4.7Kohm,5%,1/10W,TP,1608 R407 2007-000084 R-CHIP 4.7Kohm,5%,1/10W,TP,1608 R301 2007-000090 R-CHIP 10Kohm,5%,1/10W,TP,1608 Samsung Electronics 6-23...
- Page 116 6.8ohm,5%,1/8W,TP,2012 R105 2007-001222 R-CHIP 9.09Kohm,1%,1/8W,TP,2012 R905 2007-002667 R-CHIP 90.9Kohm,1%,1/4W,TP,3216 R116 2007-008261 R-CHIP 150KOHM,1%,1/2W,TP,5025 R117 2007-008261 R-CHIP 150KOHM,1%,1/2W,TP,5025 R118 2007-008261 R-CHIP 150KOHM,1%,1/2W,TP,5025 R903 2007-008261 R-CHIP 150KOHM,1%,1/2W,TP,5025 R904 2007-008261 R-CHIP 150KOHM,1%,1/2W,TP,5025 C105 2201-000322 C-CERAMIC,DISC 2.2NF,10%,2KV,�5P,TP,13X5MM,10 C106 2201-000322 C-CERAMIC,DISC 2.2NF,10%,2KV,�5P,TP,13X5MM,10 6-24 Samsung Electronics...
- Page 117 1000nF,10%,25V,X7R,3216 C122 2203-005261 C-CER,CHIP 1000nF,10%,25V,X7R,3216 C400 2203-006104 C-CER,CHIP 1000nF,10%,50V,X7R,3225 C424 2203-006104 C-CER,CHIP 1000nF,10%,50V,X7R,3225 C008 2301-001703 C-FILM,LEAD 1000nF,5%,630V,BK,30X23X15,- C810 2301-001703 C-FILM,LEAD 1000nF,5%,630V,BK,30X23X15,- C422 2306-000123 C-FILM,LEAD-PPF 100nF,5%,630V,BK,26x16.5x8.5,2 C809 2306-000123 C-FILM,LEAD-PPF 100nF,5%,630V,BK,26x16.5x8.5,2 C904 2401-000027 C-AL 4.7uF,20%,50V,GP,TP,5x11,5 C123 2401-000303 C-AL 100uF,20%,25V,GP,TP,6.3x11,5 Samsung Electronics 6-25...
- Page 118 ASS� CONNECTOR WIRE-JUMP UH140EAV,SSEC,UL1015,AWG12,170÷10,SIN- 81T-3.6S DB93-06393B ASS� CONNECTOR WIRE-JUMP UH140EAV,SSEC,UL1015,AWG12,170÷10,SIN- 81T-3.6S DB95-00630A ASS�-IPM MH080FXEA4,PS21869-P PFC-HIC DB95-01471A ASS�-PFC MODULE UH140EAV,PFC MODULE Q903 DB98-16589A ASS�-IGBT C125 2201-000154 C-CERAMIC,DISC 10NF,+80-20%,2KV,�5P,TP,20X5MM,7.5 C128 2201-000154 C-CERAMIC,DISC 10NF,+80-20%,2KV,�5P,TP,20X5MM,7.5 C126 2201-000322 C-CERAMIC,DISC 2.2NF,10%,2KV,�5P,TP,13X5MM,10 C127 2201-000322 C-CERAMIC,DISC 2.2NF,10%,2KV,�5P,TP,13X5MM,10 6-26 Samsung Electronics...
- Page 119 4.7Kohm,5%,1/10W,TP,1608 R324 2007-000084 R-CHIP 4.7Kohm,5%,1/10W,TP,1608 R325 2007-000084 R-CHIP 4.7Kohm,5%,1/10W,TP,1608 R327 2007-000084 R-CHIP 4.7Kohm,5%,1/10W,TP,1608 R328 2007-000084 R-CHIP 4.7Kohm,5%,1/10W,TP,1608 R407 2007-000084 R-CHIP 4.7Kohm,5%,1/10W,TP,1608 R301 2007-000090 R-CHIP 10Kohm,5%,1/10W,TP,1608 R302 2007-000090 R-CHIP 10Kohm,5%,1/10W,TP,1608 R309 2007-000090 R-CHIP 10Kohm,5%,1/10W,TP,1608 R311 2007-000090 R-CHIP 10Kohm,5%,1/10W,TP,1608 Samsung Electronics 6-27...
- Page 120 150KOHM,1%,1/2W,TP,5025 R903 2007-008261 R-CHIP 150KOHM,1%,1/2W,TP,5025 R904 2007-008261 R-CHIP 150KOHM,1%,1/2W,TP,5025 C105 2201-000322 C-CERAMIC,DISC 2.2NF,10%,2KV,�5P,TP,13X5MM,10 C106 2201-000322 C-CERAMIC,DISC 2.2NF,10%,2KV,�5P,TP,13X5MM,10 C109 2203-000192 C-CER,CHIP 100nF,+80-20%,50V,�5V,2012 C112 2203-000192 C-CER,CHIP 100nF,+80-20%,50V,�5V,2012 C116 2203-000192 C-CER,CHIP 100nF,+80-20%,50V,�5V,2012 C117 2203-000192 C-CER,CHIP 100nF,+80-20%,50V,�5V,2012 C121 2203-000192 C-CER,CHIP 100nF,+80-20%,50V,�5V,2012 6-28 Samsung Electronics...
- Page 121 100nF,5%,630V,BK,26x16.5x8.5,2 C904 2401-000027 C-AL 4.7uF,20%,50V,GP,TP,5x11,5 C123 2401-000303 C-AL 100uF,20%,25V,GP,TP,6.3x11,5 C124 2401-000470 C-AL 10uF,20%,450V,GP,TP,13x20mm,5m C300 2401-000480 C-AL 10uF,20%,50V,GP,TP,5x11,5 C305 2401-000480 C-AL 10uF,20%,50V,GP,TP,5x11,5 C309 2401-000480 C-AL 10uF,20%,50V,GP,TP,5x11,5 C315 2401-000480 C-AL 10uF,20%,50V,GP,TP,5x11,5 C317 2401-000480 C-AL 10uF,20%,50V,GP,TP,5x11,5 C322 2401-000480 C-AL 10uF,20%,50V,GP,TP,5x11,5 Samsung Electronics 6-29...
- Page 122 ASS� CONNECTOR WIRE- UH140EAV,SSEC,UL1015,AWG12,170÷10,SIN-81T-3.6S JUMP DB93-06393B ASS� CONNECTOR WIRE- UH140EAV,SSEC,UL1015,AWG12,170÷10,SIN-81T-3.6S JUMP DB95-00630A ASS�-IPM MH080FXEA4,PS21869-P PFC-HIC DB95-01471A ASS�-PFC MODULE UH140EAV,PFC MODULE Q903 DB98-16589A ASS�-IGBT C125 2201-000154 C-CERAMIC,DISC 10NF,+80-20%,2KV,�5P,TP,20X5MM,7.5 C128 2201-000154 C-CERAMIC,DISC 10NF,+80-20%,2KV,�5P,TP,20X5MM,7.5 C126 2201-000322 C-CERAMIC,DISC 2.2NF,10%,2KV,�5P,TP,13X5MM,10 C127 2201-000322 C-CERAMIC,DISC 2.2NF,10%,2KV,�5P,TP,13X5MM,10 6-30 Samsung Electronics...
- Page 123 R-CHIP 1Kohm,5%,1/10W,TP,1608 2007-000080 R-CHIP 2Kohm,5%,1/10W,TP,1608 R315 2007-000084 R-CHIP 4.7Kohm,5%,1/10W,TP,1608 R324 2007-000084 R-CHIP 4.7Kohm,5%,1/10W,TP,1608 R325 2007-000084 R-CHIP 4.7Kohm,5%,1/10W,TP,1608 R327 2007-000084 R-CHIP 4.7Kohm,5%,1/10W,TP,1608 R328 2007-000084 R-CHIP 4.7Kohm,5%,1/10W,TP,1608 R407 2007-000084 R-CHIP 4.7Kohm,5%,1/10W,TP,1608 R301 2007-000090 R-CHIP 10Kohm,5%,1/10W,TP,1608 R302 2007-000090 R-CHIP 10Kohm,5%,1/10W,TP,1608 Samsung Electronics 6-31...
- Page 124 90.9Kohm,1%,1/4W,TP,3216 R116 2007-008261 R-CHIP 150KOHM,1%,1/2W,TP,5025 R117 2007-008261 R-CHIP 150KOHM,1%,1/2W,TP,5025 R118 2007-008261 R-CHIP 150KOHM,1%,1/2W,TP,5025 R903 2007-008261 R-CHIP 150KOHM,1%,1/2W,TP,5025 R904 2007-008261 R-CHIP 150KOHM,1%,1/2W,TP,5025 C105 2201-000322 C-CERAMIC,DISC 2.2NF,10%,2KV,�5P,TP,13X5MM,10 C106 2201-000322 C-CERAMIC,DISC 2.2NF,10%,2KV,�5P,TP,13X5MM,10 C109 2203-000192 C-CER,CHIP 100nF,+80-20%,50V,�5V,2012 C112 2203-000192 C-CER,CHIP 100nF,+80-20%,50V,�5V,2012 6-32 Samsung Electronics...
- Page 125 1000nF,10%,50V,X7R,3225 C008 2301-001703 C-FILM,LEAD 1000nF,5%,630V,BK,30X23X15,- C810 2301-001703 C-FILM,LEAD 1000nF,5%,630V,BK,30X23X15,- C422 2306-000123 C-FILM,LEAD-PPF 100nF,5%,630V,BK,26x16.5x8.5,2 C809 2306-000123 C-FILM,LEAD-PPF 100nF,5%,630V,BK,26x16.5x8.5,2 C904 2401-000027 C-AL 4.7uF,20%,50V,GP,TP,5x11,5 C123 2401-000303 C-AL 100uF,20%,25V,GP,TP,6.3x11,5 C124 2401-000470 C-AL 10uF,20%,450V,GP,TP,13x20mm,5m C300 2401-000480 C-AL 10uF,20%,50V,GP,TP,5x11,5 C305 2401-000480 C-AL 10uF,20%,50V,GP,TP,5x11,5 Samsung Electronics 6-33...
- Page 126 ASS� CONNECTOR WIRE-JUMP UH140EAV,SSEC,UL1015,AWG12,170÷10,SIN-81T- 3.6S DB93-06393B ASS� CONNECTOR WIRE-JUMP UH140EAV,SSEC,UL1015,AWG12,170÷10,SIN-81T- 3.6S DB95-00630A ASS�-IPM MH080FXEA4,PS21869-P PFC-HIC DB95-01471A ASS�-PFC MODULE UH140EAV,PFC MODULE Q903 DB98-16589A ASS�-IGBT C125 2201-000154 C-CERAMIC,DISC 10NF,+80-20%,2KV,�5P,TP,20X5MM,7.5 C128 2201-000154 C-CERAMIC,DISC 10NF,+80-20%,2KV,�5P,TP,20X5MM,7.5 C126 2201-000322 C-CERAMIC,DISC 2.2NF,10%,2KV,�5P,TP,13X5MM,10 C127 2201-000322 C-CERAMIC,DISC 2.2NF,10%,2KV,�5P,TP,13X5MM,10 6-34 Samsung Electronics...
- Page 127 R-CHIP 2007-000074 R404 100ohm,5%,1/10W,TP,1608 R-CHIP 2007-000074 R405 100ohm,5%,1/10W,TP,1608 R-CHIP 2007-000074 R406 100ohm,5%,1/10W,TP,1608 R-CHIP 2007-000076 R504 330ohm,5%,1/10W,TP,1608 R-CHIP 2007-000076 R505 330ohm,5%,1/10W,TP,1608 R-CHIP 2007-000076 R506 330ohm,5%,1/10W,TP,1608 R-CHIP 2007-000076 R507 330ohm,5%,1/10W,TP,1608 R-CHIP 2007-000076 R553 330ohm,5%,1/10W,TP,1608 R-CHIP 2007-000076 R606 330ohm,5%,1/10W,TP,1608 R-CHIP Samsung Electronics 6-35...
- Page 128 R-CHIP 2007-000656 R308 27Kohm,5%,1/4W,TP,3216 R-CHIP 2007-000656 R311 27Kohm,5%,1/4W,TP,3216 R-CHIP 2007-000656 R312 27Kohm,5%,1/4W,TP,3216 R-CHIP 2007-000924 R112 470Kohm,1%,1/4W,TP,3216 R-CHIP 2007-000924 R113 470Kohm,1%,1/4W,TP,3216 R-CHIP 2007-000924 R114 470Kohm,1%,1/4W,TP,3216 R-CHIP 2007-000929 R412 470ohm,1%,1/10W,TP,1608 R-CHIP 2007-000950 R806 47ohm,5%,1/4W,TP,3216 R-CHIP 2007-000965 R511 5.1Kohm,5%,1/10W,TP,1608 R-CHIP 6-36 Samsung Electronics...
- Page 129 C-CER,CHIP 2203-002002 C318 33pF,5%,50V,NPO,BK,1608,- C-CER,CHIP 2203-002002 C319 33pF,5%,50V,NPO,BK,1608,- C-CER,CHIP 2203-002002 C320 33pF,5%,50V,NPO,BK,1608,- C-CER,CHIP 2203-002002 C321 33pF,5%,50V,NPO,BK,1608,- C-CER,CHIP 2203-002398 C419 22nF,10%,50V,X7R,1608 C-CER,CHIP 2203-002398 C420 22nF,10%,50V,X7R,1608 C-CER,CHIP 2203-005249 C109 100nF,10%,50V,X7R,1608 C-CER,CHIP 2203-005249 C112 100nF,10%,50V,X7R,1608 C-CER,CHIP 2203-005249 C116 100nF,10%,50V,X7R,1608 C-CER,CHIP Samsung Electronics 6-37...
- Page 130 C-AL 2401-000832 C110 220uF,20%,25V,GP,TP,8x11.5,5 C-AL 2401-000832 C805 220uF,20%,25V,GP,TP,8x11.5,5 C-AL 2401-001552 C107 47uF,20%,35V,GP,TP,6.3x11,2.5 C-AL 2401-002274 C114 220uF,20%,35V,WT,TP,10x12.5,5 C-AL 2401-002274 C119 220uF,20%,35V,WT,TP,10x12.5,5 C-AL 2401-002274 C421 220uF,20%,35V,WT,TP,10x12.5,5 C-AL 2401-002300 C118 47?F,20%,50V,GP,TP,6.3x11,5mm C-AL 2401-002300 C401 47?F,20%,50V,GP,TP,6.3x11,5mm C-AL 2401-002300 C402 47?F,20%,50V,GP,TP,6.3x11,5mm C-AL 6-38 Samsung Electronics...
- Page 131 MH080EAV2A,MITSUBISHI IPM ASS�-IPM DB98-16591A D101 ASS�-DIODE RECTIFIER DB98-16600A LED2 ASS�-LED GREEN DB98-16601A LED1 ASS�-LED RED DB98-16602A LED3 ASS�-LED �EL DB98-22298A CN51 INVERTER,SMAW250A-O4 RED ASS�-HOOK RED DB98-22299A CN50 inverter,SMAW250A-04 WHT ASS�-HOOK WHT DB98-24921A CN30 UH035EAV,SMAW250A-06 WHT ASS�-HOOK WHT Samsung Electronics 6-39...
-
Page 132: Wiring Diagram
7. Wiring Diagram ���� ��� ����� ����� ������ ���������� ��� ����� ���� ���������� ������� ���� ������ ����� ������� ���� ����� ���� ��� ����� ������� ������ This Document can not be used without Samsung’s authorization. Samsung Electronics... - Page 133 ADDRESS & OPTION SWITCH SET PART LOADING PART DISPLA� PCB PART BLDC FAN MOTOR CONTROL PART LOUVER CONTROL PART 485 COMMUNICATION PART EEV & SUB-PCB PART EXTERNAL CONTROL PART TEMPERATURE SENSOR PART This Document can not be used without Samsung’s authorization. Samsung Electronics...
- Page 134 8-2 Outdoor Unit ■ MAIN PCB(UH090/105/140EAV) ���� ����� ������ ����� ������ ��� ������������� ��� ������ ��� ������ �������� ����� �� � ����� ��� � ��� ���� This Document can not be used without Samsung’s authorization. Samsung Electronics...
- Page 135 ���� ������ ���� ���� ����� ������ ������������� ������ �� ���������� ������ ��� ����� ������ TEMPERATURE SENSOR & EEV PART DISPLA� PART SMPS PART INVERTER PART COMMUNICATION PART PFC PART This Document can not be used without Samsung’s authorization. Samsung Electronics...
- Page 136 ■ INVERTER PCB ���� ��� ����������� �� ���� ���� ����� ������ �� ���� ����� ������ ����� ��� ������ �������� ������ This Document can not be used without Samsung’s authorization. Samsung Electronics...
- Page 137 ■ EMI PCB(UH090/105/140EAV) �������� ����� This Document can not be used without Samsung’s authorization. Samsung Electronics...
- Page 138 Product Specifications ■ EMI PCB(UH070EAV1) This Document can not be used without Samsung’s authorization. Samsung Electronics...
- Page 139 9. Preference Sheet 9-1 Refrigerating Cycle Diagram Indoor Unit Outdoor Unit Samsung Electronics...
- Page 140 & Outdoor Version Unit Buint-in Ceiling - Refrigerant Console R-22 R407C Split R410A Universal Outdoor Unit(DPM) Power Supply Normal 115V,60Hz 220V,60Hz Mode 208~230V,60Hz 200~220V,50Hz 220~240V,50Hz H/P+Heater 220V,60Hz,3Φ C/O+Heater 380~415V,50Hz,3Φ C/O+Hydronic 127V, 50Hz 220~240V,50/60Hz,1Φ 380V,60Hz,3Φ Inverter 1Φ Inverter 3Φ Samsung Electronics...
-
Page 141: Wiring Diagram
SYSTEM AIR CONDITIONER Basic : CH140EAV/UH140GAV Model : CH070EAV1/CH090/105/140EAV UH070EAV1/UH090/105/140EAV Model Code : CH070EAV1/CH090/105/140EAV UH070EAV1/UH090/105/140EAV AIR CONDITIONER THE FEATURE OF PRODUCT 1. Precautions 2. Product Specifi cations 3. Disassembly and Reassembly 4. Troubleshooting 5. Exploded Views and Parts List CH070EAV1/CH090/105/140EAV 6. - Page 142 Mideast & Africa http://mea.samsungportal.com © Samsung Electronics Co., Ltd. Feb. 2008. This Service Manual is a property of Samsung Electronics Co., Ltd. Printed in China. Any unauthorized use of Manual can be punished under applicable International and/or domestic law.