
Related Manuals for Miele CS1028GSS


Summary of Contents for Miele CS1028GSS
- Page 1 Operating and Installation Instructions Gas Combiset CS 1028 ® ® en - US, CA To prevent accidents and appliance damage, read these instructions before installation or use. M.-Nr. 07 369 720...
- Page 2 WARNING: If the information in this manual is not followed exactly, a fire or explosion may result causing property damage, personal injury or death. – Do not store or use gasoline or other flammable vapors and liquids in the vicinity of this or any other appliance.
-
Page 3: Table Of Contents
Contents IMPORTANT SAFETY INSTRUCTIONS....... . . 4 Guide to the combiset ..........9 Burner . -
Page 4: Important Safety Instructions
IMPORTANT SAFETY INSTRUCTIONS Children WARNING- When using your gas Children should not be left appliance follow basic unattended in an area where the precautions, including the appliance is in use. Never allow following: children to sit or stand on any part of the appliance. - Page 5 Install the appliance so that the power cord and gas piping do not Installation, repair and maintenance come into contact with any portion of work should be performed by a Miele the combiset which may become hot authorized service technician. Work by during use.
- Page 6 Do not let the potholder applications. Please contact the touch the hot heating elements. Do not nearest Miele Dealer or the Miele use towels or other bulky items near the Technical Service Department with appliance.
- Page 7 IMPORTANT SAFETY INSTRUCTIONS Do not use pans that extend past Always position pan handles and the burner grate. Using larger pans utensils inward so they do not extend may cause the flames to spread out over adjacent work areas, burner or the and damage the surrounding edge of the combiset.
- Page 8 In the event of damage or defect, turn off the appliance immediately. Turn off the gas shut off valve and disconnect completely from the electrical supply. Contact the Miele Technical Service Department. Do not use the appliance until it has been repaired.
-
Page 9: Guide To The Combiset
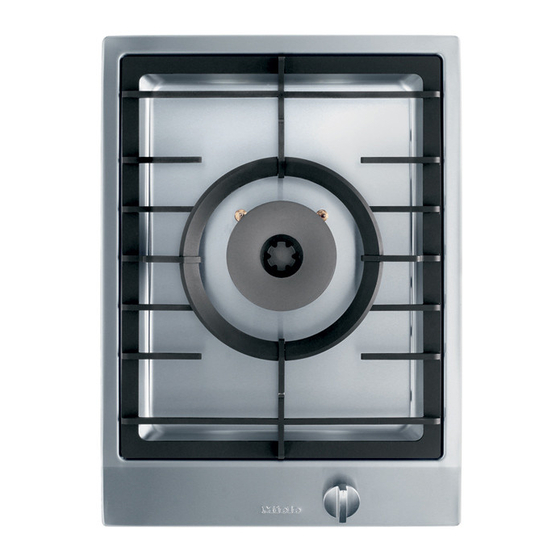
Guide to the combiset a Burner grate b Burner c Control knob... -
Page 10: Burner
Guide to the combiset Burner d Burner cap e Burner head f Cover plate g Ignitor h Ignition safety control (Thermocouple) i Burner base... -
Page 11: Before Using The Combiset
Before using the combiset Cleaning the combiset Metal components have a protective coating which may give off a slight odor Before using for the first time clean the the first time your new appliance is appliance as follows: heated. ^ Remove any protective foil. The harmless odor will dissipate after a ^ Wash the removable parts of the gas short time and does not indicate a... -
Page 12: Operation
Operation Turning on and off / Regulating Turning on The control knob is used to turn on the burner and to regulate the strength of the flame. ß The gas supply is turned off * Ignition setting & Highest flame / Lowest flame ^ To turn on the burner, press the control knob down and turn it... -
Page 13: Using The Cooktop During A Power Failure
Operation Using the cooktop during a Adjusting the flame power failure The burner can be variably adjusted between the lowest and highest flame If there is an interruption to the by turning the control knob. electrical supply, the gas can be ignited using a match. -
Page 14: Pans
Pans Pan size Suitable pans – Set the combiset to a high flame Unlike pans used on an electric when using a large diameter pan and combiset, the bases do not need to be low flame when using a small even for good results. -
Page 15: Safety Features
Safety features Ignition Safety Control This gas combiset incorporates an Ignition Safety Control which stops the supply of gas if the flame goes out. ^ To reignite the burner, turn the control knob clockwise to “ß”, then turn on the burner as usual. This safety feature is not operated by electricity, it will be active even if the appliance is in use during a power... -
Page 16: Cleaning And Care
Keep the ignitor in the burner dry. If These cleaning products are available it gets wet it will not spark. from Miele. Dry your combiset thoroughly after Do not use stainless steel cleaner on or cleaning it to prevent lime deposits. -
Page 17: Burner
Cleaning and care Burner Reassembling the burner Do not clean any parts of the burner in a dishwasher. The burner can be dismantled and cleaned when cool. ^ Remove the burner parts and wash them in a solution of warm water and liquid dish soap. -
Page 18: Frequently Asked Questions
Frequently asked questions Repairs should only be carries out by an authorized technician in accordance with local and national safety regulations. Unauthorized repairs could cause injury or appliance damage. The manufacturer cannot be held responsible for unauthorized work. The burner does not ignite after several attempts. Possible fault Solution The burner is not assembled correctly. -
Page 19: Technical Service
Technical Service In the event of a fault which you cannot easily fix yourself, please contact the Miele Technical Service Department at the address on the back of this booklet. When contacting Technical Service please quote the serial number and... - Page 20 Miele Service department, Extended Service Contracts offered by other providers for Miele products will not be recognized by Miele. Our goal is to prevent unauthorized (and untrained) service personnel from working on your Miele products, possibly doing further damage to them, you and/or your home.
- Page 21 Installation Instructions IMPORTANT: SAVE FOR THE LOCAL ELECTRICAL INSPECTOR'S USE To prevent accidents and appliance damage read these instructions before installation or use.
-
Page 22: Important Safety Instructions
(3.5 kPa). This appliance must be installation in these applications. Please isolated at test pressures equal to or contact the Miele Technical Service less than ½ psi (3.5 kPa). Department with specific requirements. The combiset must not be installed... - Page 23 IMPORTANT SAFETY INSTRUCTIONS Safety distances above the appliance The minimum safety distance given by the hood manufacturer must be maintained between the combiset and the hood above it. See the installation instructions of the hood for these safety measurements. If the hood manufacturers instructions are not available or if flammable objects are installed over the combiset (e.g.
- Page 24 IMPORTANT SAFETY INSTRUCTIONS Safety distances to the sides of the appliance The appliance should only be installed as shown in the illustrations, while 2 " (50 mm) maintaining the required safety distances shown. Do not install the appliance between two tall cabinets, this is a fire hazard.
-
Page 25: Installation
Installation Safety distance from the wall covering If a wall covering is installed, a minimum safety distance must be maintained between the countertop cut-out and the covering, since high temperatures can damage these materials. If the covering is made of a combustible material (such as wood), the distance between the countertop cut-out and the wall covering must be a minimum of 2"... -
Page 26: Installation Dimensions
Installation Installation dimensions a Spring clips b Appliance front c Installation height d Power supply box with connection cable, L = 4 ft (1.2 m) e Gas fitting f Rating label... -
Page 27: Cut Out
Installation Cut out If during installation the seal around the frame does not sit flush with the ^ Make the countertop cut-out for one countertop in the corners, the corner or more appliances as applicable. radius, maximum " (4 mm), can be Remember to maintain a minimum carefully filed down to fit. -
Page 28: Installation Of Multiple Appliances
Installation Installation of multiple appliances When installing more than one combiset appliance, a support bar b must be installed between the appliances. Countertop cut-out Countertop cut-out two appliances three appliances For the installation of three appliances For the installation of two appliances the width of the countertop cut-out D is the width of the countertop cut-out D is the sum of A and B and C. - Page 29 Installation Sample calculations for a countertop cut-out for three appliances appliance width appliance width appliance width Countertop minus 5/16" minus 5/16" cut-out (8 mm) (8 mm) 11" (280 mm) 11 5/16" (288 mm) 11" (280 mm) 33 3/8" (848 mm) 11"...
- Page 30 Installation a Spring clips b Support bars c Space between support bar and countertop d Sealing strip The illustration represents the attachment of spring clips a and support bars b for 3 appliances. An additional support bar is required for each additional appliance. The position for attachment of an additional support bar depends on the width of appliance B.
-
Page 31: Attach The Spring Clips And Support Bars
Installation Attach the spring clips and support bars Wood or solid surface countertops ^ Place the supplied spring clips a and the support bars b at the marked positions as shown above, by laying them on the upper edge of the cut-out and then securing them with the "... - Page 32 Installation Granite countertop The screws are not needed for granite countertops. 3 / 1 6 " 1 " - 1 m m ) ( 2 5 - 3 0 ^ Coat the edges of the spring clips a, ^ and the space e between the support bars b and the countertop with silicone (supplied).
-
Page 33: Installing The Appliance / Appliances
Installation ^ Place the front edge of the next Installing the appliance / appliance into the cut-out. appliances ^ Connect the appliance / appliances ^ Feed the power cord down through to the main power supply (see the cut-out. "Electrical connection"). ^ Place the front edge of the appliance ^ Turn the appliance / appliances on into the cut-out. -
Page 34: Sealing
Installation Sealing Tiled surfaces The grouting a and shaded area under The appliance must not be permanently the appliance frame must be flat and sealed into the countertop when even so that the frame will lie evenly installed. The sealing strip under the and the sealing strip under the edge of edge of the appliance provides a the upper part of the appliance can... -
Page 35: Electrical Connection
Electrical connection This appliance must be grounded This appliance is equipped with a according to local or national codes. three-prong grounding plug to prevent shock hazards. It should be All electrical work should be plugged directly into a properly performed by a qualified electrician grounded outlet. - Page 36 Electrical connection Wiring Diagram...
-
Page 37: Gas Connection
Gas connection Installation and service must be The gas connection must be made performed by a qualified installer, in accordance with local codes or, in service agency or the gas supplier. the absence of local codes, with In Massachusetts a licensed the National Fuel Gas Code, plumber/gas fitter is required. -
Page 38: Gas Pressure Regulator
- 4" w.c. LP gas - 10" w.c. Do not use any regulator unless it has been supplied by Miele. Doing so may cause a gas leak. If there is any doubt concerning installation contact the Miele Technical Service Department. -
Page 39: Nominal Ratings
Gas connection Nominal ratings Maximum output Gas type BTU/hr Natural Gas (NG) 27,600 Liquid Gas 22,200 (Propane) (LP) Minimum output Gas type BTU/hr Natural Gas (NG) 5,700 1.67 Liquid Gas 5,700 1.67 (Propane) (LP) -
Page 40: Converting To Another Type Of Gas
Converting to another type of gas The combiset should have been ordered for connection to either natural gas or LP gas (propane). If the combiset is not configured for the proper type of gas connection please contact your Miele Dealer. -
Page 41: Help Protect Our Environment
Help protect our environment Disposal of packing materials Disposal of an old appliance The cardboard box and packing Old appliances contain materials that materials are biodegradable and can be recycled. Please contact your recyclable. Please recycle. local recycling authority about the possibility of recycling these materials. - Page 44 Alteration rights reserved / 3918 M.-Nr. 07 369 720 / 05 For the most updated manual see the Miele web site.