JVC KD-AR390 Instructions Manual
Hide thumbs
Also See for KD-AR390:
- Instructions manual (183 pages) ,
- Installation & connection manual (4 pages) ,
- Brochure (8 pages)
Table of Contents
Advertisement
CD RECEIVER
RECEPTOR CON CD
RÉCEPTEUR CD
For canceling the display demonstration, see page 4.
Para cancelar la demostración en pantalla, consulte la página 4.
Pour annuler la démonstration des affichages, référez-vous à la page 4.
For installation and connections, refer to the separate manual.
Para la instalación y las conexiones, refiérase al manual separado.
Pour l'installation et les raccordements, se référer au manuel séparé.
MANUEL D'INSTRUCTIONS
All manuals and user guides at all-guides.com
INSTRUCTIONS
MANUAL DE INSTRUCCIONES
KD-AR390/KD-G340
KD-AR390/KD-G340
KD-AR390/KD-G340
For customer Use:
Enter below the Model
No. and Serial No. which
are located on the top or
bottom of the cabinet. Retain
this information for future
reference.
Model No.
Serial No.
GET0487-001A
[J]
Advertisement
Table of Contents
Troubleshooting

Related Manuals for JVC KD-AR390


Summary of Contents for JVC KD-AR390
- Page 1 All manuals and user guides at all-guides.com CD RECEIVER KD-AR390/KD-G340 RECEPTOR CON CD KD-AR390/KD-G340 RÉCEPTEUR CD KD-AR390/KD-G340 For canceling the display demonstration, see page 4. Para cancelar la demostración en pantalla, consulte la página 4. Pour annuler la démonstration des affichages, référez-vous à la page 4.
- Page 2 – Connect the equipment into an outlet on a circuit different from that to which the receiver is connected. – Consult the dealer or an experienced radio/TV technician for help. Caution: Changes or modifications not approved by JVC could void the user’s authority to operate the equipment. IMPORTANT FOR LASER PRODUCTS 1. CLASS 1 LASER PRODUCT 2.
-
Page 3: Table Of Contents
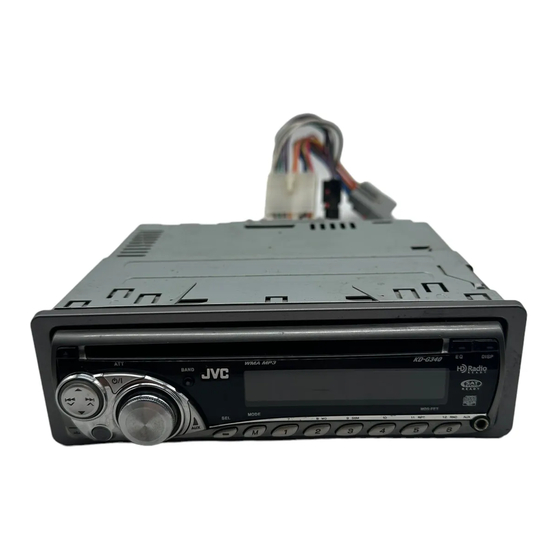
Discs produce very little noise compared with other sources. Lower the volume before playing a disc to The control panel illustrations used for avoid damaging the speakers by the sudden increase of explanation in this manual is of KD-AR390. the output level. -
Page 4: Introductions
All manuals and user guides at all-guides.com Preparation Cancel the display demonstration and set the clock • See also page 22. Turn on the power. Enter the PSM settings. Cancel the display demonstrations Select “DEMO,” then “DEMO OFF.” Set the clock Select “CLOCK HOUR,”... -
Page 5: Operations
All manuals and user guides at all-guides.com Basic operations Using the control panel • FM/AM: Select preset station. • BT-PHONE/BT-AUDIO: Select setting item/ Registered device. • HD RADIO: Select channel. • SIRIUS/XM: Select category. Select “AUX IN” directly if an external component is •... -
Page 6: Using The Remote Controller (Rm-Rk50)
(direct sunlight or artificial lighting). Remote sensor For USA-California Only: This product contains a CR Coin Cell Lithium Battery which contains Perchlorate Material—special KD-AR390 is equipped with the steering wheel handling may apply. remote control function. See www.dtsc.ca.gov/hazardouswaste/perchlorate • See the Installation/Connection Manual (separate... - Page 7 All manuals and user guides at all-guides.com • Searches for stations if pressed briefly. • Fast-forwards or reverses the track if pressed and held. • Changes the tracks if pressed briefly. • While listening to the satellite radio: – Changes the channels if pressed briefly. –...
-
Page 8: Listening To The Radio
All manuals and user guides at all-guides.com Listening to the radio Select “FM/AM.” Select the bands. Search for a station to listen—Auto Search. Manual Search: Hold either one of the buttons until “M” flashes on the display, then press it repeatedly. •... -
Page 9: Disc Operations
All manuals and user guides at all-guides.com Disc operations All tracks will be played repeatedly until you change the To stop play and eject the disc source or eject the disc. • Press SRC to listen to another playback source. Prohibiting disc ejection To cancel the prohibition, repeat the same procedure. -
Page 10: Using The Bluetooth ® Devices
All manuals and user guides at all-guides.com Using the Bluetooth ® devices For Bluetooth operations, it is required to connect Registering using “OPEN” the Bluetooth Adapter (KS-BTA200) (separately Preparation: Operate the device to turn on its Bluetooth purchased) to the CD changer jack on the rear of this function. - Page 11 All manuals and user guides at all-guides.com Connecting/disconnecting/deleting a Use the Bluetooth device to search and registered device connect. On the device to be connected, enter the same Select “BT-PHONE” or “BT-AUDIO.” PIN code you have just entered for this unit. “CONNECTED”...
-
Page 12: Using The Bluetooth Cellular Phone
Hold any button (except When a text message comes in..If the cellular phone is compatible with text message (notified through JVC Bluetooth adapter) and “MSG Direct dialing: INFO” (message info) is set to “AUTO” (see page 24), the Select “NUMBER.”... -
Page 13: Using The Bluetooth Audio Player
Then select a phone number. Bluetooth Information: * Displays only when your cellular phone is If you wish to receive more information about equipped with these functions and is compatible Bluetooth, visit our JVC web site. with this unit. EXTERNAL DEVICES... -
Page 14: Listening To The Hd Radio ™ Broadcast
All manuals and user guides at all-guides.com Listening to the HD Radio ™ Broadcast Before operating, connect HD Radio tuner box, Searching for HD Radio stations KT-HD300 (separately purchased) to the CD changer only jack on the rear of the unit. What is HD Radio Technology? HD Radio Technology can deliver high-quality digital sound—AM digital will have FM-like quality (in stereo) -
Page 15: Listening To The Cd Changer
All manuals and user guides at all-guides.com Listening to the CD changer It is recommended to use a JVC MP3-compatible CD changer (separately purchased) with your unit. You can connect a CD changer to the CD changer jack on the rear of the unit. -
Page 16: Listening To The Satellite Radio
Before operating, connect either one of the following (separately purchased) to the CD changer jack on the rear of this unit. • JVC SIRIUS Satellite radio interface, KS-SRA100, for listening to the SIRIUS Satellite radio. • JVC Smart Digital Adapter, XMDJVC100, for listening to the XM Satellite radio. - Page 17 All manuals and user guides at all-guides.com Select “SIRIUS” or “XM.” Select the bands. SIRIUS: Select a category. SIRIUS: If you select “ALL,” you can tune in to all the channels of all categories. Select a channel to listen. • Holding the button changes the channels rapidly. •...
-
Page 18: Listening To The Ipod
All manuals and user guides at all-guides.com Listening to the iPod Before operating, connect the Interface adapter for iPod, KS-PD100 (separately purchased) to the CD changer jack on the rear of the unit. Preparation: Make sure “CHANGER” is selected for the external input setting, see page 23. Select “IPOD.”... -
Page 19: Listening To The Other External
All manuals and user guides at all-guides.com Listening to the other external components You can connect an external component to: • CD changer jack on the rear of this unit using the following adapters: – Line Input Adapter, KS-U57 (separately purchsed) –... -
Page 20: Selecting A Preset Sound Mode
All manuals and user guides at all-guides.com Selecting a preset sound mode You can select a preset sound mode suitable to the music genre (iEQ: intelligent equalizer). Preset value setting for each sound mode Preset value Sound BASS (bass) MID (mid-range) TRE (treble) LOUD mode... - Page 21 All manuals and user guides at all-guides.com FADER * Range/selectable items R06 to F06 Sound Adjust the front and rear speaker elements BASS output balance. Frequency 60 Hz 500 Hz 7.5 kHz BALANCE * L06 to R06 80 Hz 1.0 kHz 10.0 kHz Adjust the left and right speaker 100 Hz...
-
Page 22: General Settings - Psm
All manuals and user guides at all-guides.com General settings — PSM You can change PSM (Preferred Setting Mode) items Adjust the PSM item selected. listed in the table below and on page 23. Enter the PSM settings. Repeat steps 2 and 3 to adjust other PSM Select a PSM item. - Page 23 : Frequencies lower than 180 Hz are sent to the subwoofer. EXT INPUT * • CHANGER : To connect a JVC CD changer, [15], or an Apple iPod, [18]. External input • EXT INPUT : To connect portable audio player to the CD changer jack, [19].
-
Page 24: Bluetooth Settings
MIC SET (microphone setting) connected and it is compatible with text message Only for the device being connected for “BT-PHONE.” (notified through JVC Bluetooth adapter). Adjust microphone volume connected to the Bluetooth Bluetooth Audio: Shows only “Version.” adapter, [LEVEL 01/02/03]. -
Page 25: Title Assignment
All manuals and user guides at all-guides.com Title assignment More about this unit You can assign titles to 30 station frequencies (FM and Basic operations AM) using 8 characters (maximum) for each title. Turning on the power • When HD Radio tuner box is connected, this feature •... - Page 26 All manuals and user guides at all-guides.com • Do not use the following CD-Rs or CD-RWs: Disc operations – Discs with stickers, labels, or a protective seal stuck Caution for DualDisc playback to the surface. • The Non-DVD side of a “DualDisc” does not comply –...
- Page 27 • While driving, do not perform complicated operation Satellite radio such as dialing the numbers, using phone book, etc. • You can also connect the JVC SIRIUS radio PnP When you perform these operations, stop your car in (Plug and Play), using the JVC SIRIUS radio adapter, a safe place.
- Page 28 Bluetooth SIG, Inc. and any use of such marks be performed correctly or as intended. In this case, by Victor Company of Japan, Limited (JVC) is under visit the following JVC web site: <http://www.jvc. license. Other trademarks and trade names are those co.jp/english/car/support/ks-pd100/index.html>...
-
Page 29: Troubleshooting
All manuals and user guides at all-guides.com Troubleshooting What appears to be trouble is not always serious. Check the following points before calling a service center. Symptoms Remedies/Causes • Sound cannot be heard from the speakers. • Adjust the volume to the optimum level. •... - Page 30 All manuals and user guides at all-guides.com Symptoms Remedies/Causes • Tracks do not play back in the order you The playback order is determined when the files are have intended them to play. recorded. • The elapsed playing time is not correct. This sometimes occurs during playback.
- Page 31 All manuals and user guides at all-guides.com Symptoms Remedies/Causes • Sound quality changes when receiving Fix the reception mode either to “DIGITAL” or “ANALOG” HD Radio stations. (see page 14). • No sound can be heard. • “ANALOG” is selected when receiving all digital broadcast of HD Radio station.
- Page 32 All manuals and user guides at all-guides.com Symptoms Remedies/Causes • “NO (information)*” scrolls on the display No text information for the selected channel. while listening to the SIRIUS Satellite radio. • “---” appears on the display while listening to the XM Satellite radio. •...
-
Page 33: Maintenance
All manuals and user guides at all-guides.com Maintenance How to clean the connectors To keep discs clean Frequent detachment will deteriorate the connectors. A dirty disc may not play correctly. To minimize this possibility, periodically wipe the If a disc does become dirty, wipe it with connectors with a cotton swab or cloth moistened with a soft cloth in a straight line from center alcohol, being careful not to damage the connectors. -
Page 34: Specifications
Output Impedance: 1 kΩ Other Terminal: AUX (auxiliary) input jack, CD changer jack, Steering wheel remote input (only for KD-AR390), Antenna TUNER SECTION Frequency Range: FM: with channel interval set to 100 kHz 87.5 MHz to 107.9 MHz or 200 kHz with channel interval set to 50 kHz 87.5 MHz to 108.0 MHz... - Page 35 All manuals and user guides at all-guides.com CD PLAYER SECTION Type: Compact disc player Signal Detection System: Non-contact optical pickup (semiconductor laser) Number of Channels: 2 channels (stereo) Frequency Response: 5 Hz to 20 000 Hz Dynamic Range: 96 dB Signal-to-Noise Ratio: 98 dB Wow and Flutter:...
- Page 36 Having TROUBLE with operation? Please reset your unit Refer to page of How to reset your unit Still having trouble?? USA ONLY Call 1-800-252-5722 http://www.jvc.com We can help you! EN, SP, FR © 2007 Victor Company of Japan, Limited 1007DTSMDTJEIN...
- Page 37 NEGATIVA. Si su vehículo no posee continu de 12 V à masse NEGATIVE. Si votre véhicule n’offre pas ce voltage inverter is required, which can be purchased at JVC car audio este sistema, será necesario un inversor de tensión, que puede ser type d’alimentation, il vous faut un convertisseur de tension, que vous...
- Page 38 JVC car audio dealer or a company supplying kits. instalación, consulte con su concesionario de JVC de equipos de audio d’installation, consulter votre revendeur d’autoradios JVC ou une •...
- Page 39 Los cables de los altavoces de esta unidad – Déconnectez les enceintes de cet appareil et connectez- – For KD-AR390: The line output level of this unit is kept high to quedan sin usar. les à l’amplificateur. Laissez les fils d’enceintes de cet maintain the hi-fi sounds reproduced from this unit.
- Page 40 All manuals and user guides at all-guides.com Connecting to the steering wheel remote controller (only for KD-AR390) / Conexión al control remoto del volante de dirección (sólo para KD-AR390) / Connexion de la télécommande de volant (seulement pour le KD-AR390) If your car is equipped with the steering wheel remote controller, Si votre voiture est équipée d’une télécommande de volant, vous...
- Page 41 All manuals and user guides at all-guides.com CD RECEIVER KD-G444 For canceling the display demonstration, see page 6. For installation and connections, refer to the separate manual. INSTRUCTIONS GET0538-001A [UI]...
- Page 42 All manuals and user guides at all-guides.com Thank you for purchasing a JVC product. Please read all instructions carefully before operation, to ensure your complete understanding and to obtain the best possible performance from the unit. IMPORTANT FOR LASER PRODUCTS 1.
- Page 43 All manuals and user guides at all-guides.com How to reset your unit CONTENTS Control panel ........4 Remote controller — .... 5 RM-RK50 Getting started ........ 6 Basic operations ........... 6 Radio operations ......7 • Your preset adjustments will also be erased (except the registered Bluetooth device, see page 15).
-
Page 44: Control Panel
All manuals and user guides at all-guides.com Control panel Parts identification Display window ∞ (up) / (down) buttons Number buttons (eject) button RPT (repeat) button (standby/on attenuator) button RND (random) button Control dial AUX (auxiliary) input jack Remote sensor Status of Bluetooth device •... -
Page 45: Rm-Rk50
All manuals and user guides at all-guides.com Sound mode (iEQ: intelligent equalizer) indicators (standby/on/attenuator) button —CLASSIC, HIP HOP, JAZZ, ROCK, POPS, USER • Turns the power on if pressed briefly or LOUD (loudness) indicator attenuates the sound when the power is on. EQ (equalizer) indicator •... -
Page 46: Getting Started
All manuals and user guides at all-guides.com Warning: For FM/AM tuner. • Do not install any battery other than CR2025 or its equivalent; otherwise, it may explode. • Do not leave the remote controller in a place ⁄ Adjust the volume. (such as dashboards) exposed to direct sunlight for a long time;... -
Page 47: Radio Operations
All manuals and user guides at all-guides.com Setting the clock To tune in to a station manually Select “CLOCK HOUR”, then adjust the hour. In step ! on the left column... Select “CLOCK MIN” (minute), then adjust the minute. Finish the procedure. To check the current clock time while the Select a desired station frequency. -
Page 48: Disc Operations
All manuals and user guides at all-guides.com Storing stations in memory Listening to a preset station You can preset six stations for each band. FM station automatic presetting — Select the preset station (1 – 6) you want. SSM (Strong-station Sequential Memory) Select the FM band (FM1 –... -
Page 49: Playing Discs In The Cd Changer
For disc number from 07 – 12: To select a number from 07 – 12: About the CD changer It is recommended to use a JVC MP3-compatible CD changer with your unit. • To use direct folder access on MP3/WMA discs, it •... - Page 50 All manuals and user guides at all-guides.com Other main functions Changing the display information Skipping tracks quickly during play While playing an audio CD or CD Text Only possible on JVC MP3-compatible CD changer Disc title/performer * Track title * •...
-
Page 51: Sound Adjustments
All manuals and user guides at all-guides.com Sound adjustment Selecting the playback modes You can use only one of the following playback modes You can select a preset sound mode suitable to the at a time. music genre (iEQ: intelligent equalizer). Select your desired playback mode. - Page 52 All manuals and user guides at all-guides.com Adjust the quality slope (Q). FADER * R06 to F06 Adjust the front and rear speaker output balance. BALANCE * L06 to R06 Adjust the left and right speaker Range/selectable items output balance. Sound elements BASS...
-
Page 53: General Settings - Psm
All manuals and user guides at all-guides.com General settings — PSM You can change PSM (Preferred Setting Mode) items Adjust the PSM item selected. listed in the table below and on page 14. Repeat steps 2 and 3 to adjust other PSM Select a PSM item. - Page 54 : Frequencies lower than 180 Hz are sent to the subwoofer. EXT INPUT * • CHANGER : To use a JVC CD changer, [8], an Apple iPod, [19]. External input • EXT INPUT : To use any other external component, [21].
-
Page 55: Using The Bluetooth ® Devices
All manuals and user guides at all-guides.com Using the Bluetooth ® devices For Bluetooth operations, it is required to connect the Registering using “OPEN” Bluetooth Adapter (KS-BTA200) to the CD changer Preparation: jack on the rear of this unit. Operate the device to turn on its Bluetooth function. •... -
Page 56: Using The Bluetooth Cellular Phone
All manuals and user guides at all-guides.com Connecting/disconnecting/deleting a Use the Bluetooth device to search and registered device connect. On the device to be connected, enter the same Select “BT-PHONE” or “BT-AUDIO.” PIN code you have just entered for this unit. “CONNECTED”... - Page 57 When a text message comes in..If the cellular phone is compatible with text message (notified through JVC Bluetooth adapter) and “MSG INFO” (message info) is set to “AUTOMATIC” (see pages 18 and 19), the unit rings to inform you of the message arrival.
-
Page 58: Using The Bluetooth Audio Player
Select “PHONE BOOK *,” “MISSED *,” If you wish to receive more information about “REDIAL *,” or “RECEIVED *” whichever you Bluetooth, visit the following JVC web site: want to use. Then select a phone number. <http://www.jvc-victor.co.jp/english/car/>. * Displays only when your cellular phone is equipped with these functions and is compatible with this unit. -
Page 59: Ipod Operations
[LEVEL 01/02/03]. Appears only when a Bluetooth phone is connected and it is compatible with text message VERSION (notified through JVC Bluetooth adapter). The Bluetooth software and hardware versions are Bluetooth Audio: Shows only “VERSION.” shown. Change the setting accordingly. - Page 60 All manuals and user guides at all-guides.com Ÿ Confirm the selection. Adjust the volume. • To move back to the previous menu, press • If a track is selected, playback starts Adjust the sound as you want. (See automatically. • If the selected item has another layer, you will pages 11 and 12.) enter the layer.
-
Page 61: Other External Component
All manuals and user guides at all-guides.com [ ] : Corresponding indicator lights up on the For selecting the external component display. connected to... • AUX input jack To check other information while listening to an iPod Folder name Track name Elapsed playing time with the current track number •... -
Page 62: Title Assignment
All manuals and user guides at all-guides.com More about this unit Title assignment You can assign titles to 30 station frequencies (FM and Basic operations AM) using 8 characters (maximum) for each title. Turning on the power • By pressing SRC or AUX on the unit, you can also turn Select FM/AM. - Page 63 All manuals and user guides at all-guides.com • When a disc is inserted upside down, “PLEASE” and Playing an MP3/WMA disc “EJECT” appear alternately on the display. Press • This unit can play back MP3/WMA files with the OPEN, then to eject the disc.
- Page 64 All manuals and user guides at all-guides.com • This unit cannot play back the following files: Warning messages for Bluetooth operations – MP3 files encoded in MP3i and MP3 PRO format. ERROR CNNCT The device is registered but the – MP3 files encoded in an inappropriate format. (Error connection has failed.
- Page 65 JVC web site:<http://www.jvc. the Bluetooth SIG, Inc. and any use of such marks co.jp/english/car/support/ks-pd100/index.html> by Victor Company of Japan, Limited (JVC) is under license. Other trademarks and trade names are those of their respective owners. Preset value setting for each sound mode...
-
Page 66: Maintenance
All manuals and user guides at all-guides.com To keep discs clean Maintenance A dirty disc may not play correctly. If a disc does become dirty, wipe it with How to clean the connectors a soft cloth in a straight line from center Frequent detachment will deteriorate the connectors. -
Page 67: Troubleshooting
All manuals and user guides at all-guides.com Troubleshooting What appears to be trouble is not always serious. Check the following points before calling a service center. Symptoms Remedies/Causes • Sound cannot be heard from the speakers. • Adjust the volume to the optimum level. •... - Page 68 All manuals and user guides at all-guides.com Symptoms Remedies/Causes • Tracks are not played back in the order you The playback order is determined when the files are have intended. recorded. • The elapsed playing time is not correct. This sometimes occurs during playback. This is caused by how the tracks are recorded on the disc.
- Page 69 All manuals and user guides at all-guides.com Symptoms Remedies/Causes • “NO DISC” appears on the display. Insert a disc into the magazine. • “NO MAGAZINE” appears on the display. Insert the magazine. • “RESET 8” appears on the display. Connect this unit and the CD changer correctly and press the reset button of the CD changer.
-
Page 70: Specifications
All manuals and user guides at all-guides.com Specifications AUDIO AMPLIFIER SECTION Maximum Power Output: Front/Rear: 50 W per channel Continuous Power Output (RMS): Front/Rear: 19 W per channel into 4 Ω, 40 Hz to 20 000 Hz at no more than 0.8% total harmonic distortion. - Page 71 All manuals and user guides at all-guides.com CD PLAYER SECTION Type: Compact disc player Signal Detection System: Non-contact optical pickup (semiconductor laser) Number of Channels: 2 channels (stereo) Frequency Response: 5 Hz to 20 000 Hz Dynamic Range: 96 dB Signal-to-Noise Ratio: 98 dB Wow and Flutter:...
- Page 72 All manuals and user guides at all-guides.com Having TROUBLE with operation? Please reset your unit Refer to page of How to reset your unit © 2007 Victor Company of Japan, Limited 1107DTSMDTJEIN...
- Page 73 • Be sure to ground this unit to the car’s chassis again after installation. Notes: • Replace the fuse with one of the specified rating. If the fuse blows frequently, consult your JVC car audio dealer. • It is recommended to connect speakers with a maximum power of more than 50 W (both at the rear and at the front, with an impedance of 4 Ω...
- Page 74 All manuals and user guides at all-guides.com CD RECEIVER KD-G446/KD-G445 KD-G446/KD-G445 For canceling the display demonstration, see page 6. For installation and connections, refer to the separate manual. INSTRUCTIONS GET0537-001A [U/UH]...
- Page 75 All manuals and user guides at all-guides.com Thank you for purchasing a JVC product. Please read all instructions carefully before operation, to ensure your complete understanding and to obtain the best possible performance from the unit. IMPORTANT FOR LASER PRODUCTS 1.
- Page 76 All manuals and user guides at all-guides.com How to reset your unit CONTENTS Control panel — ..4 KD-G446/KD-G445 Remote controller — .... 5 RM-RK50 Getting started ........ 6 Basic operations ........... 6 Radio operations ......7 • Your preset adjustments will also be erased (except the registered Bluetooth device, see page 15).
- Page 77 All manuals and user guides at all-guides.com Control panel — KD-G446/KD-G445 Parts identification Display window ∞ (up) / (down) buttons Number buttons (eject) button RPT (repeat) button (standby/on attenuator) button RND (random) button Control dial AUX (auxiliary) input jack Remote sensor Status of Bluetooth device •...
-
Page 78: Rm-Rk50
All manuals and user guides at all-guides.com Sound mode (iEQ: intelligent equalizer) indicators (standby/on/attenuator) button —CLASSIC, HIP HOP, JAZZ, ROCK, POPS, USER • Turns the power on if pressed briefly or LOUD (loudness) indicator attenuates the sound when the power is on. EQ (equalizer) indicator •... -
Page 79: Getting Started
All manuals and user guides at all-guides.com Warning: For FM/AM tuner. • Do not install any battery other than CR2025 or its equivalent; otherwise, it may explode. • Do not leave the remote controller in a place ⁄ Adjust the volume. (such as dashboards) exposed to direct sunlight for a long time;... -
Page 80: Radio Operations
All manuals and user guides at all-guides.com Setting the clock To tune in to a station manually Select “CLOCK HOUR”, then adjust the hour. In step ! on the left column... Select “CLOCK MIN” (minute), then adjust the minute. Finish the procedure. To check the current clock time while the Select a desired station frequency. -
Page 81: Disc Operations
All manuals and user guides at all-guides.com Storing stations in memory Listening to a preset station You can preset six stations for each band. FM station automatic presetting — Select the preset station (1 – 6) you want. SSM (Strong-station Sequential Memory) Select the FM band (FM1 –... -
Page 82: Playing Discs In The Cd Changer
For disc number from 07 – 12: To select a number from 07 – 12: About the CD changer It is recommended to use a JVC MP3-compatible CD changer with your unit. • To use direct folder access on MP3/WMA discs, it •... - Page 83 All manuals and user guides at all-guides.com Other main functions Changing the display information Skipping tracks quickly during play While playing an audio CD or CD Text Only possible on JVC MP3-compatible CD changer Disc title/performer * Track title * •...
-
Page 84: Sound Adjustments
All manuals and user guides at all-guides.com Sound adjustment Selecting the playback modes You can use only one of the following playback modes You can select a preset sound mode suitable to the at a time. music genre (iEQ: intelligent equalizer). Select your desired playback mode. - Page 85 All manuals and user guides at all-guides.com Adjust the quality slope (Q). FADER * R06 to F06 Adjust the front and rear speaker output balance. BALANCE * L06 to R06 Adjust the left and right speaker Range/selectable items output balance. Sound elements BASS...
-
Page 86: General Settings - Psm
All manuals and user guides at all-guides.com General settings — PSM You can change PSM (Preferred Setting Mode) items Adjust the PSM item selected. listed in the table below and on page 14. Repeat steps 2 and 3 to adjust other PSM Select a PSM item. - Page 87 : Frequencies lower than 180 Hz are sent to the subwoofer. EXT INPUT * • CHANGER : To use a JVC CD changer, [8], an Apple iPod, [19]. External input • EXT INPUT : To use any other external component, [21].
-
Page 88: Using The Bluetooth ® Devices
All manuals and user guides at all-guides.com Using the Bluetooth ® devices For Bluetooth operations, it is required to connect the Registering using “OPEN” Bluetooth Adapter (KS-BTA200) to the CD changer Preparation: jack on the rear of this unit. Operate the device to turn on its Bluetooth function. •... -
Page 89: Using The Bluetooth Cellular Phone
All manuals and user guides at all-guides.com Connecting/disconnecting/deleting a Use the Bluetooth device to search and registered device connect. On the device to be connected, enter the same Select “BT-PHONE” or “BT-AUDIO.” PIN code you have just entered for this unit. “CONNECTED”... - Page 90 When a text message comes in..If the cellular phone is compatible with text message (notified through JVC Bluetooth adapter) and “MSG INFO” (message info) is set to “AUTOMATIC” (see pages 18 and 19), the unit rings to inform you of the message arrival.
-
Page 91: Using The Bluetooth Audio Player
Select “PHONE BOOK *,” “MISSED *,” If you wish to receive more information about “REDIAL *,” or “RECEIVED *” whichever you Bluetooth, visit the following JVC web site: want to use. Then select a phone number. <http://www.jvc-victor.co.jp/english/car/>. * Displays only when your cellular phone is equipped with these functions and is compatible with this unit. -
Page 92: Ipod Operations
[LEVEL 01/02/03]. Appears only when a Bluetooth phone is connected and it is compatible with text message VERSION (notified through JVC Bluetooth adapter). The Bluetooth software and hardware versions are Bluetooth Audio: Shows only “VERSION.” shown. Change the setting accordingly. - Page 93 All manuals and user guides at all-guides.com Ÿ Confirm the selection. Adjust the volume. • To move back to the previous menu, press • If a track is selected, playback starts Adjust the sound as you want. (See automatically. • If the selected item has another layer, you will pages 11 and 12.) enter the layer.
-
Page 94: Other External Component
All manuals and user guides at all-guides.com [ ] : Corresponding indicator lights up on the For selecting the external component display. connected to... • AUX input jack To check other information while listening to an iPod Folder name Track name Elapsed playing time with the current track number •... -
Page 95: Title Assignment
All manuals and user guides at all-guides.com Title assignment More about this unit You can assign titles to 30 station frequencies (FM and Basic operations AM) using 8 characters (maximum) for each title. Turning on the power • By pressing SRC or AUX on the unit, you can also turn Select FM/AM. - Page 96 All manuals and user guides at all-guides.com • When a disc is inserted upside down, “PLEASE” and Playing an MP3/WMA disc “EJECT” appear alternately on the display. Press • This unit can play back MP3/WMA files with the OPEN, then to eject the disc.
- Page 97 All manuals and user guides at all-guides.com • This unit cannot play back the following files: Warning messages for Bluetooth operations – MP3 files encoded in MP3i and MP3 PRO format. ERROR CNNCT The device is registered but the – MP3 files encoded in an inappropriate format. (Error connection has failed.
- Page 98 JVC web site:<http://www.jvc. the Bluetooth SIG, Inc. and any use of such marks co.jp/english/car/support/ks-pd100/index.html> by Victor Company of Japan, Limited (JVC) is under license. Other trademarks and trade names are those of their respective owners. Preset value setting for each sound mode...
-
Page 99: Maintenance
All manuals and user guides at all-guides.com To keep discs clean Maintenance A dirty disc may not play correctly. If a disc does become dirty, wipe it with How to clean the connectors a soft cloth in a straight line from center Frequent detachment will deteriorate the connectors. -
Page 100: Troubleshooting
All manuals and user guides at all-guides.com Troubleshooting What appears to be trouble is not always serious. Check the following points before calling a service center. Symptoms Remedies/Causes • Sound cannot be heard from the speakers. • Adjust the volume to the optimum level. •... - Page 101 All manuals and user guides at all-guides.com Symptoms Remedies/Causes • Tracks are not played back in the order you The playback order is determined when the files are have intended. recorded. • The elapsed playing time is not correct. This sometimes occurs during playback. This is caused by how the tracks are recorded on the disc.
- Page 102 All manuals and user guides at all-guides.com Symptoms Remedies/Causes • “NO DISC” appears on the display. Insert a disc into the magazine. • “NO MAGAZINE” appears on the display. Insert the magazine. • “RESET 8” appears on the display. Connect this unit and the CD changer correctly and press the reset button of the CD changer.
-
Page 103: Specifications
All manuals and user guides at all-guides.com Specifications AUDIO AMPLIFIER SECTION Maximum Power Output: Front/Rear: 50 W per channel Continuous Power Output (RMS): Front/Rear: 19 W per channel into 4 Ω, 40 Hz to 20 000 Hz at no more than 0.8% total harmonic distortion. - Page 104 All manuals and user guides at all-guides.com CD PLAYER SECTION Type: Compact disc player Signal Detection System: Non-contact optical pickup (semiconductor laser) Number of Channels: 2 channels (stereo) Frequency Response: 5 Hz to 20 000 Hz Dynamic Range: 96 dB Signal-to-Noise Ratio: 98 dB Wow and Flutter:...
- Page 105 All manuals and user guides at all-guides.com Having TROUBLE with operation? Please reset your unit Refer to page of How to reset your unit EN, TH © 2007 Victor Company of Japan, Limited 1107DTSMDTJEIN...
- Page 106 • • Replace the fuse with one of the specified rating. If the fuse blows frequently, consult your JVC car audio „™È æ ‘ ° — ¥ ®”‡æ“–·∑πøî « À“°øî « Ï ¢ “¥∫Ë Õ ¬ „ÀÈ ª √÷ ° …“√È “ π¢“¬‡§√◊ Ë Õ ß‡ ’ ¬ ß√∂¬πµÏ...
- Page 107 ¿“æµ— « Õ¬Ë “ ßµË Õ ‰ªπ’ È · ¥ß∂÷ ß °“√µ‘ ¥ µ— È ß ·∫∫∑— Ë « ‰ª À“°§ÿ ≥ ¡’ ª í ≠ À“À√◊ Õ µÈ Õ ß°“√¢È Õ ¡Ÿ ≈ ‡°’ Ë ¬ «°— ∫ ™ÿ ¥ µ‘ ¥ µ— È ß °√ÿ ≥ “ª√÷ ° …“°— ∫ ºŸ È ¢ “¬‡§√◊ Ë Õ ß‡ ’ regarding installation kits, consult your JVC car audio dealer or a company supplying kits.
- Page 108 All manuals and user guides at all-guides.com ENGLISH ‰∑¬ ELECTRICAL CONNECTIONS °“√‡™◊ Ë Õ ¡‚¥¬„™È ‰øøÈ “ Typical connections / °“√‡™◊ Ë Õ ¡µË Õ ·∫∫ª°µ Before connecting: Check the wiring in the vehicle carefully. Incorrect connection may cause serious °Ë...
- Page 109 °Ë Õ π®–‡™◊ Ë Õ ¡µË Õ °— ∫ Õÿ ª °√≥Ï ¿ “¬πÕ° °√ÿ ≥ “µ√«® Õ∫„ÀÈ · πË „ ®«Ë “ ªî ¥ ‡§√◊ Ë Õ ßÕ¬Ÿ Ë You can connect the following JVC components to the CD changer jack.
- Page 110 CAUTION: When connecting two components in series Before connecting the external components, make sure that the unit is turned off. You can connect the following JVC components to the CD changer jack. JVC component Model name CD changer jack CD changer (CD-CH) CH-X1500, etc.
- Page 111 All manuals and user guides at all-guides.com CD RECEIVER KD-G446/KD-G445 ALAT PENERIMA CD KD-G446/KD-G445 For canceling the display demonstration, see page 6. Untuk membatalkan tampilan demonstrasi, lihat halaman 6. For installation and connections, refer to the separate manual. Untuk instalasi dan penyambungan, lihat buku pedoman terpisah. INSTRUCTIONS BUKU PETUNJUK GET0537-004A...
- Page 112 All manuals and user guides at all-guides.com Thank you for purchasing a JVC product. Please read all instructions carefully before operation, to ensure your complete understanding and to obtain the best possible performance from the unit. IMPORTANT FOR LASER PRODUCTS 1.
- Page 113 All manuals and user guides at all-guides.com How to reset your unit CONTENTS Control panel — ..4 KD-G446/KD-G445 Remote controller — .... 5 RM-RK50 Getting started ........ 6 Basic operations ........... 6 Radio operations ......7 • Your preset adjustments will also be erased (except the registered Bluetooth device, see page 15).
- Page 114 All manuals and user guides at all-guides.com Control panel — KD-G446/KD-G445 Parts identification Display window ∞ (up) / (down) buttons Number buttons (eject) button RPT (repeat) button (standby/on attenuator) button RND (random) button Control dial AUX (auxiliary) input jack Remote sensor Status of Bluetooth device •...
-
Page 115: Rm-Rk50
All manuals and user guides at all-guides.com Sound mode (iEQ: intelligent equalizer) indicators (standby/on/attenuator) button —CLASSIC, HIP HOP, JAZZ, ROCK, POPS, USER • Turns the power on if pressed briefly or LOUD (loudness) indicator attenuates the sound when the power is on. EQ (equalizer) indicator •... -
Page 116: Getting Started
All manuals and user guides at all-guides.com Warning: For FM/AM tuner. • Do not install any battery other than CR2025 or its equivalent; otherwise, it may explode. • Do not leave the remote controller in a place ⁄ Adjust the volume. (such as dashboards) exposed to direct sunlight for a long time;... -
Page 117: Radio Operations
All manuals and user guides at all-guides.com Setting the clock To tune in to a station manually Select “CLOCK HOUR”, then adjust the hour. In step ! on the left column... Select “CLOCK MIN” (minute), then adjust the minute. Finish the procedure. To check the current clock time while the Select a desired station frequency. -
Page 118: Disc Operations
All manuals and user guides at all-guides.com Storing stations in memory Listening to a preset station You can preset six stations for each band. FM station automatic presetting — Select the preset station (1 – 6) you want. SSM (Strong-station Sequential Memory) Select the FM band (FM1 –... -
Page 119: Playing Discs In The Cd Changer
For disc number from 07 – 12: To select a number from 07 – 12: About the CD changer It is recommended to use a JVC MP3-compatible CD changer with your unit. • To use direct folder access on MP3/WMA discs, it •... - Page 120 All manuals and user guides at all-guides.com Other main functions Changing the display information Skipping tracks quickly during play While playing an audio CD or CD Text Only possible on JVC MP3-compatible CD changer Disc title/performer * Track title * •...
-
Page 121: Sound Adjustments
All manuals and user guides at all-guides.com Sound adjustment Selecting the playback modes You can use only one of the following playback modes You can select a preset sound mode suitable to the at a time. music genre (iEQ: intelligent equalizer). Select your desired playback mode. - Page 122 All manuals and user guides at all-guides.com Adjust the quality slope (Q). FADER * R06 to F06 Adjust the front and rear speaker output balance. BALANCE * L06 to R06 Adjust the left and right speaker Range/selectable items output balance. Sound elements BASS...
-
Page 123: General Settings - Psm
All manuals and user guides at all-guides.com General settings — PSM You can change PSM (Preferred Setting Mode) items Adjust the PSM item selected. listed in the table below and on page 14. Repeat steps 2 and 3 to adjust other PSM Select a PSM item. - Page 124 : Frequencies lower than 180 Hz are sent to the subwoofer. EXT INPUT * • CHANGER : To use a JVC CD changer, [8], an Apple iPod, [19]. External input • EXT INPUT : To use any other external component, [21].
-
Page 125: Using The Bluetooth ® Devices
All manuals and user guides at all-guides.com Using the Bluetooth ® devices For Bluetooth operations, it is required to connect the Registering using “OPEN” Bluetooth Adapter (KS-BTA200) to the CD changer Preparation: jack on the rear of this unit. Operate the device to turn on its Bluetooth function. •... -
Page 126: Using The Bluetooth Cellular Phone
All manuals and user guides at all-guides.com Connecting/disconnecting/deleting a Use the Bluetooth device to search and registered device connect. On the device to be connected, enter the same Select “BT-PHONE” or “BT-AUDIO.” PIN code you have just entered for this unit. “CONNECTED”... - Page 127 When a text message comes in..If the cellular phone is compatible with text message (notified through JVC Bluetooth adapter) and “MSG INFO” (message info) is set to “AUTOMATIC” (see pages 18 and 19), the unit rings to inform you of the message arrival.
-
Page 128: Using The Bluetooth Audio Player
Select “PHONE BOOK *,” “MISSED *,” If you wish to receive more information about “REDIAL *,” or “RECEIVED *” whichever you Bluetooth, visit the following JVC web site: want to use. Then select a phone number. <http://www.jvc-victor.co.jp/english/car/>. * Displays only when your cellular phone is equipped with these functions and is compatible with this unit. -
Page 129: Ipod Operations
[LEVEL 01/02/03]. Appears only when a Bluetooth phone is connected and it is compatible with text message VERSION (notified through JVC Bluetooth adapter). The Bluetooth software and hardware versions are Bluetooth Audio: Shows only “VERSION.” shown. Change the setting accordingly. - Page 130 All manuals and user guides at all-guides.com Ÿ Confirm the selection. Adjust the volume. • To move back to the previous menu, press • If a track is selected, playback starts Adjust the sound as you want. (See automatically. • If the selected item has another layer, you will pages 11 and 12.) enter the layer.
-
Page 131: Other External Component
All manuals and user guides at all-guides.com [ ] : Corresponding indicator lights up on the For selecting the external component display. connected to... • AUX input jack To check other information while listening to an iPod Folder name Track name Elapsed playing time with the current track number •... -
Page 132: Title Assignment
All manuals and user guides at all-guides.com Title assignment More about this unit You can assign titles to 30 station frequencies (FM and Basic operations AM) using 8 characters (maximum) for each title. Turning on the power • By pressing SRC or AUX on the unit, you can also turn Select FM/AM. - Page 133 All manuals and user guides at all-guides.com • When a disc is inserted upside down, “PLEASE” and Playing an MP3/WMA disc “EJECT” appear alternately on the display. Press • This unit can play back MP3/WMA files with the OPEN, then to eject the disc.
- Page 134 All manuals and user guides at all-guides.com • This unit cannot play back the following files: Warning messages for Bluetooth operations – MP3 files encoded in MP3i and MP3 PRO format. ERROR CNNCT The device is registered but the – MP3 files encoded in an inappropriate format. (Error connection has failed.
- Page 135 JVC web site:<http://www.jvc. the Bluetooth SIG, Inc. and any use of such marks co.jp/english/car/support/ks-pd100/index.html> by Victor Company of Japan, Limited (JVC) is under license. Other trademarks and trade names are those of their respective owners. Preset value setting for each sound mode...
-
Page 136: Maintenance
All manuals and user guides at all-guides.com To keep discs clean Maintenance A dirty disc may not play correctly. If a disc does become dirty, wipe it with How to clean the connectors a soft cloth in a straight line from center Frequent detachment will deteriorate the connectors. -
Page 137: Troubleshooting
All manuals and user guides at all-guides.com Troubleshooting What appears to be trouble is not always serious. Check the following points before calling a service center. Symptoms Remedies/Causes • Sound cannot be heard from the speakers. • Adjust the volume to the optimum level. •... - Page 138 All manuals and user guides at all-guides.com Symptoms Remedies/Causes • Tracks are not played back in the order you The playback order is determined when the files are have intended. recorded. • The elapsed playing time is not correct. This sometimes occurs during playback. This is caused by how the tracks are recorded on the disc.
- Page 139 All manuals and user guides at all-guides.com Symptoms Remedies/Causes • “NO DISC” appears on the display. Insert a disc into the magazine. • “NO MAGAZINE” appears on the display. Insert the magazine. • “RESET 8” appears on the display. Connect this unit and the CD changer correctly and press the reset button of the CD changer.
-
Page 140: Specifications
All manuals and user guides at all-guides.com Specifications AUDIO AMPLIFIER SECTION Maximum Power Output: Front/Rear: 50 W per channel Continuous Power Output (RMS): Front/Rear: 19 W per channel into 4 Ω, 40 Hz to 20 000 Hz at no more than 0.8% total harmonic distortion. - Page 141 All manuals and user guides at all-guides.com CD PLAYER SECTION Type: Compact disc player Signal Detection System: Non-contact optical pickup (semiconductor laser) Number of Channels: 2 channels (stereo) Frequency Response: 5 Hz to 20 000 Hz Dynamic Range: 96 dB Signal-to-Noise Ratio: 98 dB Wow and Flutter:...
- Page 142 All manuals and user guides at all-guides.com Having TROUBLE with operation? Please reset your unit Refer to page of How to reset your unit Ada MASALAH dengan cara pengoperasian? Setel kembali unit Anda Lihat halaman mengenai Bagaimana mereset unit anda EN, IN ©...
- Page 143 • Pastikan untuk mentanahkan unit ini ke casis mobil kembali setelah pemasangan. Notes: Catatan: • Replace the fuse with one of the specified rating. If the fuse blows frequently, consult your JVC car audio • Ganti sekring dengan voltase yang sudah ditetapkan. Jika sekring sering meledak, konsultasikan pada dealer.
- Page 144 The following illustration shows a typical installation. If you have any questions or require information Ilustrasi berikut menunjukkan sebuah tipe pemasangan. Jika anda mempunyai suatu pertanyaan atau regarding installation kits, consult your JVC car audio dealer or a company supplying kits. informasi yang diperlukan mengenai alat-alat pemasangan, konsultasikan pada penyalur audio mobil JVC •...
- Page 145 All manuals and user guides at all-guides.com ENGLISH INDONESIA ELECTRICAL CONNECTIONS SAMBUNGAN-SAMBUNGAN LISTRIK Typical connections / Ciri khas sambungan-sambungan Before connecting: Check the wiring in the vehicle carefully. Incorrect connection may cause serious Sebelum penyambungan: Cek perkabelan dalam mobil dengan hati-hati. Penyambungan yang tidak damage to this unit.
- Page 146 Before connecting the external components, make sure that the unit is turned off. Sebelum menyambungkan komponen eksternal, pastikan bahwa alat penerima sudah dimatikan. You can connect the following JVC components to the CD changer jack. Anda dapat menghubungkan komponen JVC berikut ini ke jack CD changer...
- Page 147 All manuals and user guides at all-guides.com CD RECEIVER KD-G446/KD-G445 KD-G446/KD-G445 For canceling the display demonstration, see page 6. For installation and connections, refer to the separate manual. INSTRUCTIONS GET0537-005A [UT]...
- Page 148 All manuals and user guides at all-guides.com Thank you for purchasing a JVC product. Please read all instructions carefully before operation, to ensure your complete understanding and to obtain the best possible performance from the unit. IMPORTANT FOR LASER PRODUCTS 1.
- Page 149 All manuals and user guides at all-guides.com How to reset your unit CONTENTS Control panel — ..4 KD-G446/KD-G445 Remote controller — .... 5 RM-RK50 Getting started ........ 6 Basic operations ........... 6 Radio operations ......7 • Your preset adjustments will also be erased (except the registered Bluetooth device, see page 15).
-
Page 150: Kd-G446/Kd-G445
All manuals and user guides at all-guides.com Control panel — KD-G446/KD-G445 Parts identification Display window ∞ (up) / (down) buttons Number buttons (eject) button RPT (repeat) button (standby/on attenuator) button RND (random) button Control dial AUX (auxiliary) input jack Remote sensor Status of Bluetooth device •... -
Page 151: Rm-Rk50
All manuals and user guides at all-guides.com Sound mode (iEQ: intelligent equalizer) indicators (standby/on/attenuator) button —CLASSIC, HIP HOP, JAZZ, ROCK, POPS, USER • Turns the power on if pressed briefly or LOUD (loudness) indicator attenuates the sound when the power is on. EQ (equalizer) indicator •... -
Page 152: Getting Started
All manuals and user guides at all-guides.com Warning: For FM/AM tuner. • Do not install any battery other than CR2025 or its equivalent; otherwise, it may explode. • Do not leave the remote controller in a place ⁄ Adjust the volume. (such as dashboards) exposed to direct sunlight for a long time;... -
Page 153: Radio Operations
All manuals and user guides at all-guides.com Setting the clock To tune in to a station manually Select “CLOCK HOUR”, then adjust the hour. In step ! on the left column... Select “CLOCK MIN” (minute), then adjust the minute. Finish the procedure. To check the current clock time while the Select a desired station frequency. -
Page 154: Disc Operations
All manuals and user guides at all-guides.com Storing stations in memory Listening to a preset station You can preset six stations for each band. FM station automatic presetting — Select the preset station (1 – 6) you want. SSM (Strong-station Sequential Memory) Select the FM band (FM1 –... -
Page 155: Playing Discs In The Cd Changer
For disc number from 07 – 12: To select a number from 07 – 12: About the CD changer It is recommended to use a JVC MP3-compatible CD changer with your unit. • To use direct folder access on MP3/WMA discs, it •... - Page 156 All manuals and user guides at all-guides.com Other main functions Changing the display information Skipping tracks quickly during play While playing an audio CD or CD Text Only possible on JVC MP3-compatible CD changer Disc title/performer * Track title * •...
-
Page 157: Sound Adjustments
All manuals and user guides at all-guides.com Sound adjustment Selecting the playback modes You can use only one of the following playback modes You can select a preset sound mode suitable to the at a time. music genre (iEQ: intelligent equalizer). Select your desired playback mode. - Page 158 All manuals and user guides at all-guides.com Adjust the quality slope (Q). FADER * R06 to F06 Adjust the front and rear speaker output balance. BALANCE * L06 to R06 Adjust the left and right speaker Range/selectable items output balance. Sound elements BASS...
-
Page 159: General Settings - Psm
All manuals and user guides at all-guides.com General settings — PSM You can change PSM (Preferred Setting Mode) items Adjust the PSM item selected. listed in the table below and on page 14. Repeat steps 2 and 3 to adjust other PSM Select a PSM item. - Page 160 : Frequencies lower than 180 Hz are sent to the subwoofer. EXT INPUT * • CHANGER : To use a JVC CD changer, [8], an Apple iPod, [19]. External input • EXT INPUT : To use any other external component, [21].
-
Page 161: Using The Bluetooth ® Devices
All manuals and user guides at all-guides.com Using the Bluetooth ® devices For Bluetooth operations, it is required to connect the Registering using “OPEN” Bluetooth Adapter (KS-BTA200) to the CD changer Preparation: jack on the rear of this unit. Operate the device to turn on its Bluetooth function. •... -
Page 162: Using The Bluetooth Cellular Phone
All manuals and user guides at all-guides.com Connecting/disconnecting/deleting a Use the Bluetooth device to search and registered device connect. On the device to be connected, enter the same Select “BT-PHONE” or “BT-AUDIO.” PIN code you have just entered for this unit. “CONNECTED”... - Page 163 When a text message comes in..If the cellular phone is compatible with text message (notified through JVC Bluetooth adapter) and “MSG INFO” (message info) is set to “AUTOMATIC” (see pages 18 and 19), the unit rings to inform you of the message arrival.
-
Page 164: Using The Bluetooth Audio Player
Select “PHONE BOOK *,” “MISSED *,” If you wish to receive more information about “REDIAL *,” or “RECEIVED *” whichever you Bluetooth, visit the following JVC web site: want to use. Then select a phone number. <http://www.jvc-victor.co.jp/english/car/>. * Displays only when your cellular phone is equipped with these functions and is compatible with this unit. -
Page 165: Ipod Operations
[LEVEL 01/02/03]. Appears only when a Bluetooth phone is connected and it is compatible with text message VERSION (notified through JVC Bluetooth adapter). The Bluetooth software and hardware versions are Bluetooth Audio: Shows only “VERSION.” shown. Change the setting accordingly. - Page 166 All manuals and user guides at all-guides.com Ÿ Confirm the selection. Adjust the volume. • To move back to the previous menu, press • If a track is selected, playback starts Adjust the sound as you want. (See automatically. • If the selected item has another layer, you will pages 11 and 12.) enter the layer.
-
Page 167: Other External Component
All manuals and user guides at all-guides.com [ ] : Corresponding indicator lights up on the For selecting the external component display. connected to... • AUX input jack To check other information while listening to an iPod Folder name Track name Elapsed playing time with the current track number •... -
Page 168: Title Assignment
All manuals and user guides at all-guides.com Title assignment More about this unit You can assign titles to 30 station frequencies (FM and Basic operations AM) using 8 characters (maximum) for each title. Turning on the power • By pressing SRC or AUX on the unit, you can also turn Select FM/AM. - Page 169 All manuals and user guides at all-guides.com • When a disc is inserted upside down, “PLEASE” and Playing an MP3/WMA disc “EJECT” appear alternately on the display. Press • This unit can play back MP3/WMA files with the OPEN, then to eject the disc.
- Page 170 All manuals and user guides at all-guides.com • This unit cannot play back the following files: Warning messages for Bluetooth operations – MP3 files encoded in MP3i and MP3 PRO format. ERROR CNNCT The device is registered but the – MP3 files encoded in an inappropriate format. (Error connection has failed.
- Page 171 JVC web site:<http://www.jvc. the Bluetooth SIG, Inc. and any use of such marks co.jp/english/car/support/ks-pd100/index.html> by Victor Company of Japan, Limited (JVC) is under license. Other trademarks and trade names are those of their respective owners. Preset value setting for each sound mode...
-
Page 172: Maintenance
All manuals and user guides at all-guides.com To keep discs clean Maintenance A dirty disc may not play correctly. If a disc does become dirty, wipe it with How to clean the connectors a soft cloth in a straight line from center Frequent detachment will deteriorate the connectors. -
Page 173: Troubleshooting
All manuals and user guides at all-guides.com Troubleshooting What appears to be trouble is not always serious. Check the following points before calling a service center. Symptoms Remedies/Causes • Sound cannot be heard from the speakers. • Adjust the volume to the optimum level. •... - Page 174 All manuals and user guides at all-guides.com Symptoms Remedies/Causes • Tracks are not played back in the order you The playback order is determined when the files are have intended. recorded. • The elapsed playing time is not correct. This sometimes occurs during playback. This is caused by how the tracks are recorded on the disc.
- Page 175 All manuals and user guides at all-guides.com Symptoms Remedies/Causes • “NO DISC” appears on the display. Insert a disc into the magazine. • “NO MAGAZINE” appears on the display. Insert the magazine. • “RESET 8” appears on the display. Connect this unit and the CD changer correctly and press the reset button of the CD changer.
-
Page 176: Specifications
All manuals and user guides at all-guides.com Specifications AUDIO AMPLIFIER SECTION Maximum Power Output: Front/Rear: 50 W per channel Continuous Power Output (RMS): Front/Rear: 19 W per channel into 4 Ω, 40 Hz to 20 000 Hz at no more than 0.8% total harmonic distortion. - Page 177 All manuals and user guides at all-guides.com CD PLAYER SECTION Type: Compact disc player Signal Detection System: Non-contact optical pickup (semiconductor laser) Number of Channels: 2 channels (stereo) Frequency Response: 5 Hz to 20 000 Hz Dynamic Range: 96 dB Signal-to-Noise Ratio: 98 dB Wow and Flutter:...
- Page 178 All manuals and user guides at all-guides.com Having TROUBLE with operation? Please reset your unit Refer to page of How to reset your unit EN, CT © 2007 Victor Company of Japan, Limited 1107DTSMDTJEIN...
- Page 179 • Be sure to ground this unit to the car’s chassis again after installation. 注意: Notes: • 把保險絲更換為額定負荷值的保險絲。如果保險絲經常燒壞,請向 JVC 汽車音響分銷商詢問。 • Replace the fuse with one of the specified rating. If the fuse blows frequently, consult your JVC car audio • 後置和前置揚聲器的最大輸入功率應大於 50 W,其阻抗為 4 Ω 8 Ω。如果最大功率小於 50 W, dealer.
- Page 180 The following illustration shows a typical installation. If you have any questions or require information 下面的圖解表示了典型的安裝程序。如果您有問題,或需要有關配套元件的資料,請向 JVC regarding installation kits, consult your JVC car audio dealer or a company supplying kits. 汽車音響分銷商或配套元件供應公司詢問。 • If you are not sure how to install this unit correctly, have it installed by a qualified technician.
- Page 181 All manuals and user guides at all-guides.com ENGLISH 中文 電路連接 ELECTRICAL CONNECTIONS Typical connections / 典型的接線方法 接線前: Before connecting: Check the wiring in the vehicle carefully. Incorrect connection may cause serious 仔細檢查汽車內的線路。不正確的接線會導致本機嚴重損壞。 damage to this unit. 電源線的引線和車身的連接器引線在顏色上可能有所不同。 The leads of the power cord and those of the connector from the car body may be different in color. 依照下圖所示之次序連接電源線的顏色導線。...
- Page 182 CAUTION: 小心: Before connecting the external components, make sure that the unit is turned off. 連接外部裝置之前,先確定本機已經關閉。 You can connect the following JVC components to the CD changer jack. 您可以連接以下 JVC 裝置至 CD 換碟器插孔。 型號名稱 JVC component Model name JVC 裝置...